(I will ramble for a bit, if you just want the guide jump below) I want to start a series more around programing than the other articles I have put up here. I know everyone here knows me as the good-looking hardware hacking guy, but most of my time at work is spent on programming and systems automation. I haven’t used the programming tag on this blog in a while, and I want to start this new series beginning with discussing upgrading to Tomcat 10.
I have for years been using an embedded Tomcat + Servlet backend, with a jQuery frontend for different small webapps I have made. I know for anyone who learned webdev in the recent past that sounds very old. I am using more and more Dropwizard and React these days, but that does leave my legacy projects on this old framework. While not the newest or flashiest thing, it does perform well with some systems handling hundreds to thousands of calls a second. (My hope is to get approval and open source some of them soon.) With the changes in the Java universe, (after Oracle bought Sun and decided to ruin everyone’s fun and causing splintering) I had to start moving from the traditional JavaX servlet namespace that Tomcat 9 and before used to Tomcat 10s Jakarta namespace. Migrating the servlets themselves was not so bad. The first big issue arose around Google’s OAuth library. I have used this library for a long time. It provides the easy-ish ability to connect to any OAuth server you want (I have specific ones at work I use) for authentication. Recently Google, doing what they do, marked this library as Maintenance Mode Only, stating they would only do emergency security fixes, but overall, its abandoned. Not what you want to hear from your authentication library. They also are not planning to move it over the Jakarta namespace making me stuck on Tomcat 9 for as long as it has support. This should be a long-time sine many big companies and projects are right where I was, and the plan is for 9 and 10 to develop together for a long time. This does mean that I cannot use the newer features of Java though. From this I knew I had to start looking at other options.
Every time I have to work on auth systems, it is maze, and once I get it working, I want it to stay working for a while, where I hopefully don’t have to touch it. There are not a ton of OAuth libraries for Java backend systems, and I wanted one that I knew had community support and would last for a while. That brought me to the popular PAC4J project. A lot of the guides I found for using this were around using JavaX and/or using PAC4J to integrate with Google Auth, or Facebook Auth, or other auth systems. I want to be able to use the systems at work, or a more generic provider such as Keycloak. I spent a good amount of time bringing different bits of information together to get a fully working PAC4J 5.7 + Tomcat 10 + Servlets setup working. I posted it on Github, and below has a guide on how to configure Keycloak in Docker to demonstrate this. This took a fair amount of time to put together, I hope it helps you out there, if it does, please give the post a like or star the repo, it pushes me to keep doing these tutorials.
Keycloak Setup
To start at the beginning, Keycloak is a webserver that works as an Identity Provider (IDP). It has its own database for users and groups, or can link into many other systems such as Google, Facebook, and many more. When hooking up to it, you can decide to use SAML or OpenID. I tend to use OAuth which is a subset of the OpenID standard (I think thats the order). This guide will use Keycloak as our IDP, then connect to that with RAC4J. I do believe PAC4J has a more native and easier to use Keycloak integration, but where is the fun in that.

Keycloak out of the box has a Docker image for development. You optionally can attach persistent storage to make users and groups stay after you delete and rebuild the container. Using this container with local storage is not a good setup this way for production, you should use a database like Postgres to back the container instead. But for our home testing this setup is fine and will work well. I use persistent storage so I can have a local Keycloak that can be updated without recreating everything. More information about the Keycloak docker container can be found here.
Setting up Keycloak with persistent storage
docker volume create keycloak
# We need to set the keycloak user to be the owner of that folder
docker run --rm --entrypoint chown -v keycloak:/keycloak alpine -R 1000:0 /keycloak
docker run -p 8081:8080 -e KEYCLOAK_ADMIN=admin -e KEYCLOAK_ADMIN_PASSWORD=admin -v keycloak:/opt/keycloak/data/h2 quay.io/keycloak/keycloak:20.0.2 start-dev --http-relative-path /auth
Setting up Keycloak WITHOUT persistent storage
docker run -p 8081:8080 -e KEYCLOAK_ADMIN=admin -e KEYCLOAK_ADMIN_PASSWORD=admin quay.io/keycloak/keycloak:20.0.2 start-dev --http-relative-path /auth
After a minute you should be able to browse to “http://127.0.0.1:8081/auth” and get:

Keycloak can use OpenID as its connector which is more of a superset of OAuth itself. For this guide I want to go over using OAuth; so we will tweak some of the Keycloak configs to work how we want, as a generic OAuth provider.
- Login with the username and password of “admin” that we set in creating the container
- Click in the top left dropdown where it says “master” and create a new realm, we will call it “example“
- Now that we are in your new realm, go to “Users” on the left
- Create a new user, lets name this new user “Jon” (or whatever your heart desires)
- Once created, click the “Credentials” tab, and set a password, I disable “temporary password” because this is not a production auth system
- Click “Client Scopes” in the top left
- “Create client scope“
- Name “openid”
- Type “Default“
- Save
- “Mappers” tab
- “Add predefined mapper“
- I did “full name”, “email”, “username”, “groups”
- Note: I found the add screen here buggy, if you page to the next list of mappers, saving doesn’t work, so do one page at a time
- Click “Clients” in the top left
- “Create client“
- Client-id “example-client”, I like to enable “Always display in console”, “Next”
- Enable “Client Authentication”, then save.
- “Client Authentication” enables “confidential access type”, this is the classic OAuth where you need a client secret to access the server
- For this demo we need to enter “http://127.0.0.1:8080/oauth/redirect*” to the “Valid redirect URIs“, and save
- Go up to “Client scopes” and add the “openid” scope as a “Default” type
- Note: I have found with PAC4J + Keycloak specifically, if you do not add the openid type, then you will get through auth but when PAC4J goes to get user information you will get an error of
WARN org.keycloak.events type=USER_INFO_REQUEST_ERROR, realmId=59d04435-daf4-4ca7-8623-195769911c0e, clientId=null, userId=null, ipAddress=172.17.0.1, error=access_denied, auth_method=validate_access_token. You may also seeWARN org.keycloak.services KC-SERVICES0091: Request is missing scope 'openid' so it's not treated as OIDC, but just pure OAuth2 request.If your client is not requesting the openid scope.- This can present itself to your client as a 401 or 403 error. As here and here, this helped me.
- Go to the “Credentials” tab, view the “Client secret” and save that for later
At this point going to http://127.0.0.1:8081/auth/realms/example/.well-known/openid-configuration will give you the OAuth endpoints we need.


Using The Example Code
Clone down the repository over at my Github. The README.md should contain what you need to get going! After adding your client secret from above, if you followed this guide, that demo should work for you with http://127.0.0.1:8080/ being the web app, and http://127.0.0.1:8081/auth being the auth server.
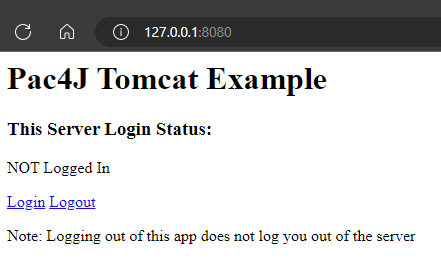
In the end you get a simple screen like this one that lets you play around with the functionality and experiment with the code.

Nice