I recently attempted to boot a Dell Precision M6800 into ESXi 7.0u1 to test some functionality before going to prod. Unfortunately this was met with “Invalid Partition Table”, switching between UEFI and BIOS boot didn’t seem to fix it giving “No boot device available” instead. After searching online I found this, https://communities.vmware.com/t5/ESXi-Discussions/quot-Invalid-Partion-Table-quot-Error-booting-ESXi-7-from-USB/m-p/1823852 which had comments such as “just dont run on a laptop” which was not very helpful.
I spent a chunk of time playing with the partitions and seeing how they were configured. I noticed when I went into the UEFI on the laptop it said it couldn’t find any file systems available, but when I loaded Windows or Linux on the system, the UEFI could see those boot partitions. I tried updating the firmware like Dell recommended, with no change. I then realized the ESXi 7.0 image is FAT16 for the EFI partition, while all other EFI partitions I have seen are FAT32.
I copied the files and folder out of the boot partition, reformatted it with FAT32 instead of FAT16, marked it as EFI type (ESP in Gparted), and moved the files back. The system booted fine the first time, with ESXi running happily. If you need boot ESXi on a Dell M6800, or M4800, or other give that a try. If this worked or didn’t work for you leave a comment below.
Dell

Dell Inspiron 3050 Ram Upgrade
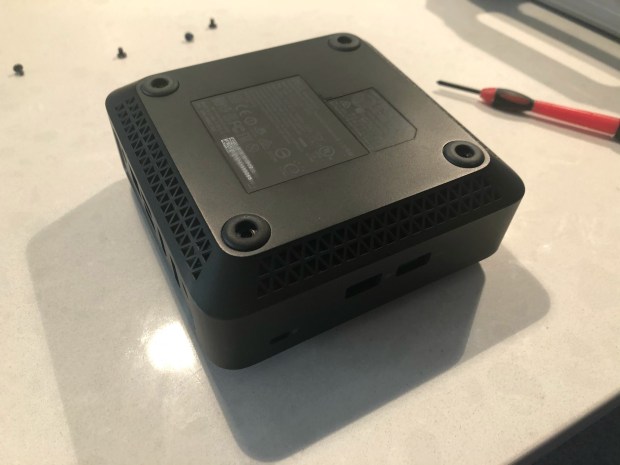
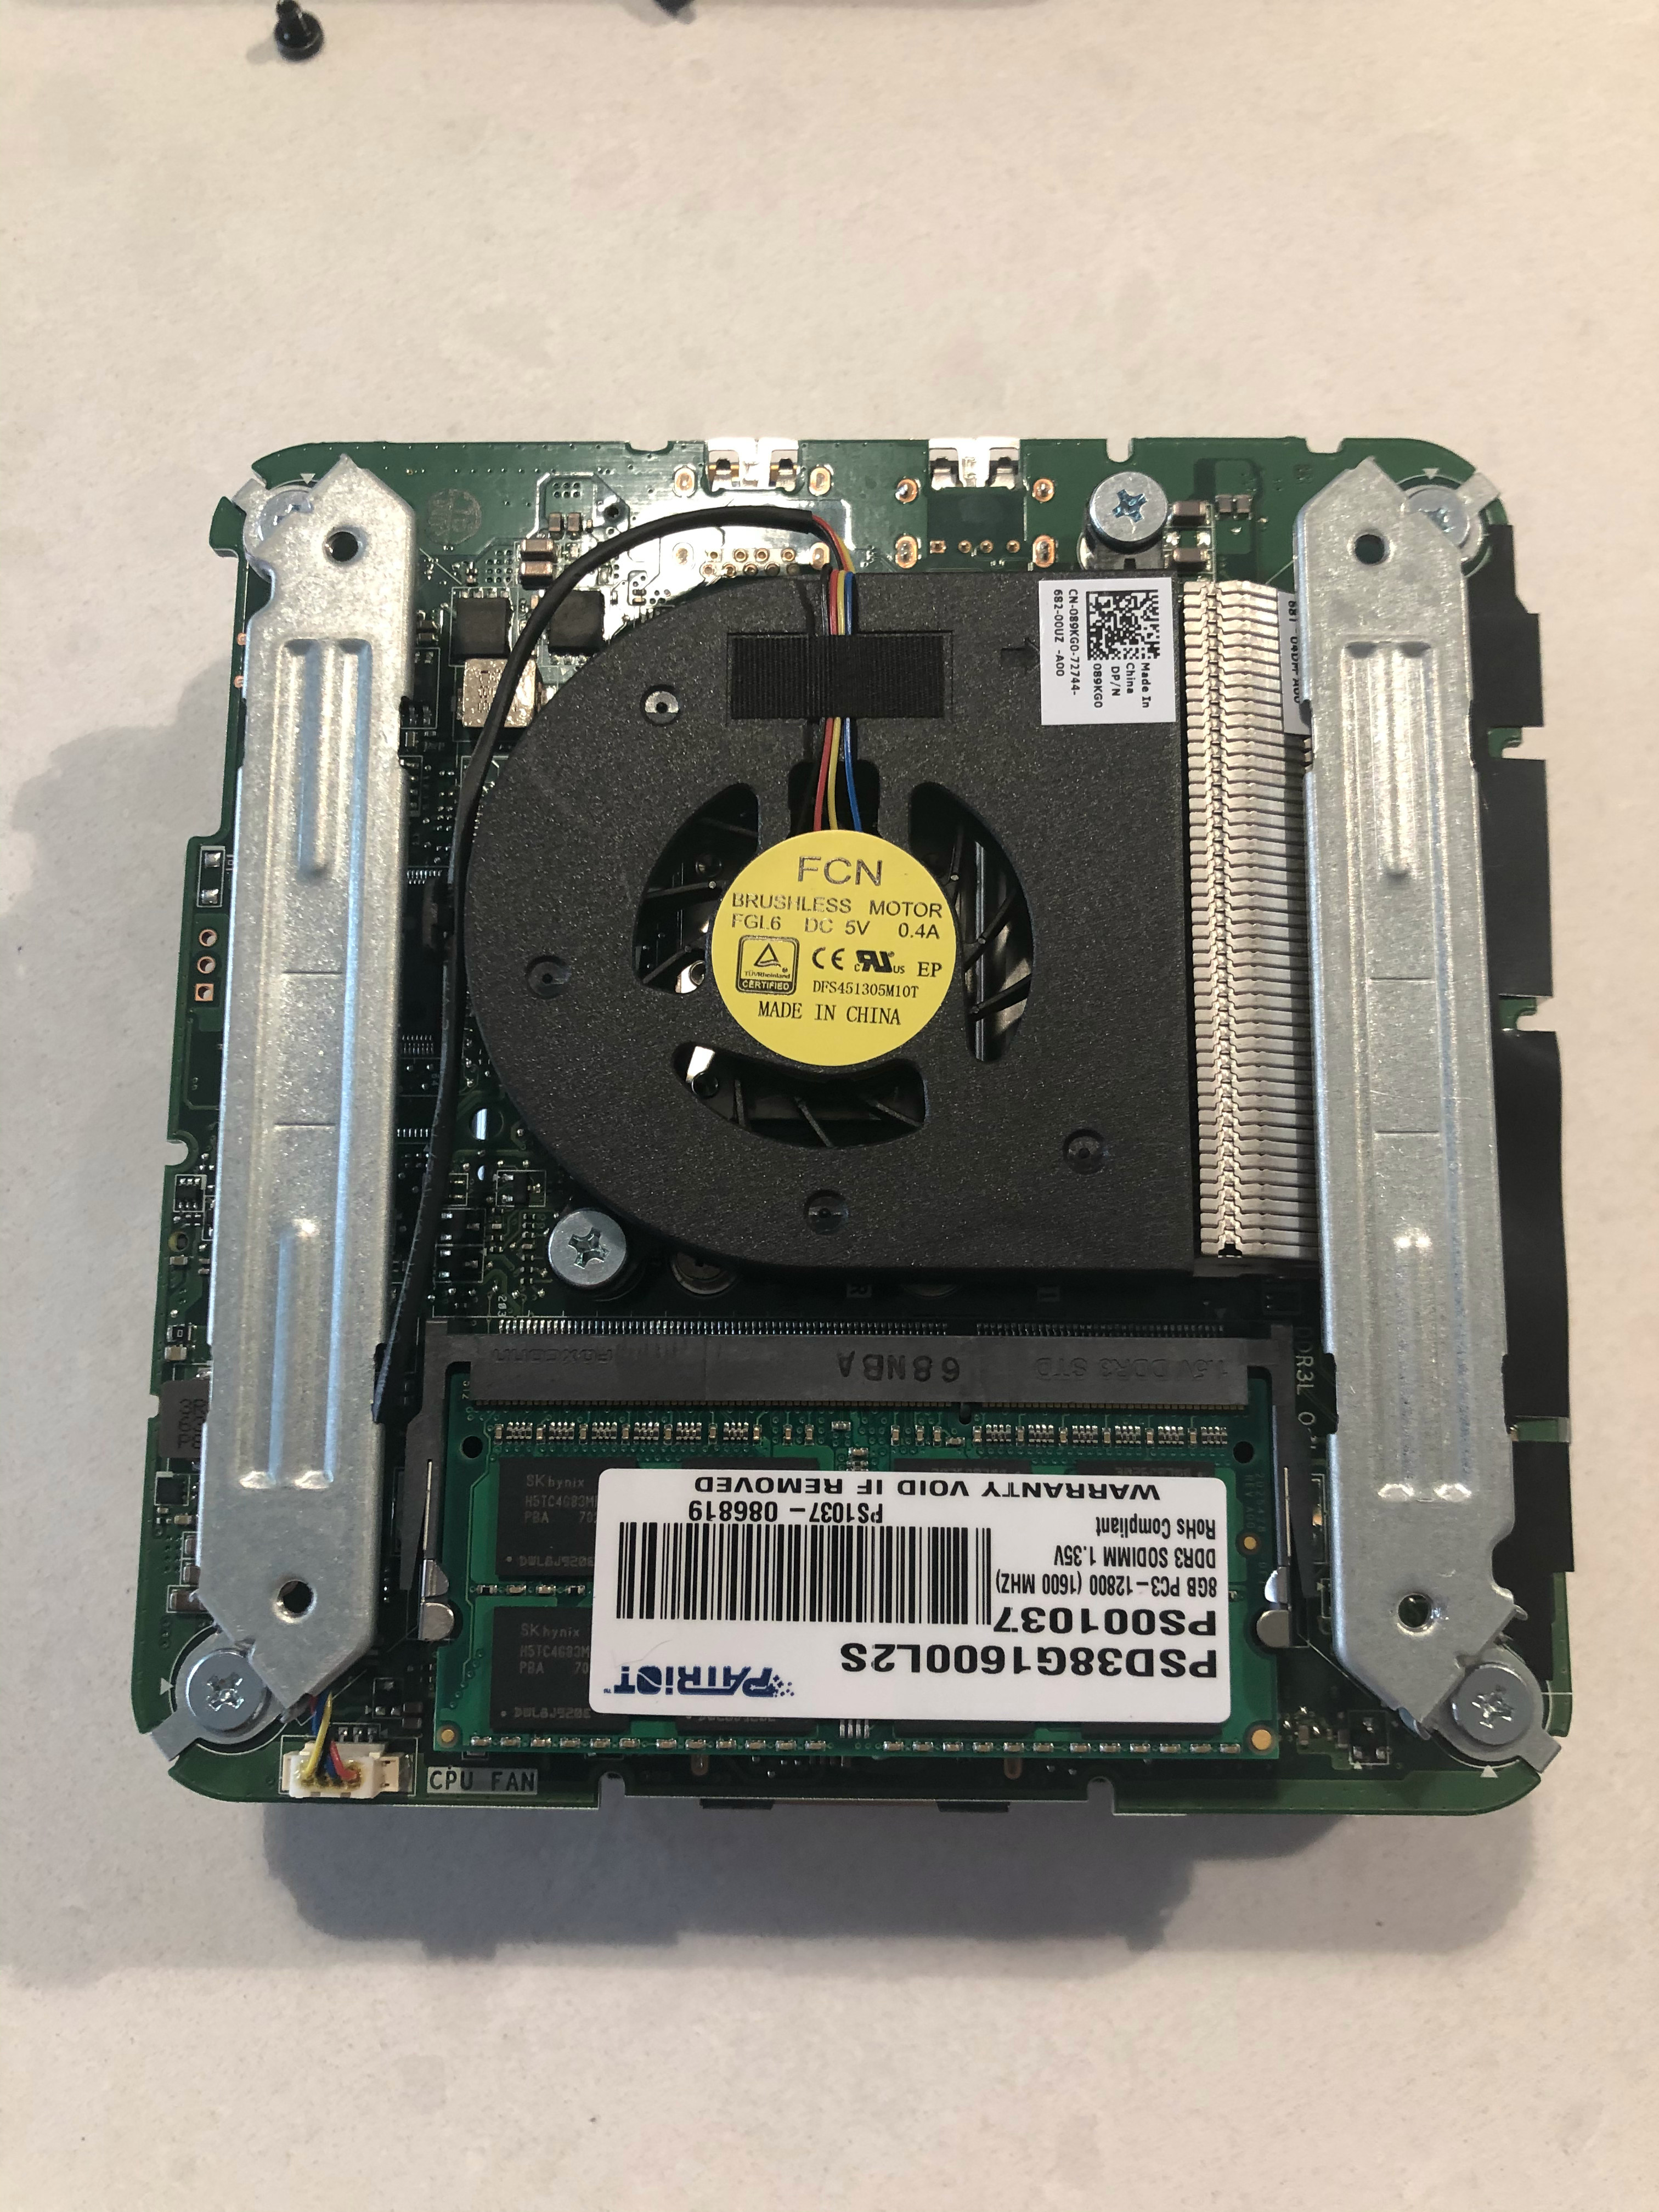
This is a short post about a Dell Inspiron 3050 I upgraded a little bit ago. This is a tiny pc, similar to an Intel NUC. Its a Intel Celeron, and came with a 32GB SSD. I got it for around $150, with an Office 365 subscription; thus it was worth it to me. It came with 2GB of ram, and a 32GB SSD, these days those are not expensive to swap; I wanted to swap the components for 8GB of ram and a 512GB SSD. Below is a short guide with some photos of opening this thing up.
First we needed to remove the case, this involves flipping it over, and taking the 4 screws out that are in the little feet.
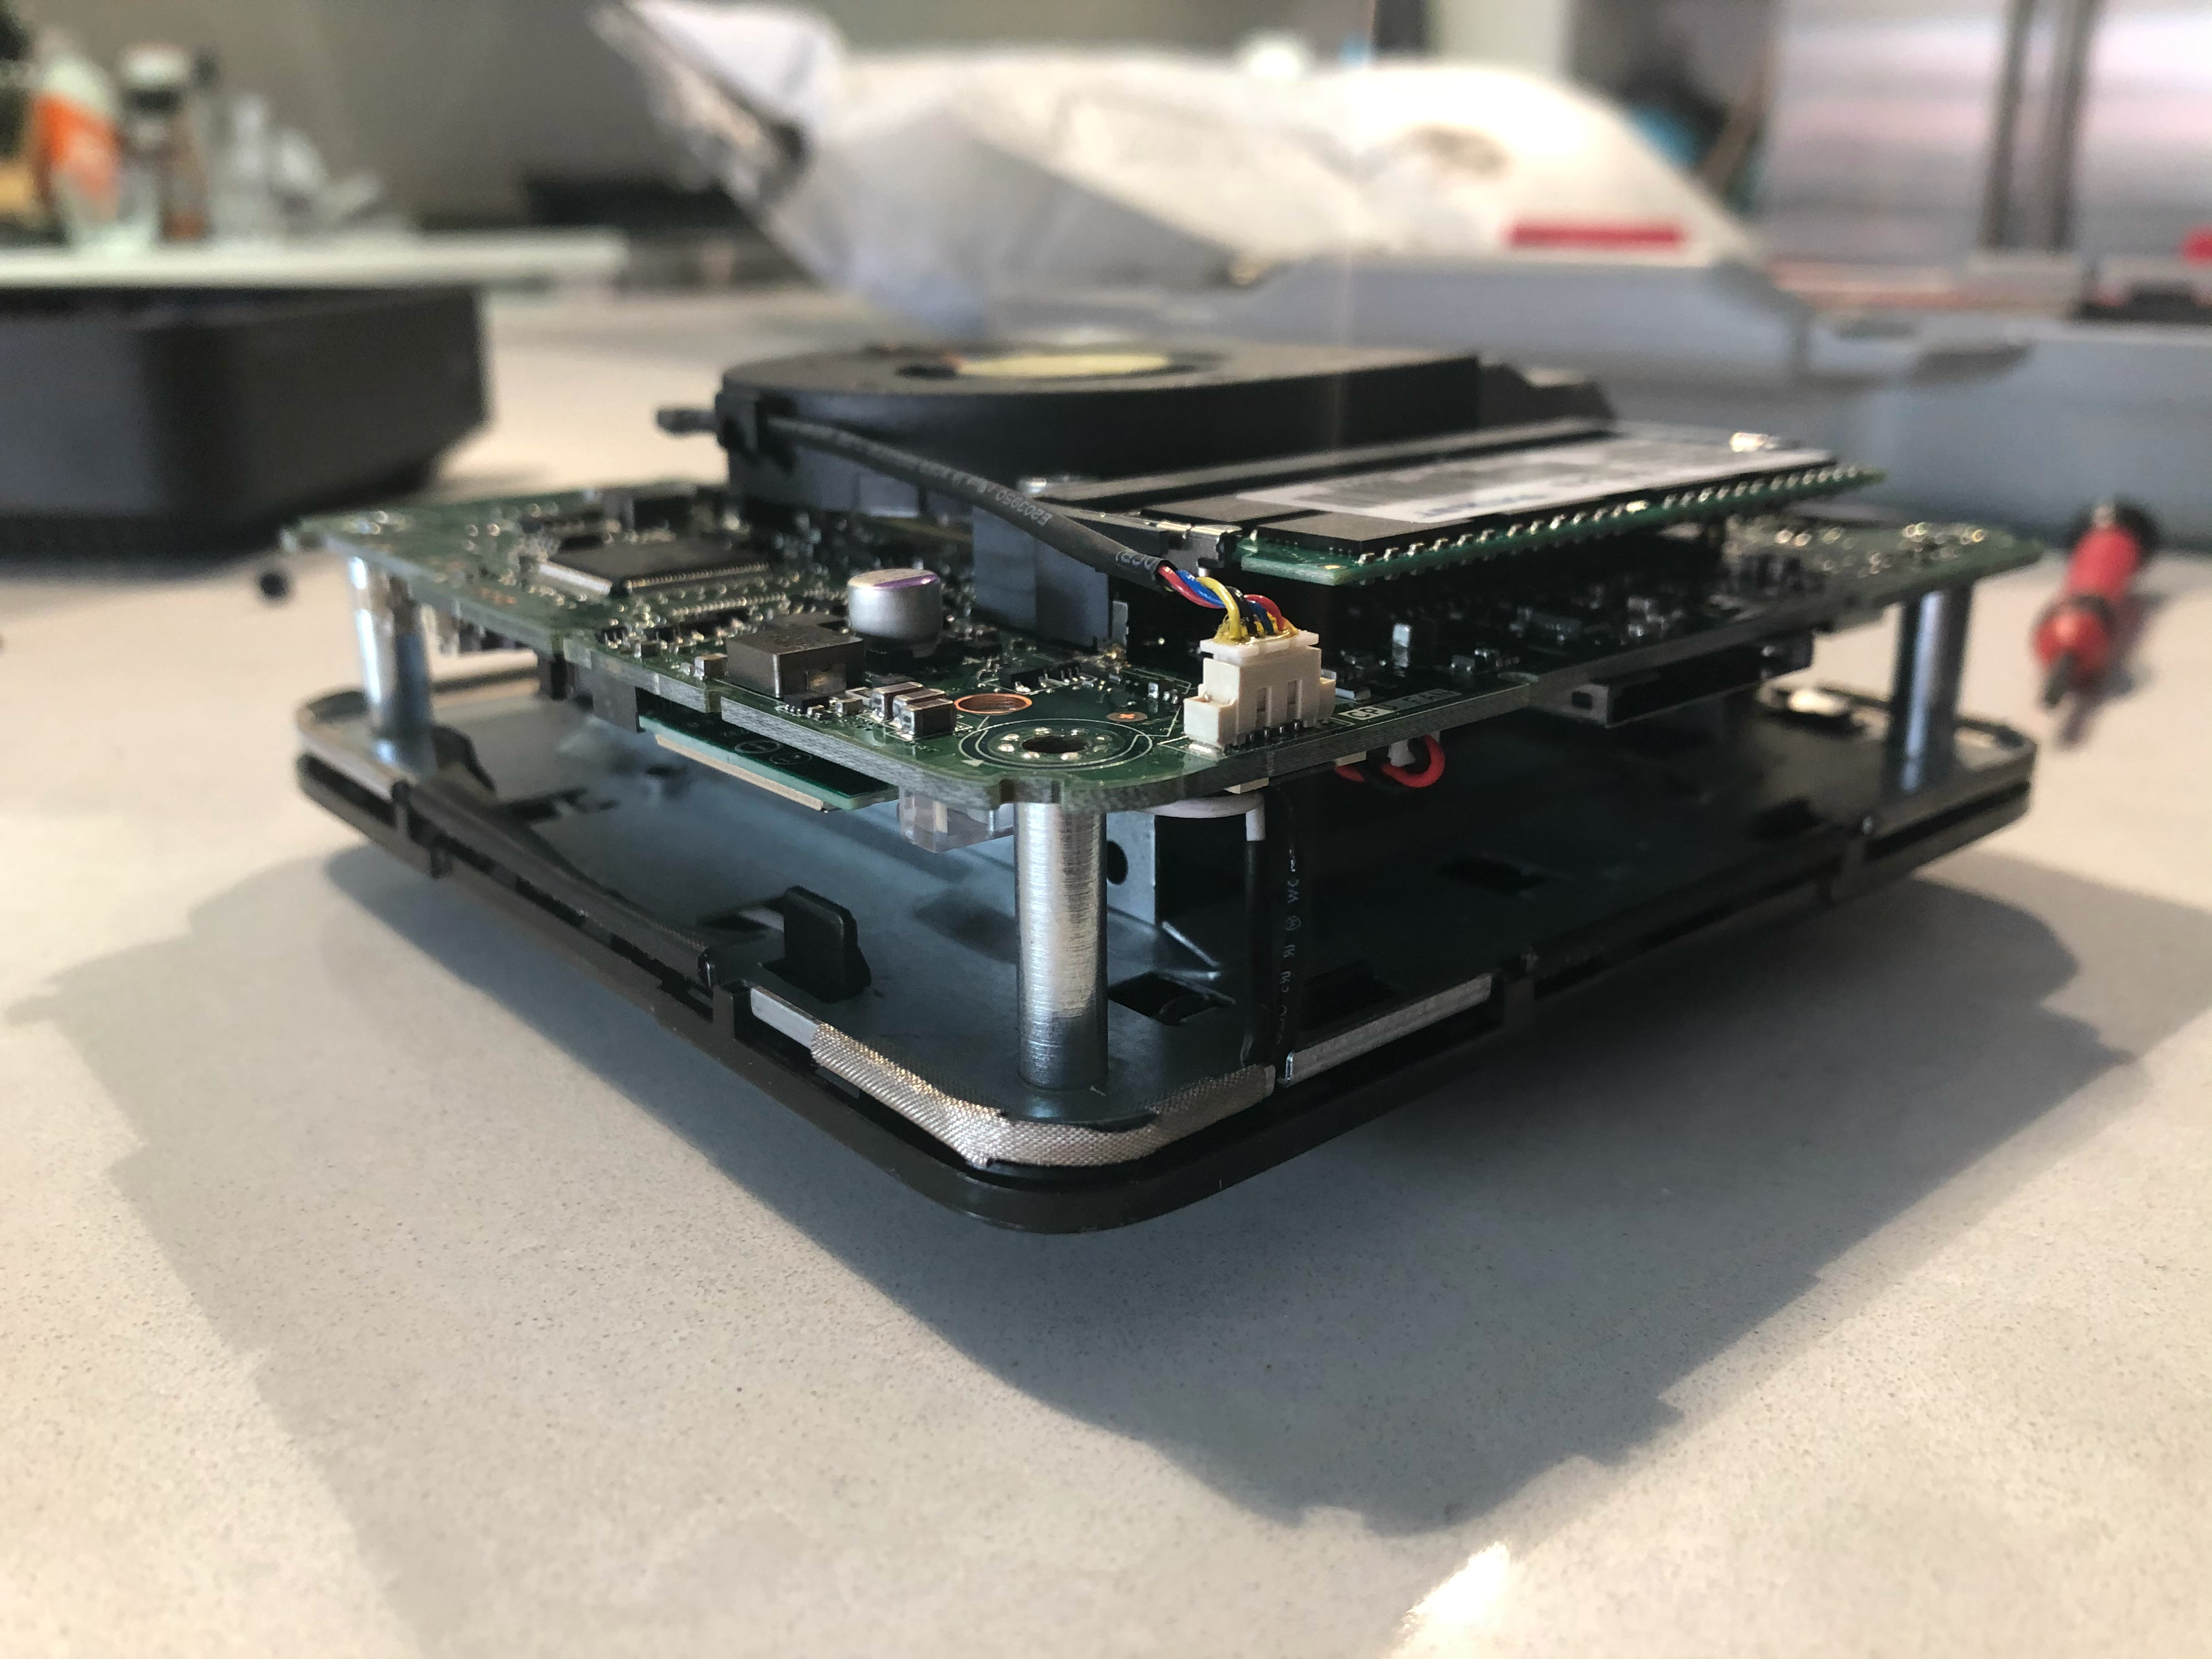
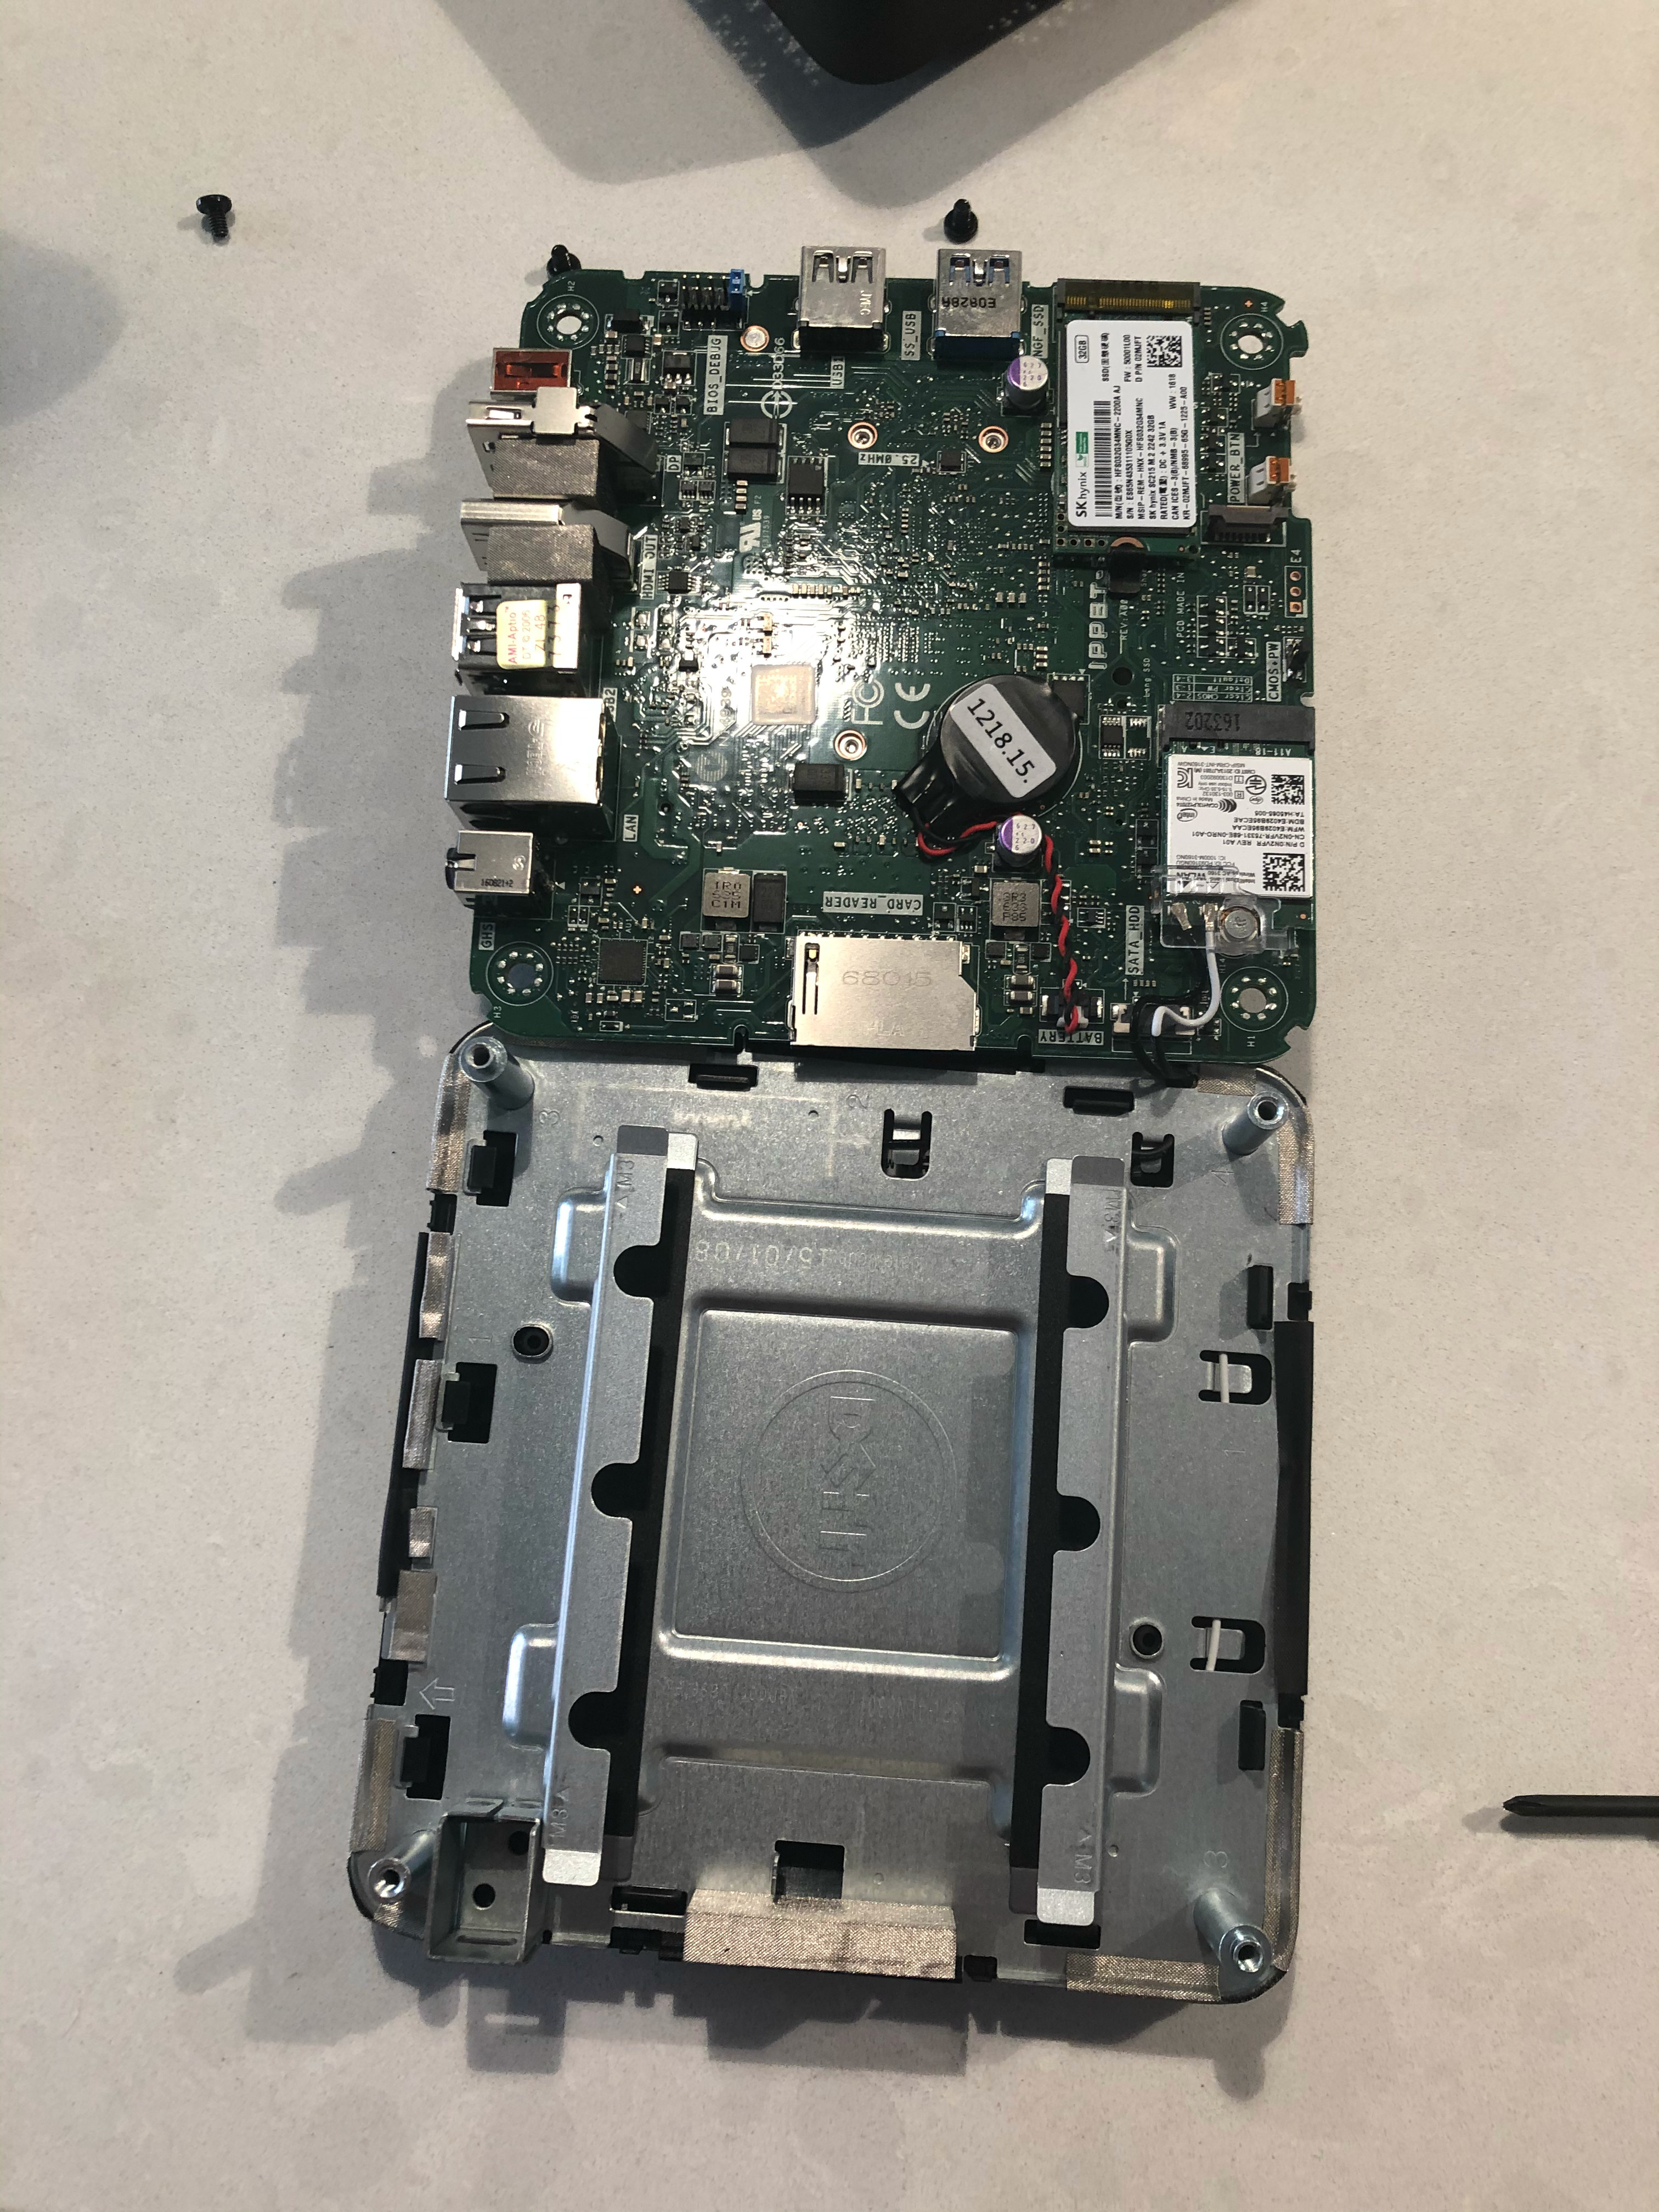
That gives you access to the RAM DIMM. Easy to swap if you want to do just that. Now there are 4 screws at the outer corners, those come out then the board can fold out keeping the antenna and other cables connected. Flipping that over and putting on the table shows the CMOS battery, as well as the SSD.

After replacing the SSD its just a matter of flipping the board back onto the posts, and screwing it all back together. Fairly easy to do, but I couldn’t find a ton of photos online so I thought I would put some up. I ended up installed Hyper-V 2019 on it, the box is fairly slow with its Celeron dual core J1800 processor; but can run a Linux VM or two. Plus its a cute little computer that uses very little power.
One last note about putting it back together, there are little metal spokes that stick out from the top metal mount, those need to line up with the motherboard the system wont go back together correctly.


How To Remove Branding From a Dell OEM Server
NOTE: This is for Dell OEM systems only, run at your own risk.
Recently I have RMAed motherboards for non-branded Dell servers. The problem I ran into is I was getting branded system boards back when I had originally had non-branded. The non-branded BIOSes would just be blank with a progress bar instead of having the Dell logo. I ended up spending more time and energy talking to Dell again trying to get boards to my specifications. I was told by several Dell engineers that unfortunately there was no way to fix this other than the factory setting the board up.
Well they were wrong, and because I didn’t find this anywhere online I am going to detail the instructions. Note: this is ONLY for people who need to un-brand systems from Dell, I have done this with 12th Generation servers and nothing else.
- Remove the old motherboard, and install the new motherboard into the chassis
- Now the first thing Dell training says is to set the service tag on the system now, DO NOT DO THIS YET
- If you set the service tag, the unbranding tool will not work. If you have already set the service tag, more than likely by booting to DOS and using ftp://ftp.dell.com/utility/asset_a209.com, then you can still fix this. Boot back to DOS and use the tool again, except with “asset_~1 /s /d”. This is an undocumented feature that will remove the service tag of the box.
- Start up any version of Windows that is at least Windows Vista loaded. I used Windows 8 because you can get a 90 day evaluation for free. And that is enough for me to do what work I need done on the box before handing it over.
- Go to Support.Dell.com, and look up the box by the service tag to get to the OEM support site. If you don’t have the service tag, look up the generic version and get the url, currently for a R720 it looks like this http://www.dell.com/support/troubleshooting/us/en/04/Product/poweredge-r620. Now if you replace “poweredge” with “oth” you get the oem version. So http://www.dell.com/support/troubleshooting/us/en/04/Product/oth-r620”.
- Go to Drivers and Downloads, and find the download for “Identity Module”, I had to switch the OS selector to “Windows Server 2008 x64” to find it. Then hit “Download File”
- Now it will offer ~3 different files, one will be similar to “R620_Identity-Module_Application_WCPFW_WN32_1.01_A00.EXE”, stating “Identity-Module_Application”, download this file.
- Run this in Windows, it will ask if you are sure and just say yes. It can take up to 5 minutes, MAKE SURE NOTHING INTURUPTS THE SERVER IN THIS TIME.
- Reboot the server, and it will come up with the branding again, then it will give a special message once it gets past post similar to “modifying branding”
- The system will reboot again, and the branding is gone
- Now go into the DOS bootable drive, USB works well, and set the service tag for the system.
Now your OEM box that was impossible to unbrand has been unbranded.
