The blog has been silent for a little while. I have been working at Cisco developing training software. Unfortunately the software is for internal use and at this time I am limited what I can say about it. But 3 months later and around 10,000 lines of code later I handed off the project to my coworkers.
Now back to school to continue studies, I think it is time for the Jukebox project to start up again. I have been researching libraries to use to play music and at this early point it may be the Mono version of XMA to play audio files. If anyone has any ideas for a java/mono/any Linux working library for mp3s that is easy pass it my way.
Author: danberk
HTML5 Practice
One project I had the idea for and played around with is a Time Manager. I wanted to be able to track events and how much time I spent on different things. The problem is that I have a thousand classes and have to finish up things for the semester, so I put a few hours into this and I am going to shelf it for now.
A cool aspect of this (along with hindrance) is the system uses Web SQL, this is a HTML5 system; instead of using a MySQL or other centralized SQL database, your local browser is the SQL server. There are limitations to this, including the spec is new and limited. Along with it only seems to work in Chrome, Safari, and Opera; I have a spot in the code so if it fails to connect to a local data store it can switch to a more traditional method but I never got to that. It also tracks modified items to eventually it could sync those items to a central server, but that never got completed so its not in the github. Everything loads on one page and uses Javascript heavily to modify that page. I put facebook login in the system, I wanted a login system that I didnt have to worry about and I have never used facebook login before.
You can check it out at http://ntbl.co/time/ along with all the code at https://github.com/daberkow/Time-Manager
Jukebox Audio Player
I have been working on the Jukebox project while code for the Enstall project client is being worked on. I had to find a music playing library that would be fairly portable. While C# with mono can easily transport Windows, Linux, and Mac, I could not find a audio library that did that. I wanted to be able to decode mp3 files as well as other compressed audio formats.
One option I had was converting all the audio files to WAV files or OGG, but these files are significantly bigger; along with, going from a lossy format to those would be a waste of resources. After looking at around 6 audio solutions I went with the easiest. To the horrors of many, and the silent screams of some, I detect your OS, then unpack that OS version of VLC. Once unpacked it starts with only a Telnet interface; with this interface, another thread logs in and controls VLC. So I have a standardized communications language, and I don’t have to handling decoding, audio cards, audio channel selecting, ect.
If you have not used this before it is built for a program to control it, there are controls such as “get_playtime”. You get a nice computer readout from that. One downside is that there are slight differences from windows to Mac to Linux, but those are easily accounted for.
If anyone has another easier solution drop it in the comments but for cross compatibility this seems to be working well.
News
I have started using the twitter feed for the site more, I am posting random news stories and articles I find interesting. http://www.twitter.com/buildingtents
Enstall Project
I am working on a project called Enstall with a partner for RCOS @ RPI, it’s available at enstall.wordpress.com, the goal is to make a package management system. One may say “but Dan there are like 10 available and one or two are already open source…” That is true but most of them are aimed at IT personel, and controlling all the computers in a corporation, this is just for a student to install and get software from their school on their PERSONAL computer. That’s the dream.
6to4 Card Cleaner Github!
Here it is! The source code (all be it not great) for 6to4 card cleaner up on github. This program has become less useful recently because my school recently implemented IPv6 across the network, and that has seemed to fixed the problem, along with new images. Anyway have fun with it, build it out, add to it…
PHP/JS and C# Encryption
Here is some code from a project I have been working on and then shelved. A C# (mono) project creates a RSA public/private key pair, then gives the public side to a MySQL database. The private side is saved to the hard drive for later. Then PHP dynamically adds the currently active key public portion into javascript, which encrypts the users input, and saves it to MySQL. Then the C# application can get the keys it has saved in a good place, and decrypt the data in the database. Benefits of this include the web data is secured from the client to the server, and even if somehow someone steals your database off your webserver, they dont have the encryption keys to take it away. This system also has a way to deactivate a old key and move to a new one, if more code was put into it someone could revoke a old key and migrate all the data using it to a new key, but that wasn’t implemented. I thought this would be a cool project and I learned a lot about RSA public private keys, a lot of languages handle the keys differently; some take it in hex, some do it differently, some call the parts one thing, some call them other names. The javascript portion is based mostly off this library (link). JQuery is used for ease.
Feel free to give feed back or use this, open source fun.
Update
Hello Internet, I am back at school; along with working on some new and exciting things. https://github.com/daberkow is going to be my new GitHub place where I put up fun and exciting code, as well as add older things I have worked on and not released code for. Below I will list a couple projects and their state:
Javascript/C# SSL: I am slowly working on putting up open source code of the Javascript/C# SSL code
6to4 Card Cleaner: There was a error in the server side version library, that was fixed and clients should be able to update to newest version of 1.63
Duplicate Image Thing: I havent done much with this, I will be adding it to github for anyway to play with
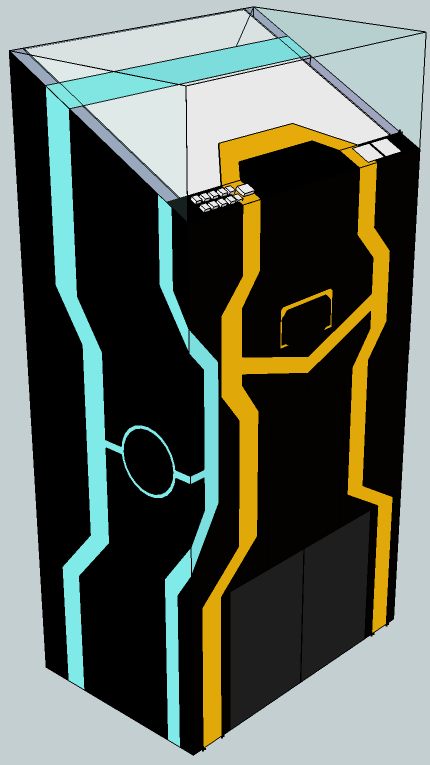
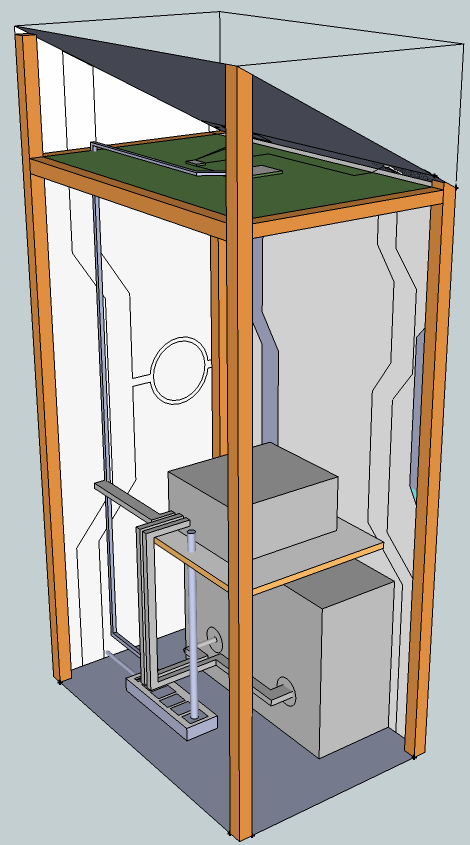
New Project! Jukebox: I am working on a Jukebox from scratch, it will be based on raspberrypi.org computer. Designed as follows using EL lighting.
Update
Version 1.61 of 6to4 Cleaner is out, but apparently it has a bug in it, so 1.62 will be out soon. Also I have been working on a lot of code internal to my job so not much I can post. I worked on a system that combines a .Net application, with javascript and PHP to allow a website to encrypt data and securely store it in a database so that only the back end .Net application can decrypt it. I will take out that junk of the code and post it soon, if anyone wants to play with it.
I recently have got CCNA certified so that has been eating a good amount of my time.
Duplicate Download Gallery v.01
I was going through all my photos the other day when I realized there were a lot of duplicates, I wanted to find a easy program that could find these. After some searching, I found a bunch of programs that worked, yet cost a good amount, and I didn’t see any that had the feature set I was looking for; including a list of the files which I could save, a method to move the duplicates to another folder, and customization. Along with most importantly I wanted a FREE duplicate file finder, not expensive one that did a simple job. So I made my own. This is version v0.01, the main function works well, the main interface is meh, but it works. More updates and features to come, but for one days work its good. Also I am going to be opening up some software in the future, including this one when its closer to completion. If you have any features you think of leave a comment, I was thinking about adding a preview for photos, music and maybe video. Saving, loading logs, delete all but one copy of file, not bad interface…
 Download:
https://github.com/daberkow/daberkow.github.io/tree/master/DDG

