This is a post I was working off and on for several years. It is something I always was meaning to finish, and got very near the end, the Covid and life happen. Instead of throwing it out I figured I would do some small edits then put out as is.
(2017) Friends and I always found the game Pac-Man Battle Royale to be fun, but when we went to look at the price of a cabinet they were $5,000! Worth it if you are a bar or arcade, but for a few friends playing games a bit over the top. After a evening at Barcade, I started the trek to see if I could build one myself for less.

The first step was figuring out where I could legally get the game, a number of sites offered the ROM but that is not what I was looking for. Next I found it was ported and available on Steam! We are in luck! The game is available for less than $10! But once I start it, I am greeted by a “fun” border and changes they made to the screen for the Windows version.

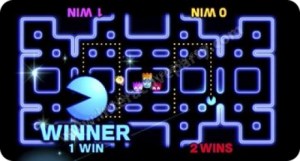
On the left you can see the Steam version; there is a border, along with all the player text is facing one direction. On the right is the original version, where the screen goes to the edge, and the 3rd and 4th players face the other direction for when players are standing around the table. This version also has been made to play with Xbox 360 wired controllers, it works with keyboard but a lot of the interface seems to be built around that.
The solution, a brave hero on Github made a modified DirectX9 driver that edits the game screen as you play! https://github.com/vikbez/pacbrcade After installing this file, I was able to get the game to look just like the original! Below are the before and afters from the repo, and I can attest it does a great job! Throw in a script to start the game at startup of a Intel Compute Stick (a full pc on a HDMI dongle), and this was ready to go.
(2021) Now it came time to build the cabinet, I hadn’t built something thing big before and didn’t really have a large plan. The hope was to have this live at the office. Being in NYC it needed to be able to fold up, and then be put somewhere when not in use. Part of my plans were to give it folding legs, and one side of the table should be a rest, so the legs can be folded and it can be put on its side somewhere out of the way.
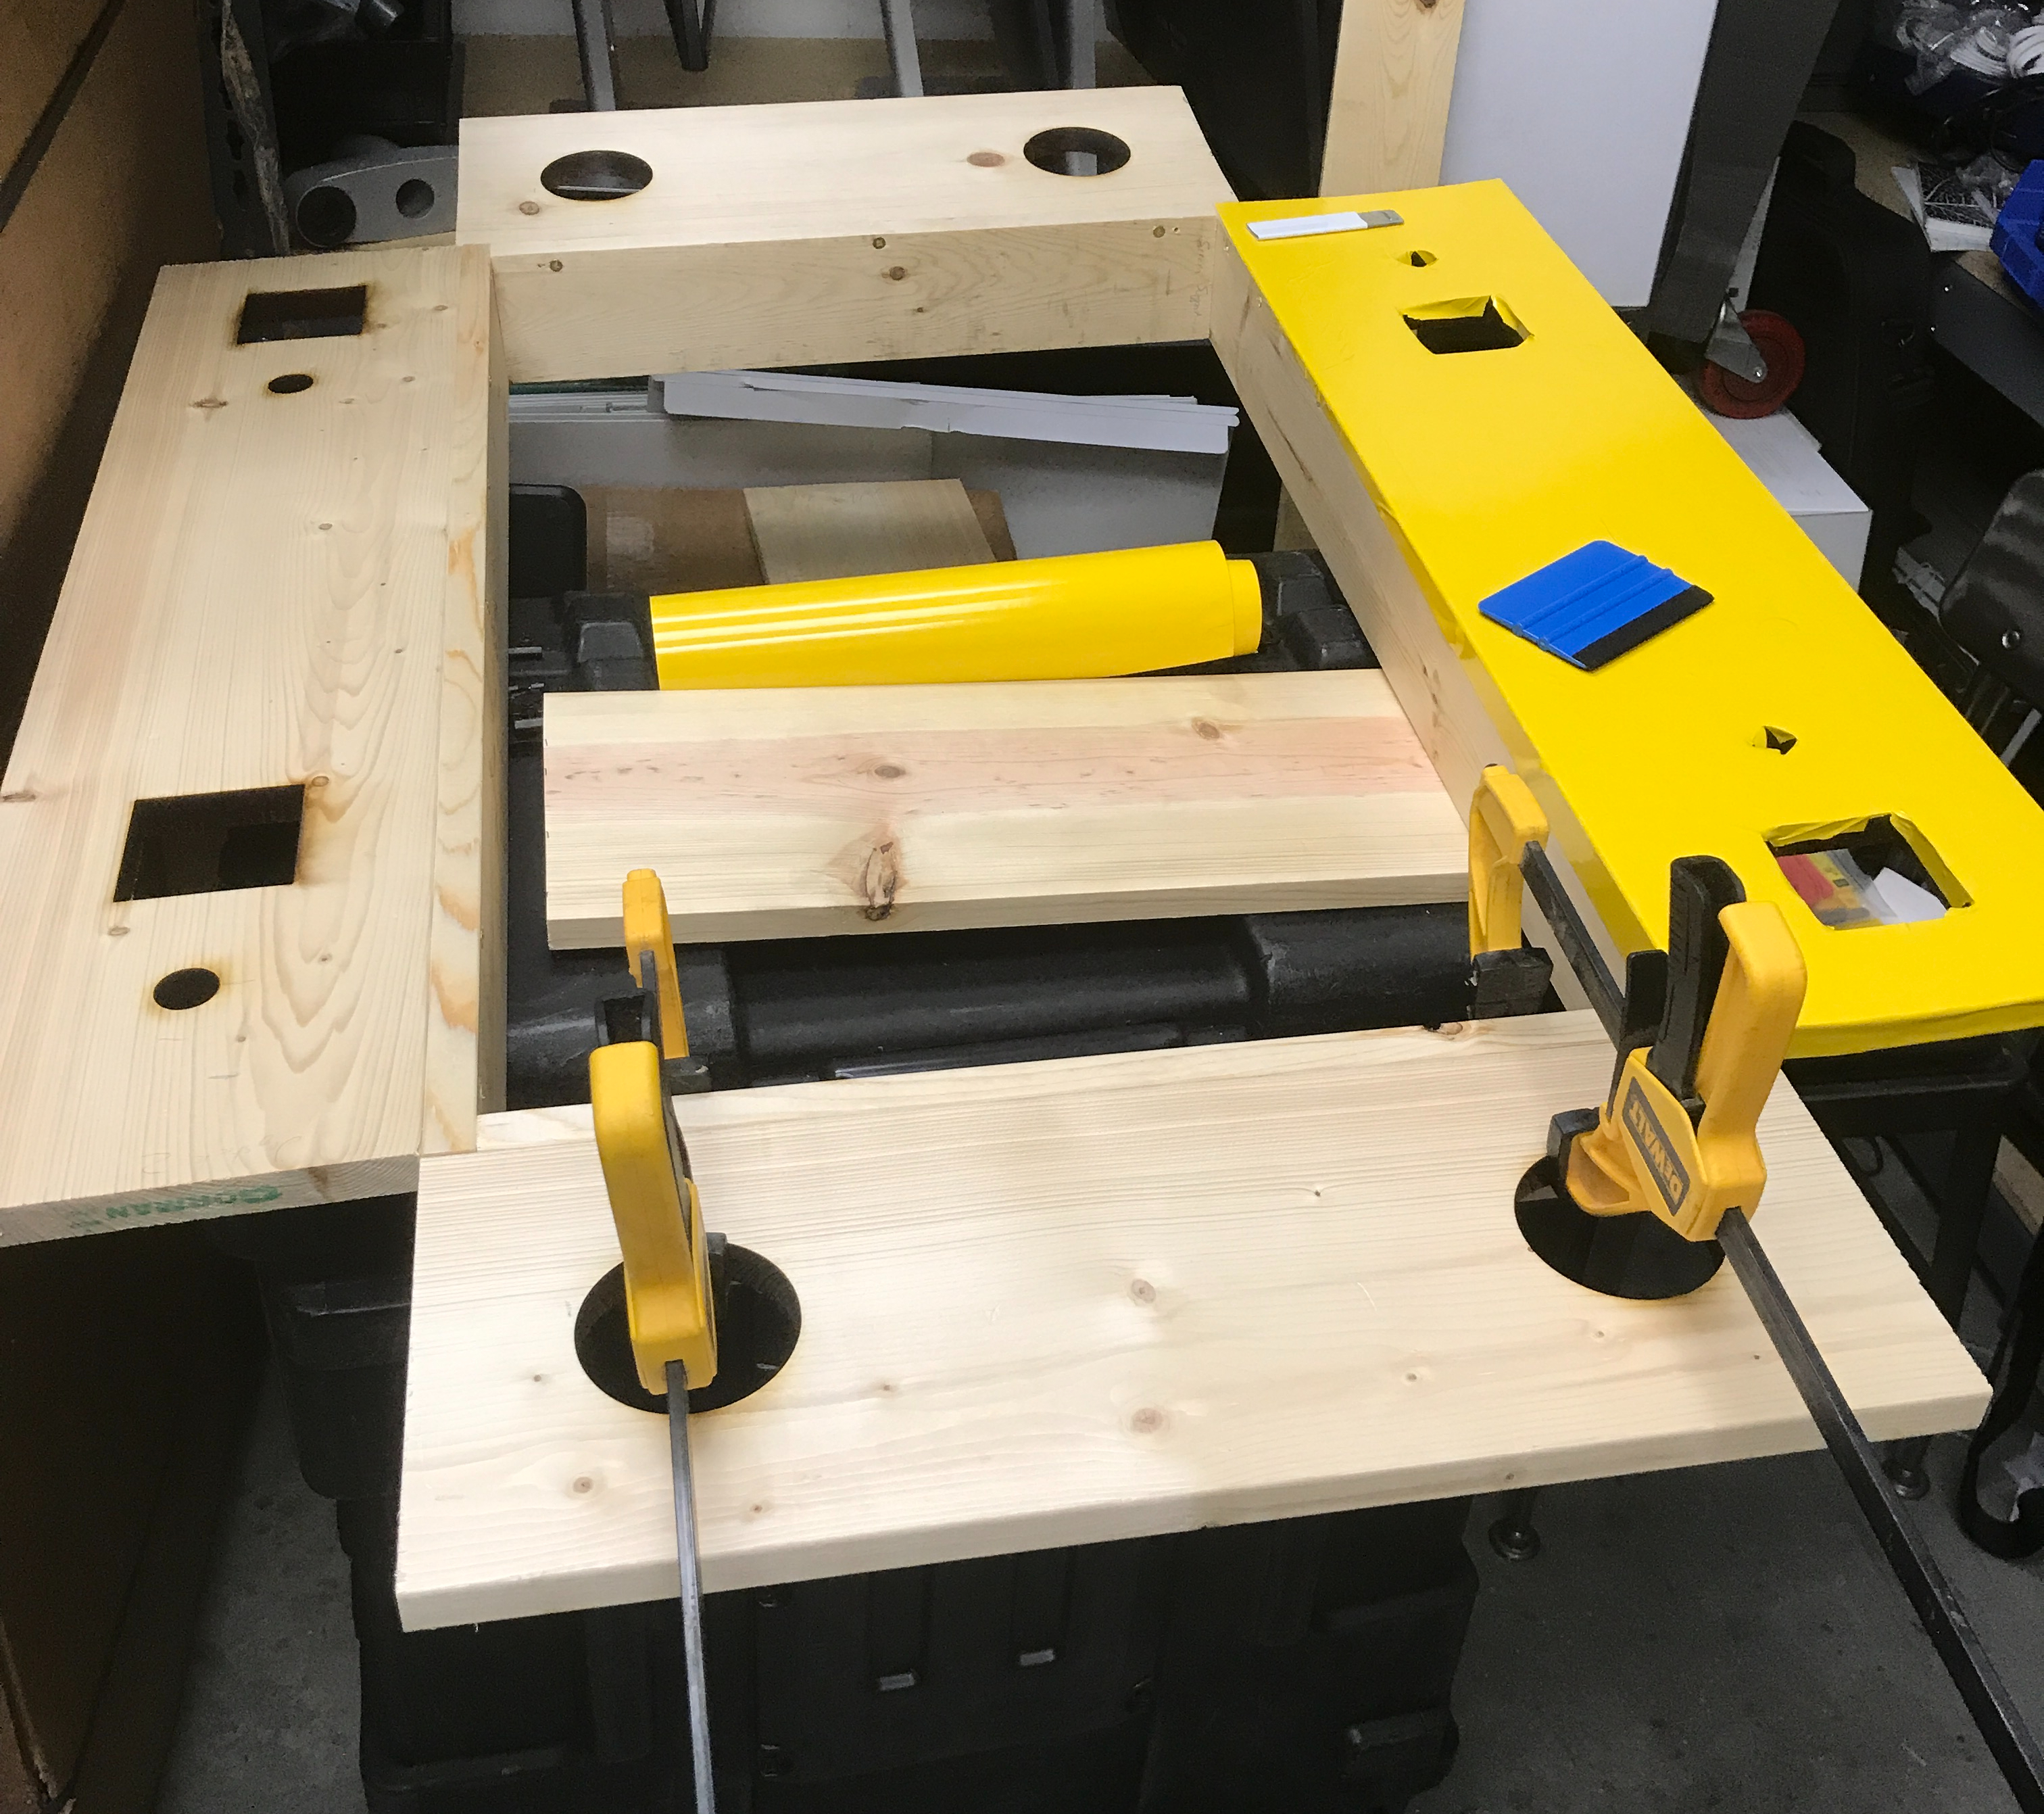
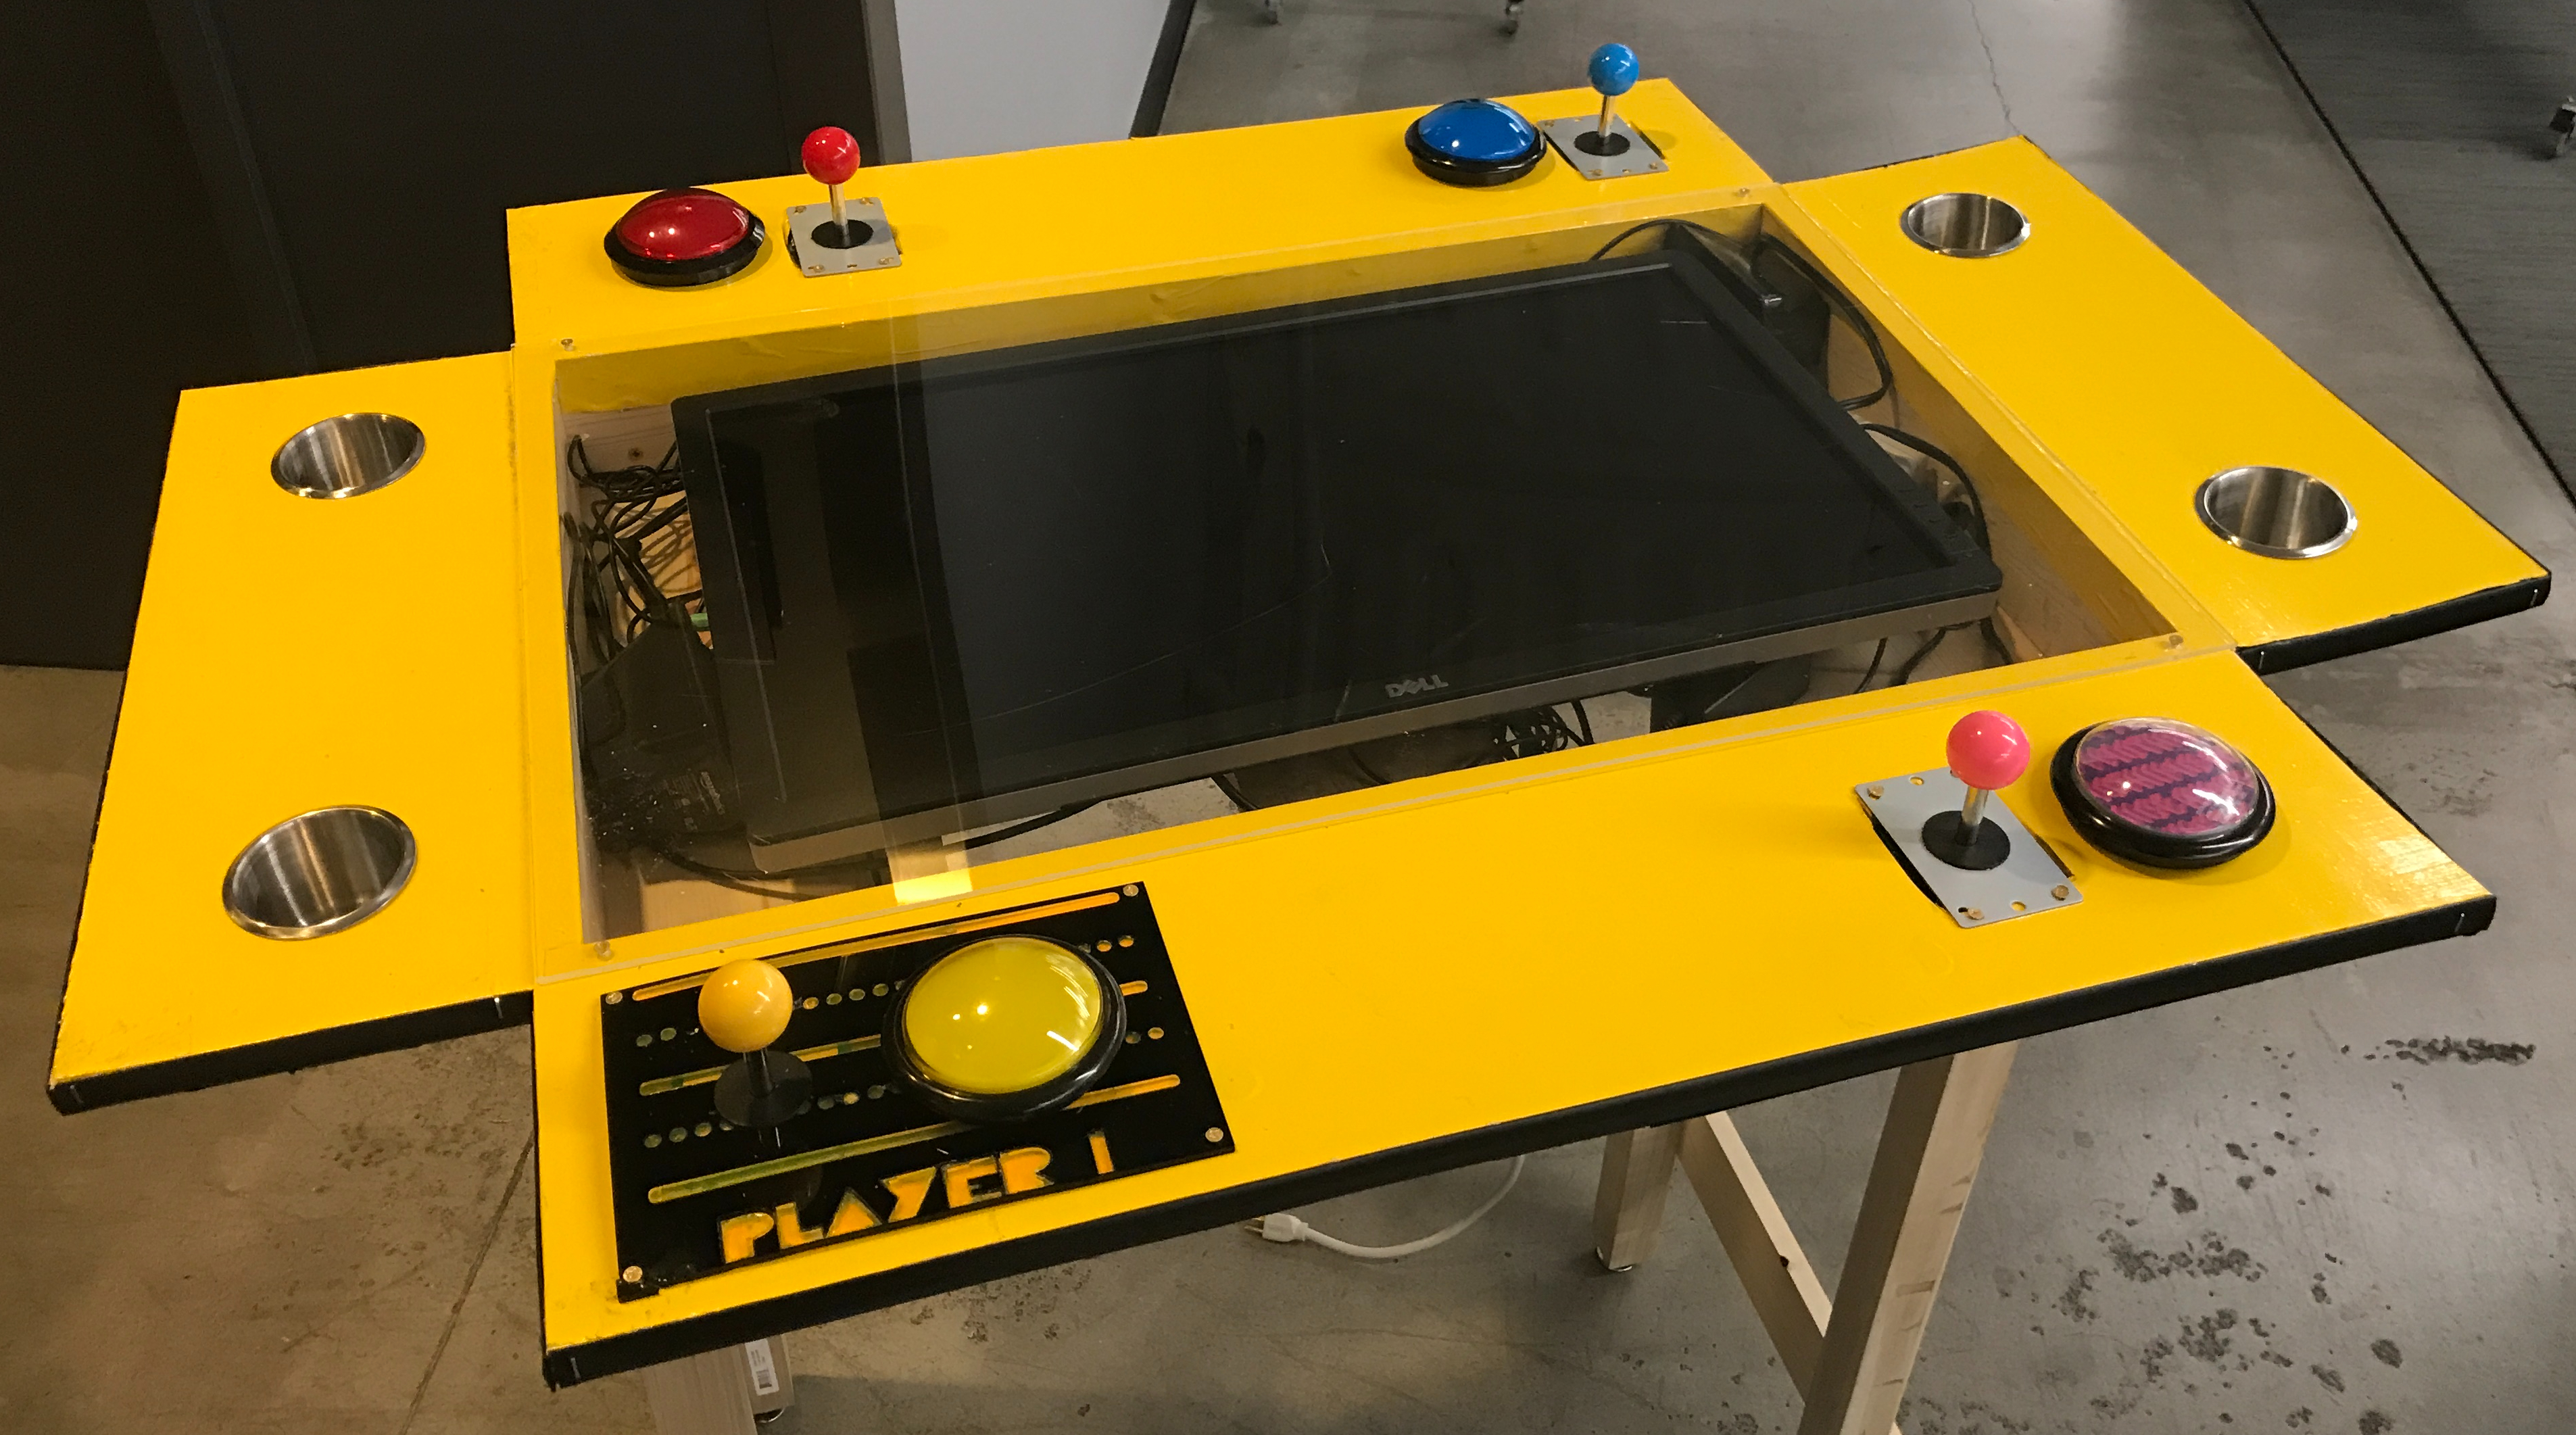
Most of the construction was actually done in one weekend in 2017, I got some 2x4s and went to the maker space I am a member of fat cat FAB LAB – NYC Hackerspace to cut the boards down to the sizes. Now this was a bit of a rough day because I was in NYC, and I am literally grabbing large 2x4s (some are 6 or 7 feet long) then walking a few blocks to the woodshop as people are drinking on a Saturday around me on the streets, then cutting them and walking several blocks to the office. After all is said and done, I used a normal drill and some wood screws to put it all together. I then used yellow vinyl wrap to make the table a bit more dressed up. Getting bubbles out of the vinyl wrapper, on a wood surface that isn’t completely flat was a bit of a challenge. I had a area for the screen to go in, then 4 sides; 2 with cup holders, and 2 with joysticks.


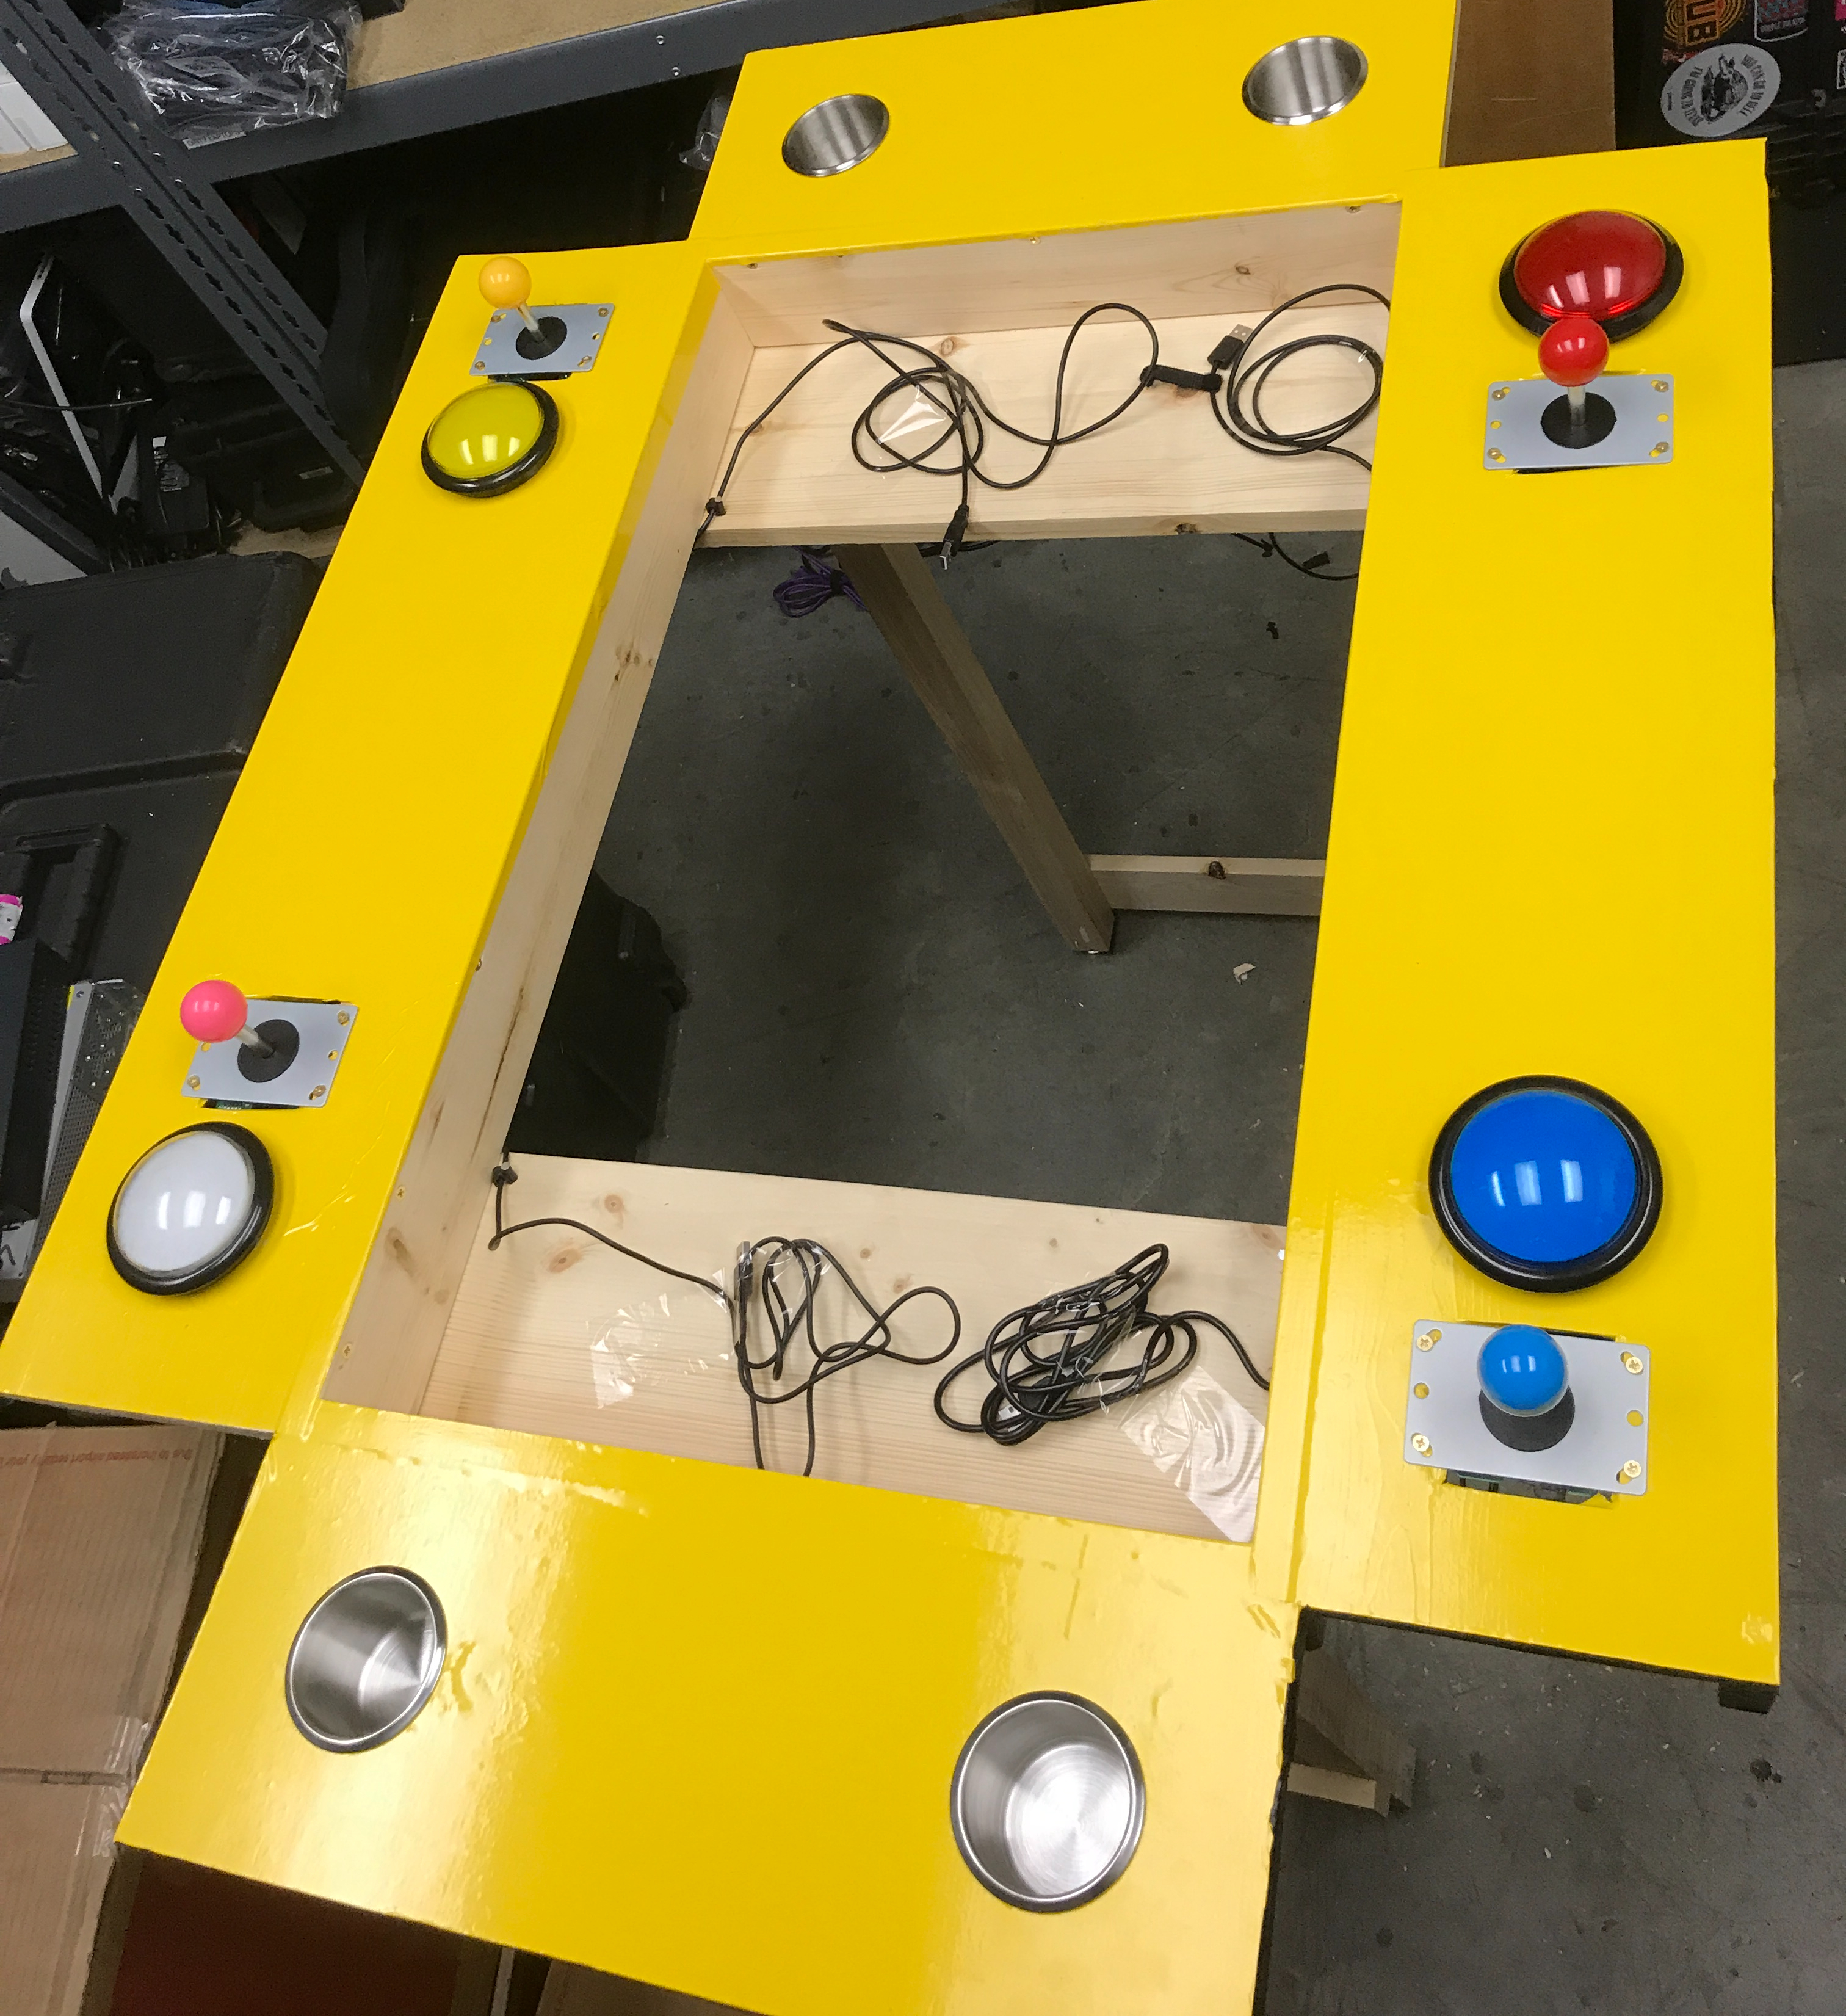
I used Teensy micro controllers as the joysticks, they emulate joysticks on a computer and you an make any input trigger any signal you want. I wanted to add some more style to the unit so I made Player 1 through 4 acrylic panels to go around the joystick and button. These were laser cut at the same woodshop I used before. I also ended up getting craft beer labels, and putting it on the inside of the buttons; that gave the unit a little more character. I put the rubber molding along the side of the unit, as you would expect from any good arcade system. After installing an old screen I found around I toped it with a sheet of clear plexiglass. This was a learning experience of plexiglass scratches easily and can crack if too much pressure is put in say a screw hole.


The whole thing worked, it booted up on the Compute Stick, auto loaded Steam, and started the game. The main issue that had me put it away for a while was the joystick handling. The joysticks I had were 8 way joysticks; they could go to the 4 sides but also to all the corners, we didn’t want the corners. In a game like Pac-Man, going to the corners of the joystick made the character either not move or go in one of the 2 directions you were facing.
The bottom of the joysticks had a plastic piece which allowed the rod of the joystick to go in certain directions. On the bottom of the units I had it was a empty square. I wanted it to be a diamond, this would have forced the player in going one of 4 directions instead. The plan was to design a piece then 3D print it and attach it to the bottom of all the joysticks.

Joystick I Needed 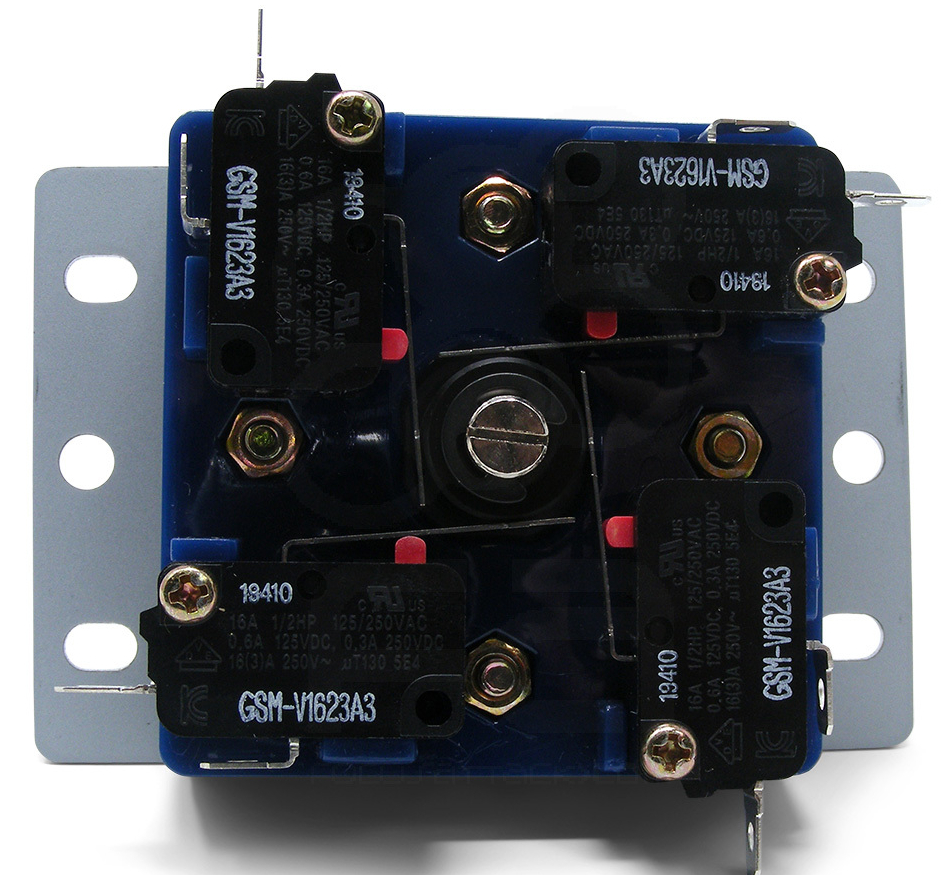
Joystick I Had
With that I put the system into a closet, where it sat for several years. There was the issue on top of all this of being in NYC and there was no place to put the thing where it would not be in the way. I worked on this before I had a 3D printer and could have put the piece together quickly.
In the end it was fun to put something together quickly like this. I got to do some bigger wood working and vinyl wrap something. One take away I have from it was the momentum of a project cant be a very motivating thing. I started and put most of the system together in a single weekend. Then the last few percent of the project, getting the joysticks correct, I lost the energy (and didn’t have a place to put the thing) and went onto other projects. I try to use that motivation to push through projects when possible, and use this project as a reminder to do that.
