For the last few years, I have been using a Mikrotik CRS309-1G-8S+. A small, low power, 8 port, 10gb/s switch. It worked well for me. One of the main things I liked about it was the low power usage. There are always discussions on different homelab forums about which switch to use. Some people like to use Arista or Cisco gear. I enjoy that gear and use it at work, but with my small and low power homelab an Arista switch would triple my power usage (a lot of them idle at 200-300 watts). There are nice features on those switches, but to get those nice features they have whole small computers as the management plane, and then power-hungry chips for switching.
The time came where I wanted to upgrade past this small Mikrotik switch. 8x10gb/s ports were great for a while, but 1 was uplink to the home core switch; then with running vSAN, I wanted 2 ports per host, and I have 4 hosts. While not urgent, I started to search for a bigger switch. Mikrotik has some bigger offerings, also low power, but a lot of the offerings were $400-$600+ to go to 12+ 10gb/s ports.
One place I like to browse periodically is the ServeTheHome forums. There homelab users talk about many different homelab things including networking. Many users seem to be interested in the Mellanox SX6012 or SX6036. This switch is discontinued from Mellanox (now Nvidia) making them go for fairly inexpensive on eBay.
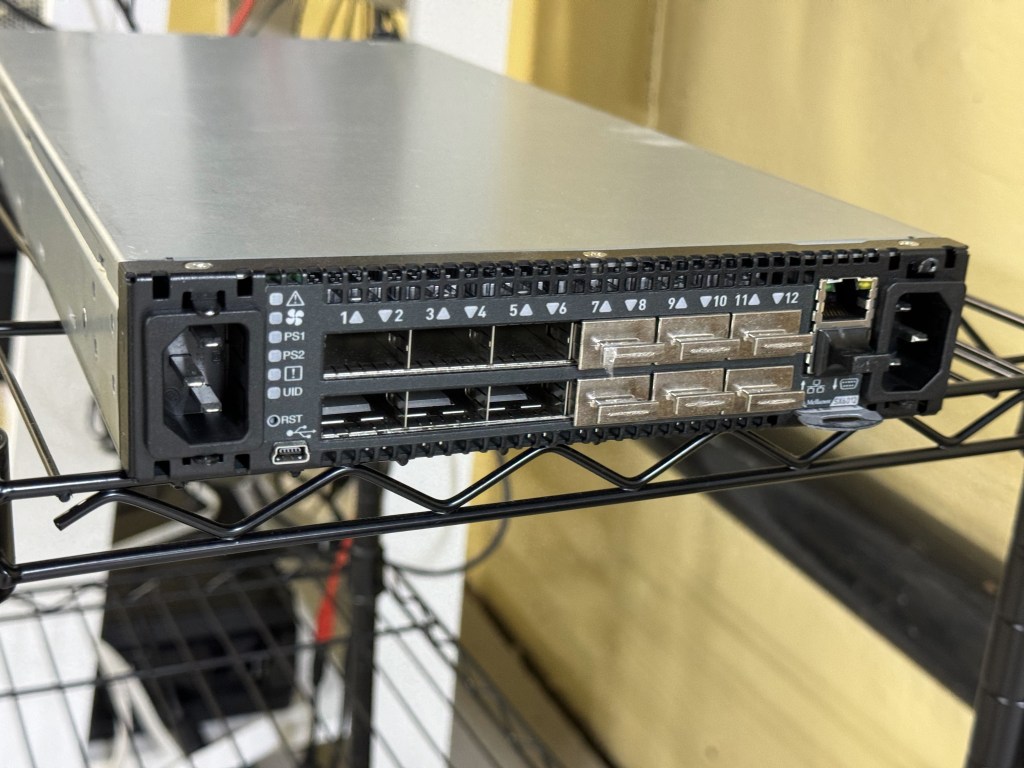
The SX6012 is a 12 port, 40gb/s switch; capable of using 40gb break out cables. That means each 40gb/s port can be 4x10gb/s ports. The switch is technically an Infiniband switch, which can get an optional Ethernet license. There are some switches sold with the license, along with guides online to enable that part of the switch. Apparently, there are also people on eBay who can “assist you” in licensing the switch for $50. Being the switch is no longer supported, I think a lot of the eBay buyers are homelab people going through the guided process of configuring the switch with a license. The switch was reported to be “not that loud”, which is true after some fan setting tweaks; and also idles at 30 watts from a low power PowerPC chip. This made it a go to for me. Plenty of ports to upgrade to over time, and a low power budget.
In looking at the switch, one thing that was heavily mentioned are the different editions of it. There are 12 and 36 port versions, along with Mellanox vs other OEM sub branded versions. For example, you can get a Dell/EMC Branded switch which will come with different features than a HPe switch, or a Mellanox themselves branded on. I wanted the 12-port version because (in theory according to online) it had slightly lower power draw. The 36-port version is supposed to be a big quieter (having more room to cool), but I also saw some firmware hacks to lower the fan noise. I saw one SX6012 unit which had the black front bezel (apparently that makes it Mellanox Brand) sitting on eBay with an expensive Buy It Now, or Make Offer. While they still go for around $250, I gave an offer for a good amount lower, and they took it! Score!
Flash forward a few days; I got the switch from the seller, powered it up, and was met with a dreaded bootloader… The OS had been wiped from the switch completely… along with everything on the flash. After a brief moment of dread, I thought about finding one of the guides online for managing these switches. Those guides are not just about enabling features like Ethernet, they are there to show you how to load different firmware revisions and where to currently find it. The Mellanox firmware itself was behind a support portal which got folded into Nvidia. Although these switches were also sold under Dell/EMC/HP brands, and some of those brands still provide the firmware packages. There are community scripts which can take in a HP firmware package and convert it to a Mellanox or other brand firmware package.
After a slow TFTP image load, I got the switch online. This allowed be to get a GUI and more easily load the follow up firmware packages. After many reboots (which can be heard throughout the house with the fans ramping to 100%), and a few upgrades later I had the switch in a good place at the last available firmware for it. For the last several months the switch has quietly been working well for me. I have one QSFP to SFP+ adapter for the 10GB from my core switch coming in. Then I have 2 QSFP -> SFP+ break out cables going to the small cluster I am running. This means I am running on this one switch, without high availability right now. If I want to reboot or patch the switch, I need to shut down my VMware cluster. One benefit to an out of support switch without firmware updates… You have no firmware updates to do!
The CLI is similar to Cisco. Like many other switch vendors, they seem to follow a similarly universal CLI. The hardest part of getting the switch going for me was figuring out the command to set the QSFP port to breakout mode. Once that was done, it creates 4 virtual sub-ports which you configure with vlans and such. The UI showed the ports as single ports, even with the breakout cable until I went in the CLI and set it to breakout mode.
With this switch working well, I moved the old 8x10gb/s Mikrotik switch over to be my new 10gb core switch. The current flow is Internet in -> Sophos XG Firewall on a Dell Optiplex 5050 -> Ruckus ICX7150 POE switch for Wifi and a few wired ports -> 8 port 10gb/s Mikrotik -> Mellanox SX6012. The house can run with just the firewall and Ruckus switch (which powers all the Wifi APs). The Mikrotik is near the router, and also allows a Cat5e run (19 meters) already in the wall to go up to the attic and give 10gb/s to a NAS and AP up there. (I know 10gb RJ45 is supposed to be Cat6, this line was run before I was here and tested fine, it has been working well the whole time) Then the Mikrotik switch has a SFP that does a longer fiber run to where my little homelab rack is. The whole system is a glorified “router on a stick” with the firewall doing all the routing between vlans.
This setup has been working well, has plenty of room for expansion, and achieved my goal of being fast with relatively low power use. I have the management for the switches on a disconnected vlan that only certain authenticated machines can connect to. This makes me feel better about its not getting security updates.
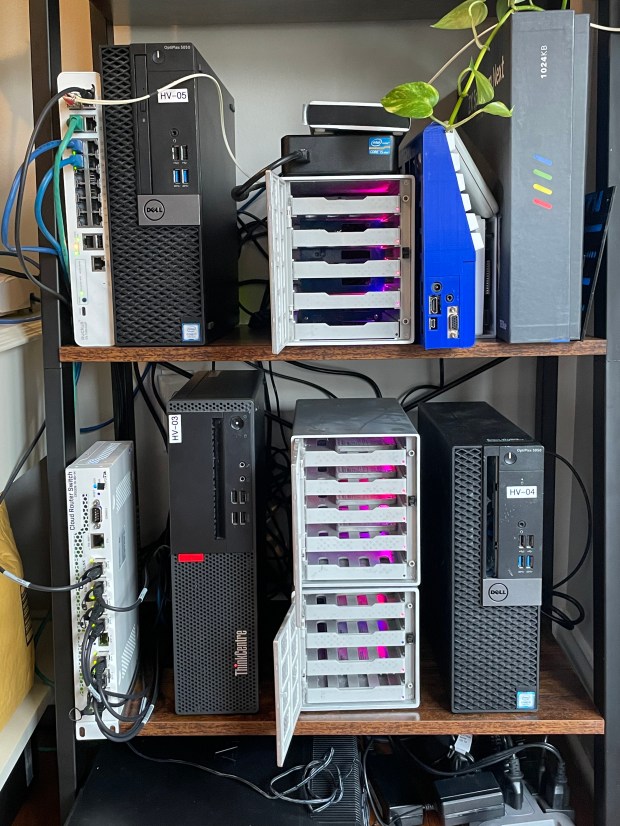
Currently I have 4 small Dell Optiplex systems as my homelab cluster along with the Mellanox switch. All together the rack idles around 130 watts. Together the systems have about 20 physical cores (not hyper threaded cores), and 288GB of RAM. It can certainly spike up if I start a bunch of heavy workloads, but I continue to find it very impressive.
I have a Ruckus Unleashed Wi-Fi setup at home. I have a main R710 (AC Wave 2, 4×4:4) in the center of the house, then a H550 where my desktop is for better wireless and added hardwired connections. One corner of the home was getting only moderate signal and already had ethernet run to it; looking online, another H550 (Wi-Fi 6, 2×2:2) on eBay would run about $150. That was a bit more than I felt like spending to fill in this pocket with lower signal. In looking around the H510 (AC Wave 2, 2×2:2) has gone end of sale, but not end of support; those are currently going for $40.
The Ruckus H510 and H550 are very similar, with the exception that the H550 is Wi-Fi 6. They are great little access points. Their range is not as good as the bigger units, and their sensitivity isn’t that high. They were designed for things like hotel rooms. But for filling in a space with Wi-fi and giving you 4 ethernet ports, each capable of having its over vlan or 802.1x.
Having already setup a H550 I figured this install with an existing cable and POE switch at the other end would be easy. The issue I ran into was I didn’t have the password and the unit refused to factory reset. The documentation said “Hold the Soft Reset Button for 8 seconds” that didn’t work. Elsewhere said “Hold both soft and hard reset buttons for 10 seconds” that didn’t work. Others said, “Hold soft reset for 30 seconds”, which also didn’t work.
In the end, in frustration, the thing that worked was hitting soft reset, which has the red status light come on, then for about 5 seconds I would keep tapping on and off the soft and hard resets. This worked like a charm. Suddenly the password was reset, and I could get in.
Generally, Ruckus Unleashed has been working well for me. There seems to be a bug where when a device restarts, SNMP does not come on even if set. I need to go into the admin panel, turn it off, then back on for SNMP to start responding. But for a home network, not a big deal. Over the holidays I had a bunch of family members over, we had 39 devices on the network at once, with over 1gb/hour being used, and everything worked well. If anyone has Ubiquiti and is tired of their controller and lack of power features, I recommend giving Ruckus Unleashed on used gear a try.
I have a mostly Ruckus and Mikrotik network stack at home. For the longest time, Ruckus Unleashed has had the ability to manage ICX switches; but every time I went to add my switch to the Unleashed interface it would hang at “Connecting…”. After a bunch of troubleshooting, I figured out why it was not working.
Unleashed likes to automatically adopt blank switches, if your switch is already configured you may have the same issue. The issue is Unleashed cannot use a ICX switch with an enable password. I had to run:
SSH@switch(config)#no aaa authentication enable default radius local
Then suddenly if I ran “# show log” I could see Unleashed adding settings to the switch. Unleashed seems to use SSH as the main mechanism for setup, then adds a RO SNMP string to the switch. Hope this helps someone!
I have written before about storage for my homelab. I have a NAS; and then for the VMware cluster, I had USB 3.0 attached 3.5″ hard drive bays. The hard drive bays shared a single USB 3.0 5 gbps connection. And being that storage has come down in price, these were SATA SSDs. Having (at the time) 4 SATA SSDs sharing a single USB 3.0 connection was not ideal; not only because of the single pipe, but because of the overhead of USB. When the vSAN these disks hit any more than idling IOPS number, latency would go through the roof. That was the main item I was attempting to correct.
Having used “disk shelves” before at work, I thought I would try to make a compact version for my homelab. I figured, all I need is an away to connect the SSDs over external SAS, an eSAS HBA, and some power. This project ended up going on for far too long and ending with a much simpler solution.
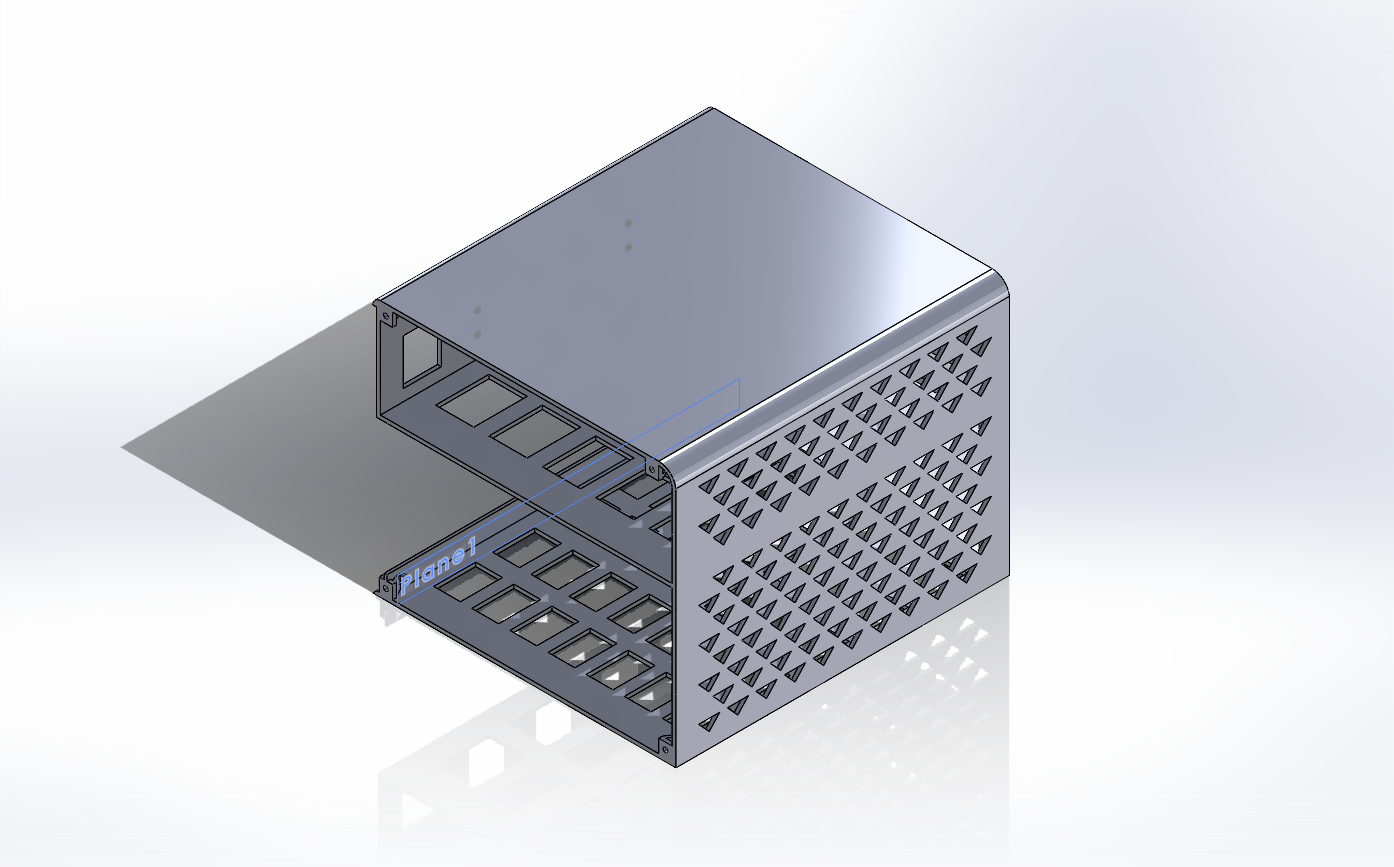
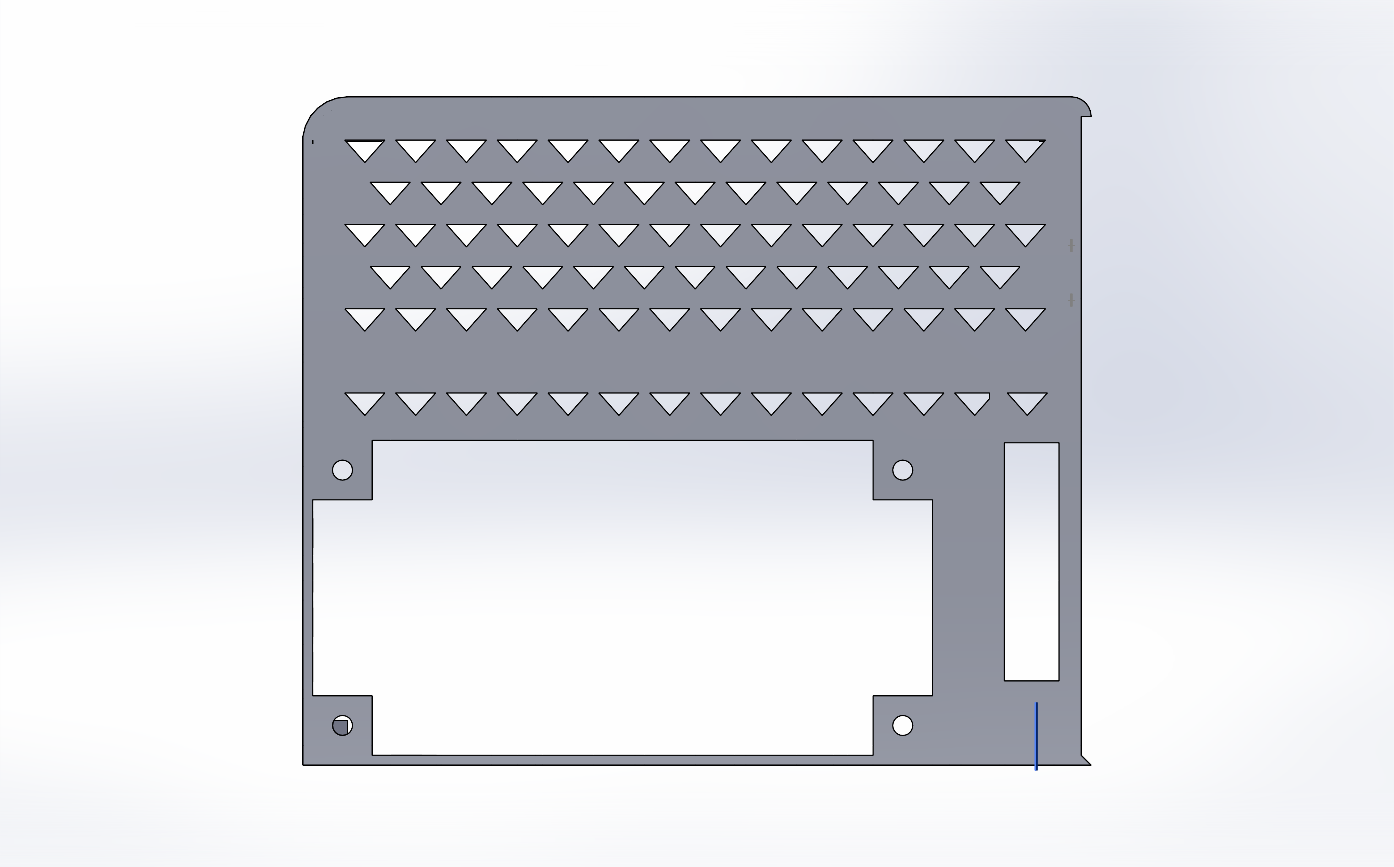
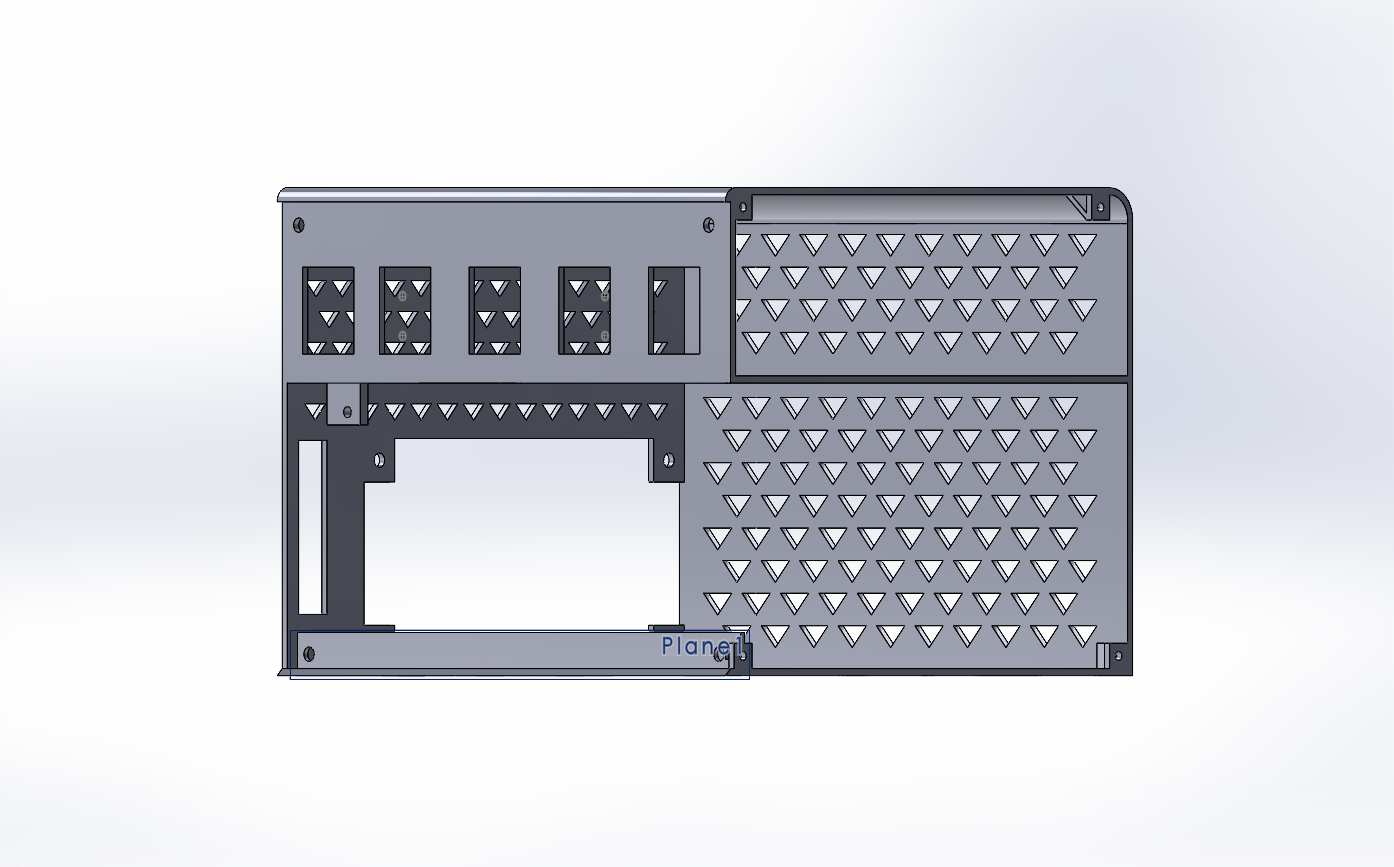
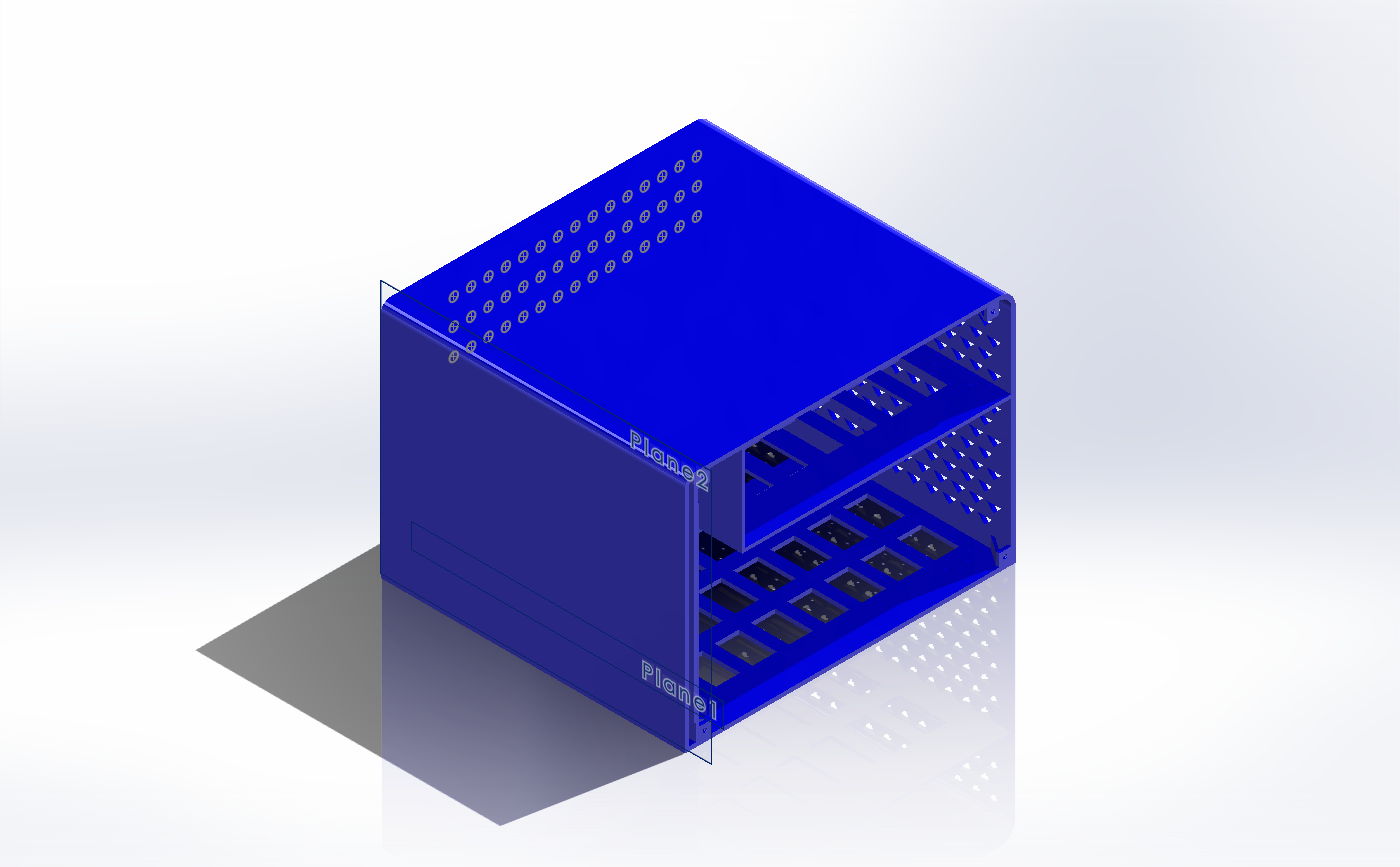
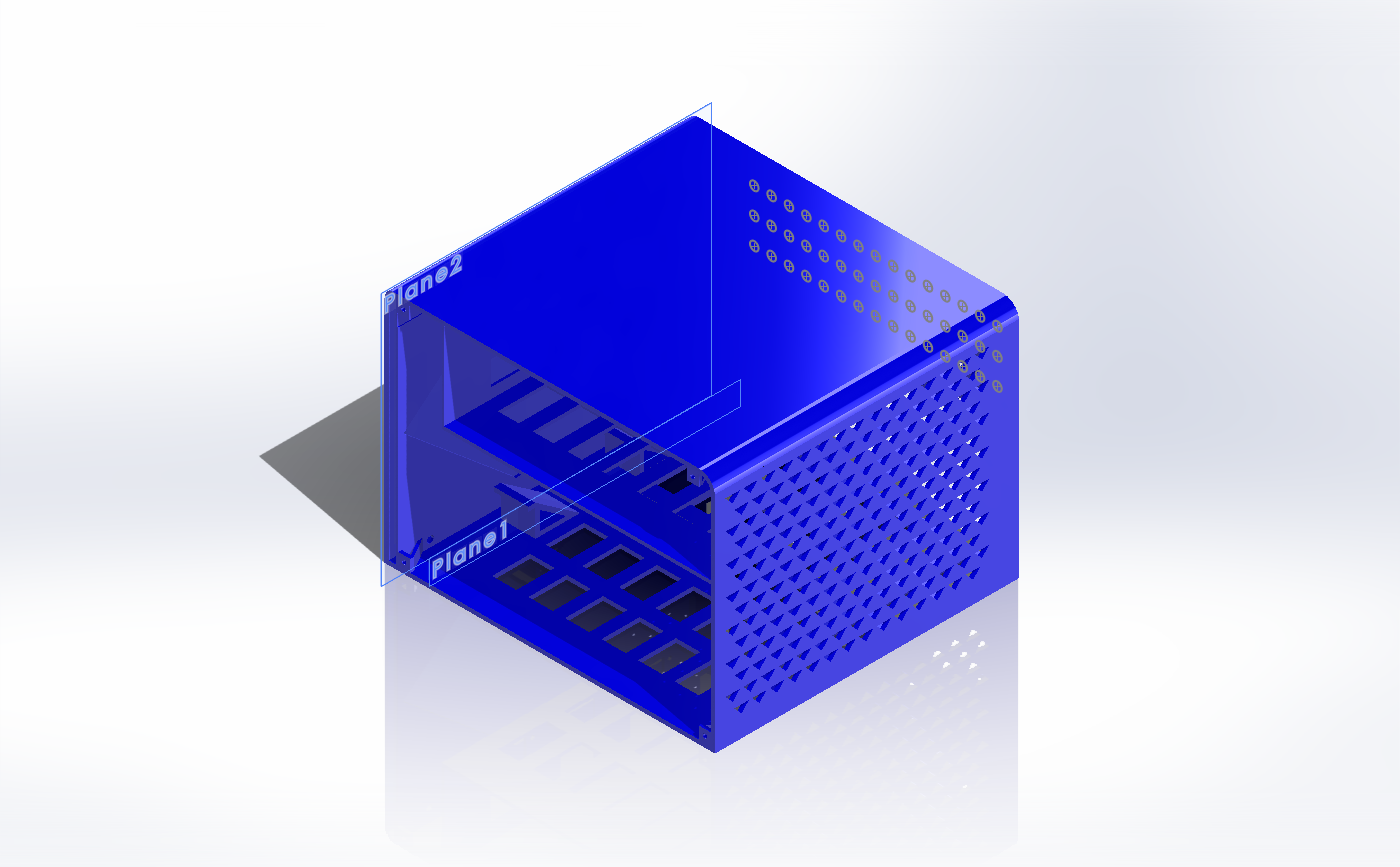
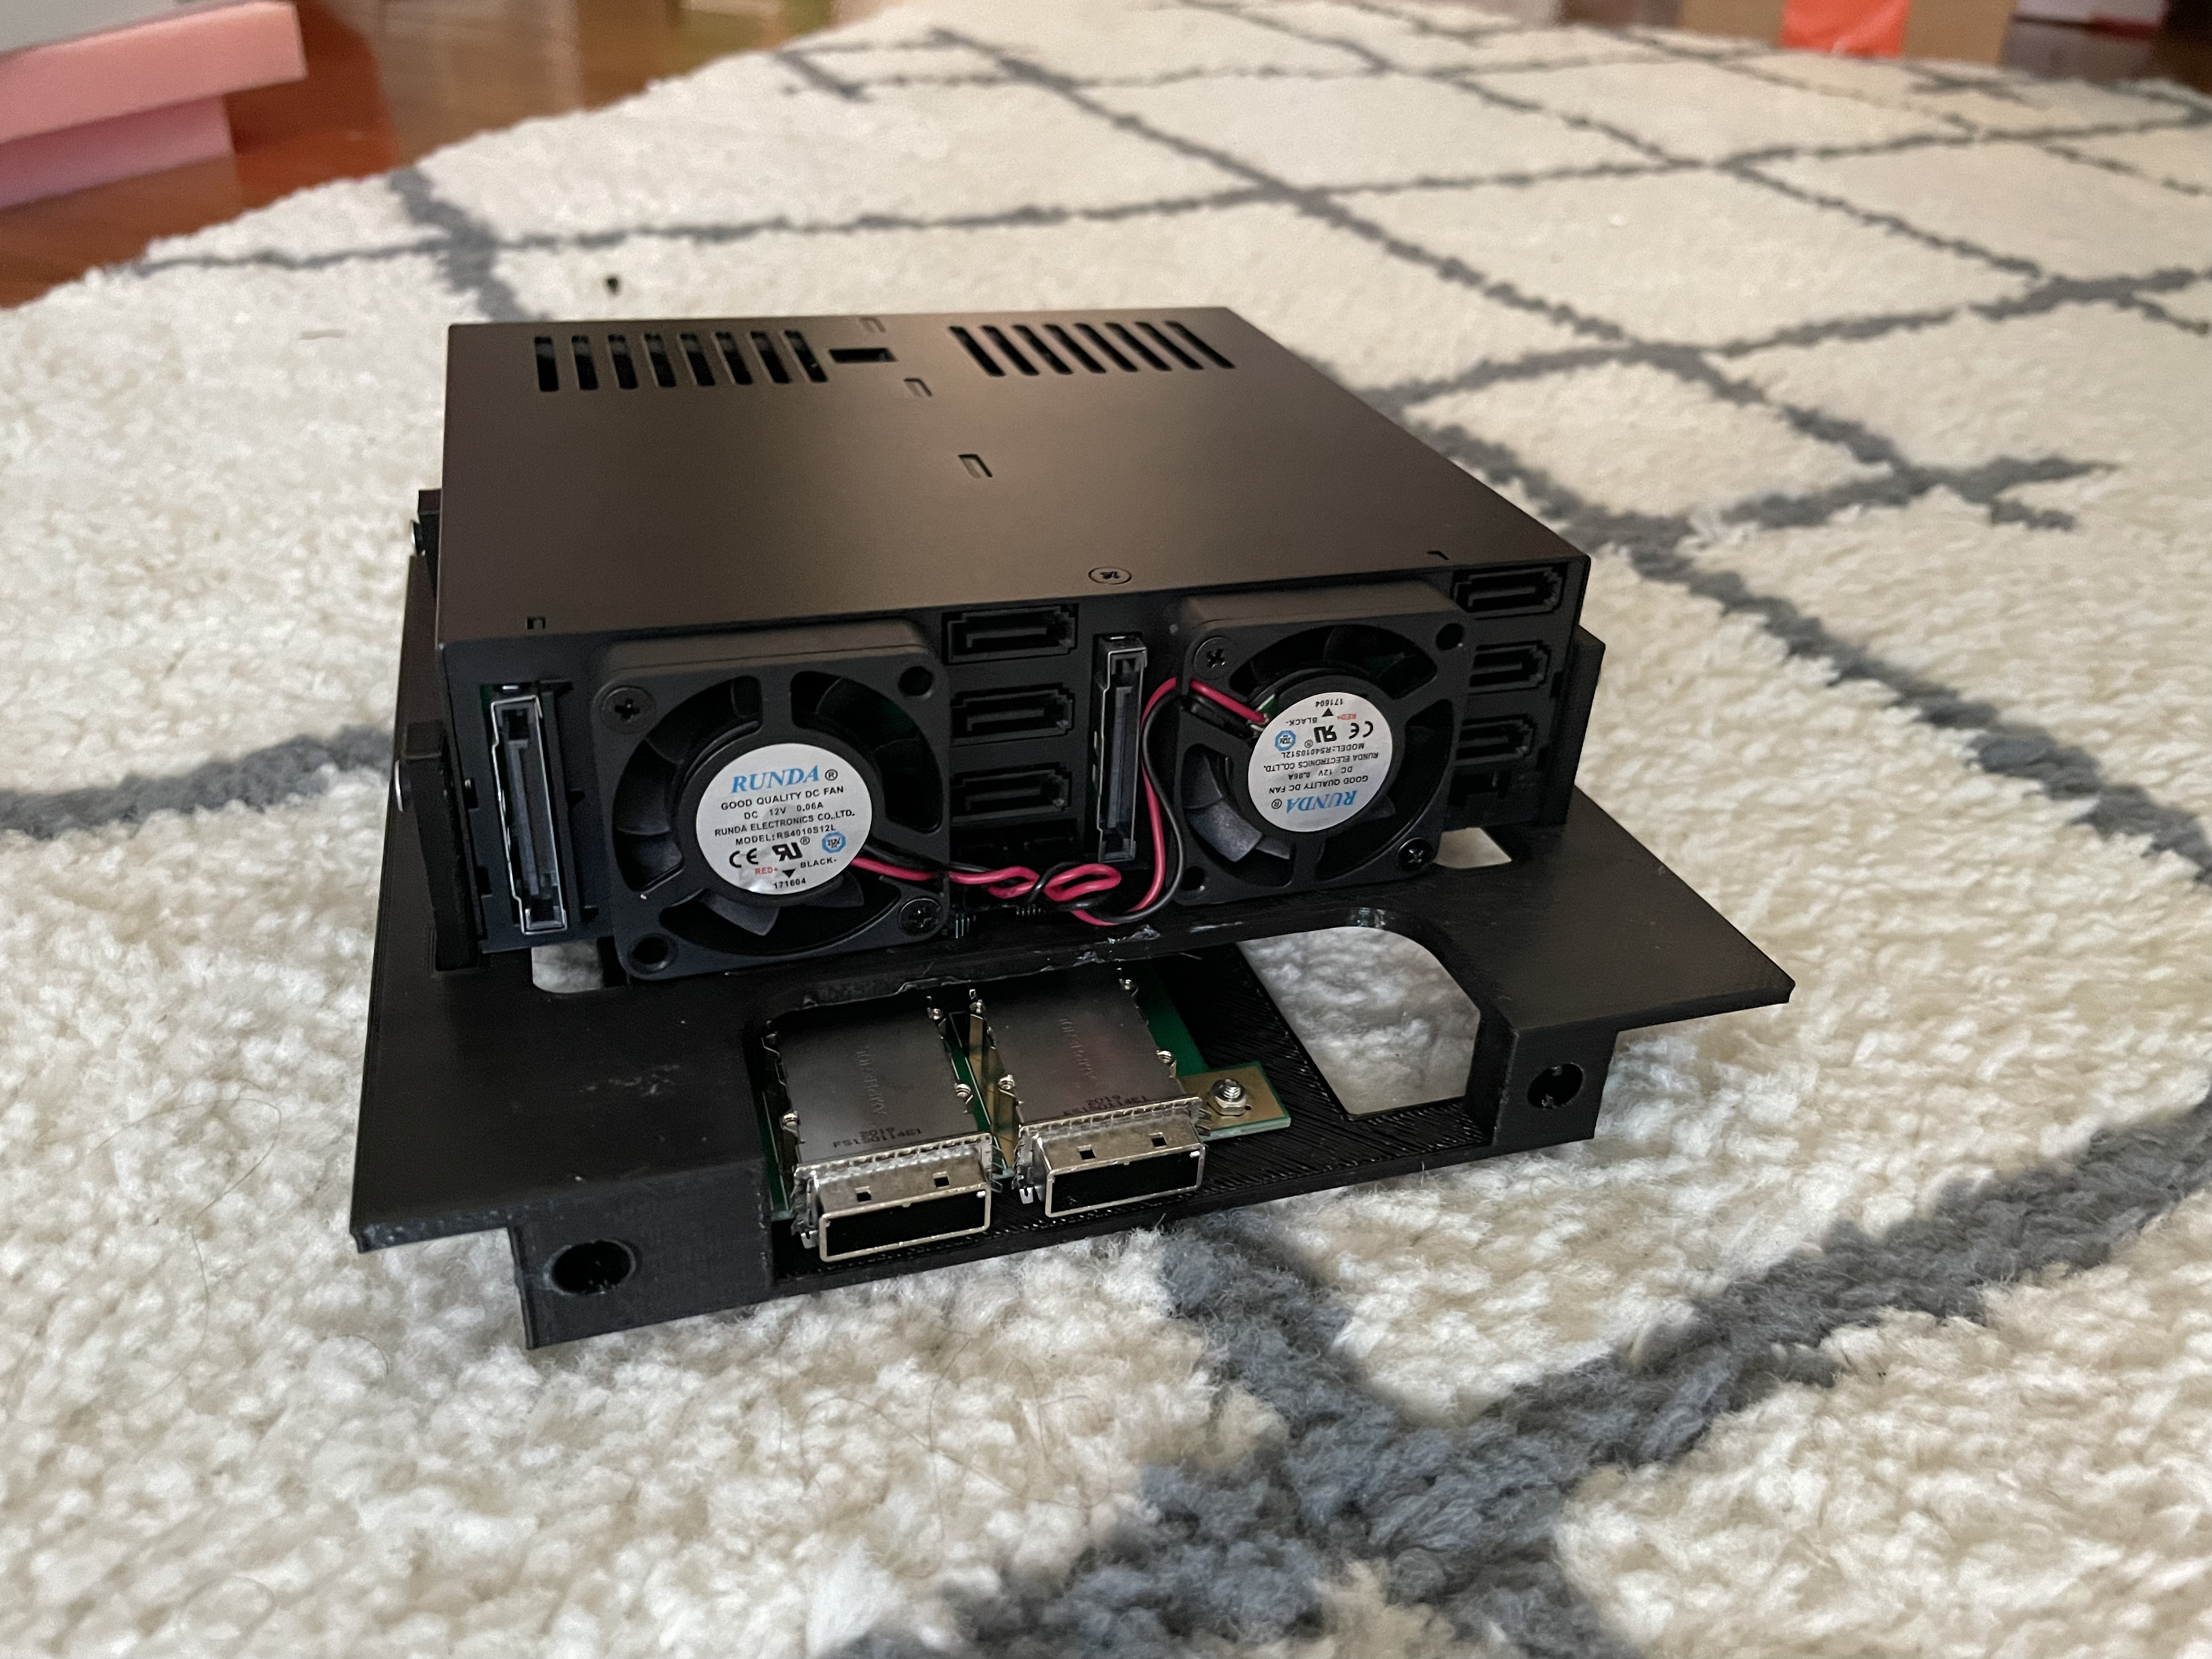
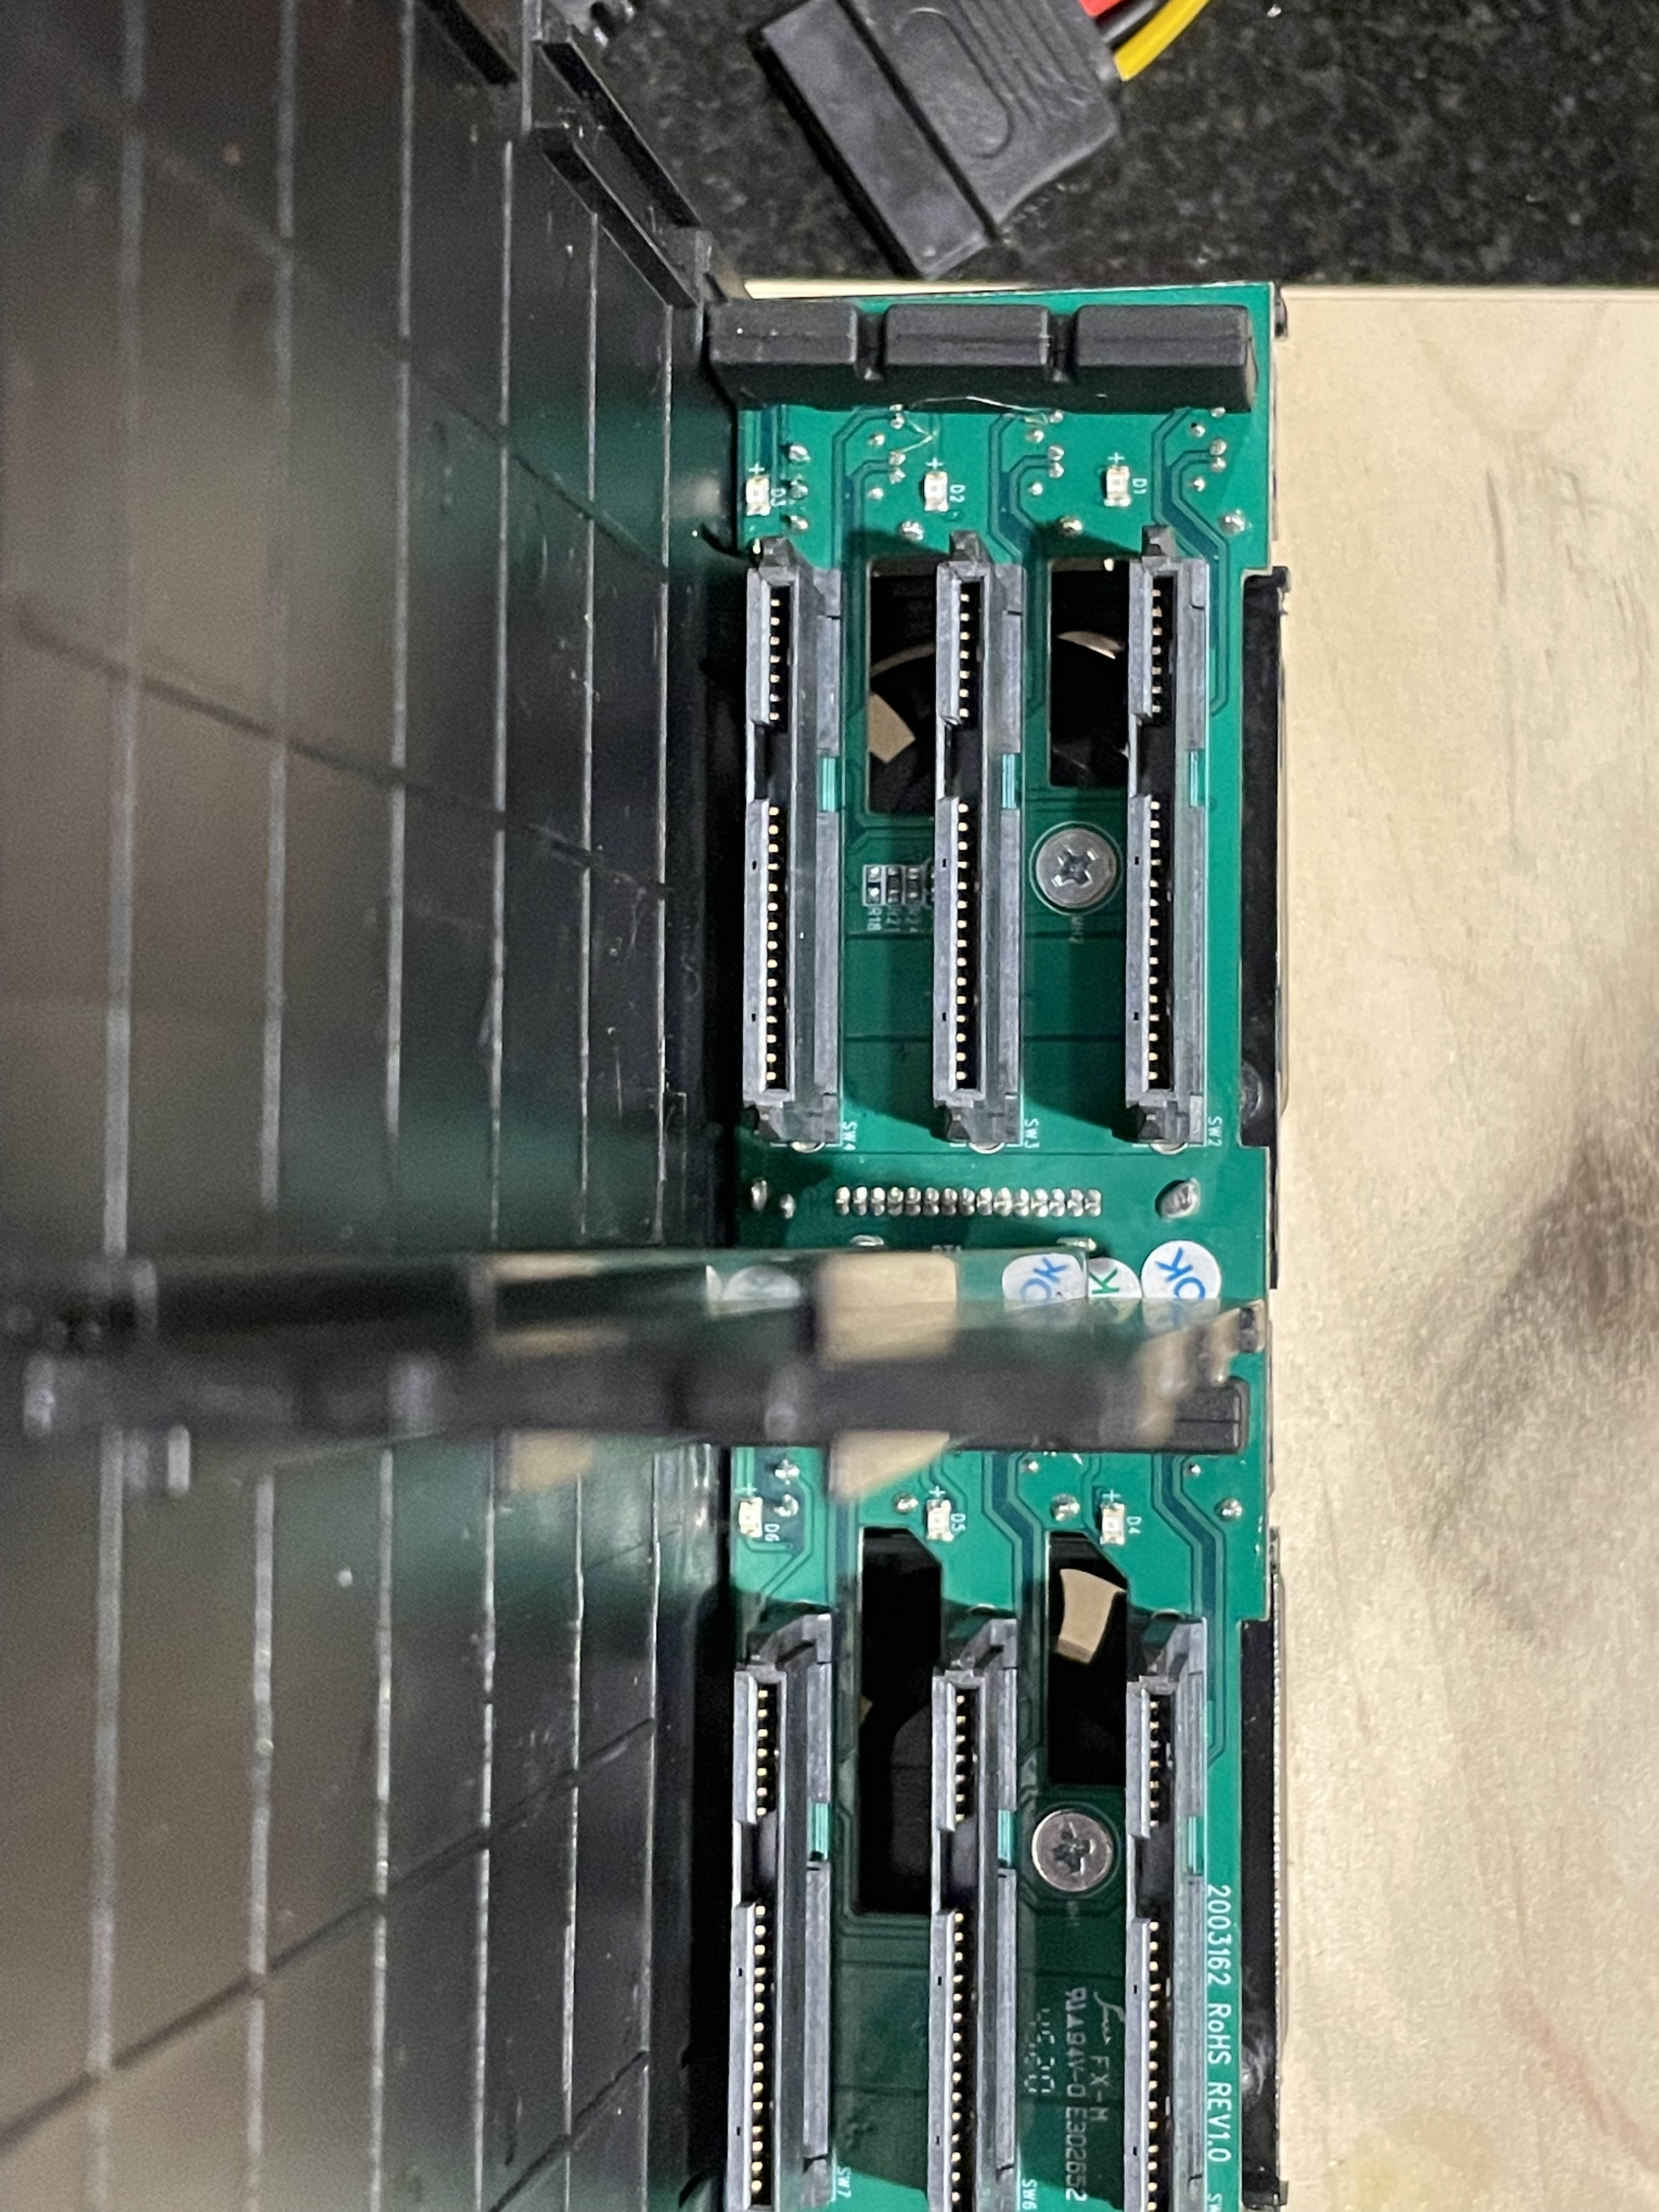
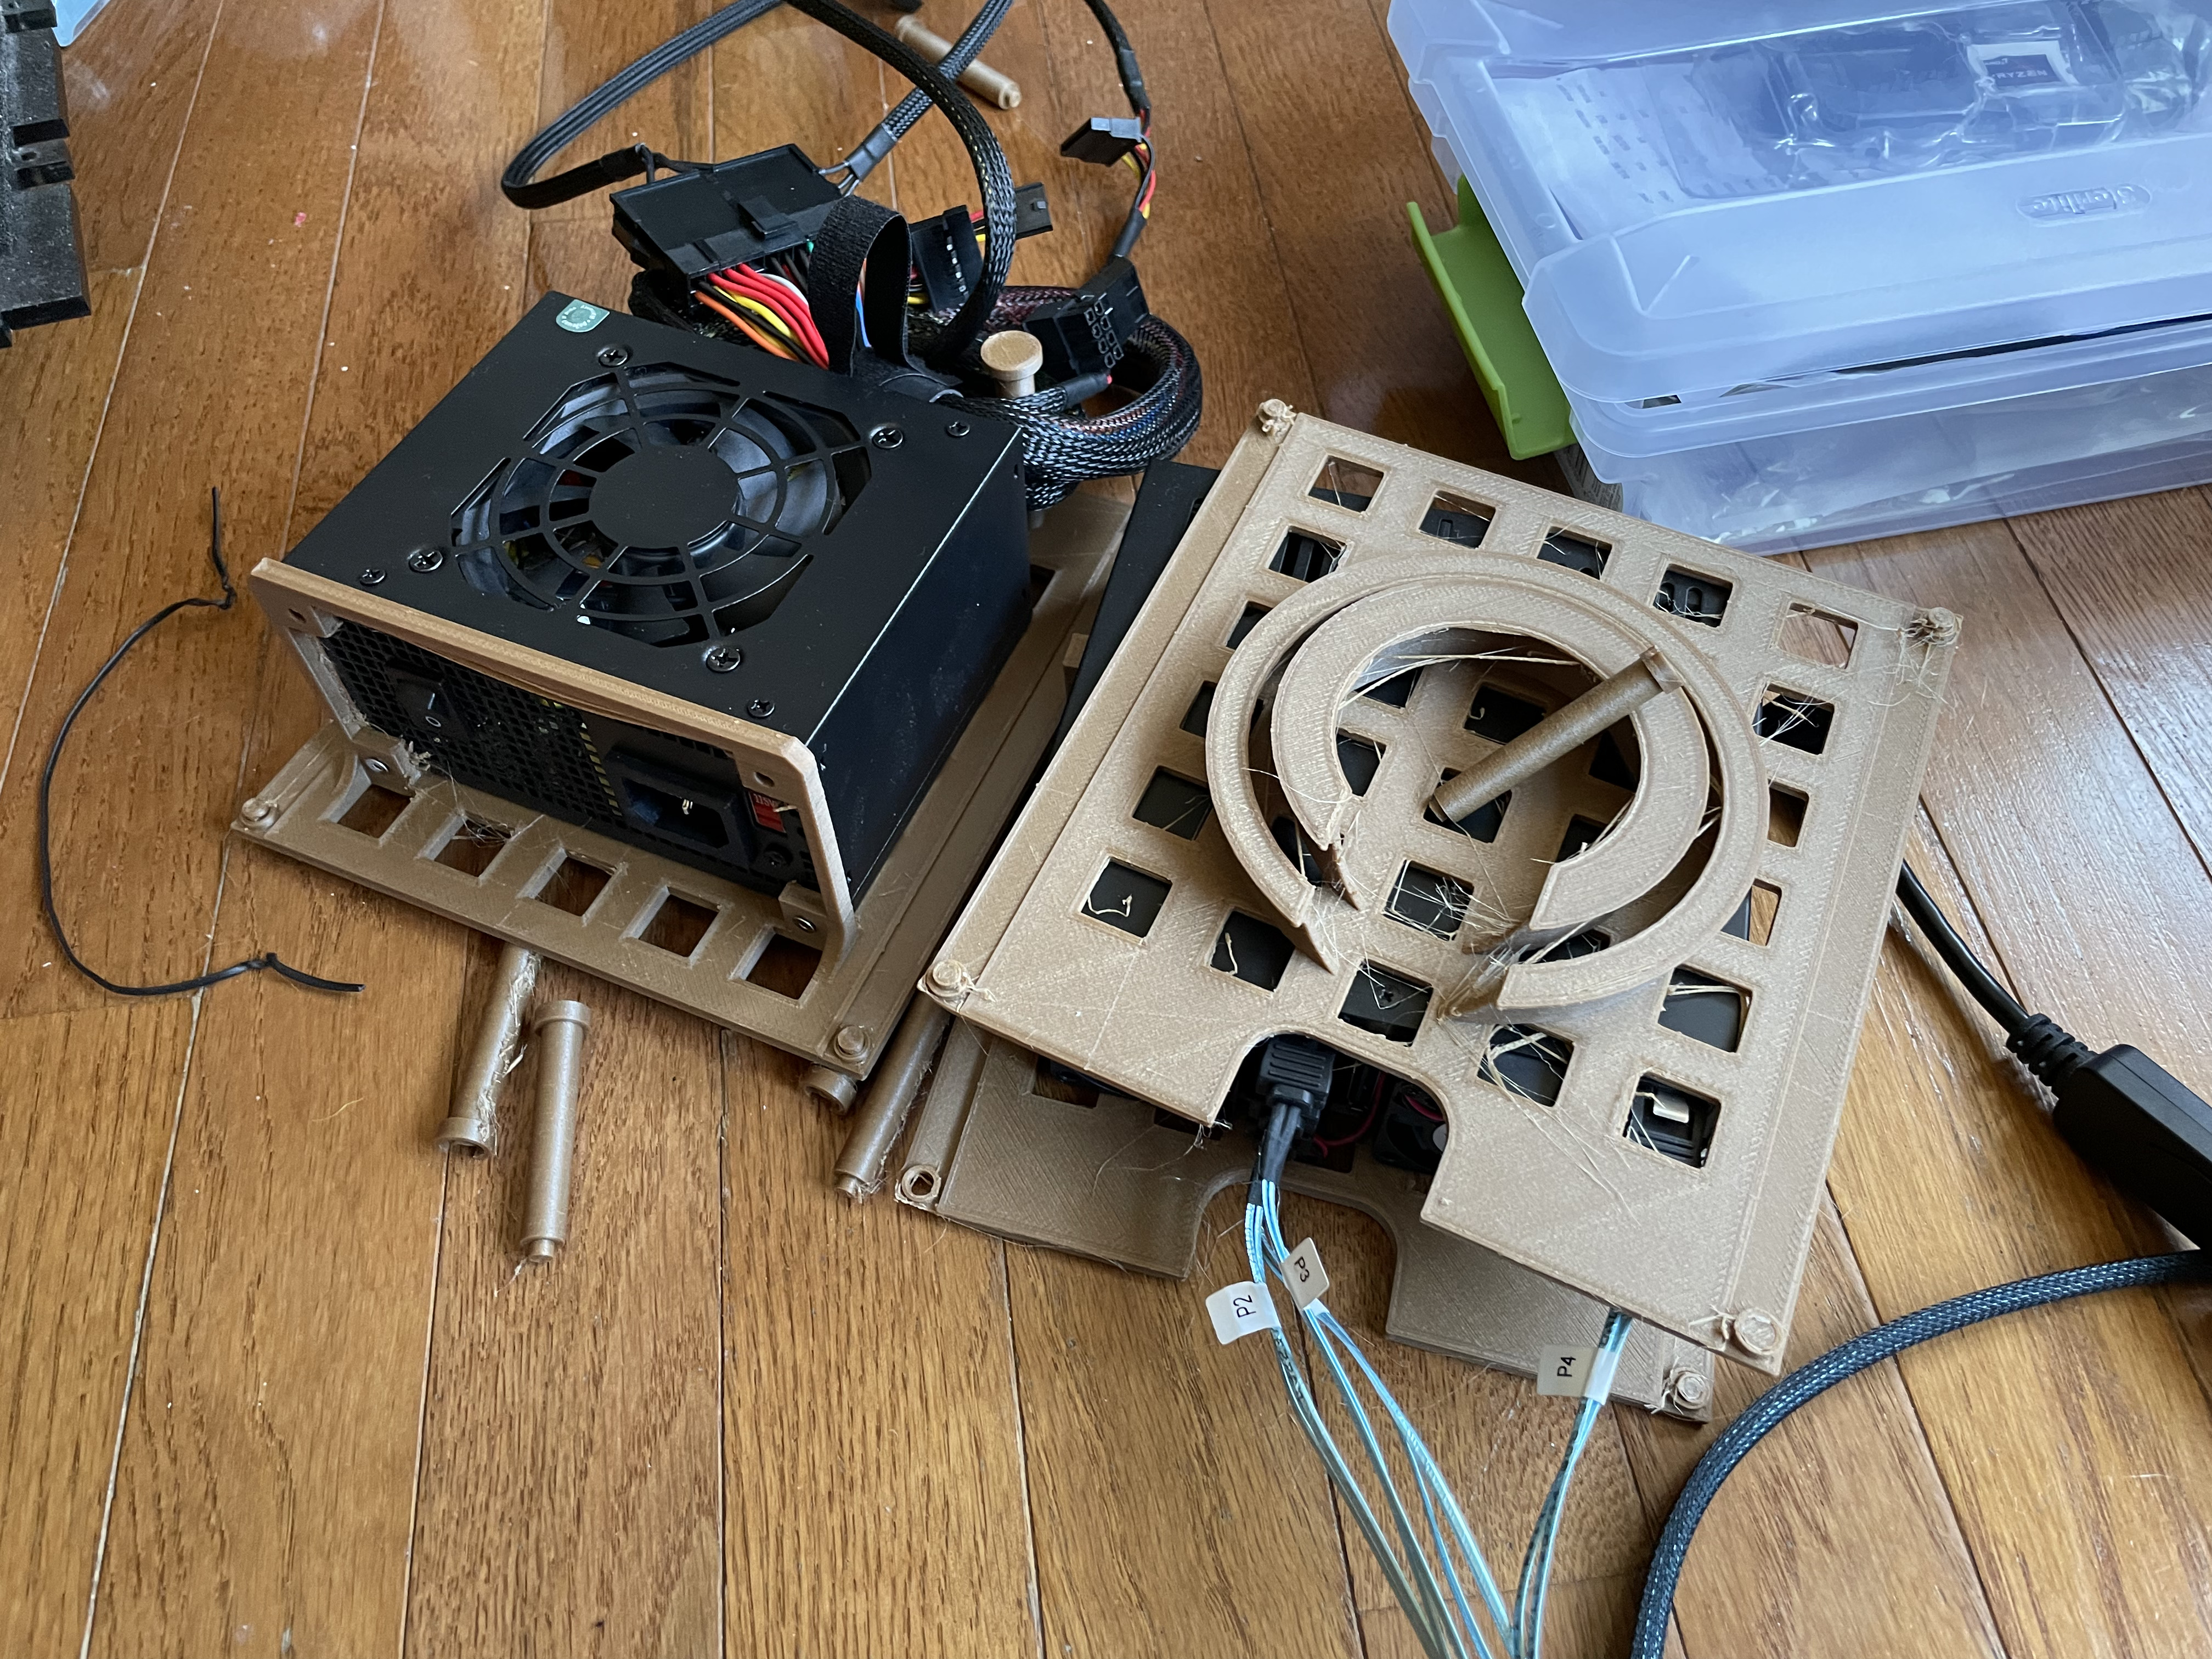
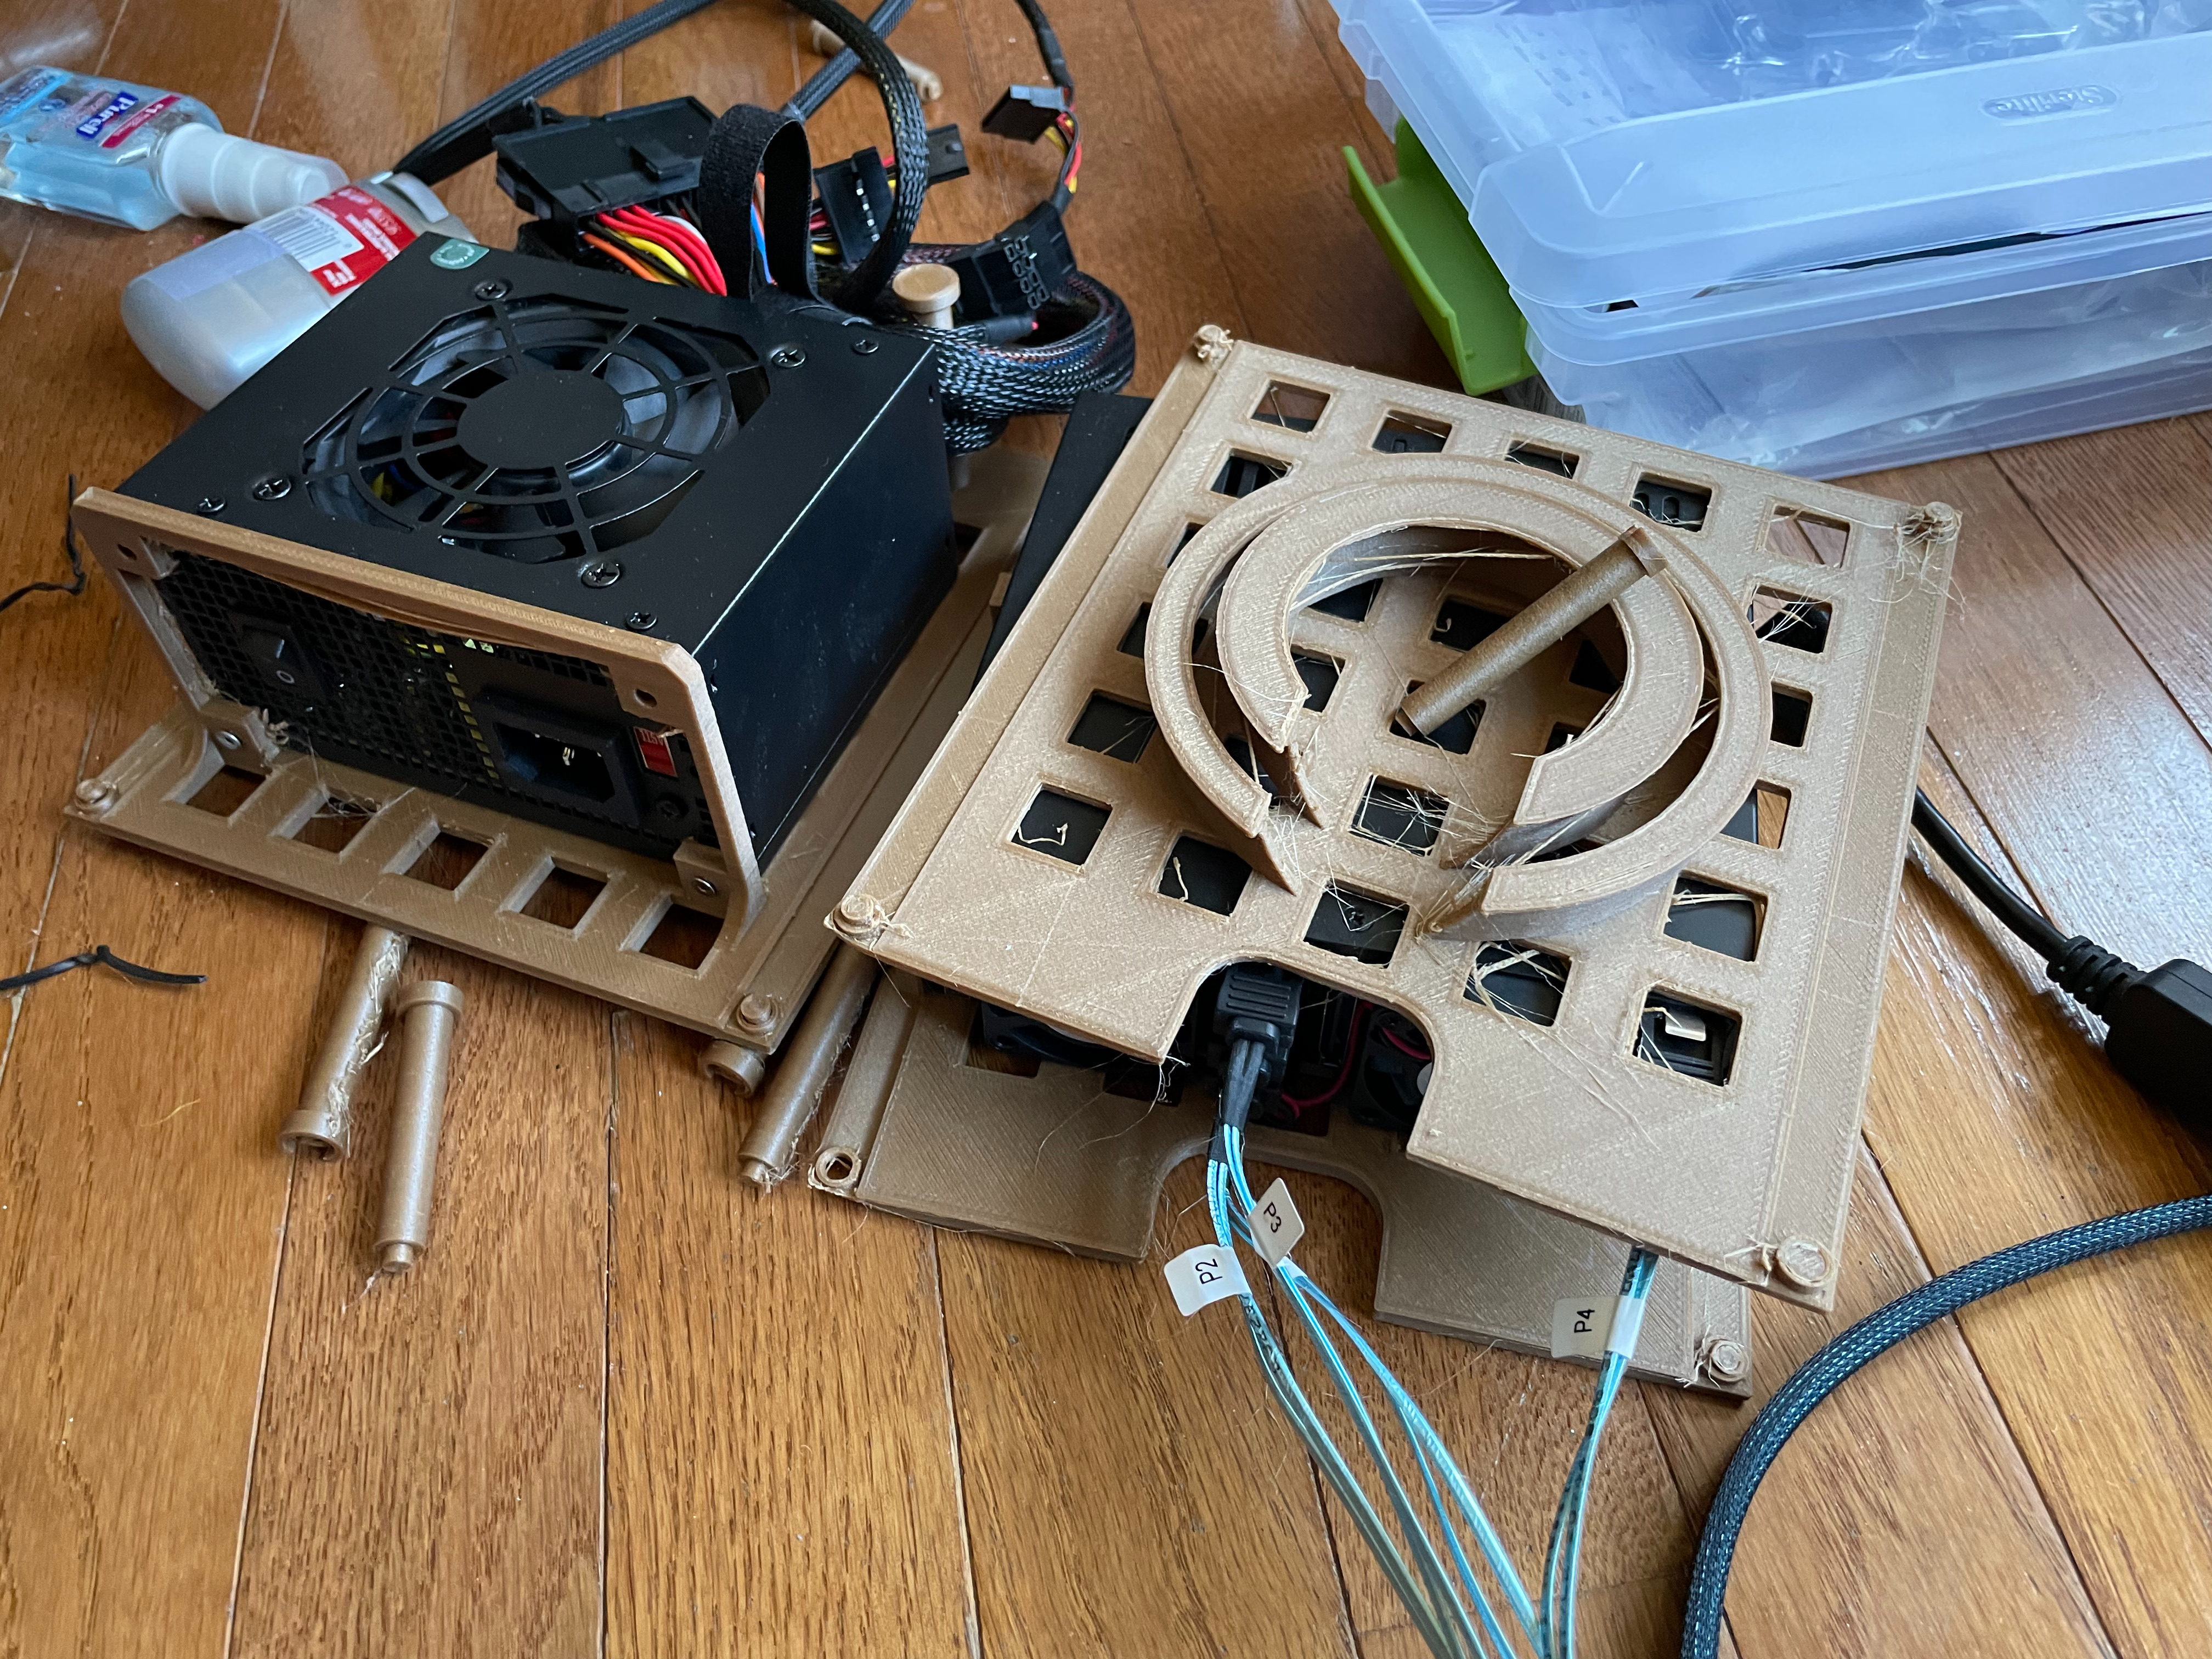
I started where any good project does, finding the general parts I will use for the project. I came across this adapter. It allows you to put 6, 2.5″ drives into a single 5.25″ DVD bay. Each drive gets its own SATA connection, and it even has fans on the back to cool them. I started designing the case around that. Then I found this little adapter to go from 2 internal SAS cables to external SAS. My thought was externally I would have eSAS into my “server”, and then convert that SAS to 4 SATA connections each.
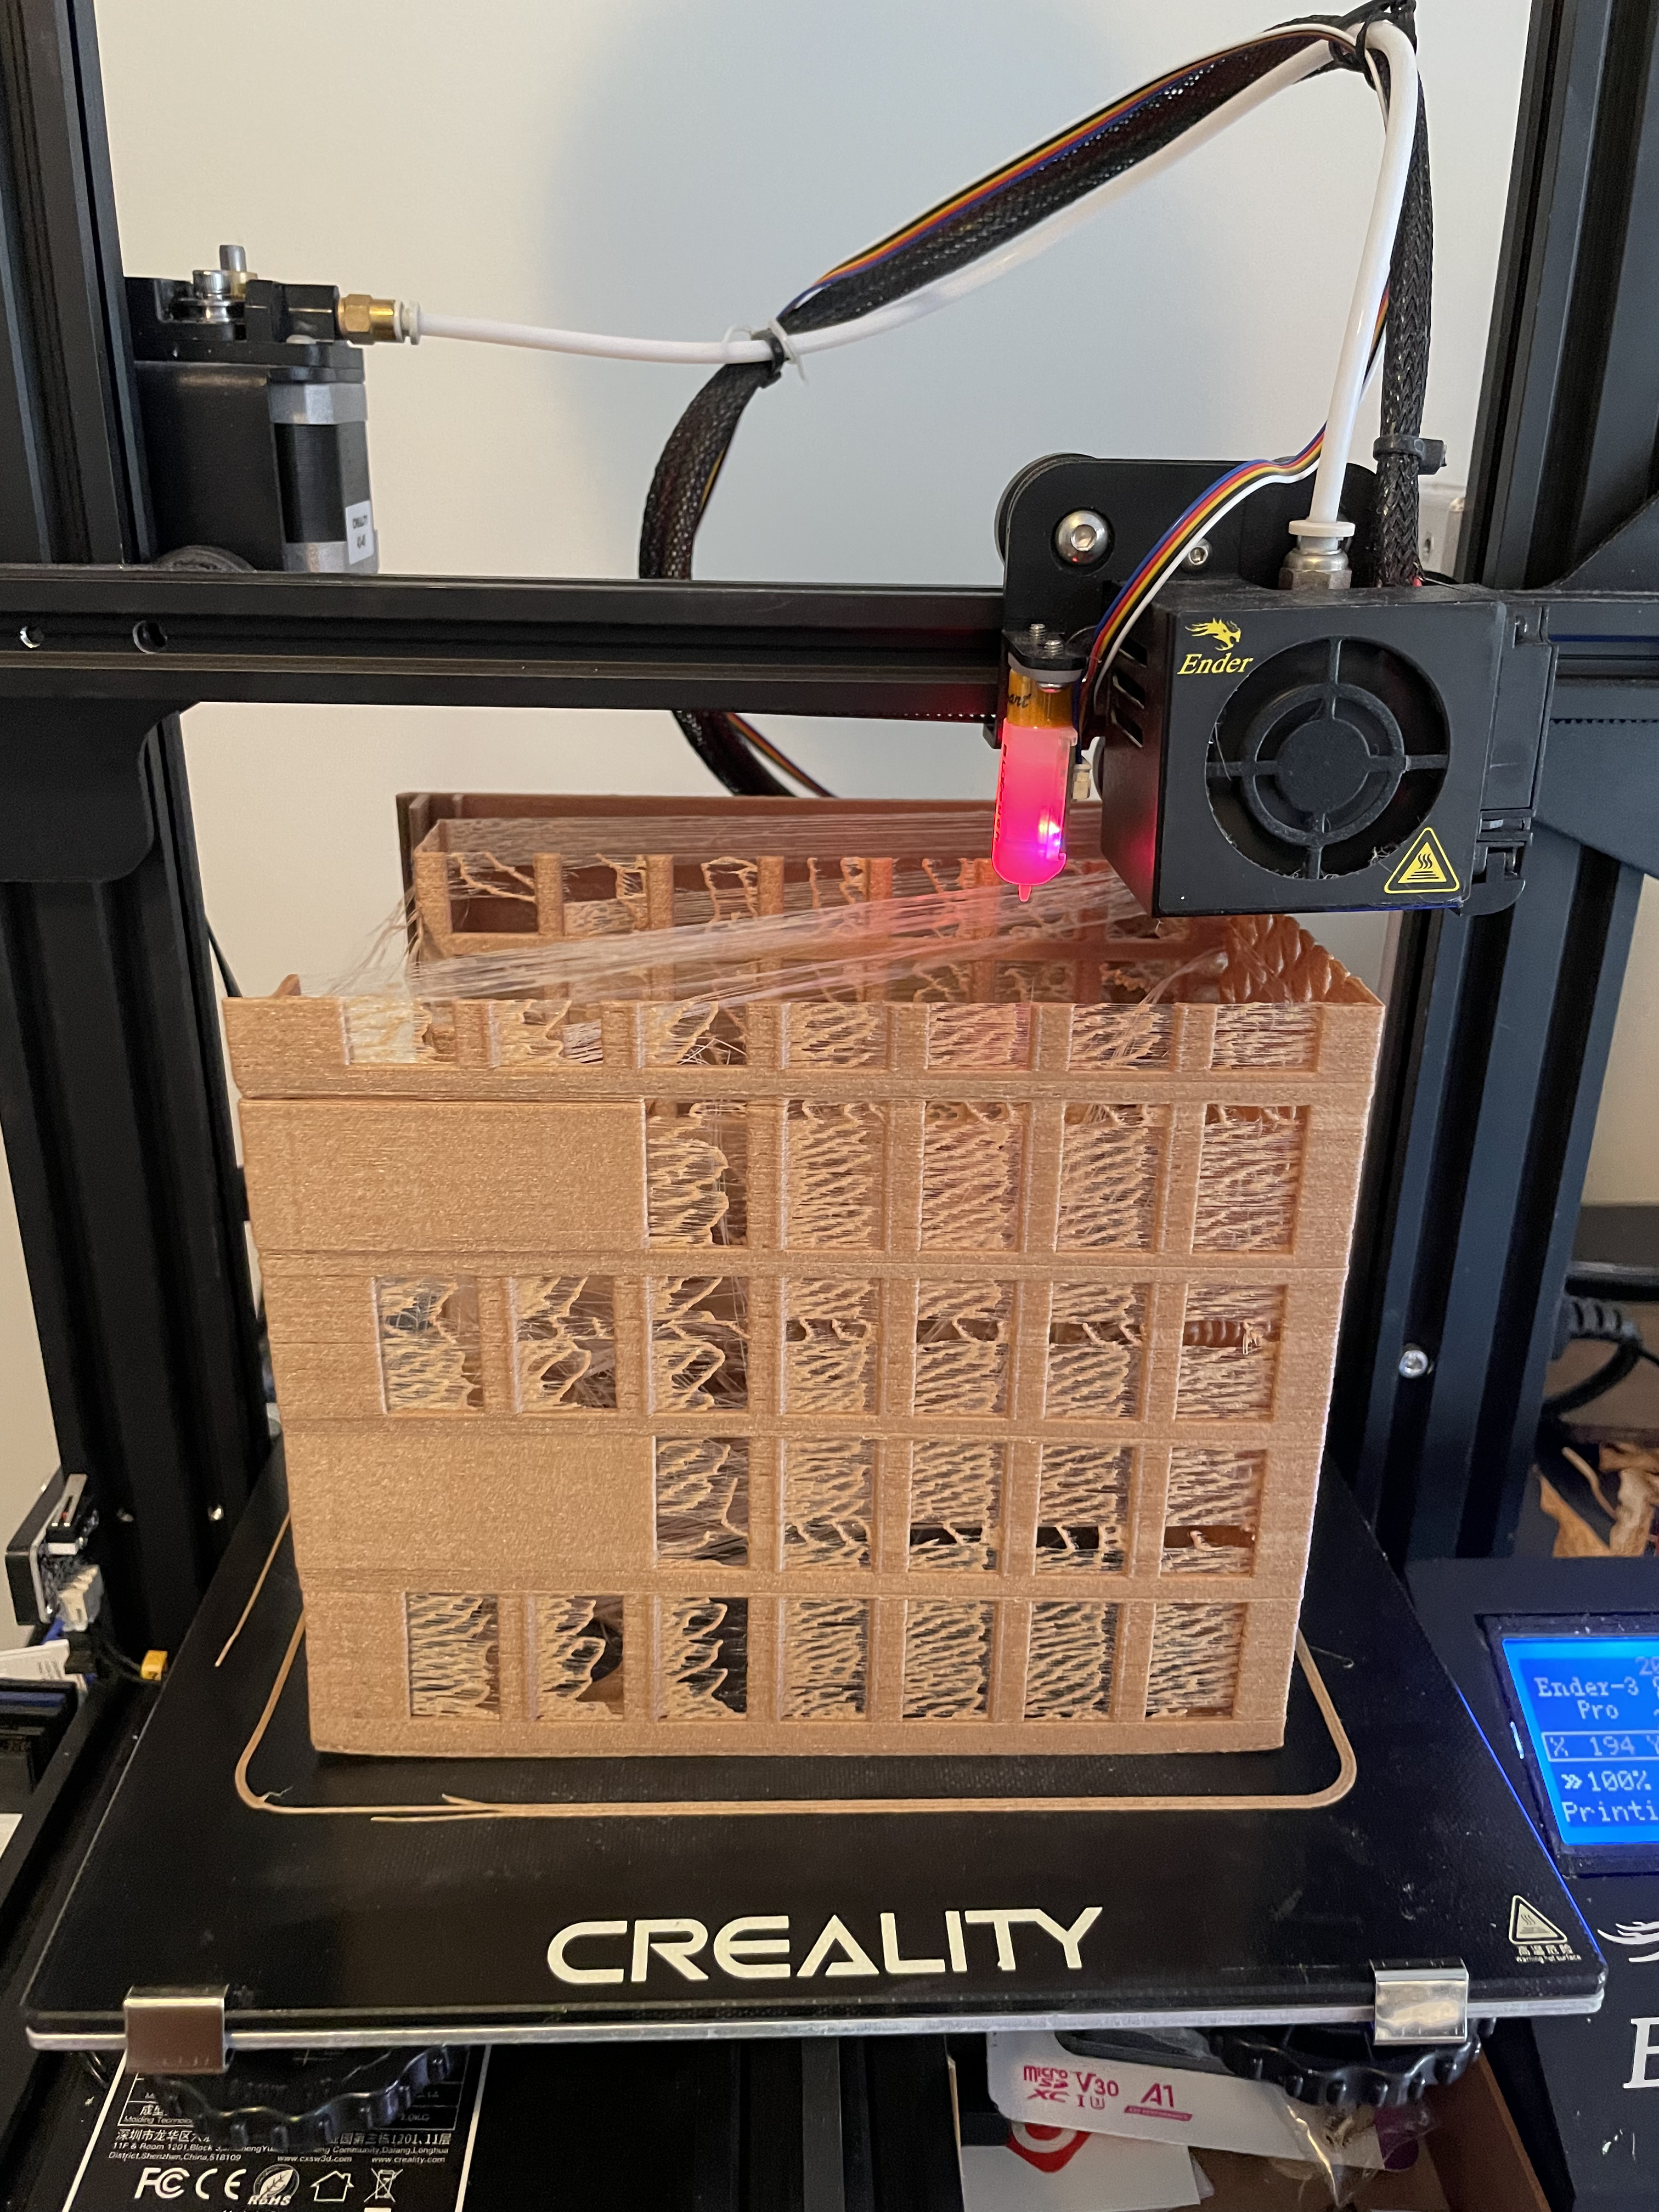
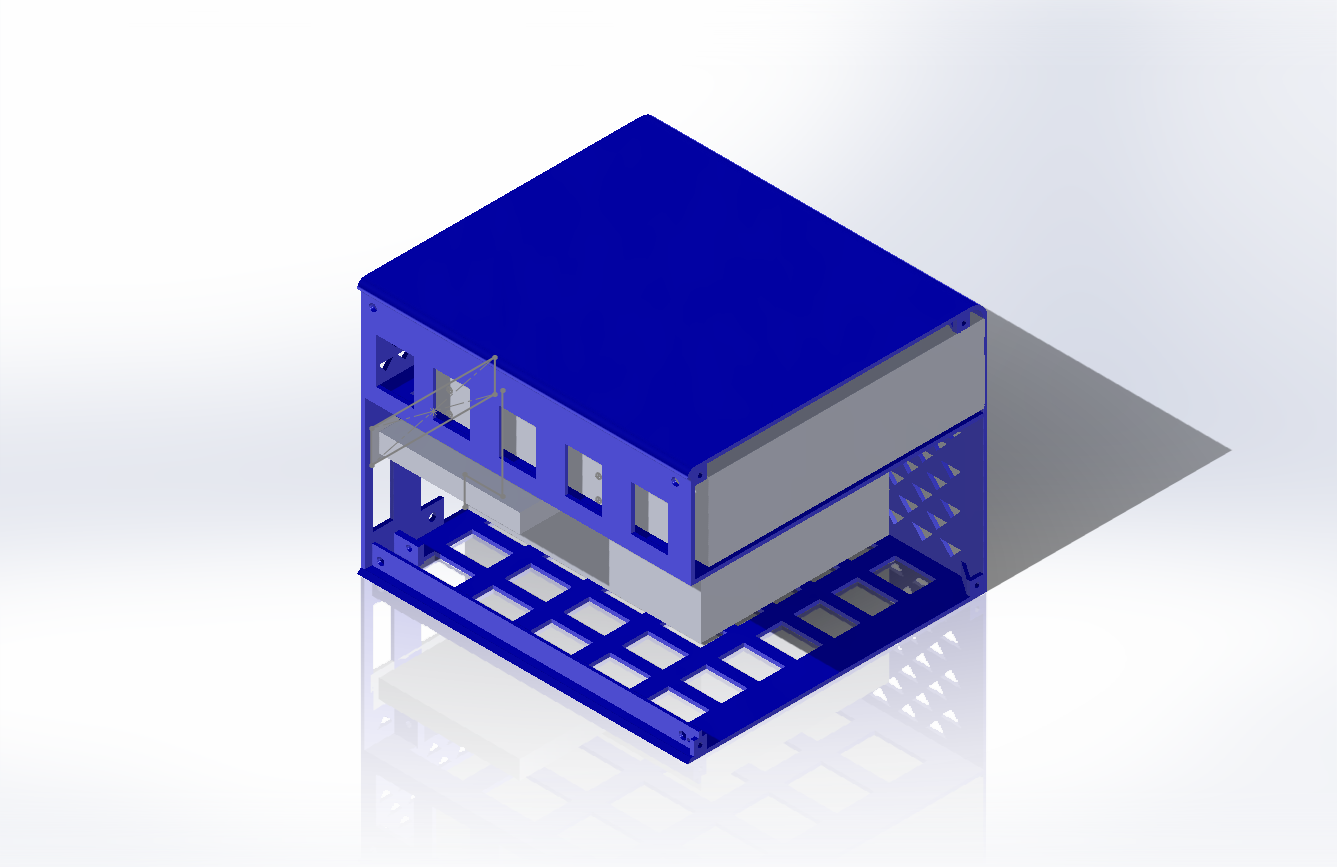
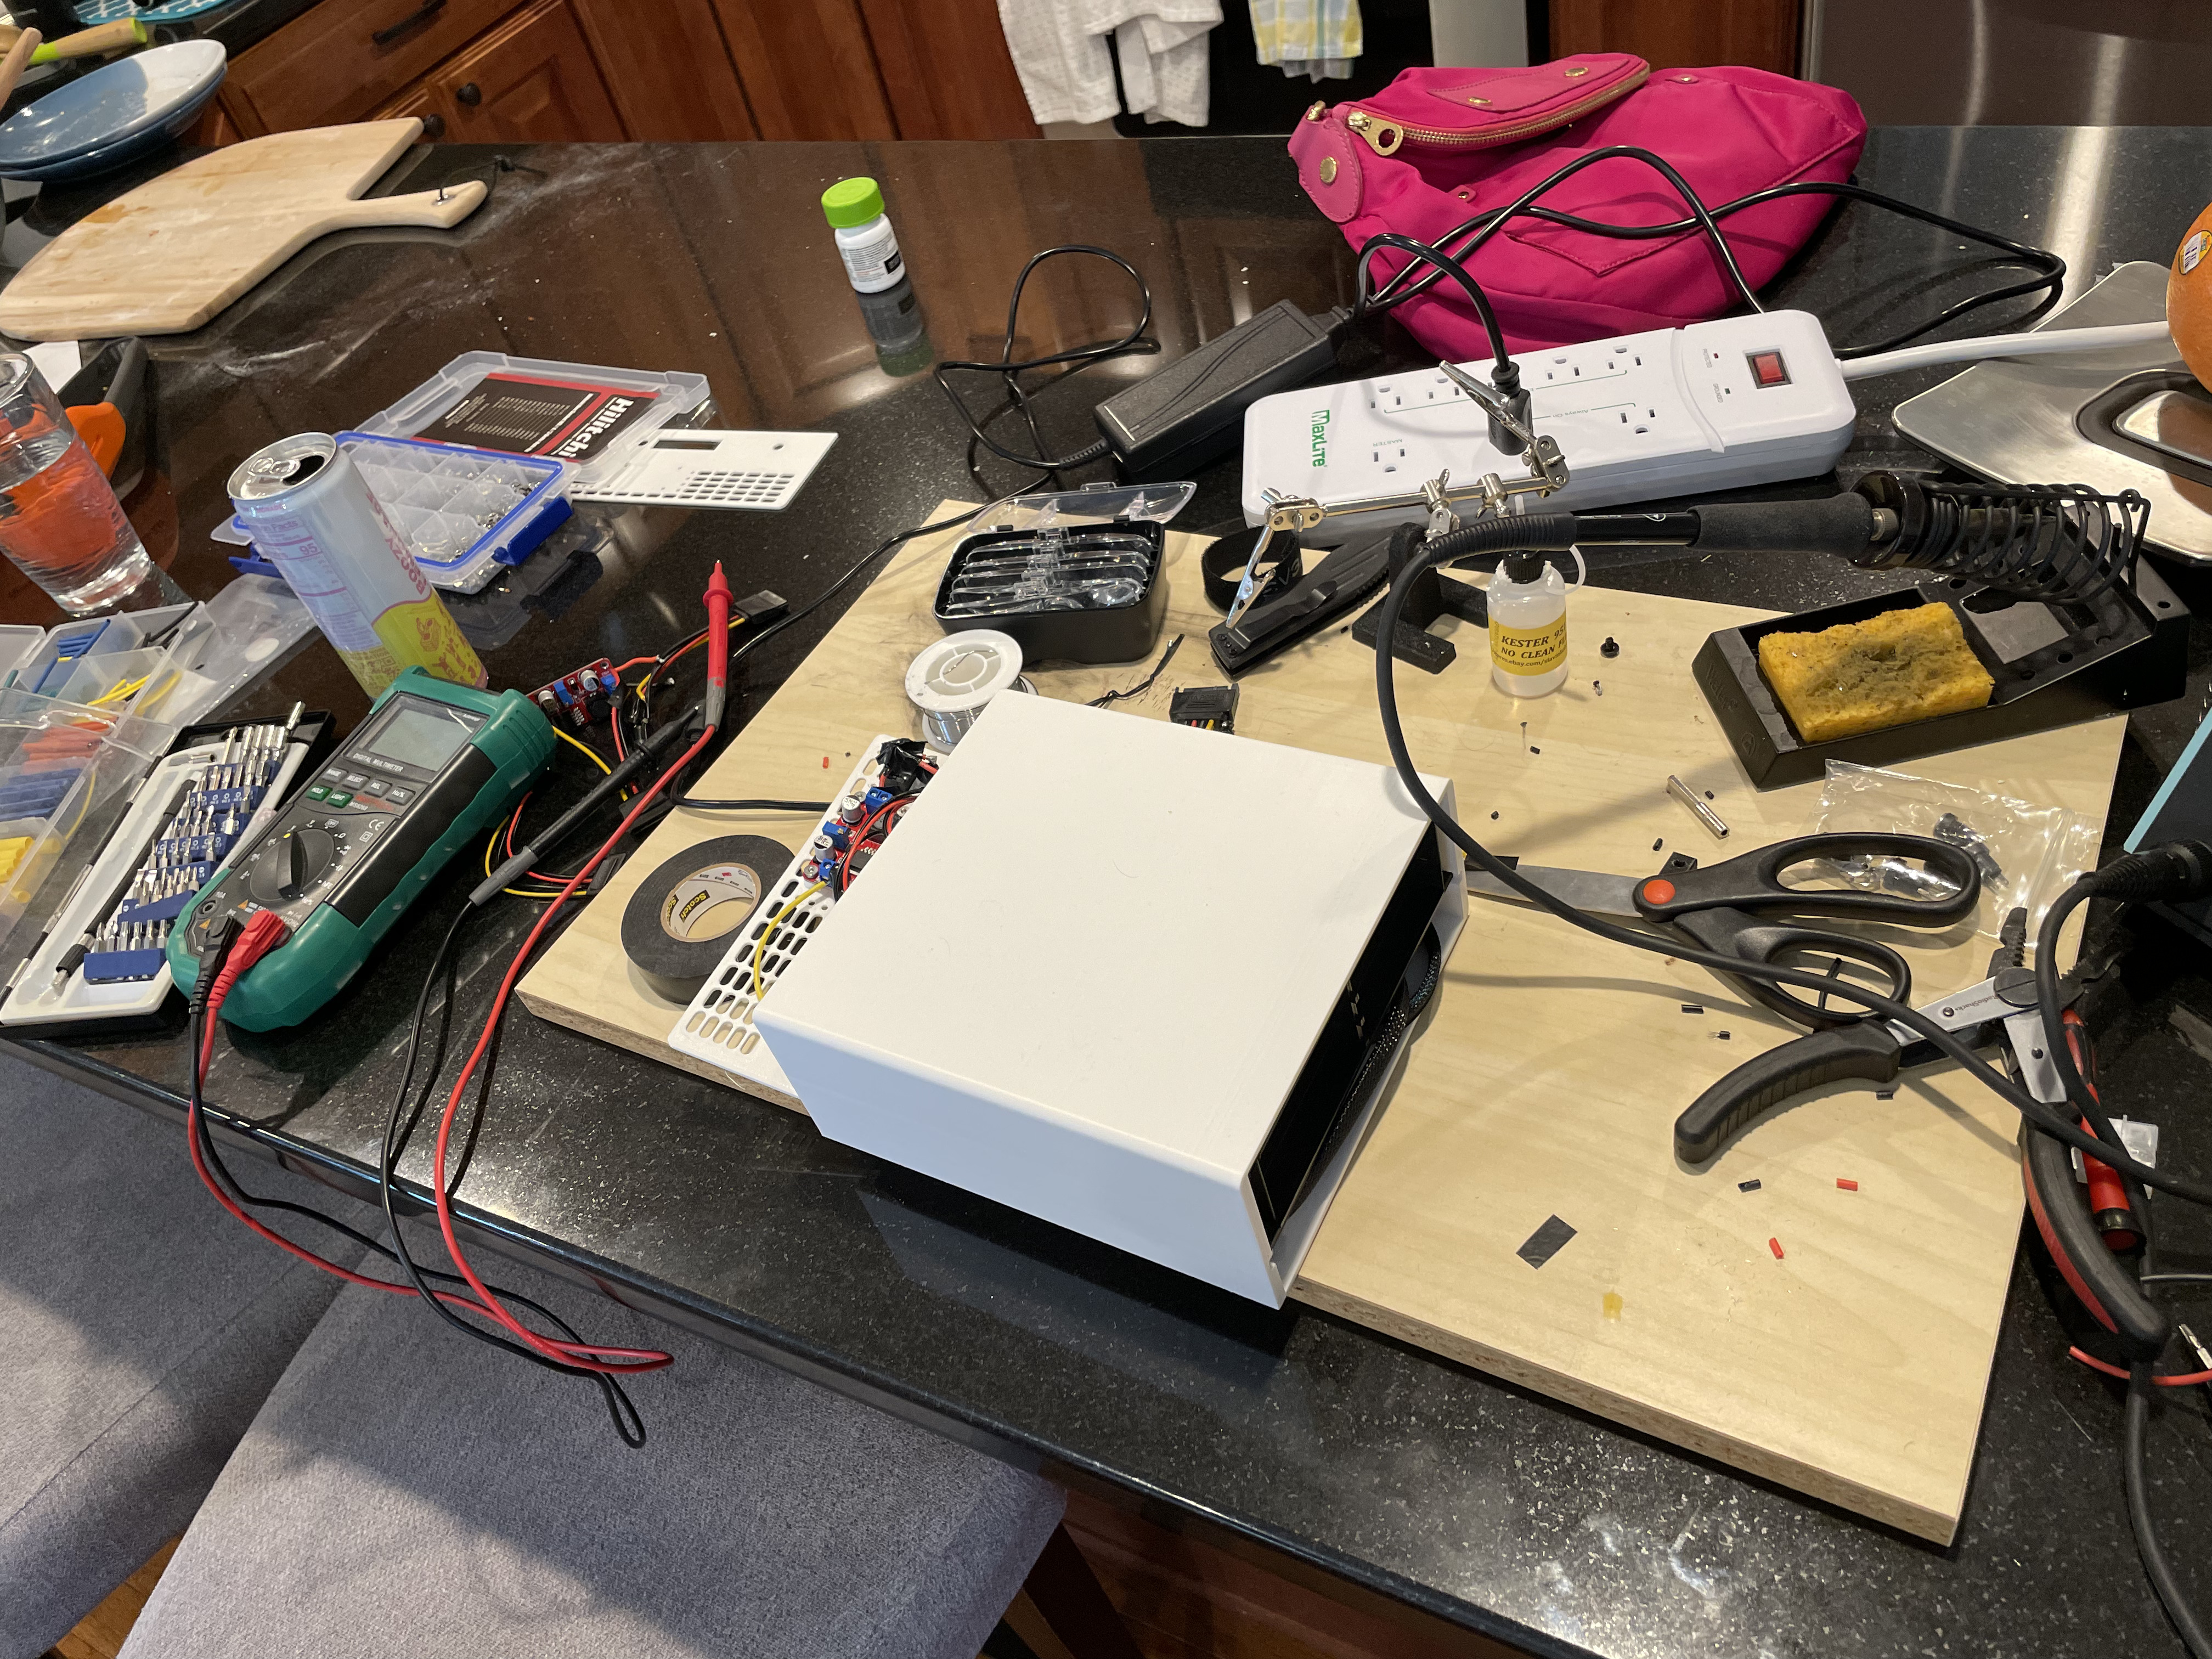
Now I needed to start creating a case to 3D print. Every other eSAS enclosure I found online was HUGE, I wanted something small that could fit the power supply, and the connections I needed. This went through many… many… iterations.
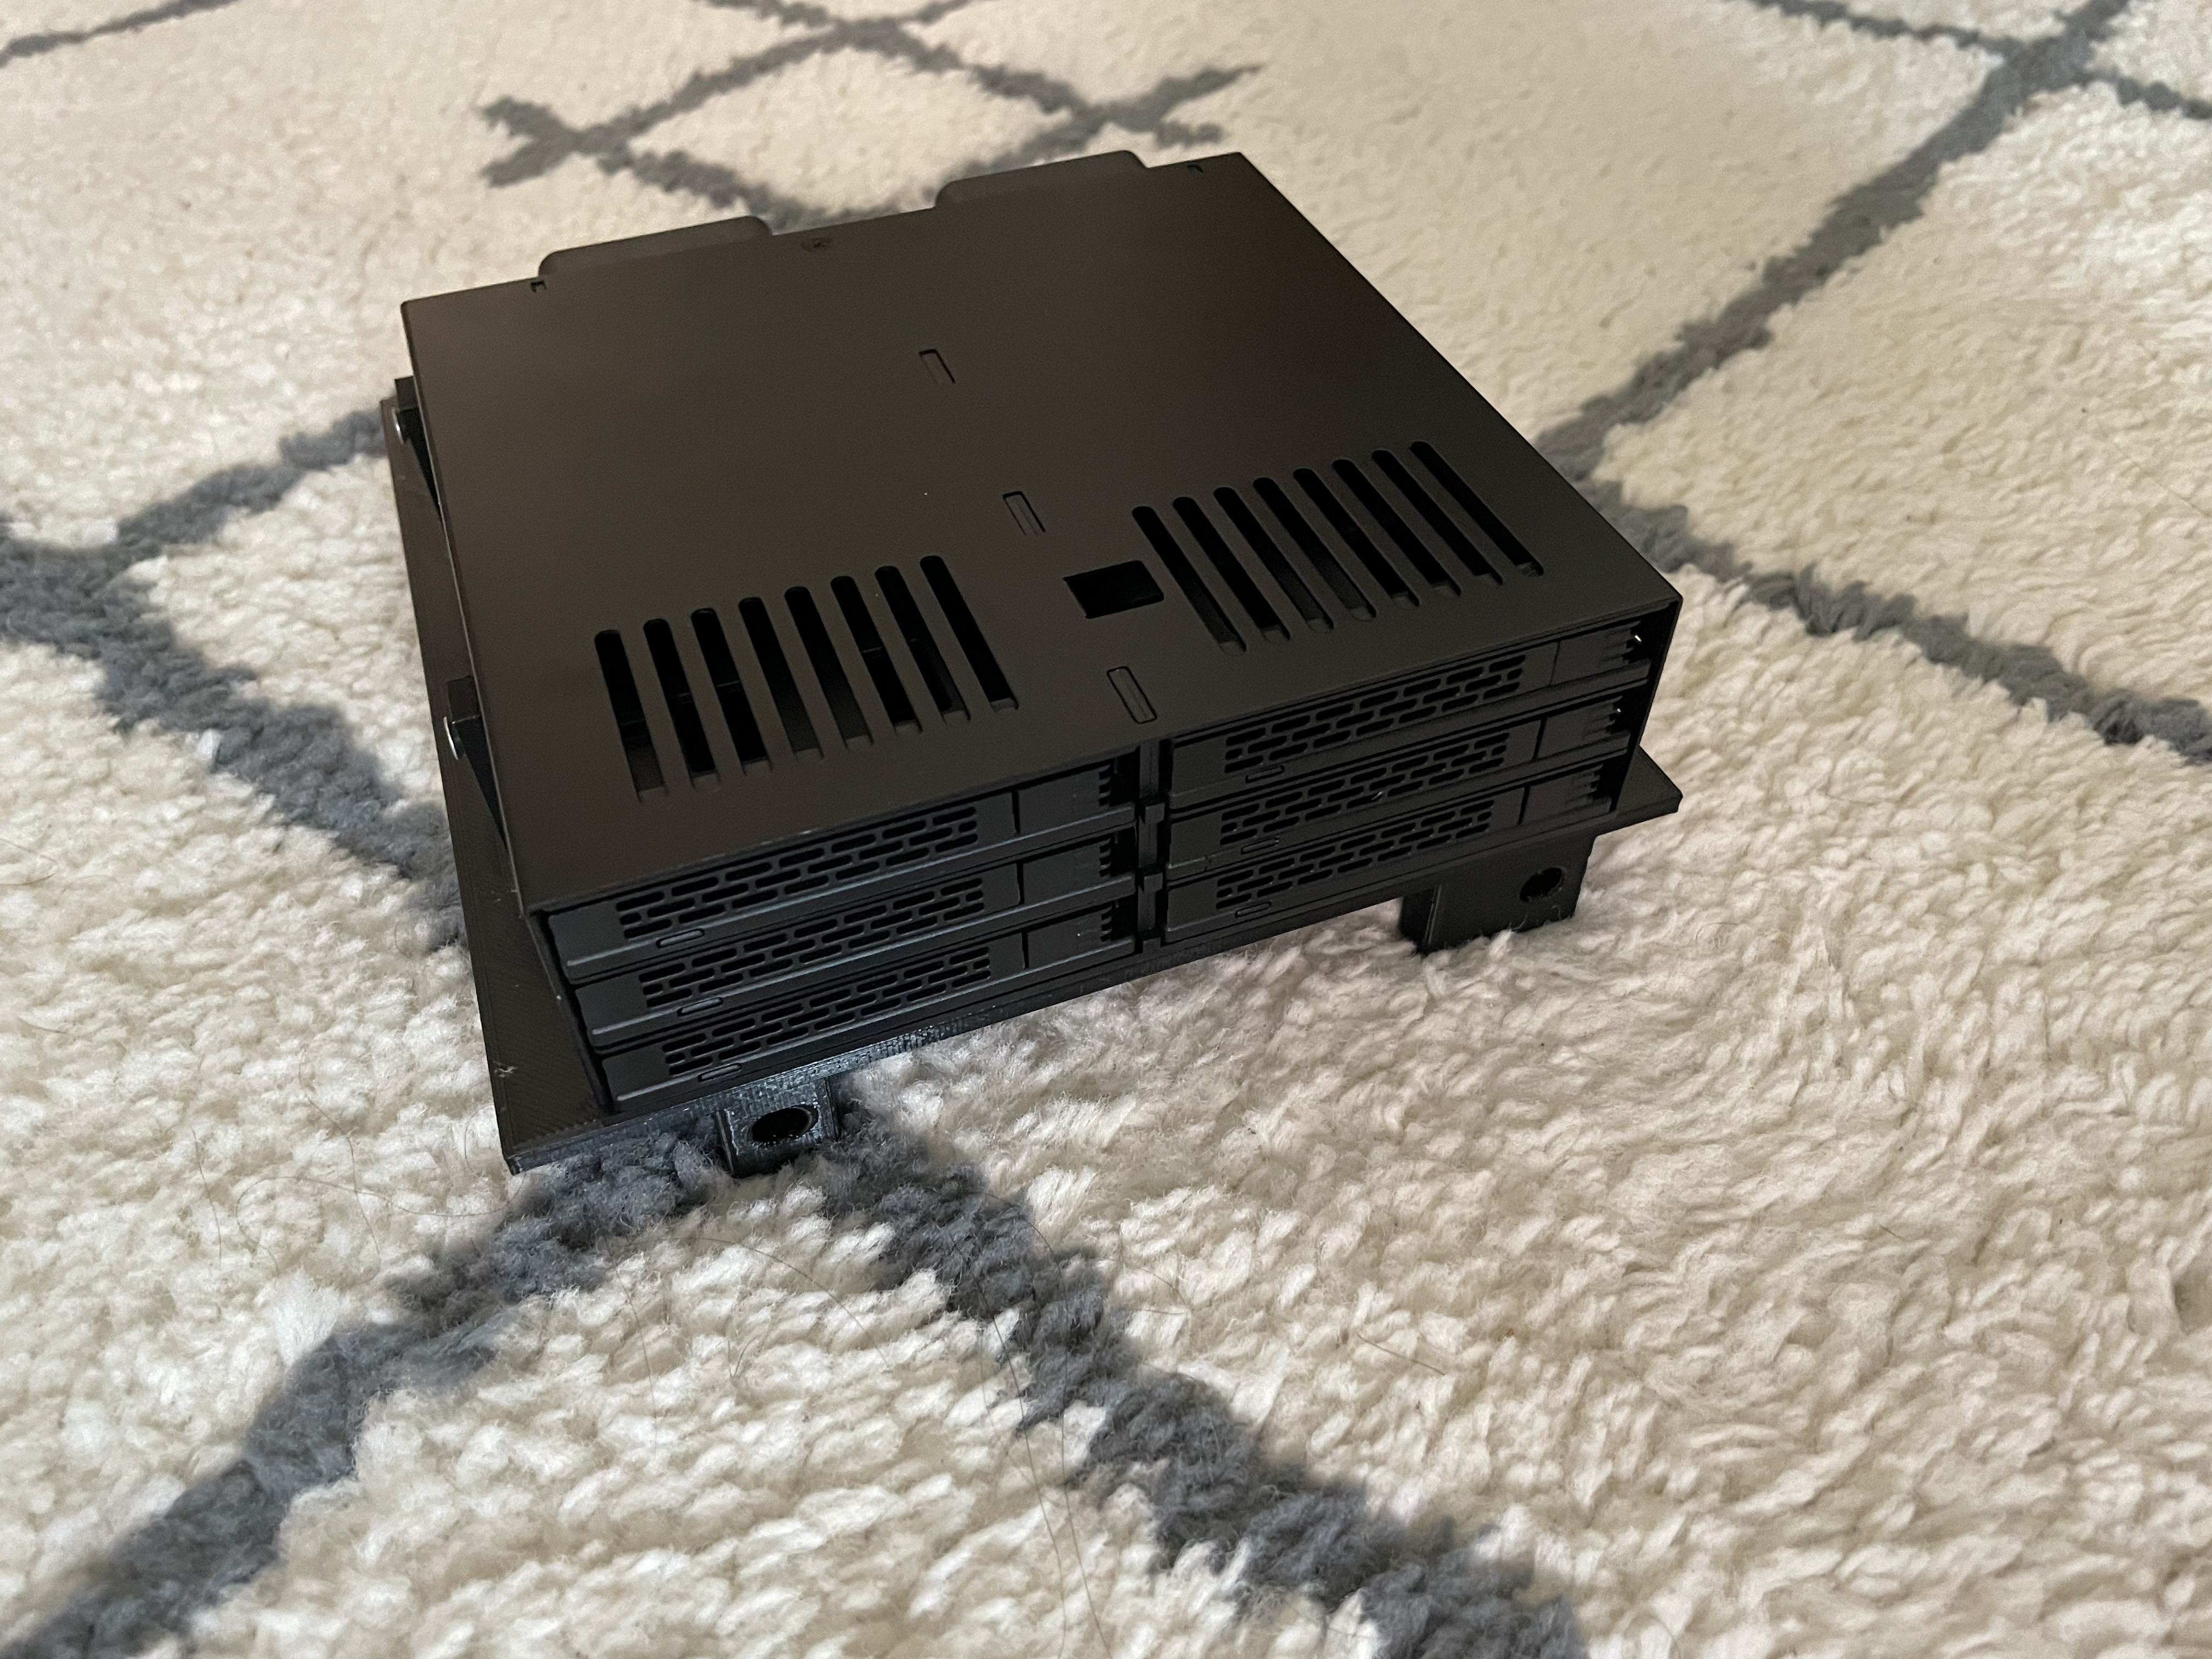
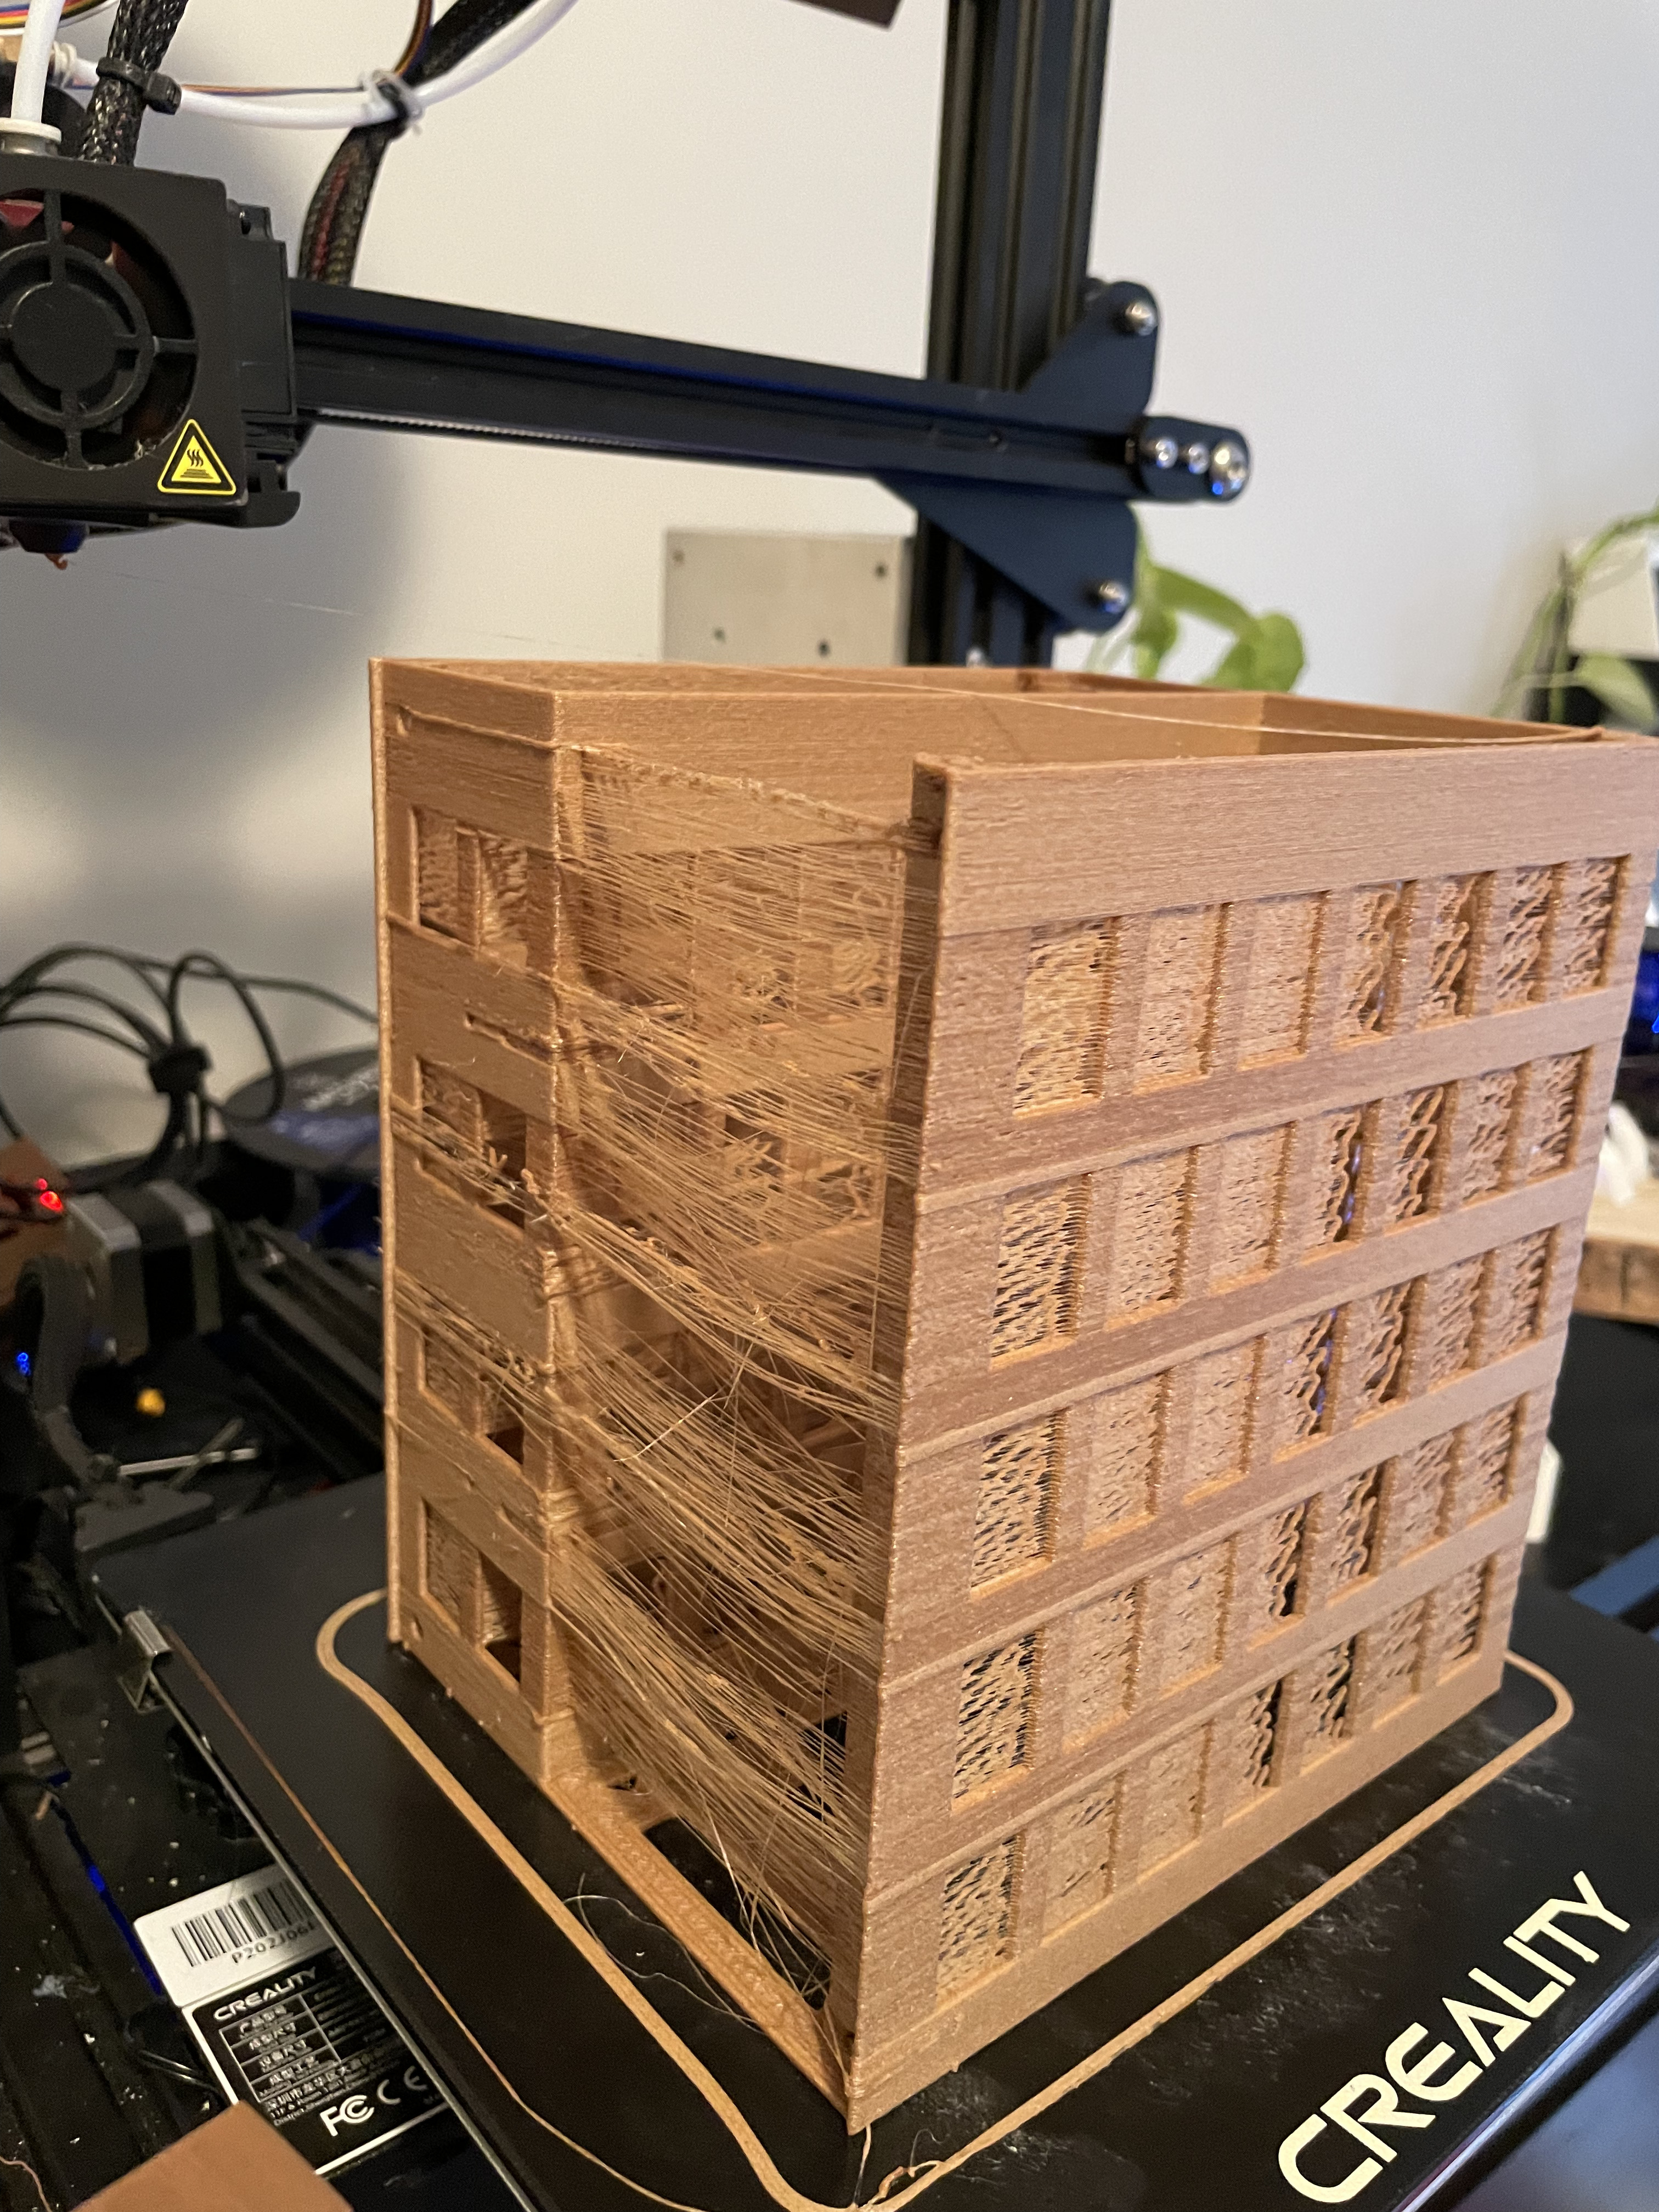
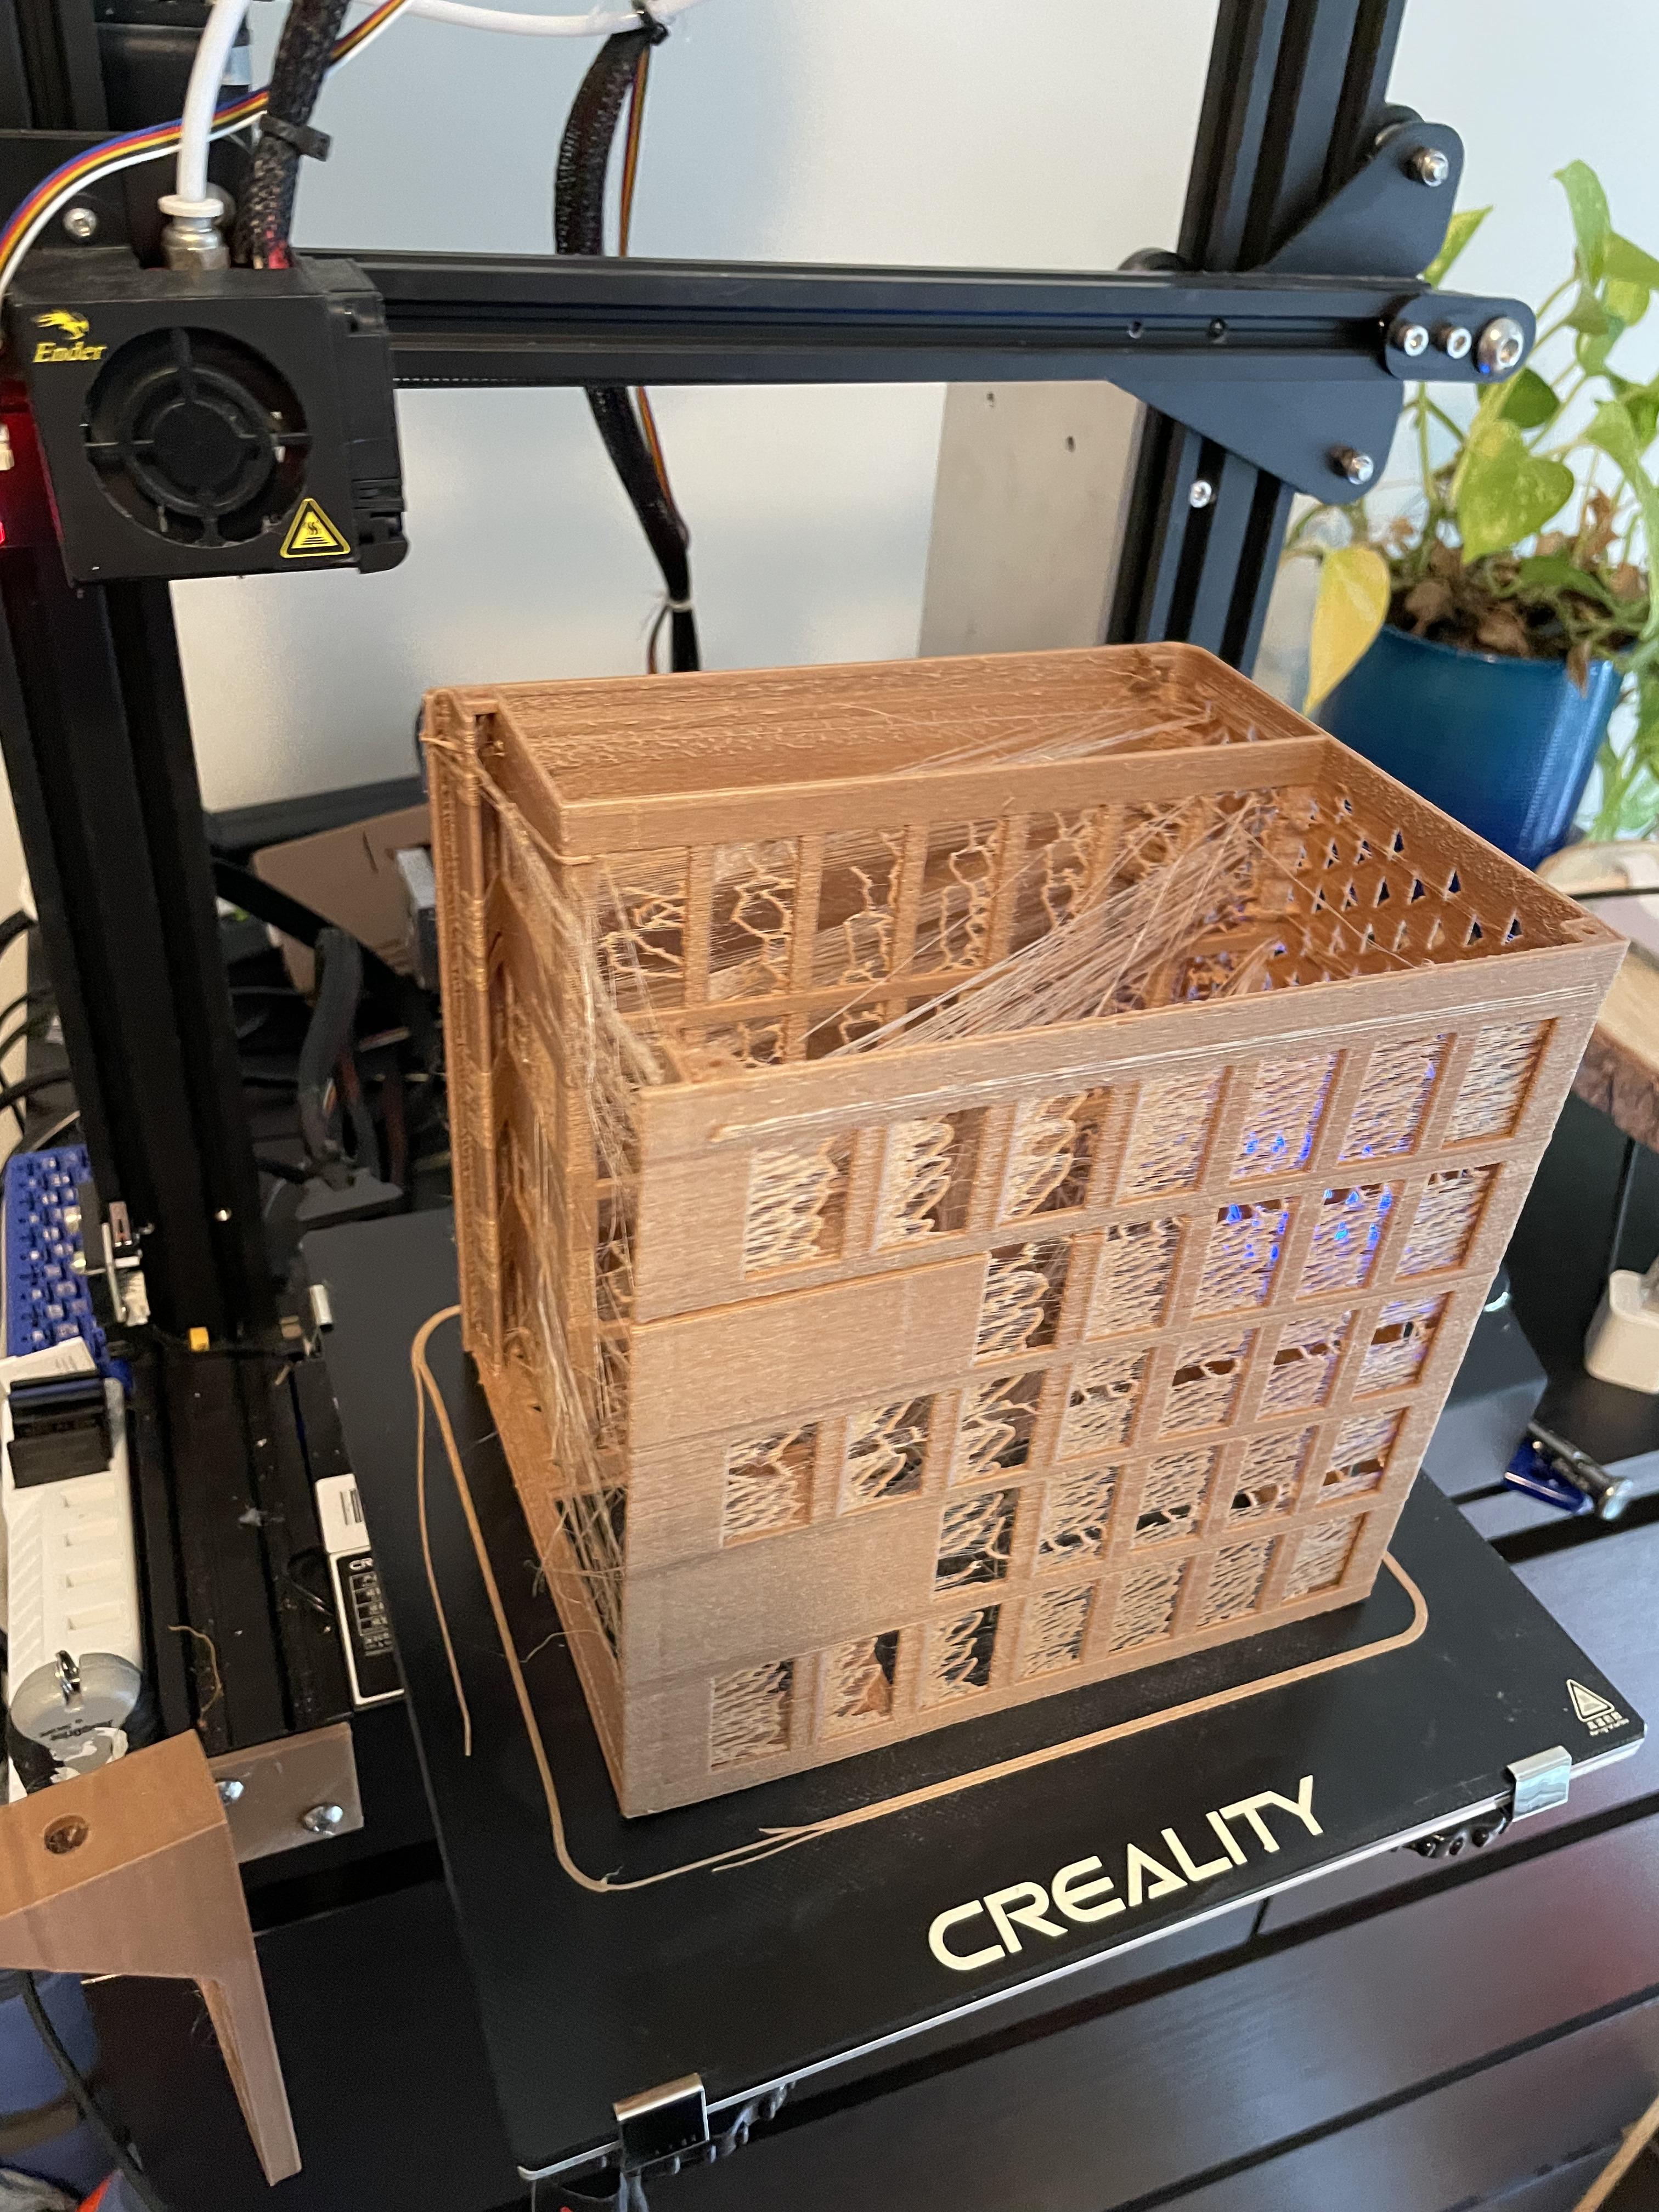
Early revisionMounted drive holder and SAS card on caddyBackplaneBad 3D printer stringingFit testing an early revisionThis is close to the final case
Some of the prints didn’t come out great; I spent some time getting the printer dialed in.
This was a bad path I went down; I was hoping to cut down the plastic and thought I could have levels and it stand on columns, this turned into much more of a mess (and hard to get to stay in the right position) than waiting for the bit prints to just finish.
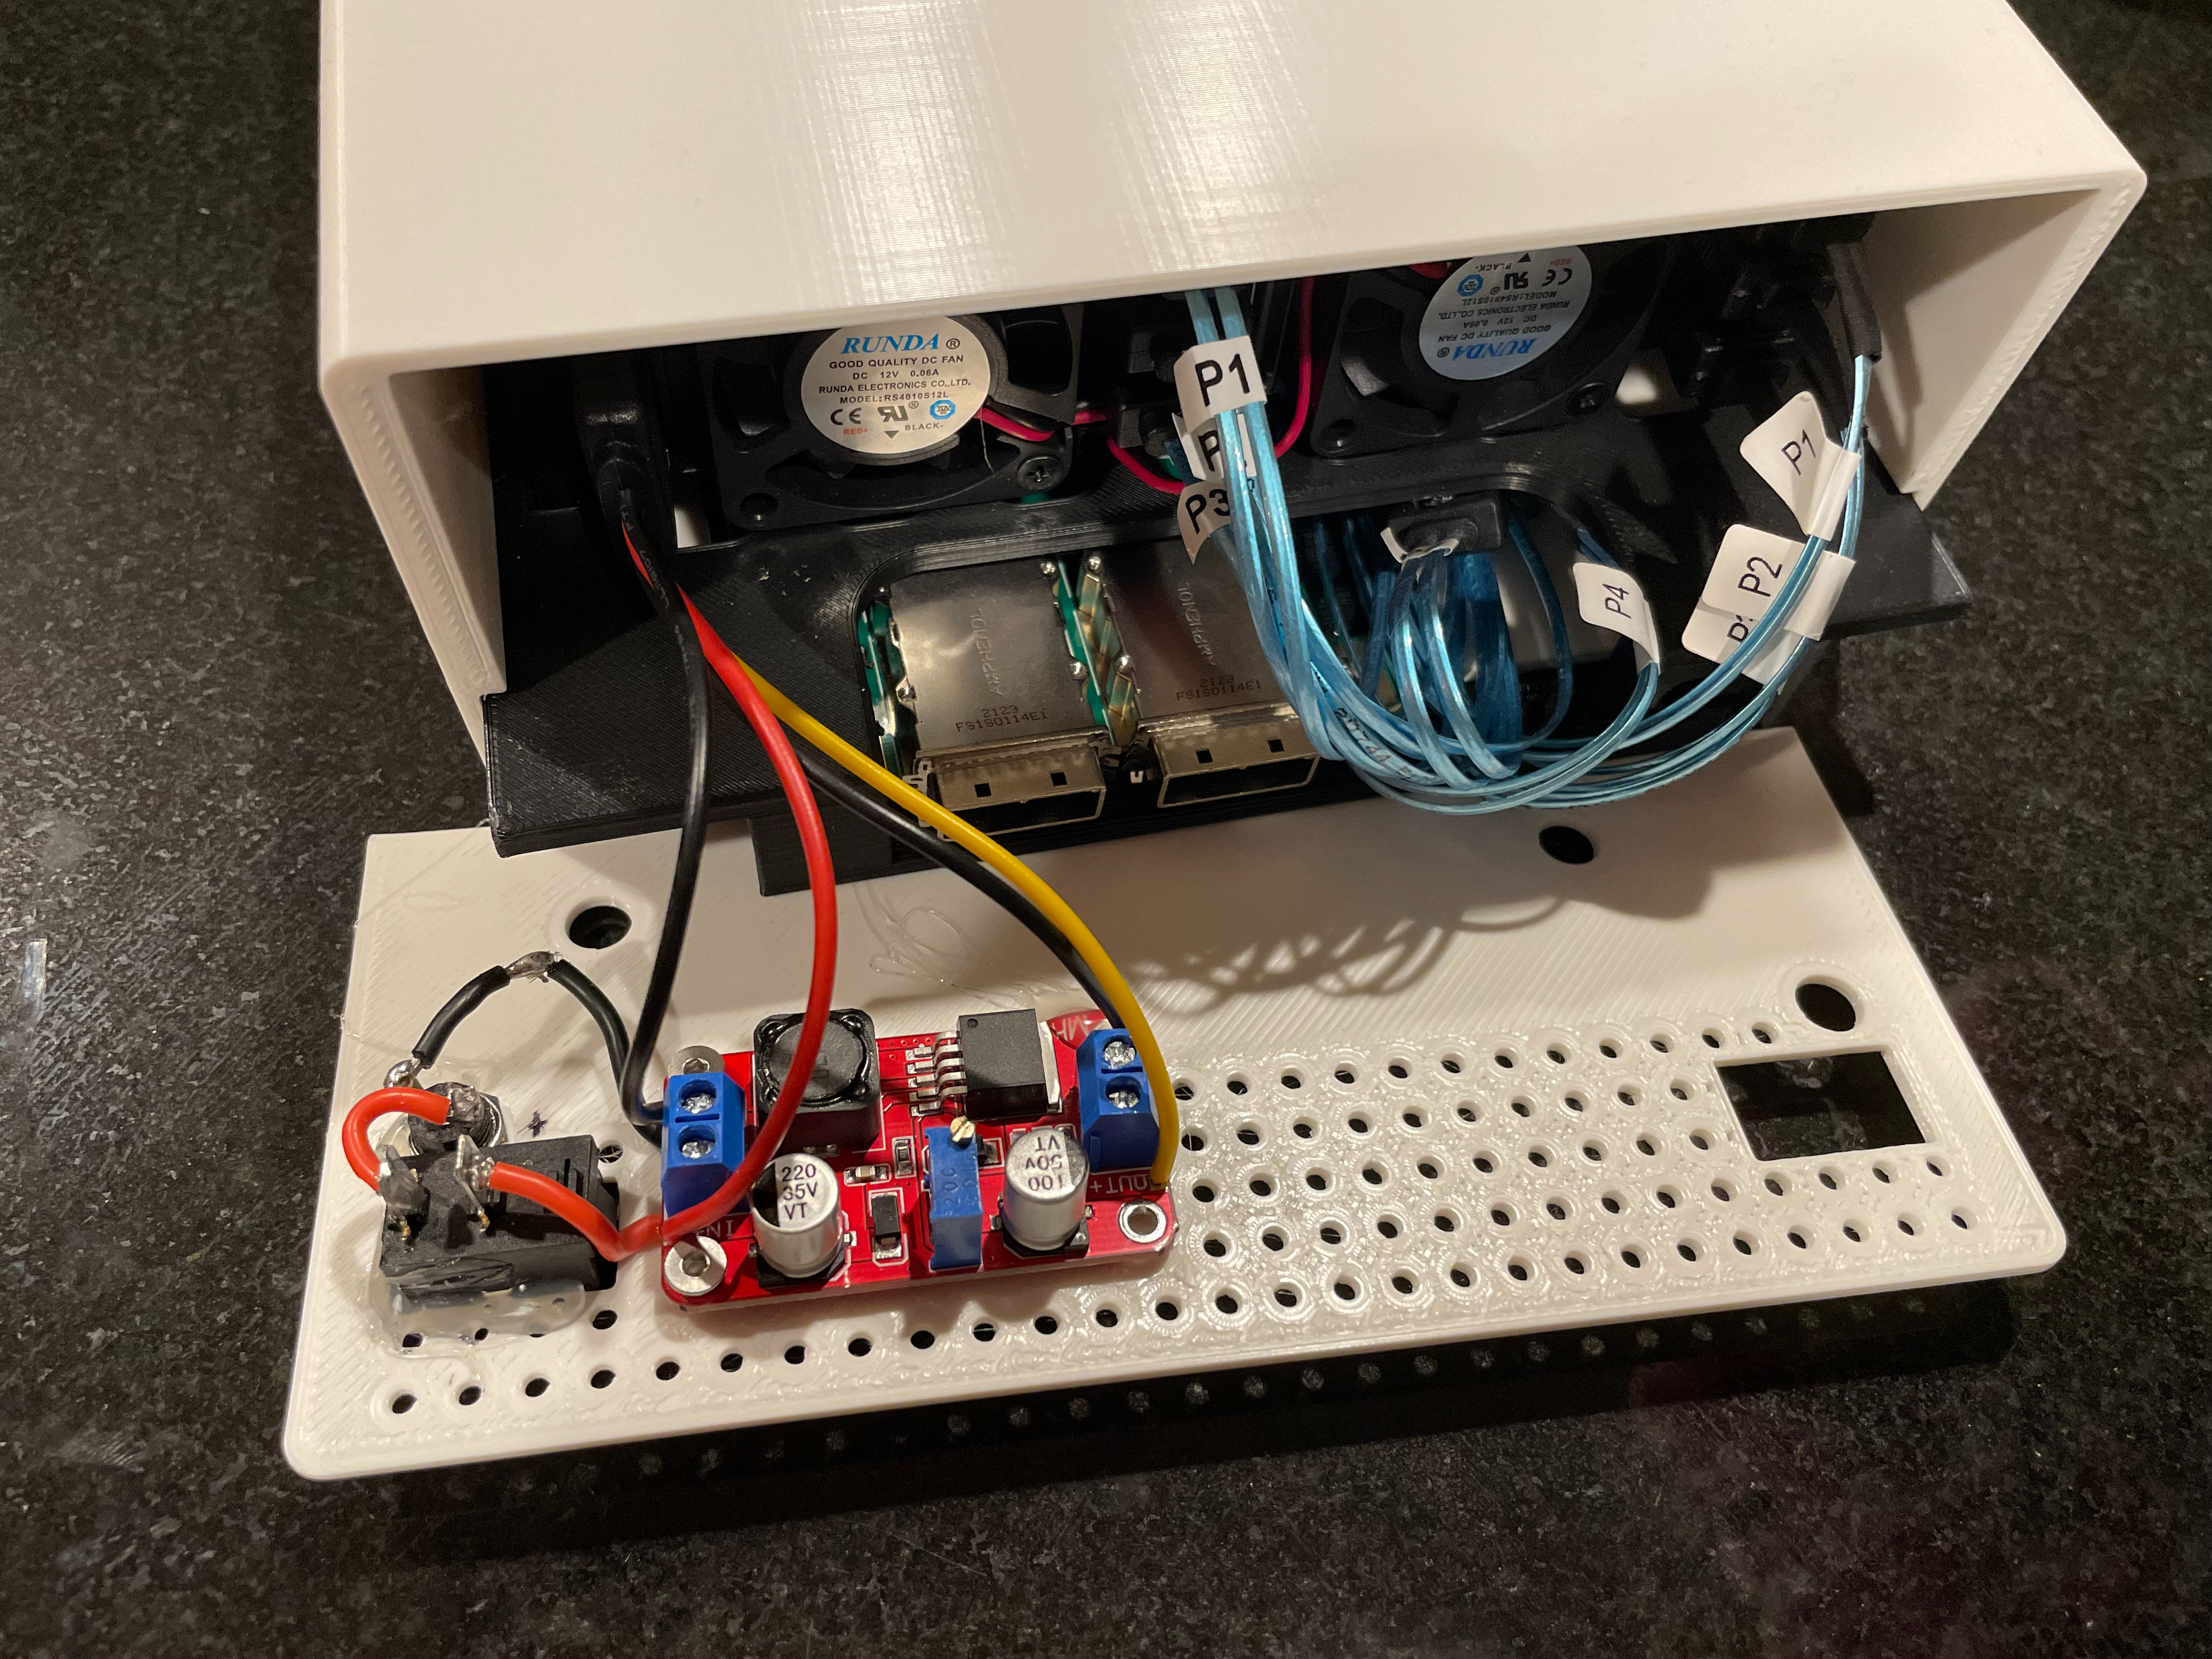
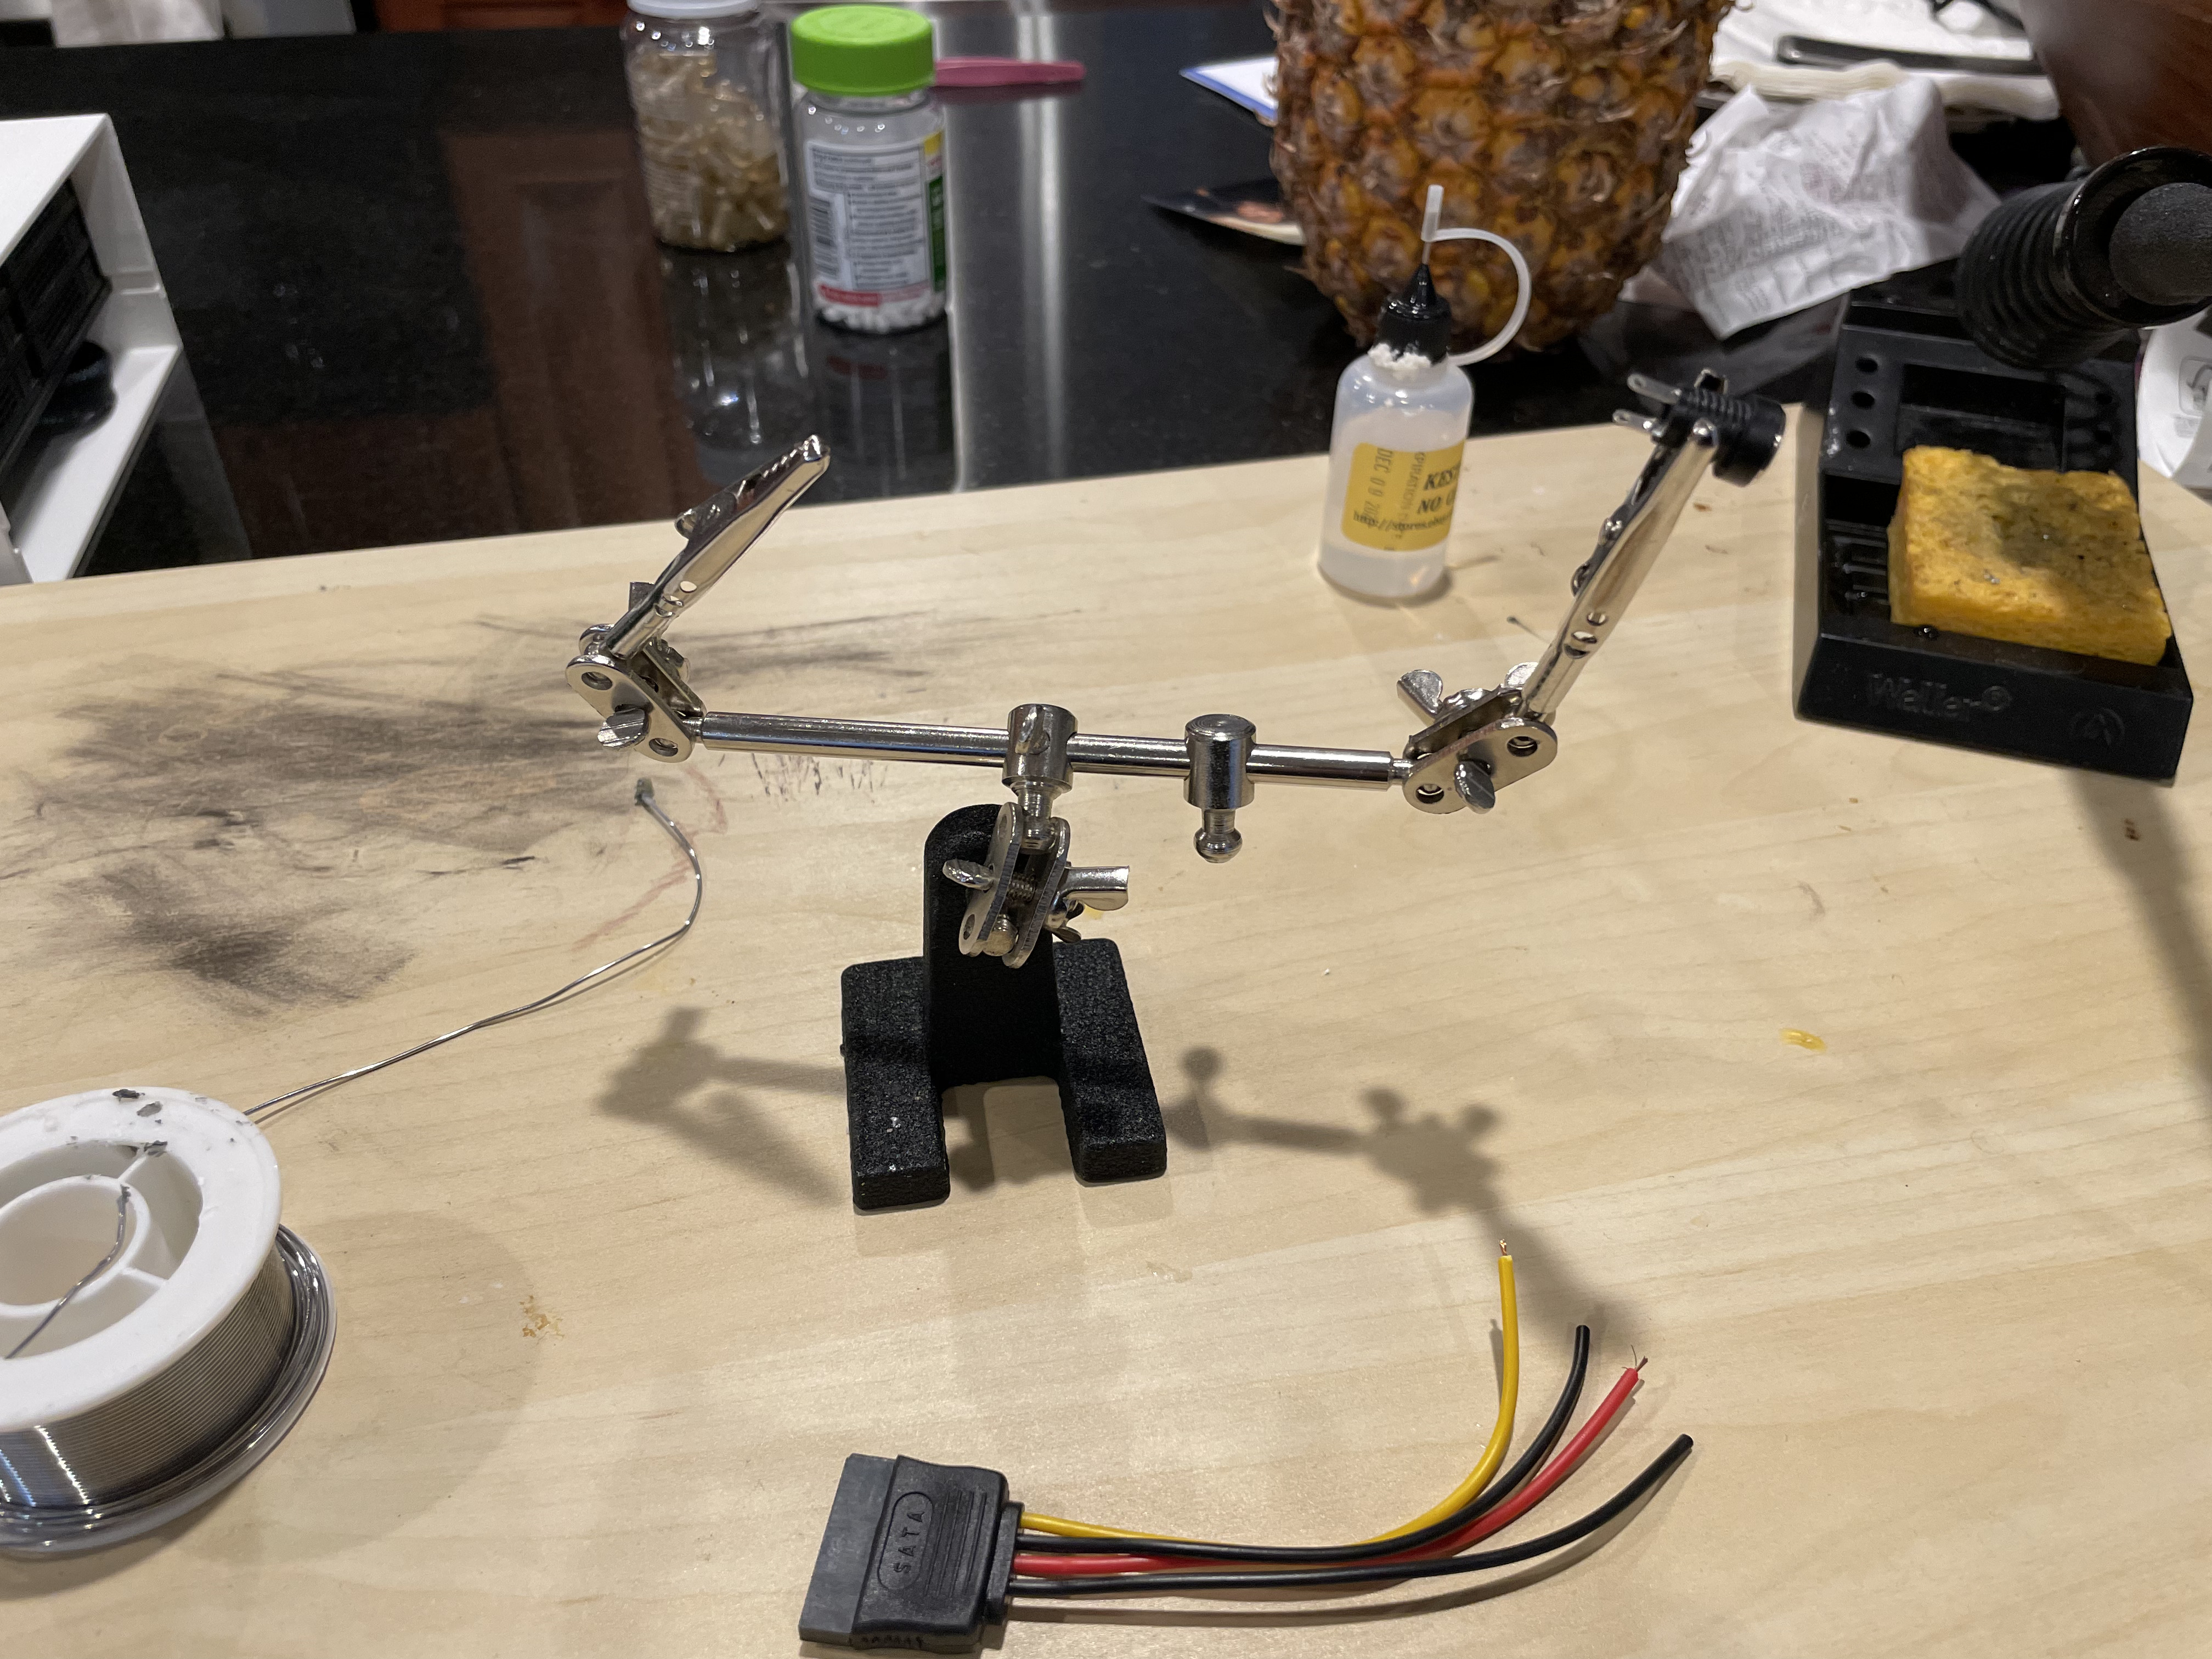
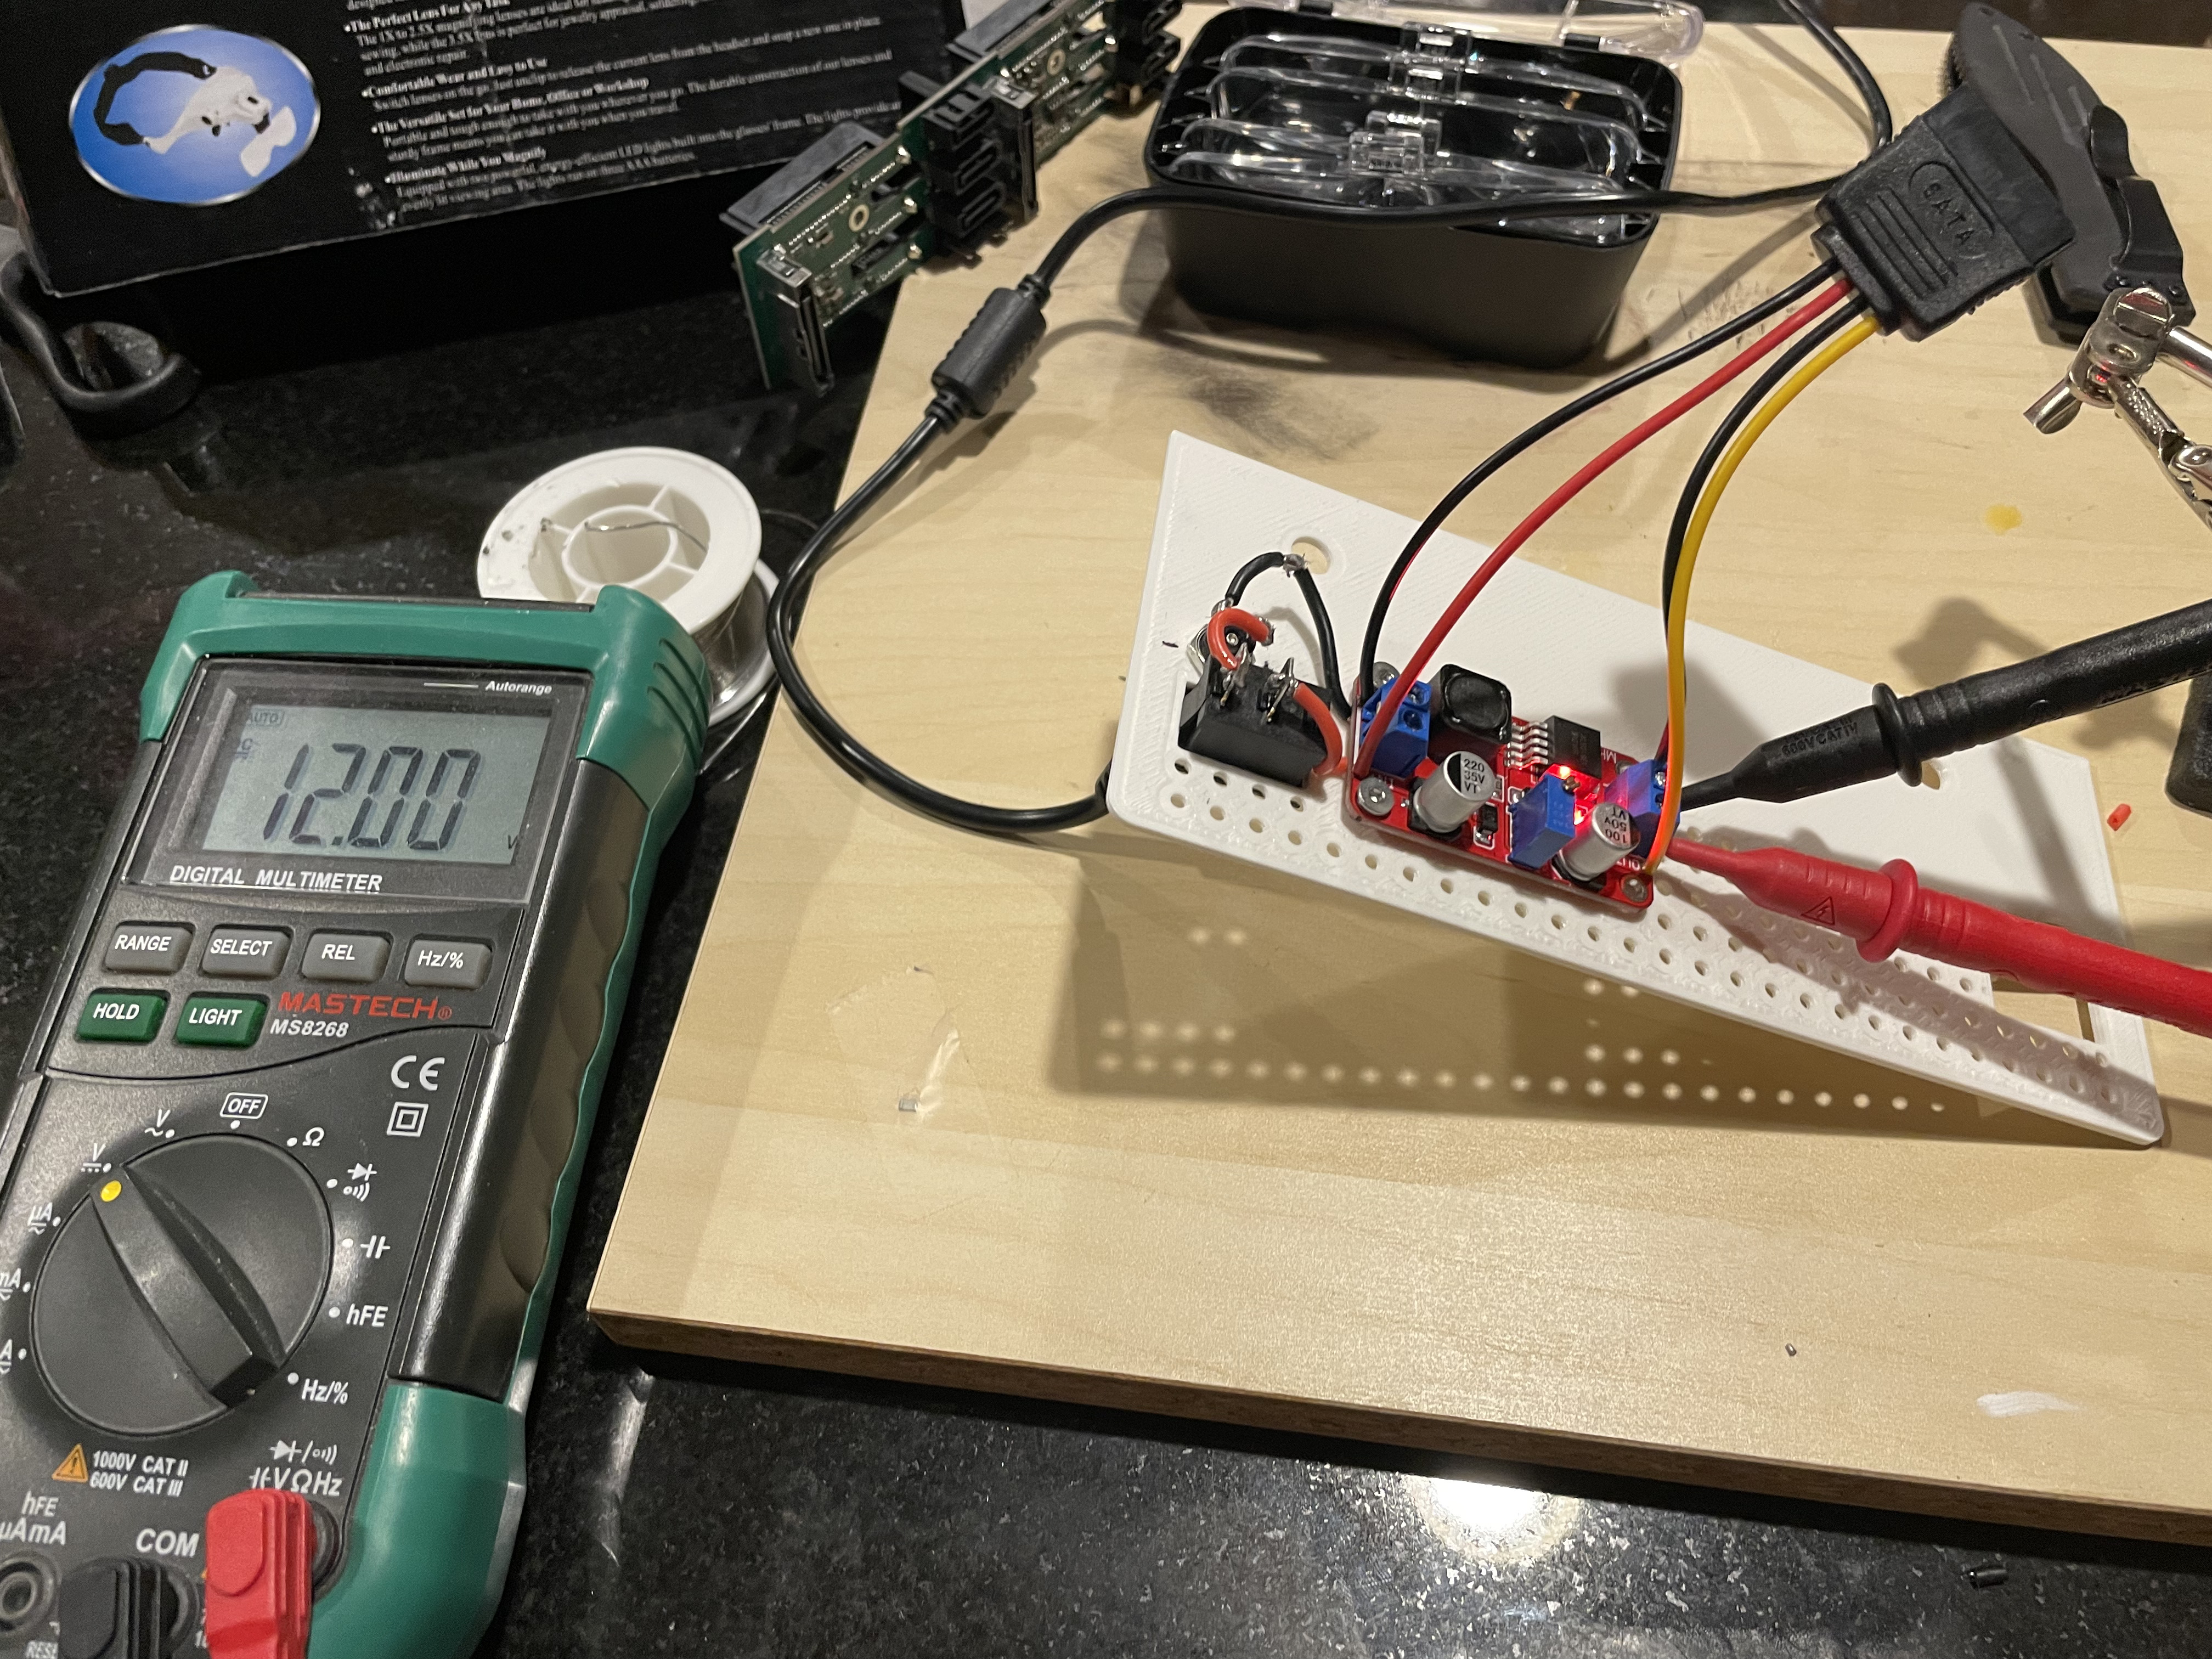
Next I had to figure out power. Each drive I had can pull up to 1.5 amps at 5 volts. This means I need 9 amps on 5 volts. That is a good amount of power on one rail. I thought I could use a standard PC power supply, with a cable to turn it on with a switch. These PSUs were big and made the design a bit bulkier. The next idea was to just use a wall power supply, a 5 volt one with enough amps. Also, I planned to only use the 4 drives per unit I had, so at least at first, I could cut the amp requirement down.
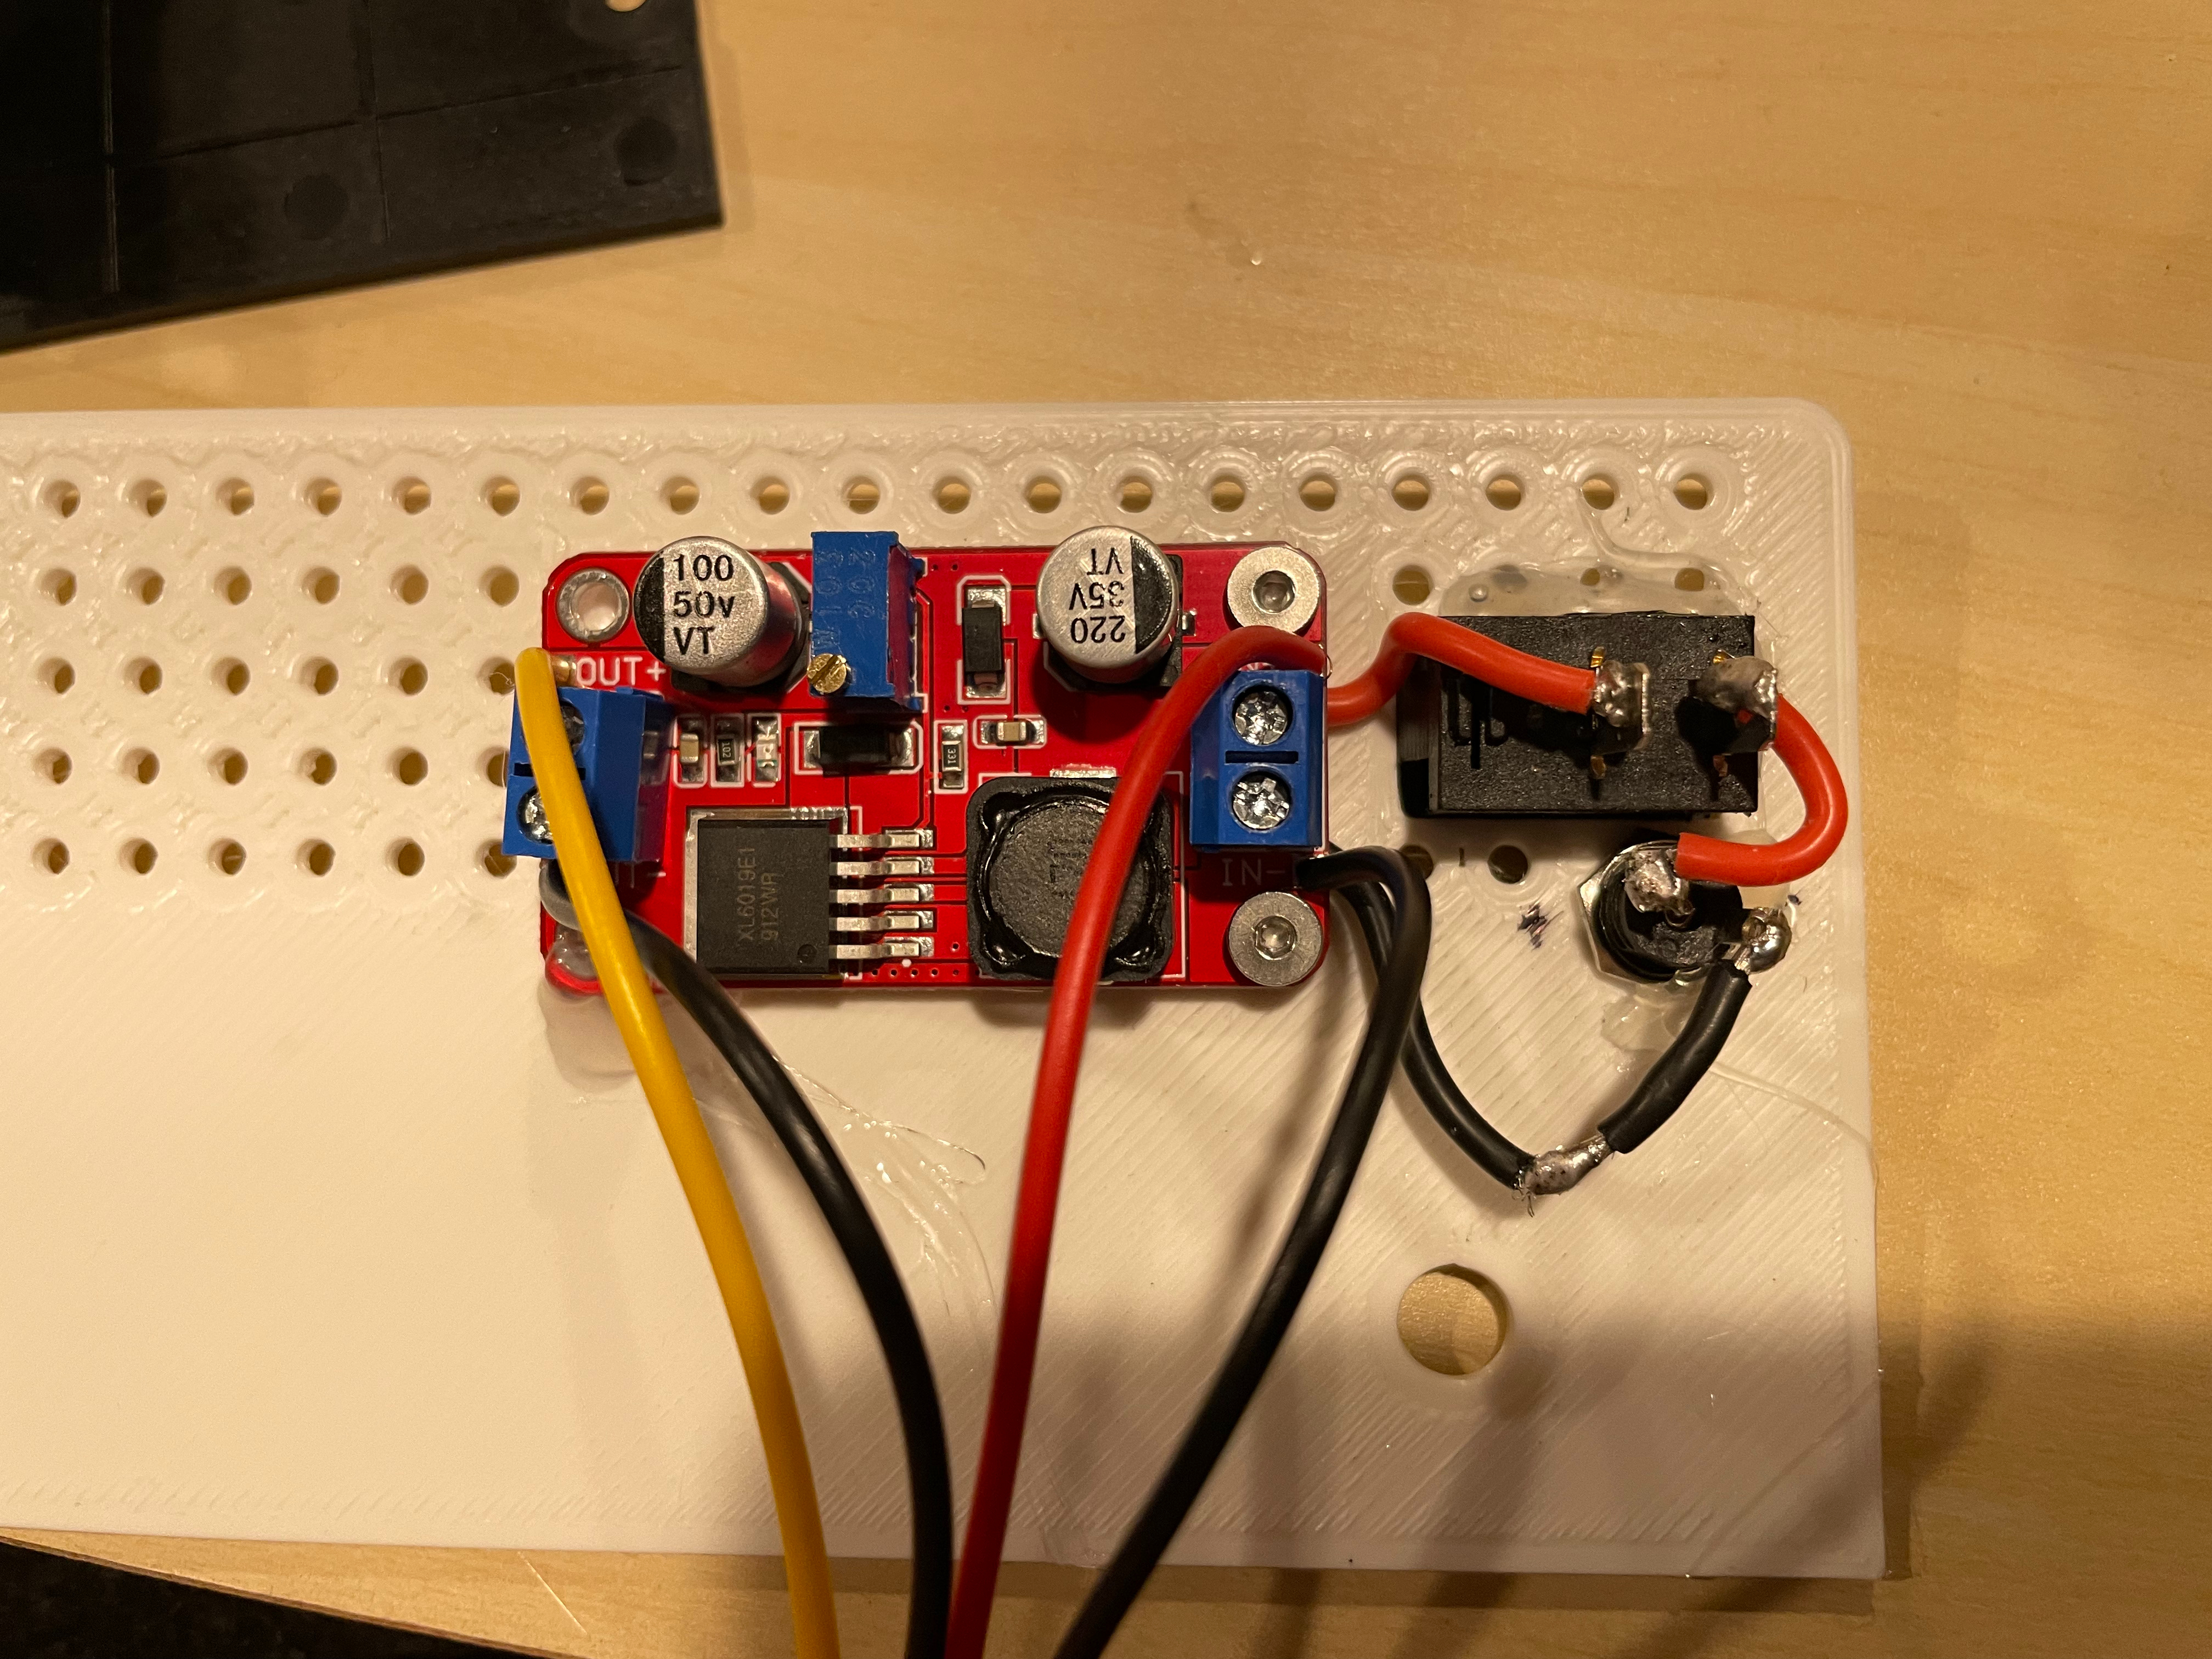
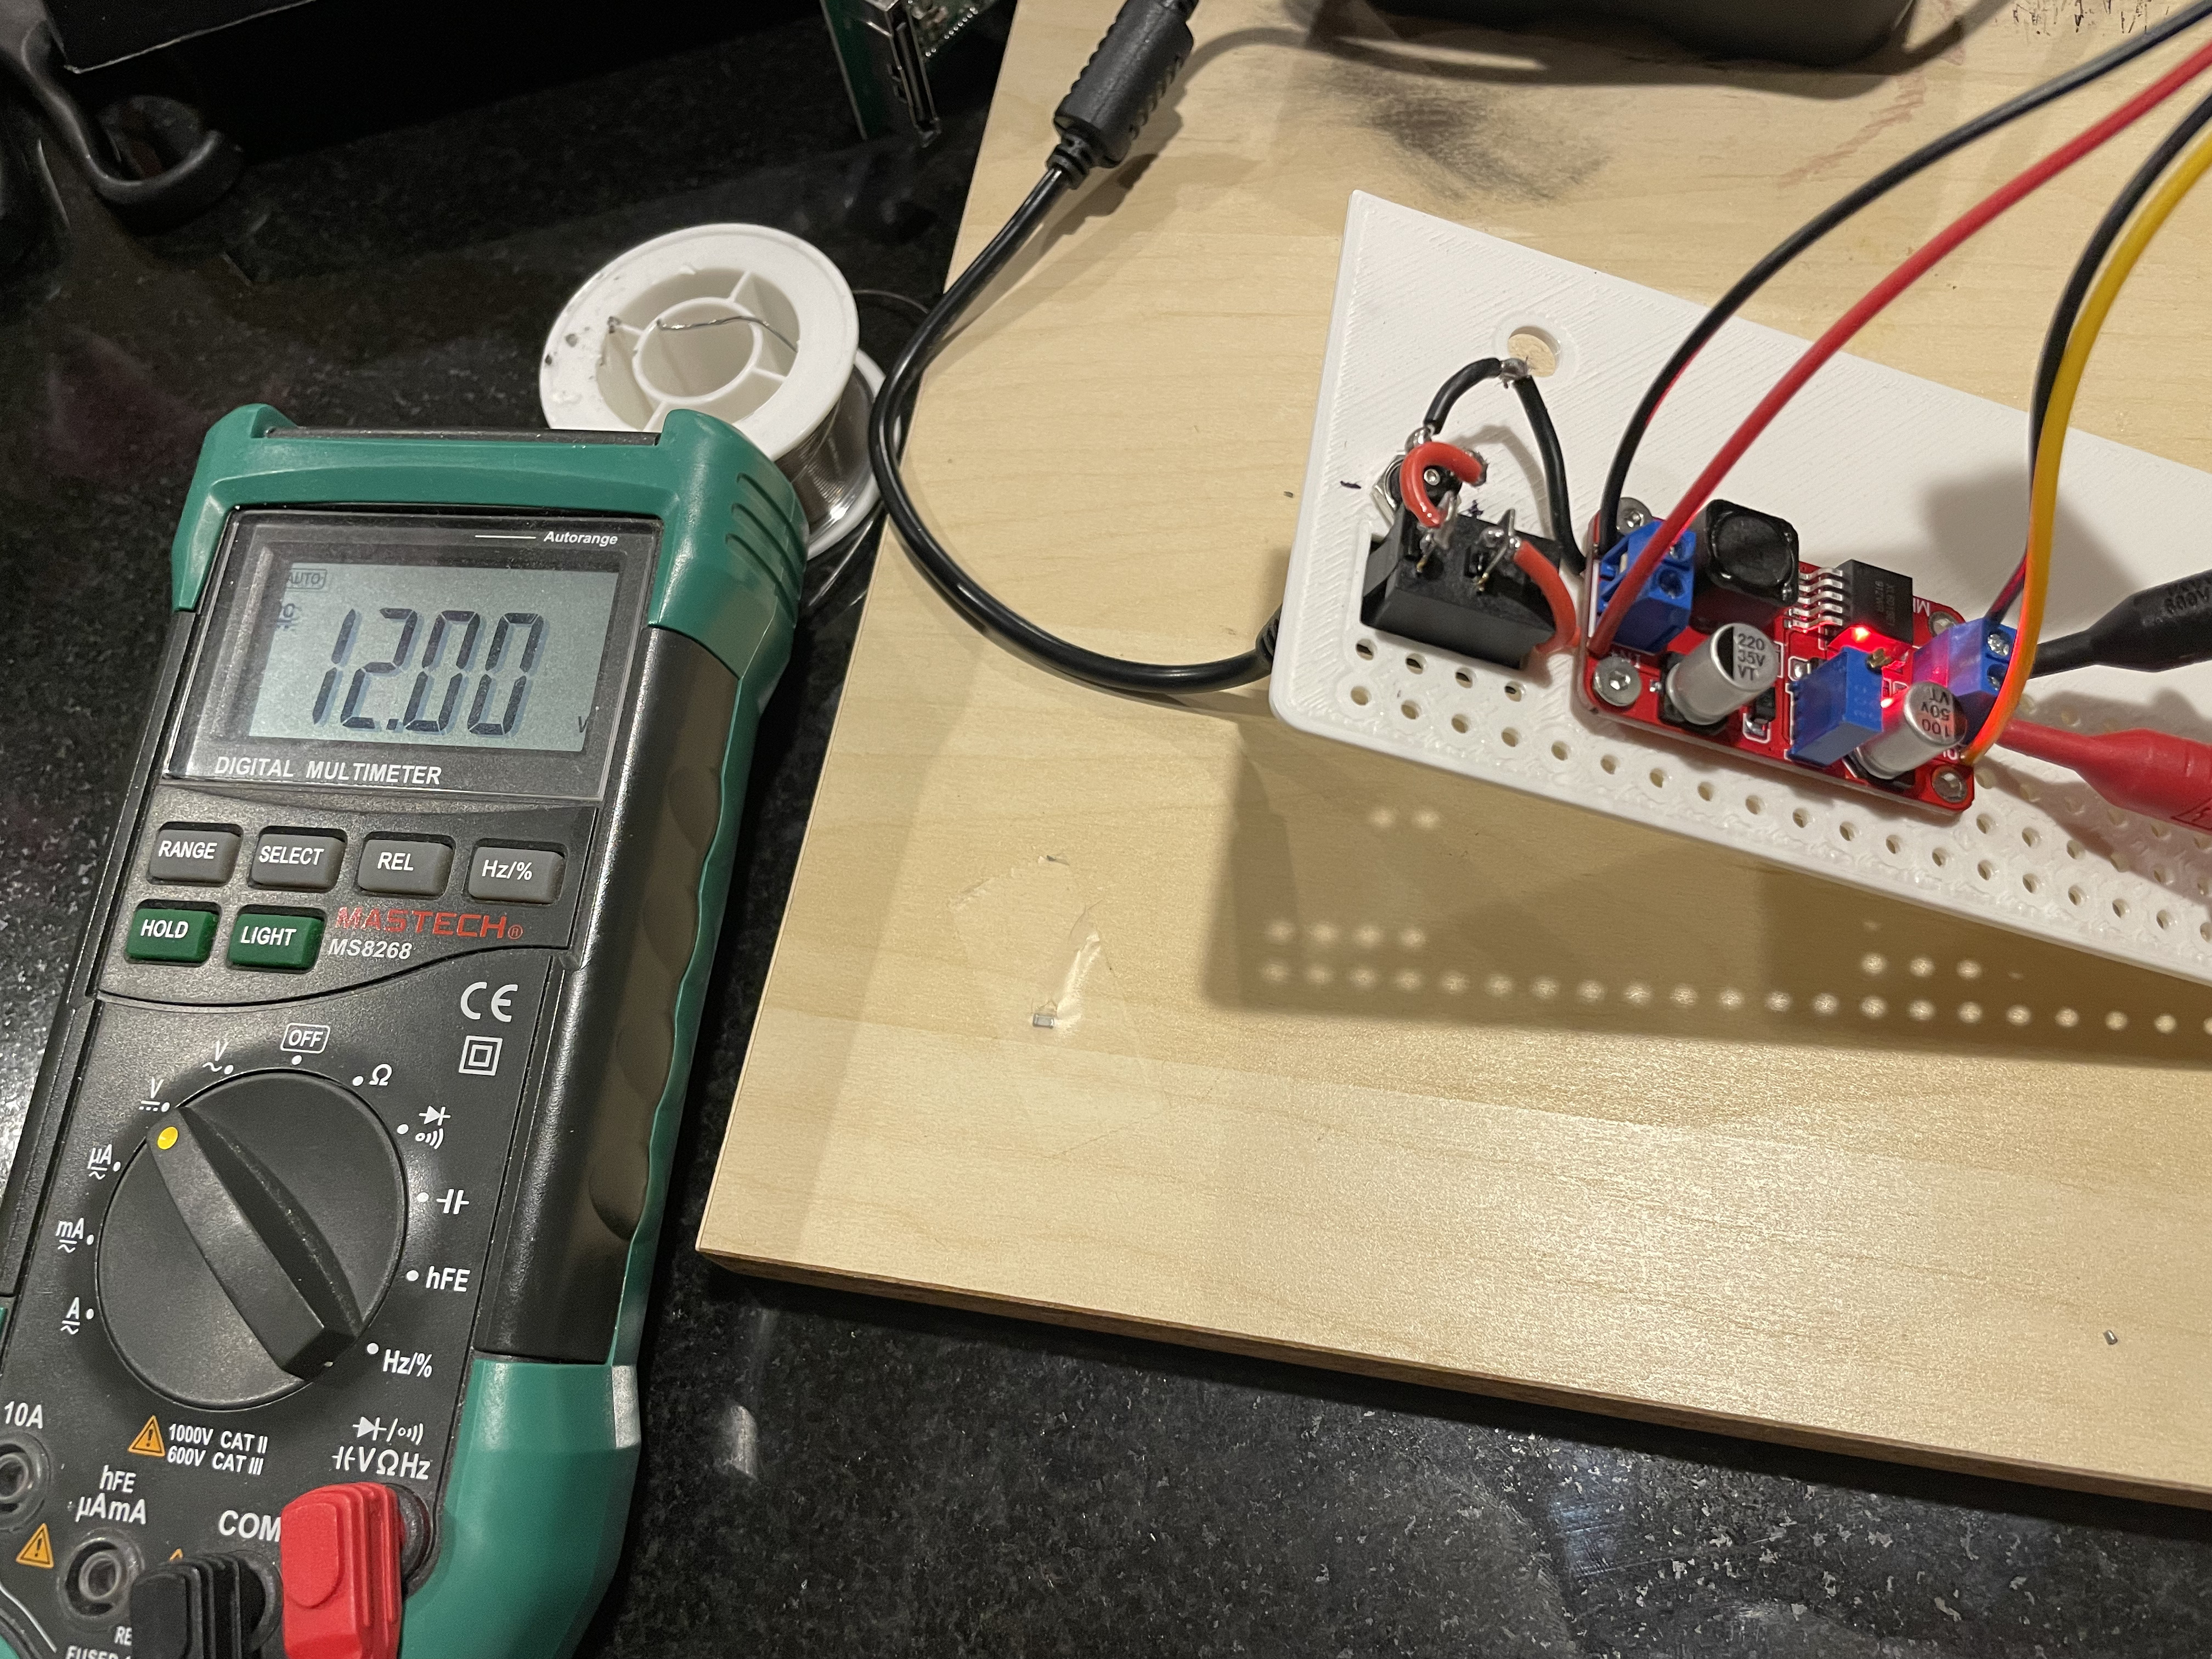
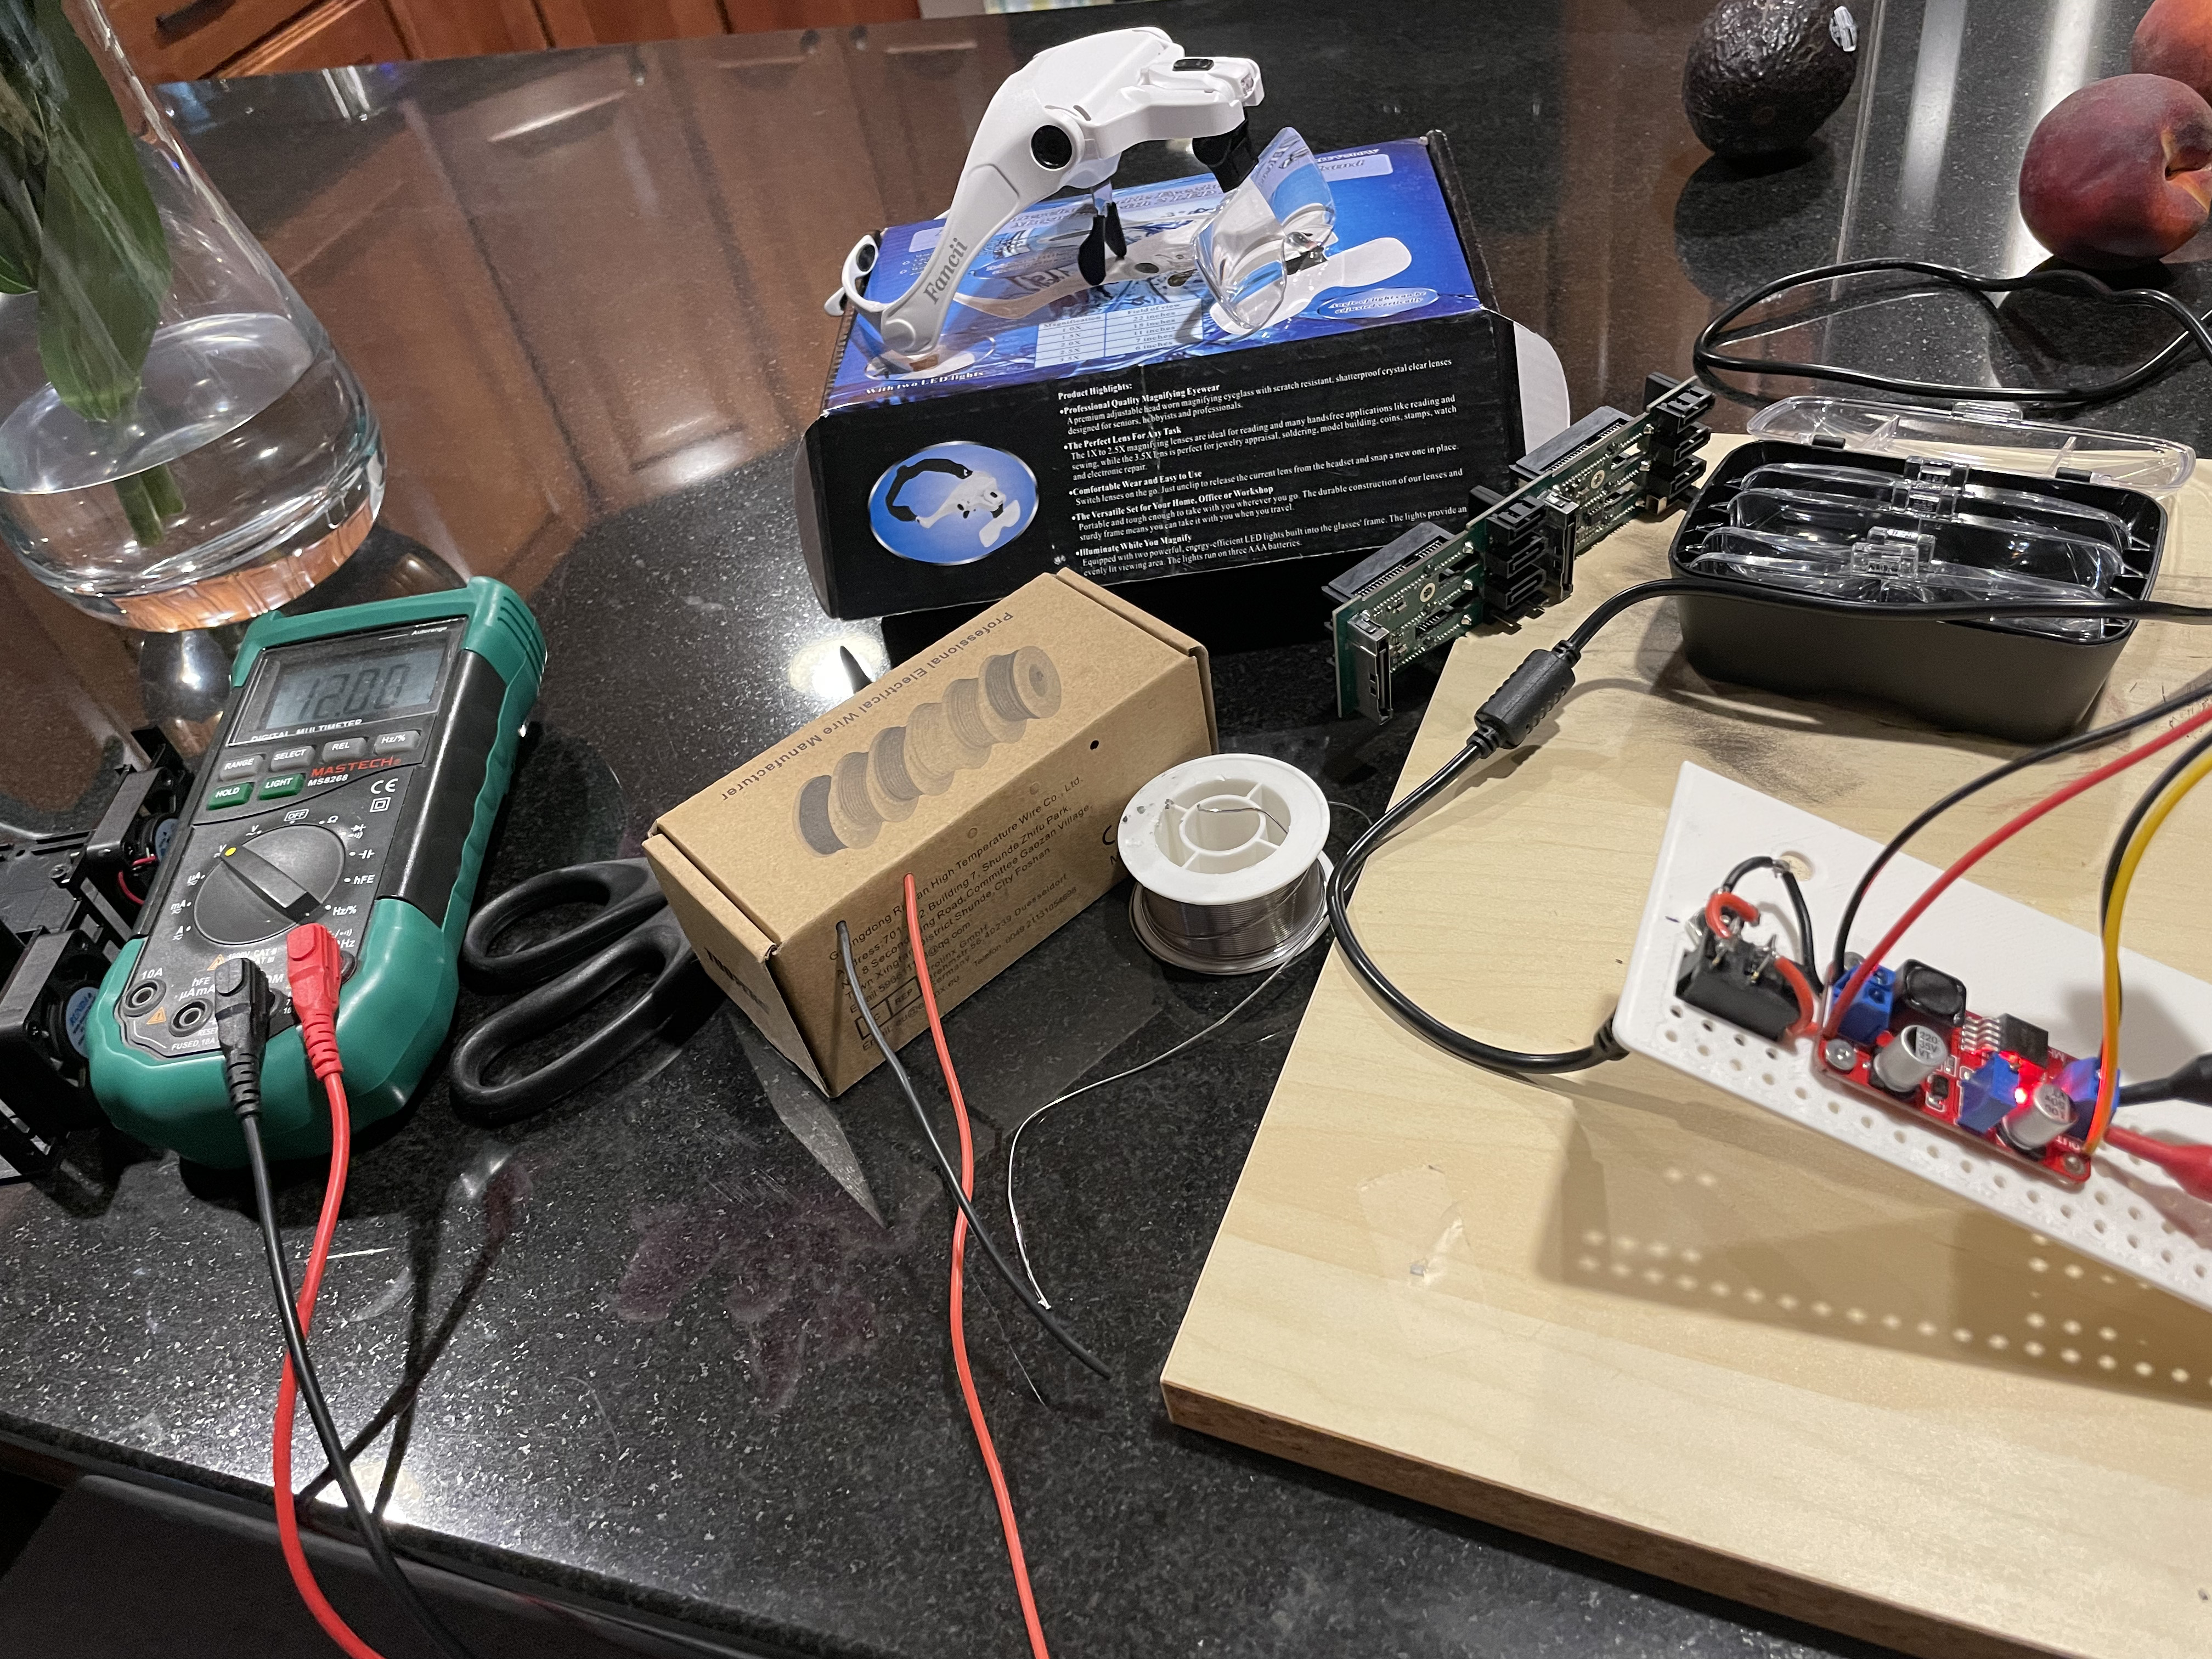
Now I ran into a new problem. The fans for the drive holder ran on the 12 volt line of the SATA cable. The SATA cable only needed 5 volts for the drives but needed 12 volts for the fans. I got a voltage converted and wired it in. I added a switch so the whole unit could be turned off and on.
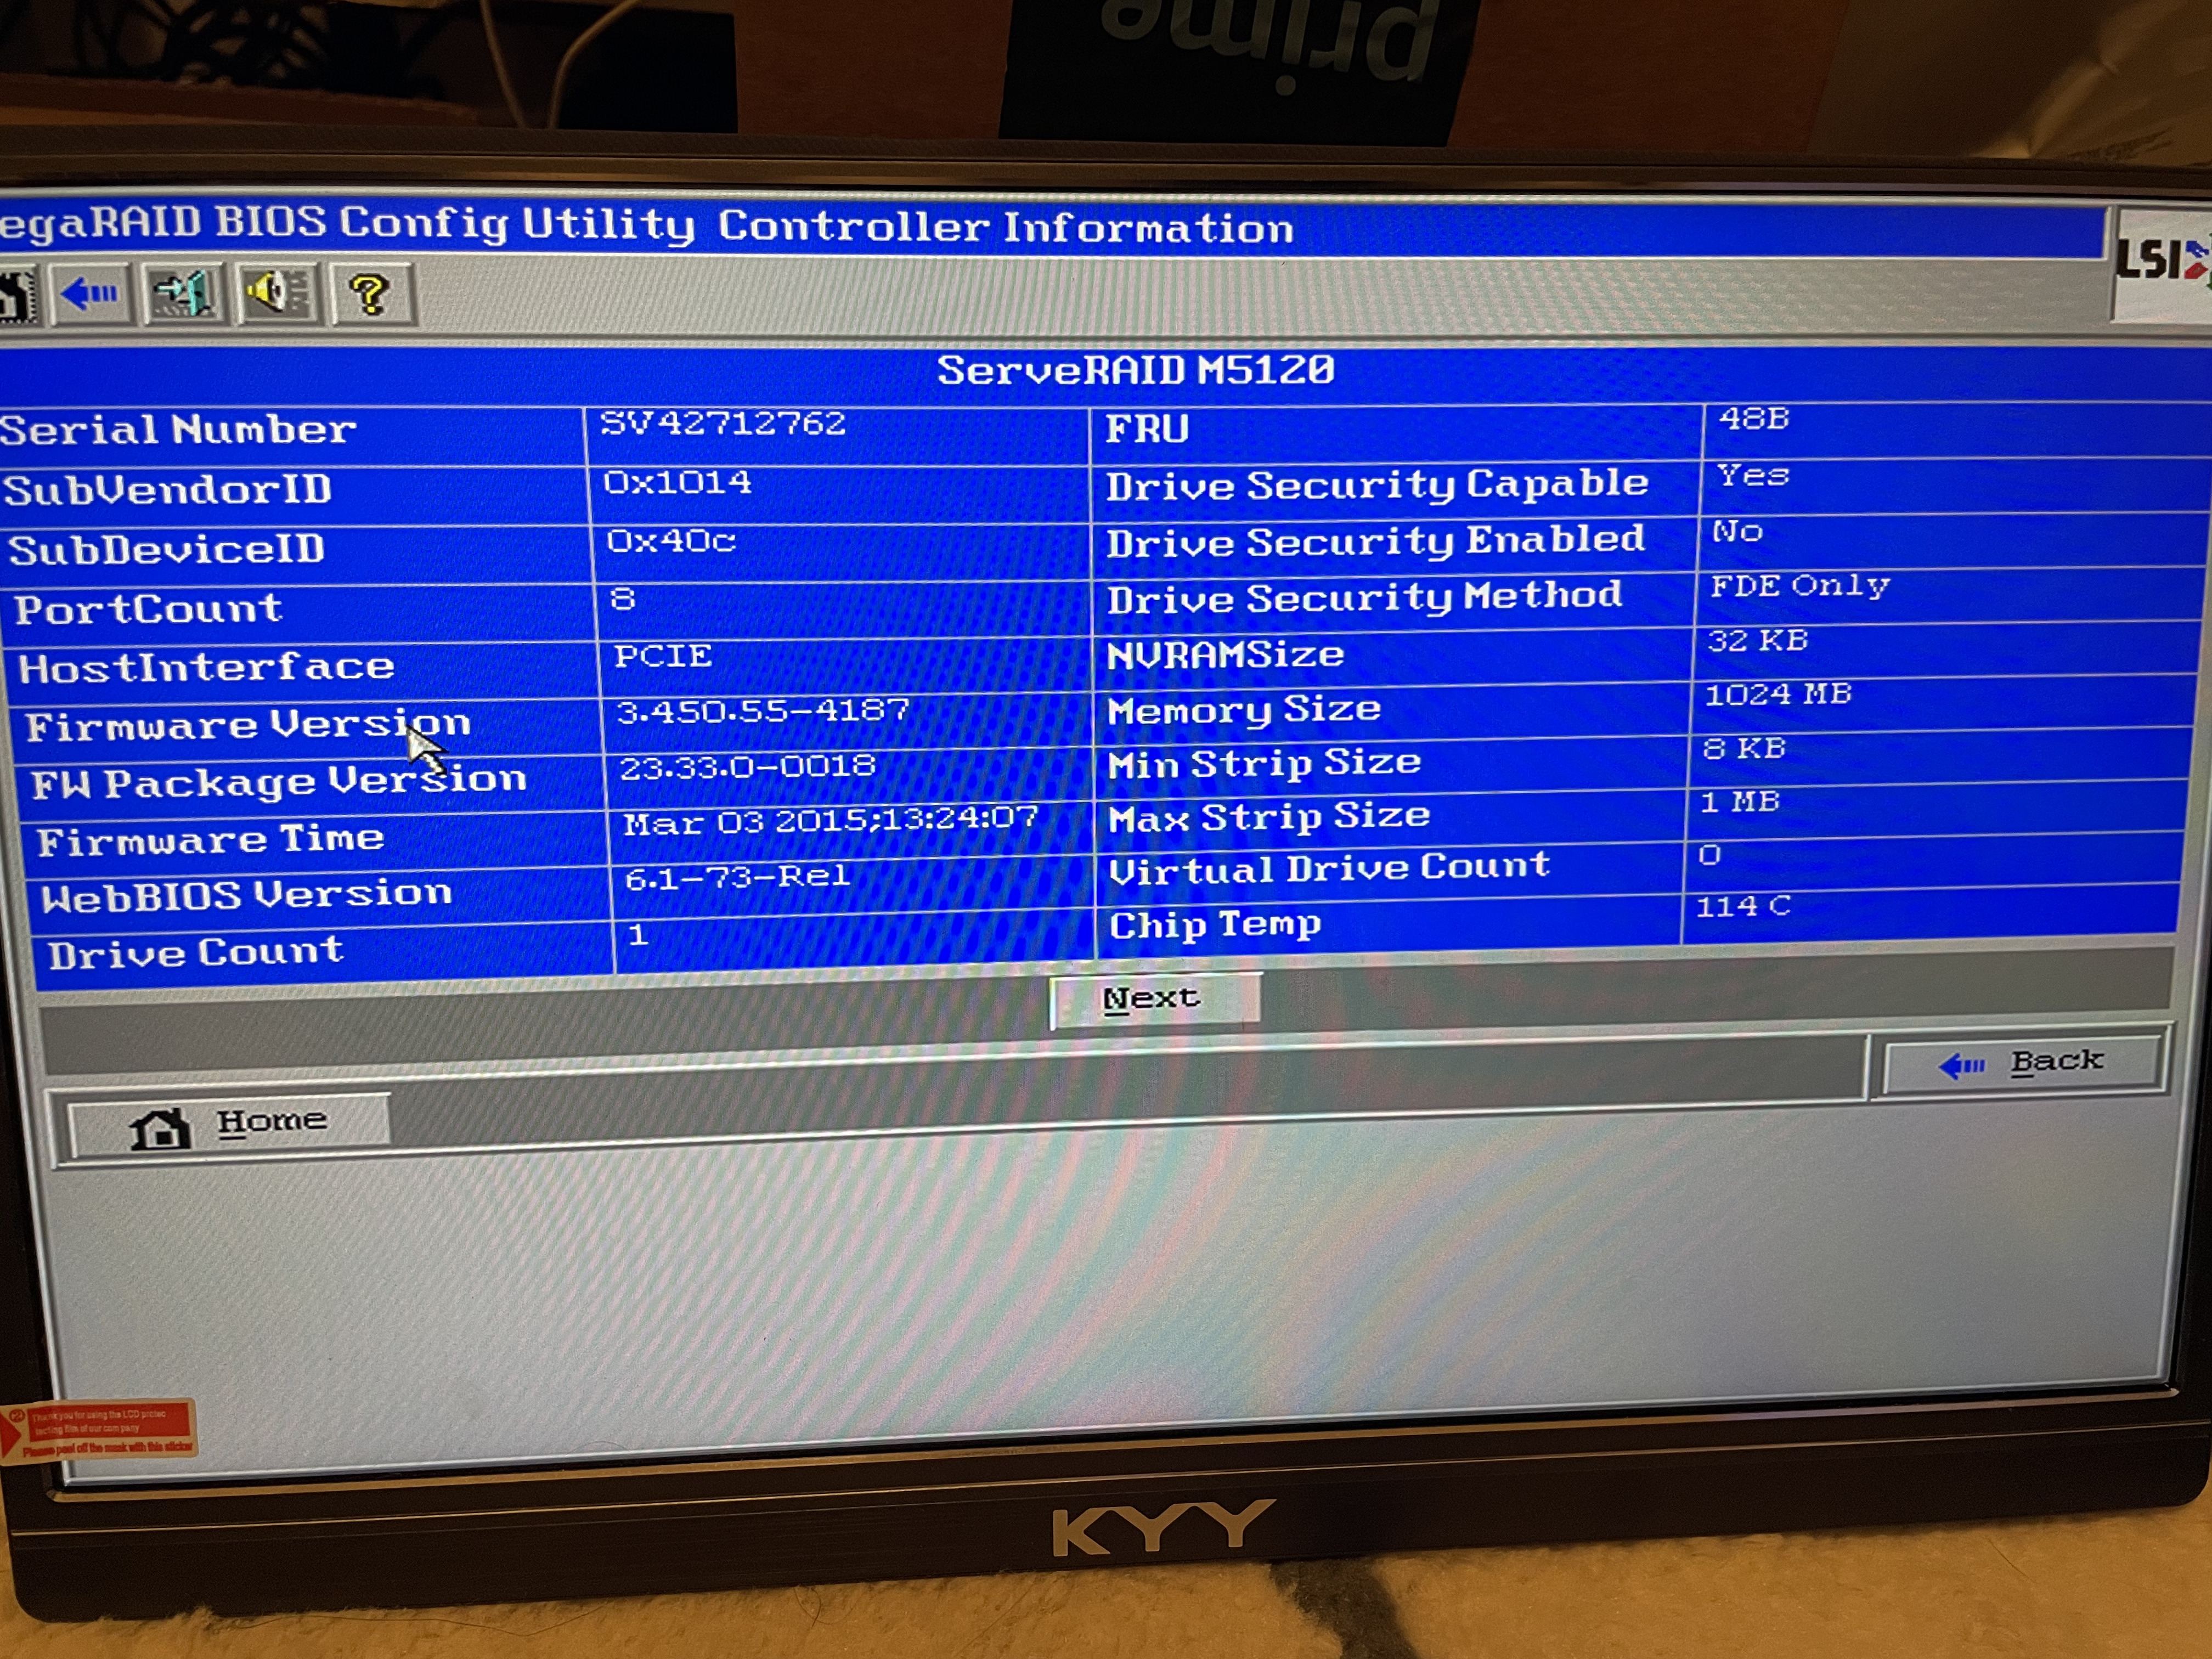
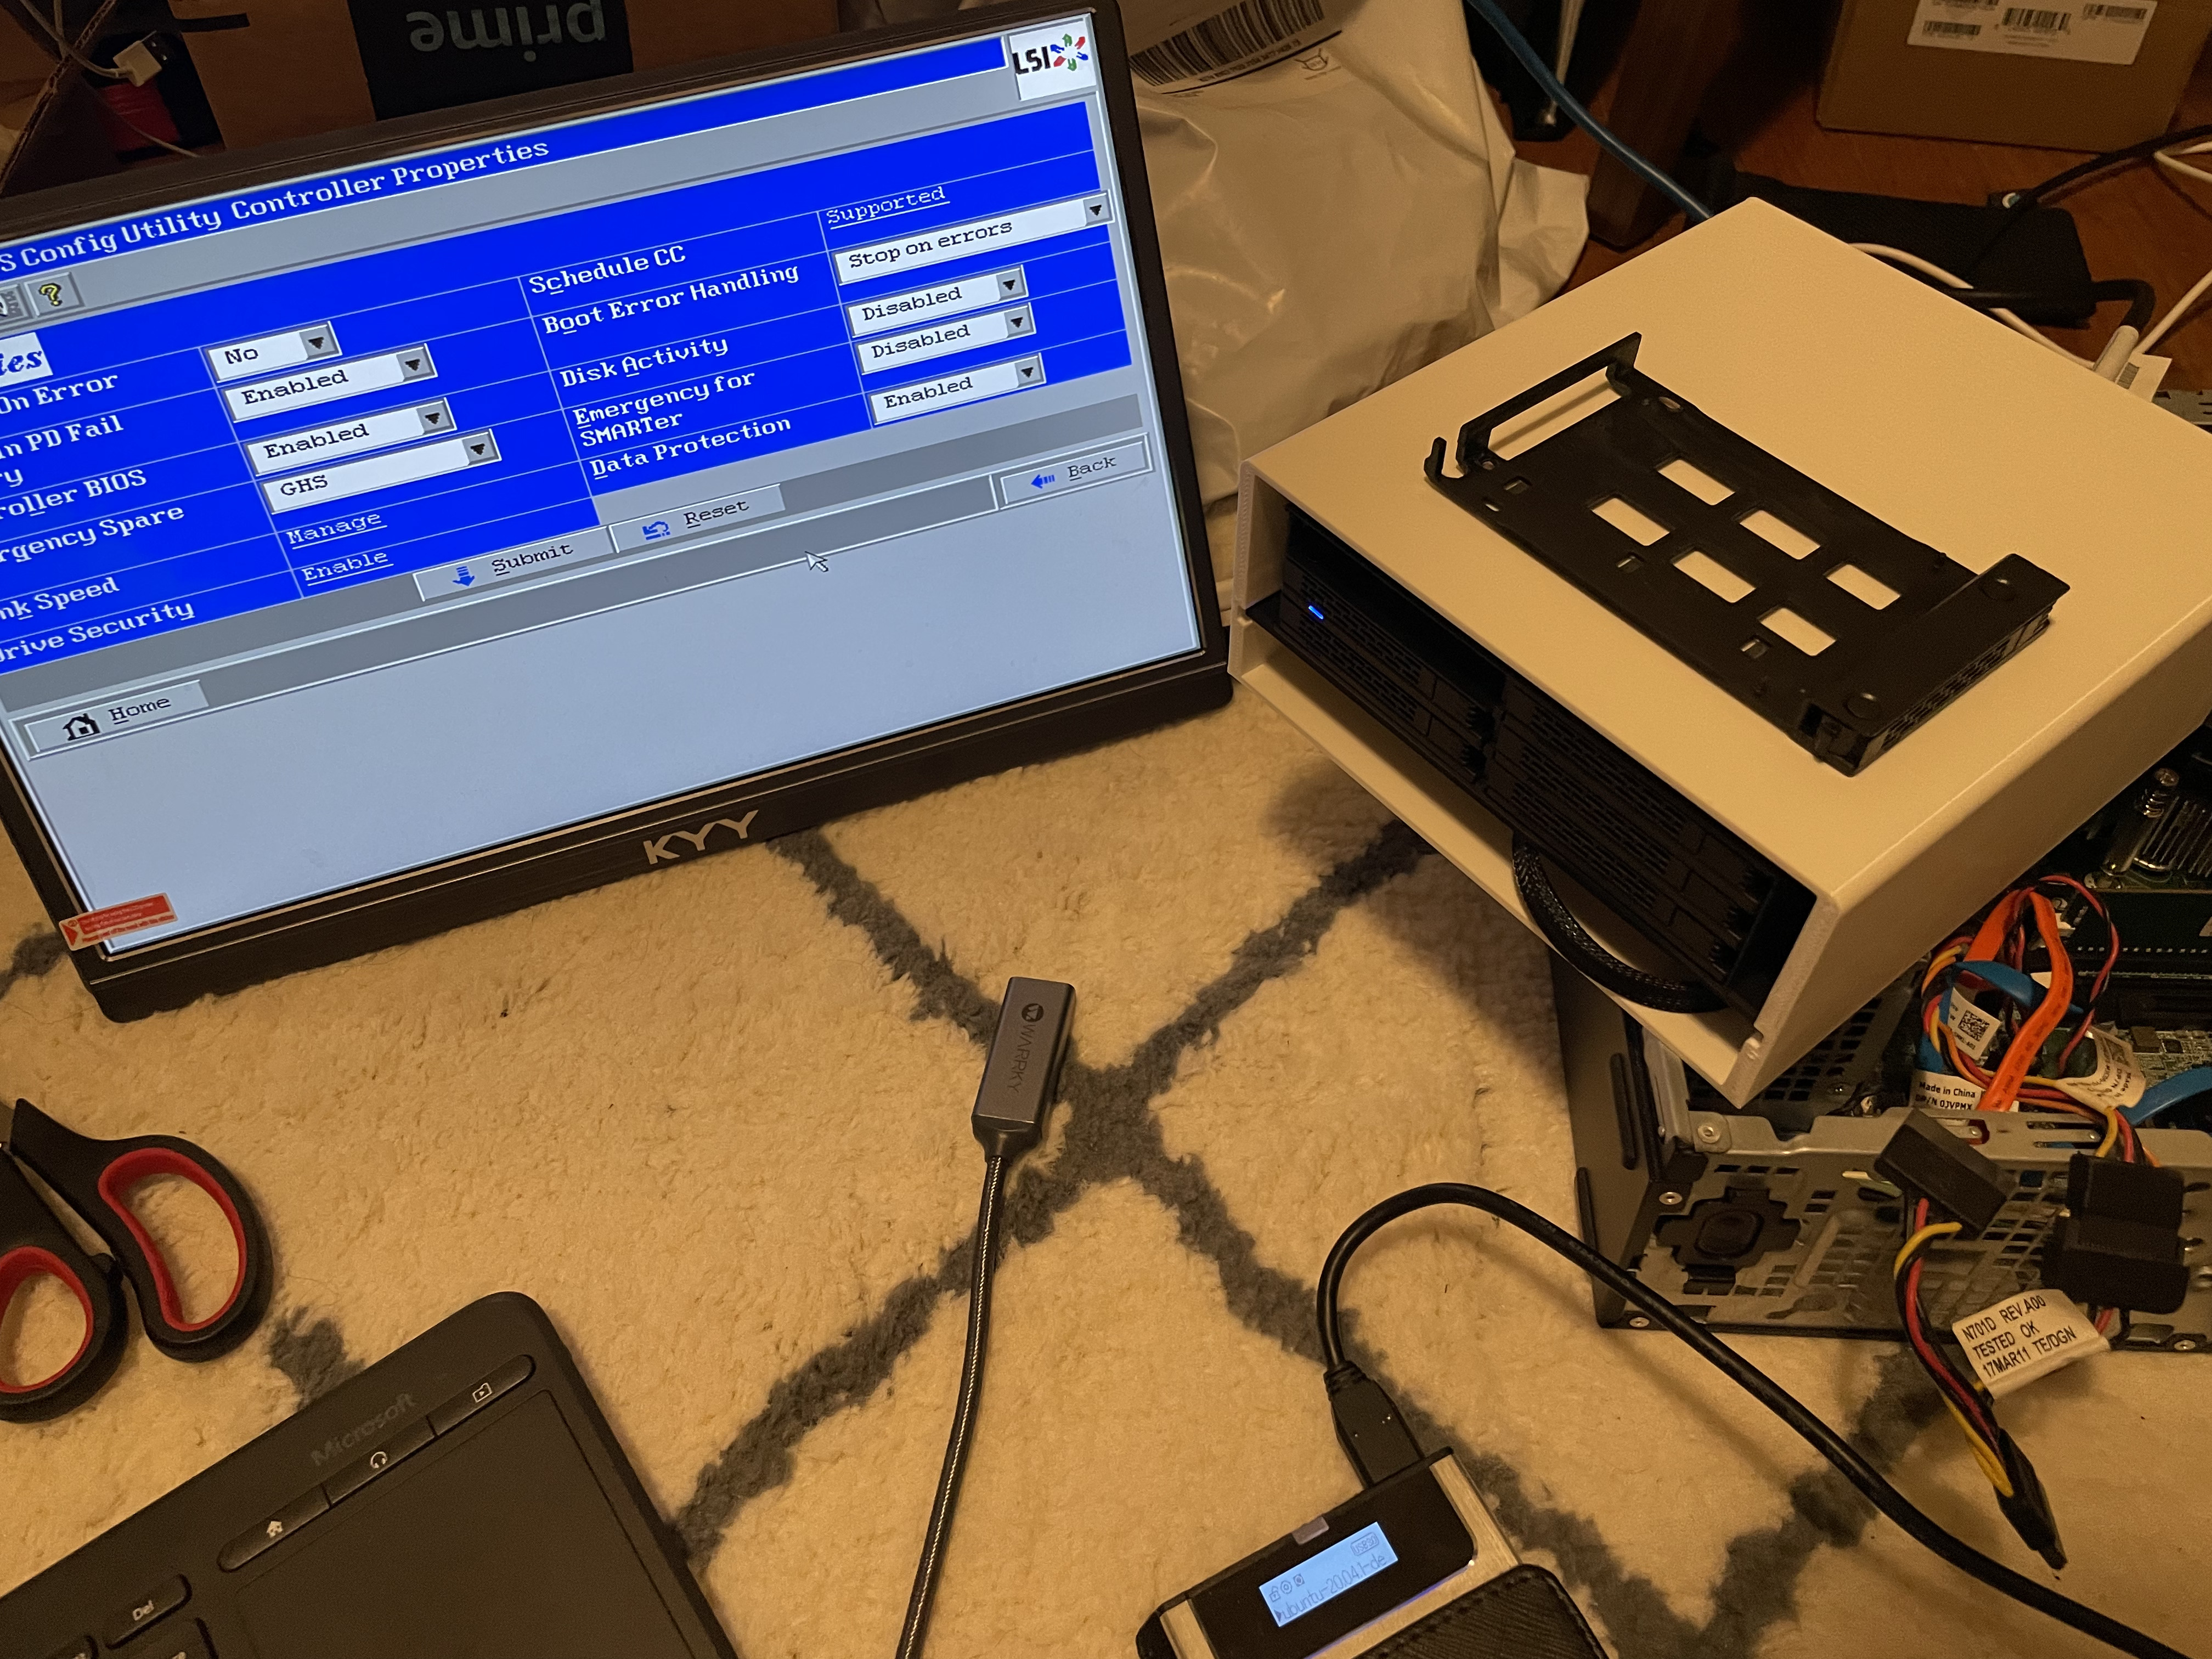
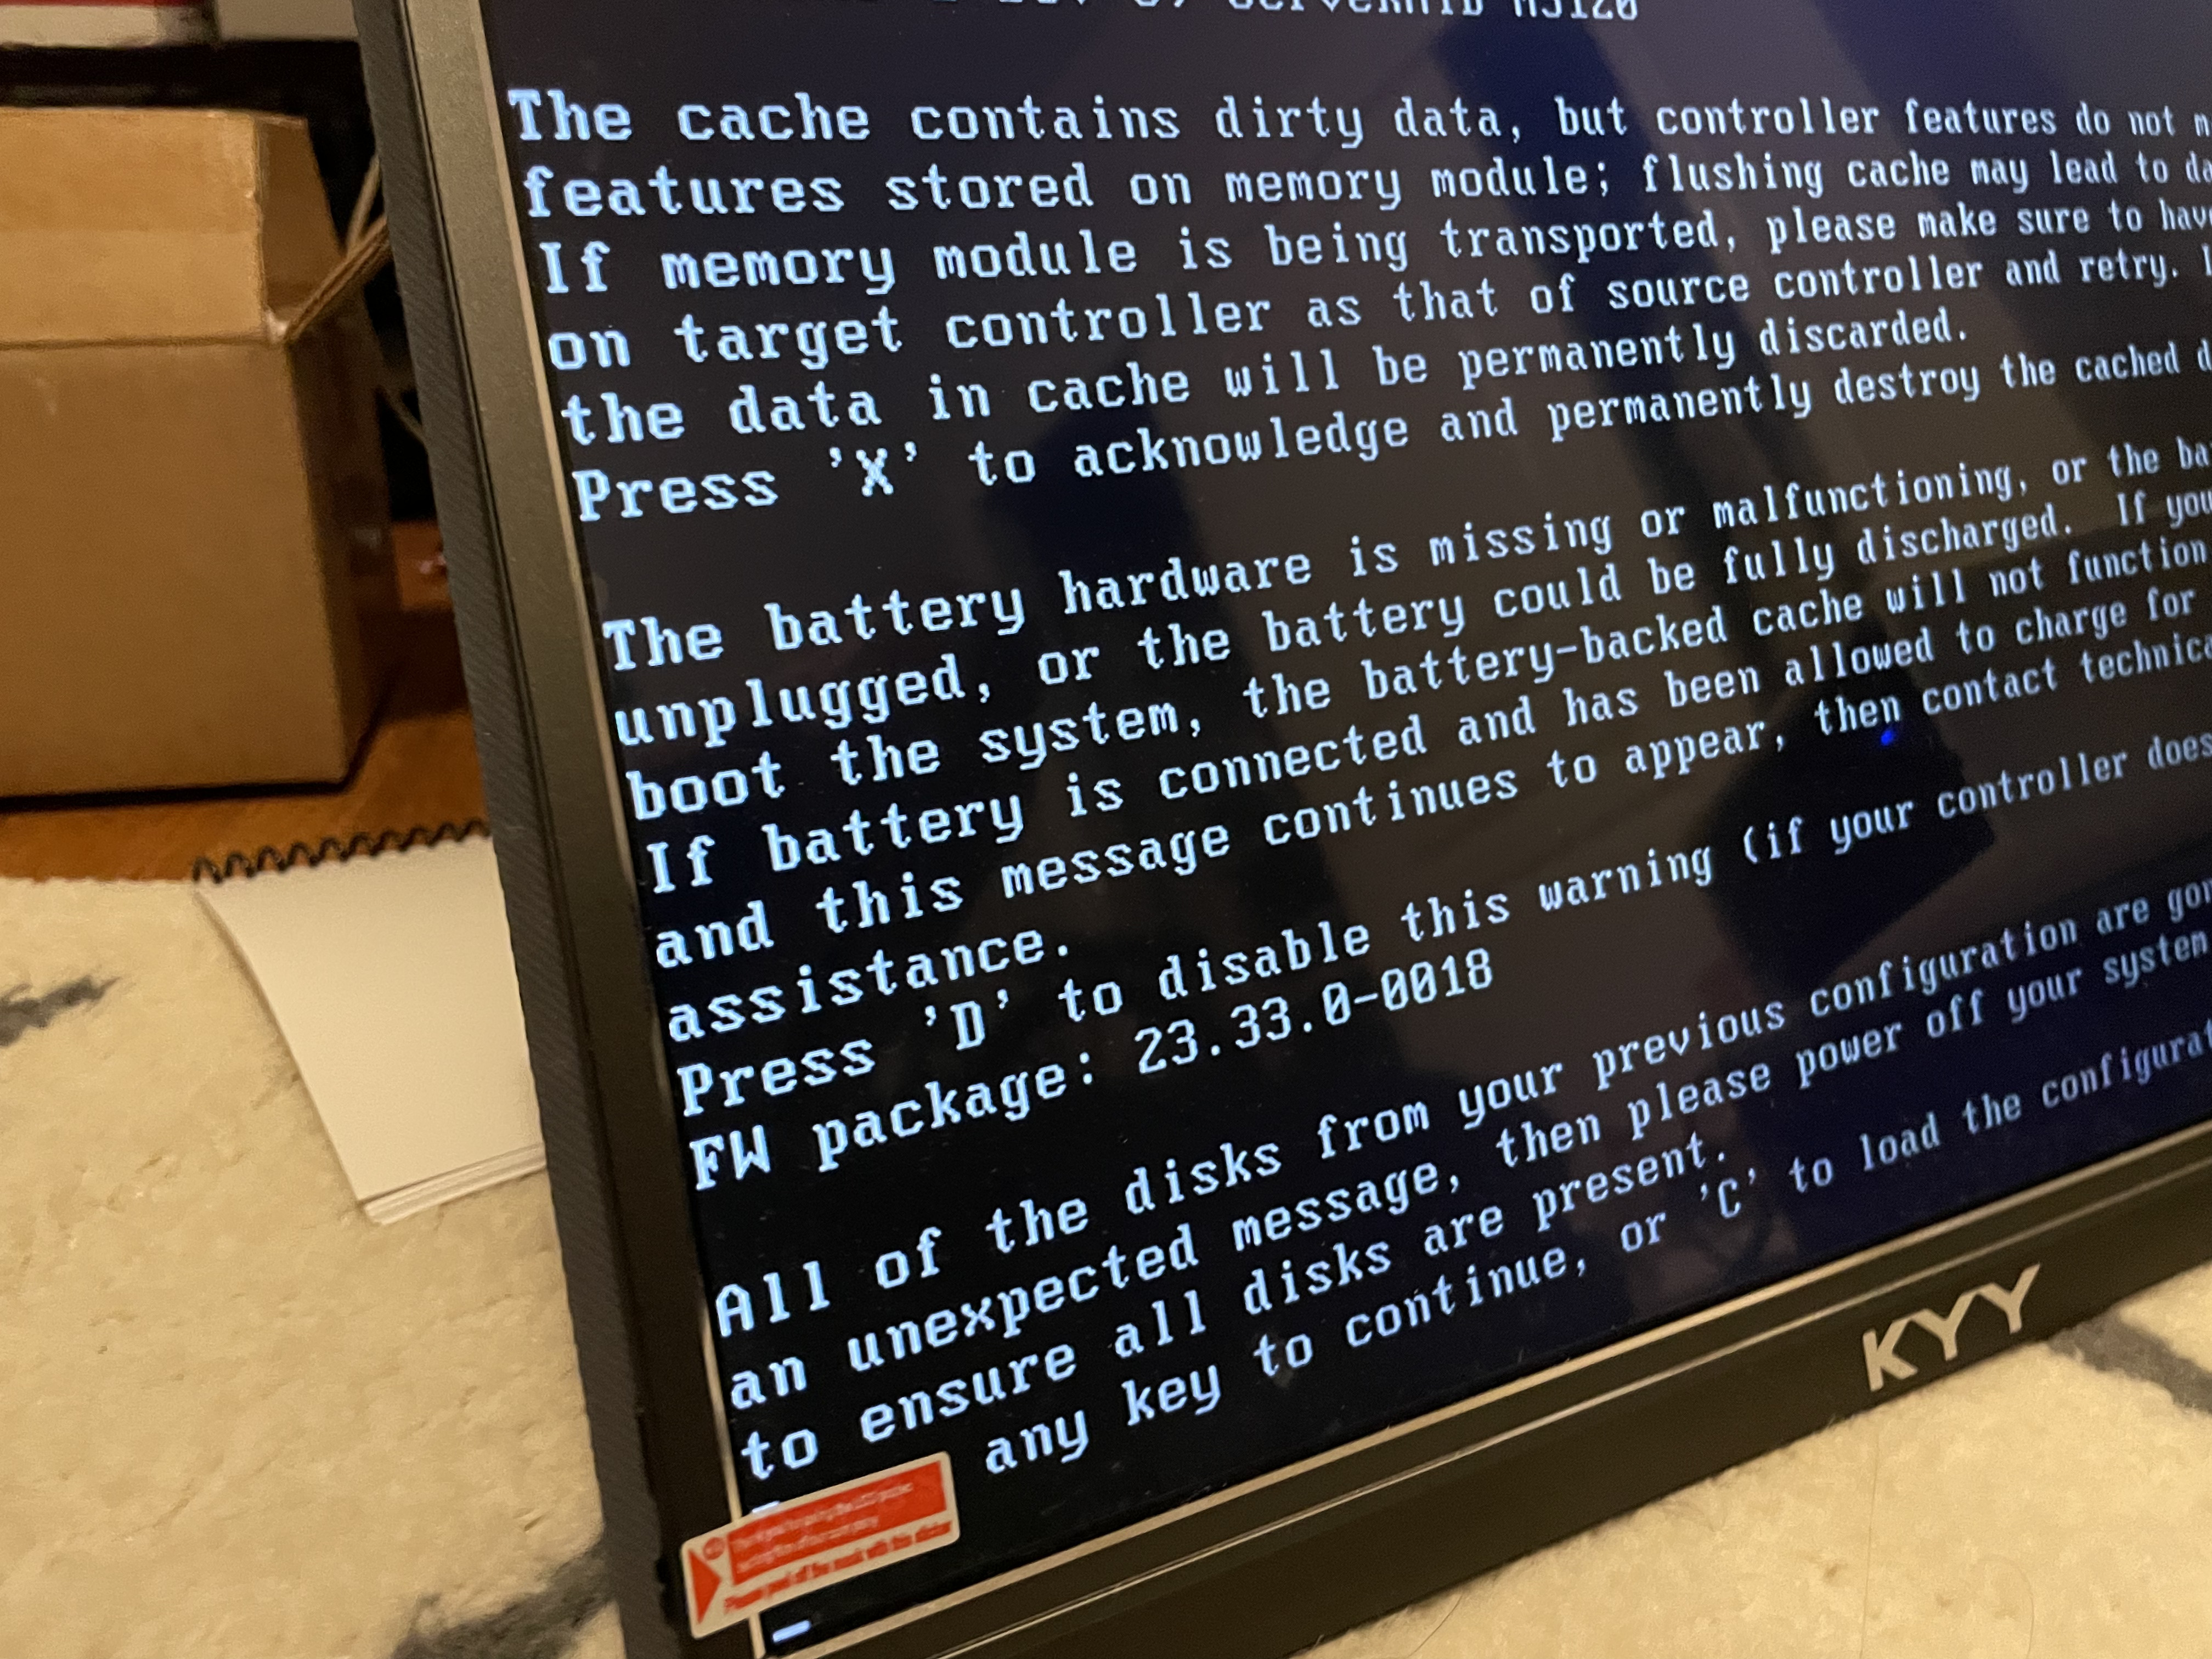
Finally, it is time to add the HBA (not raid controller) to the Dell Optiplex and bring the drives up. This is where everything fell apart. The Optiplexs REALLY didn’t want to start with the HBA controllers. I ordered MANY off ebay to try. Older gen, newer gen, different chipsets… Sometimes they would see SOME of the drives on start-up, sometimes if I bounced the container, then it would see the drives, but there was no consistency. One of the HBAs wouldn’t allow the desktop to boot at all when the card was in. Someone online mentioned, if you put tape over one of the pins on the front of the PCI express connector, the PC won’t be able to read the bus ID it doesn’t understand, and this will allow it to boot. I couldn’t believe when that worked! It still had issues seeing the drives, but interesting none the less.
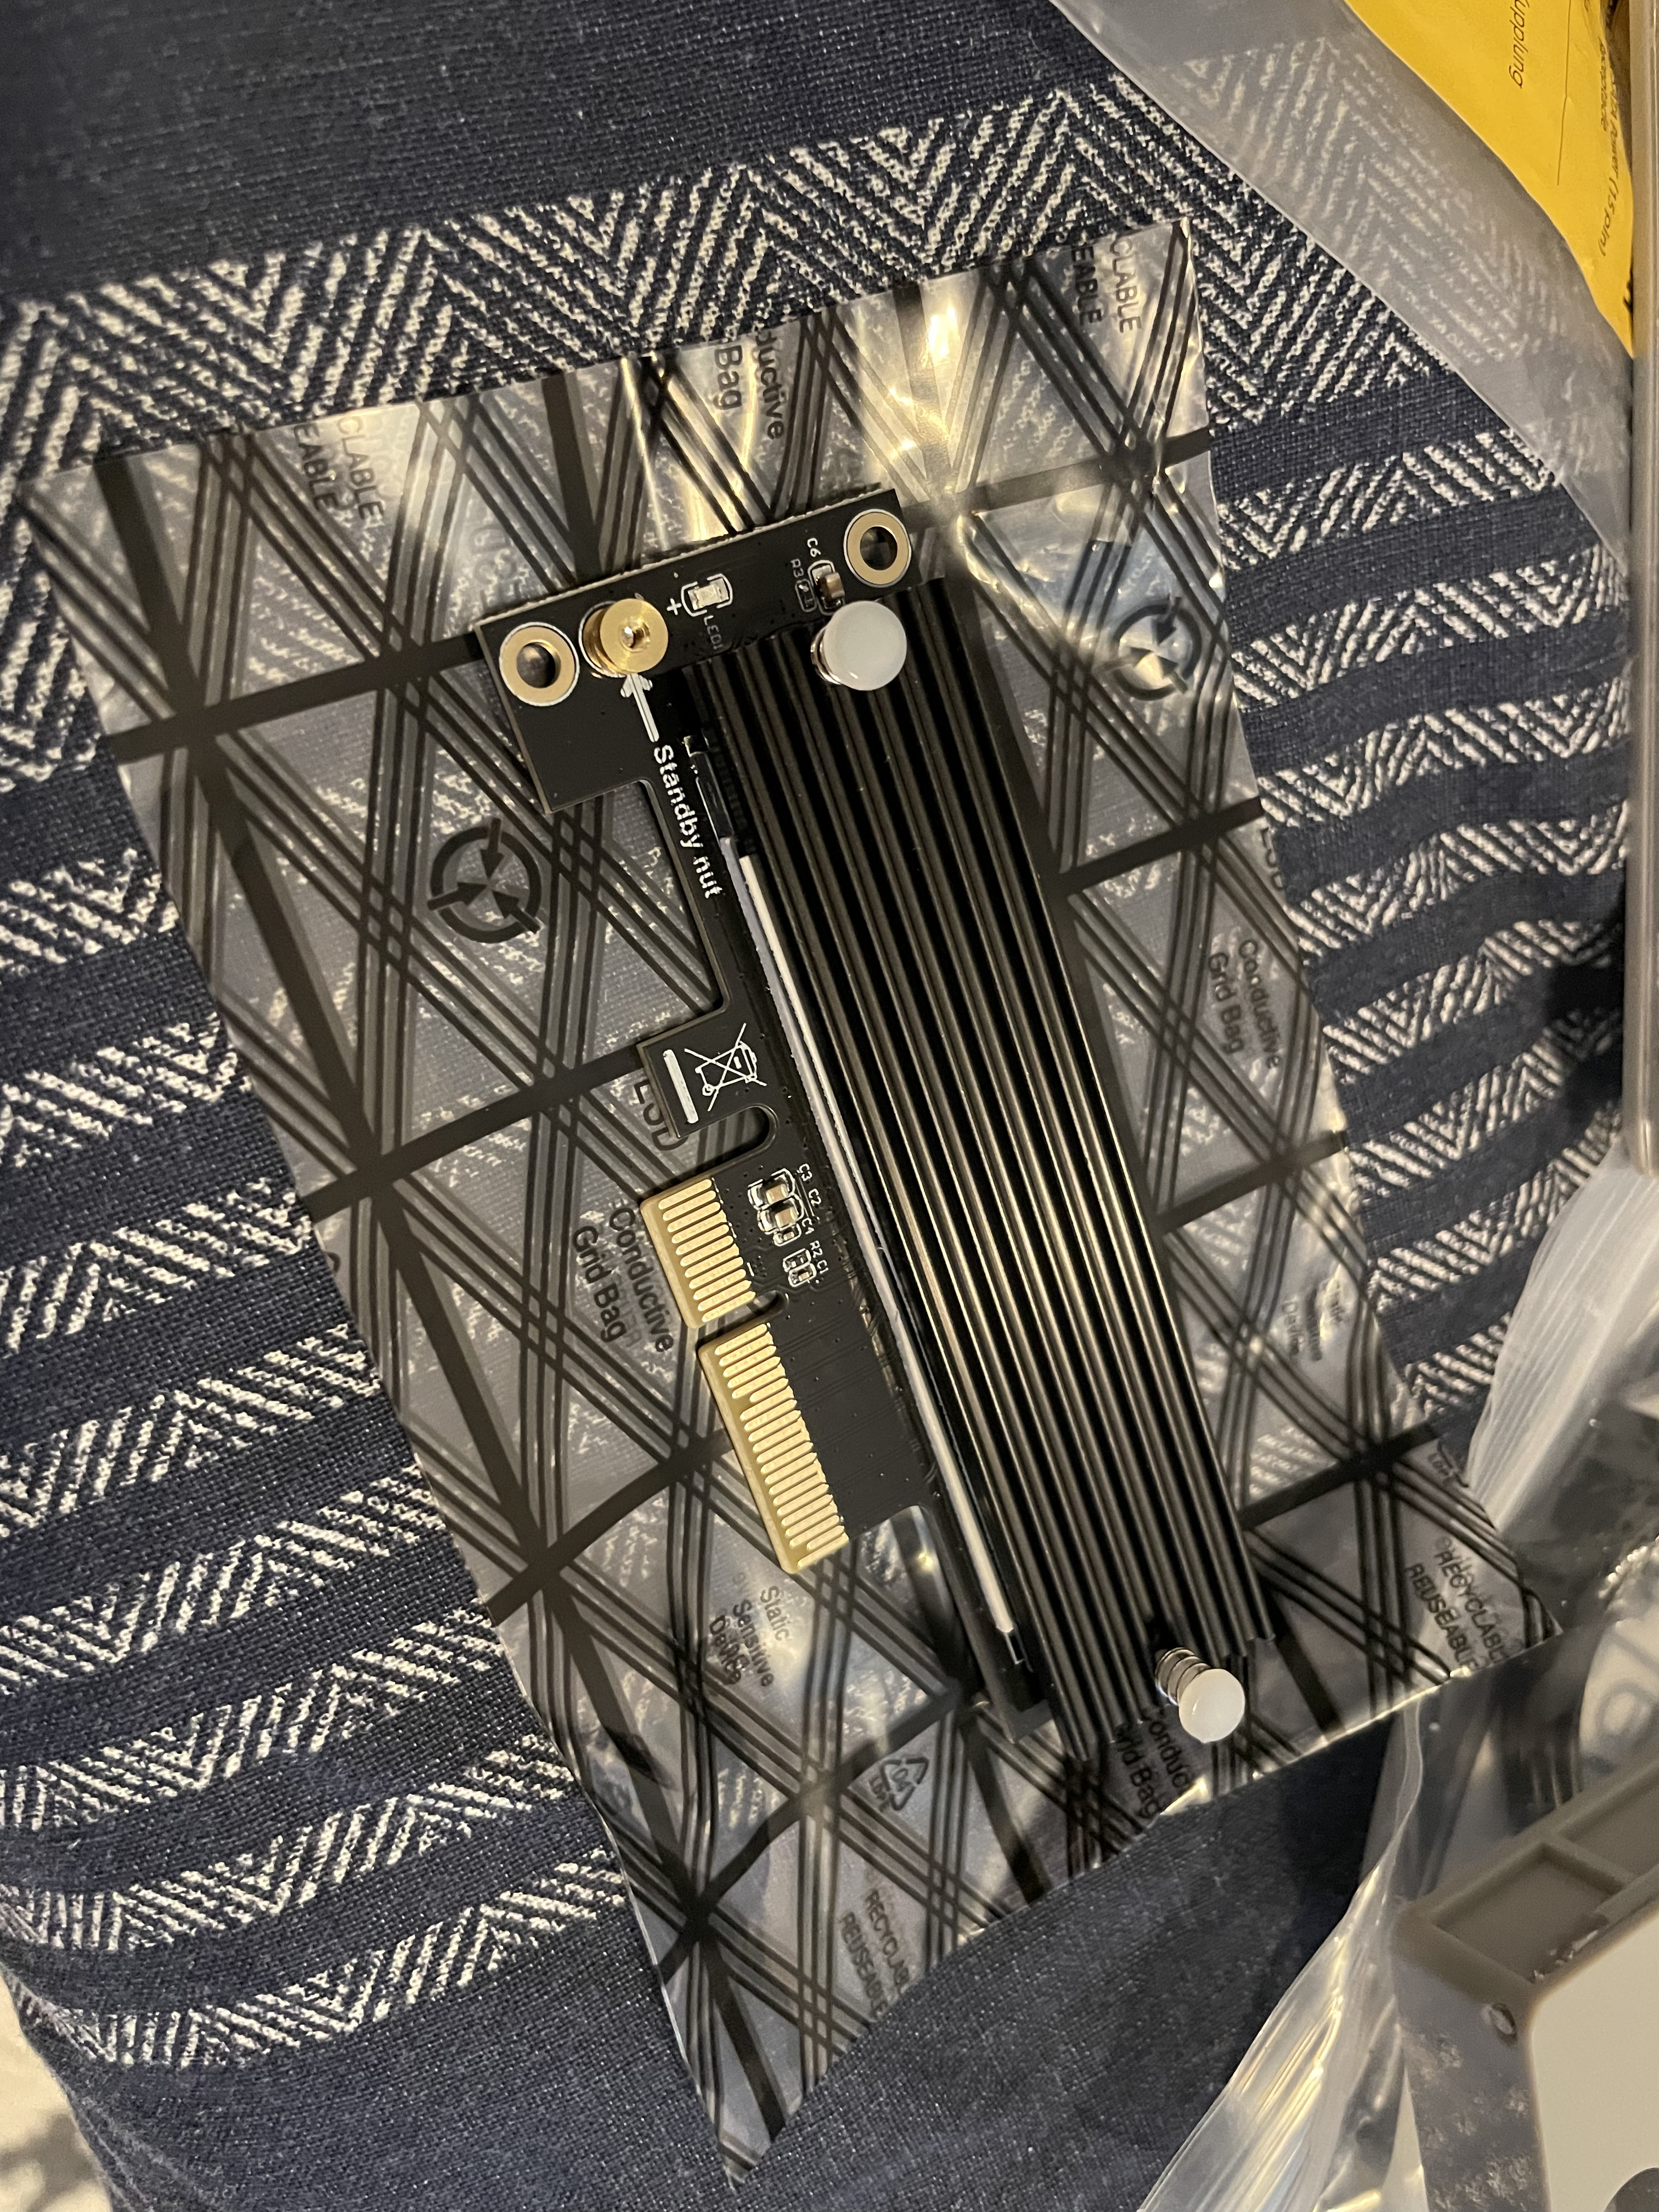
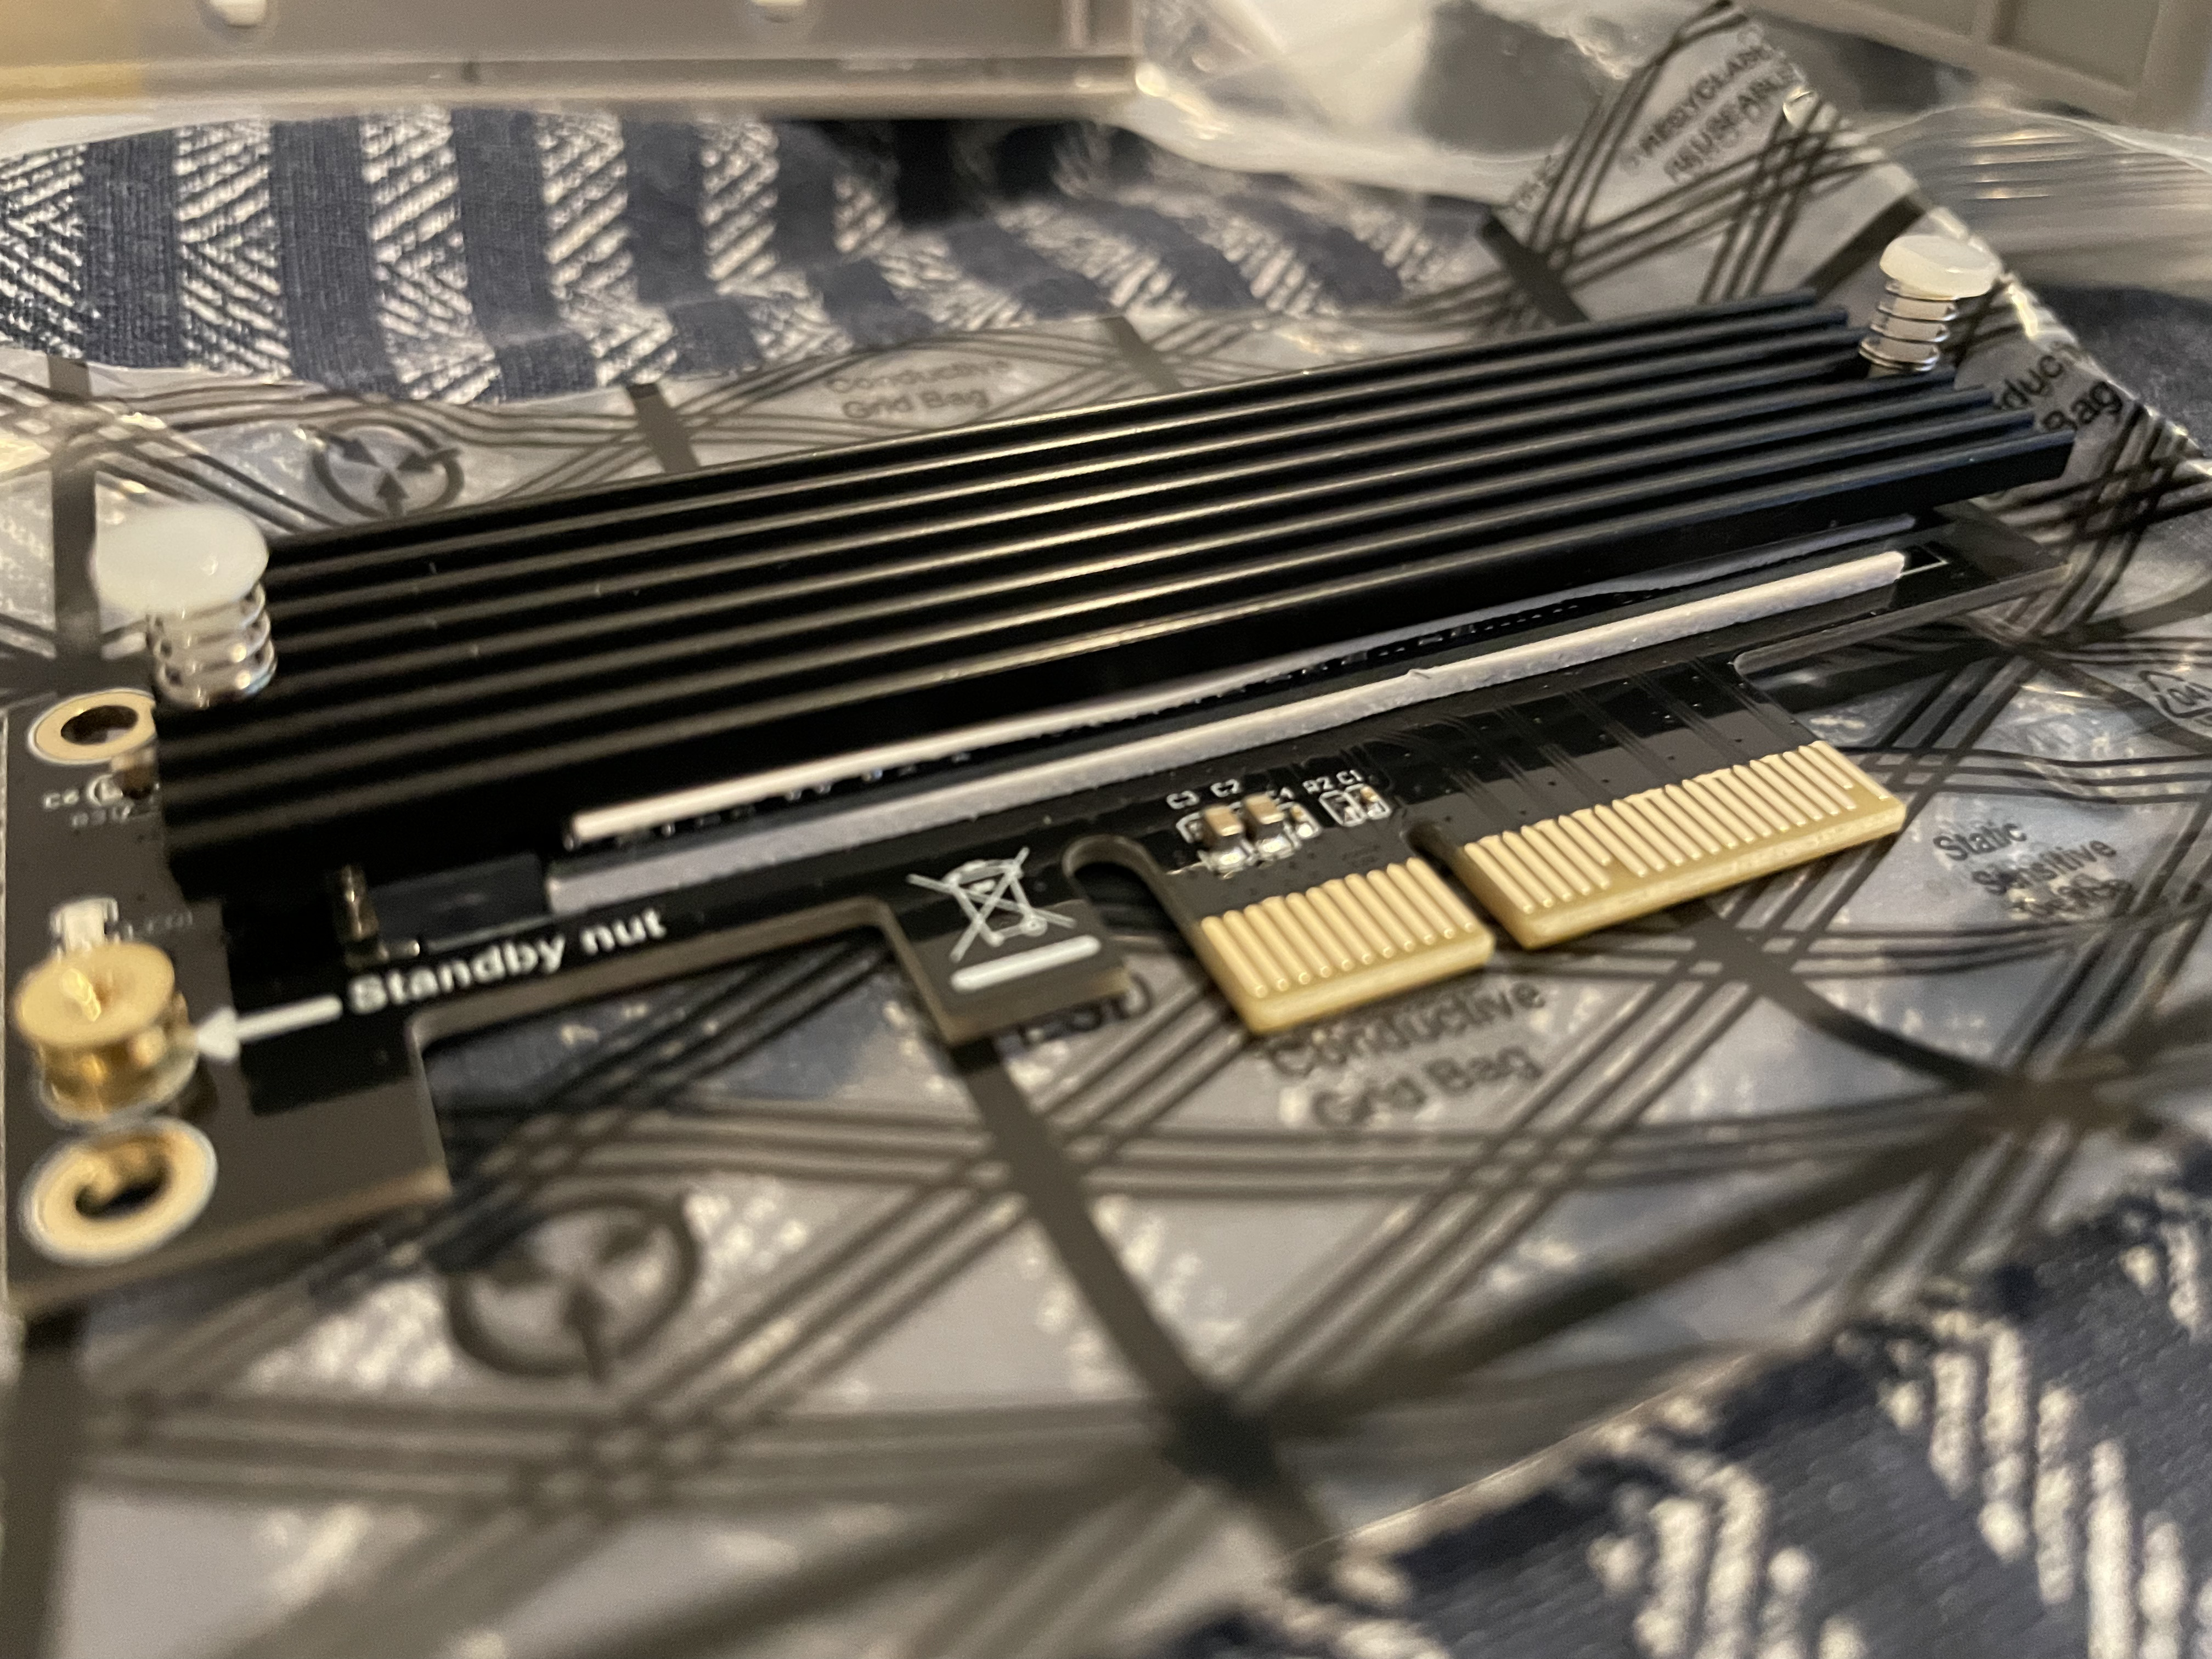
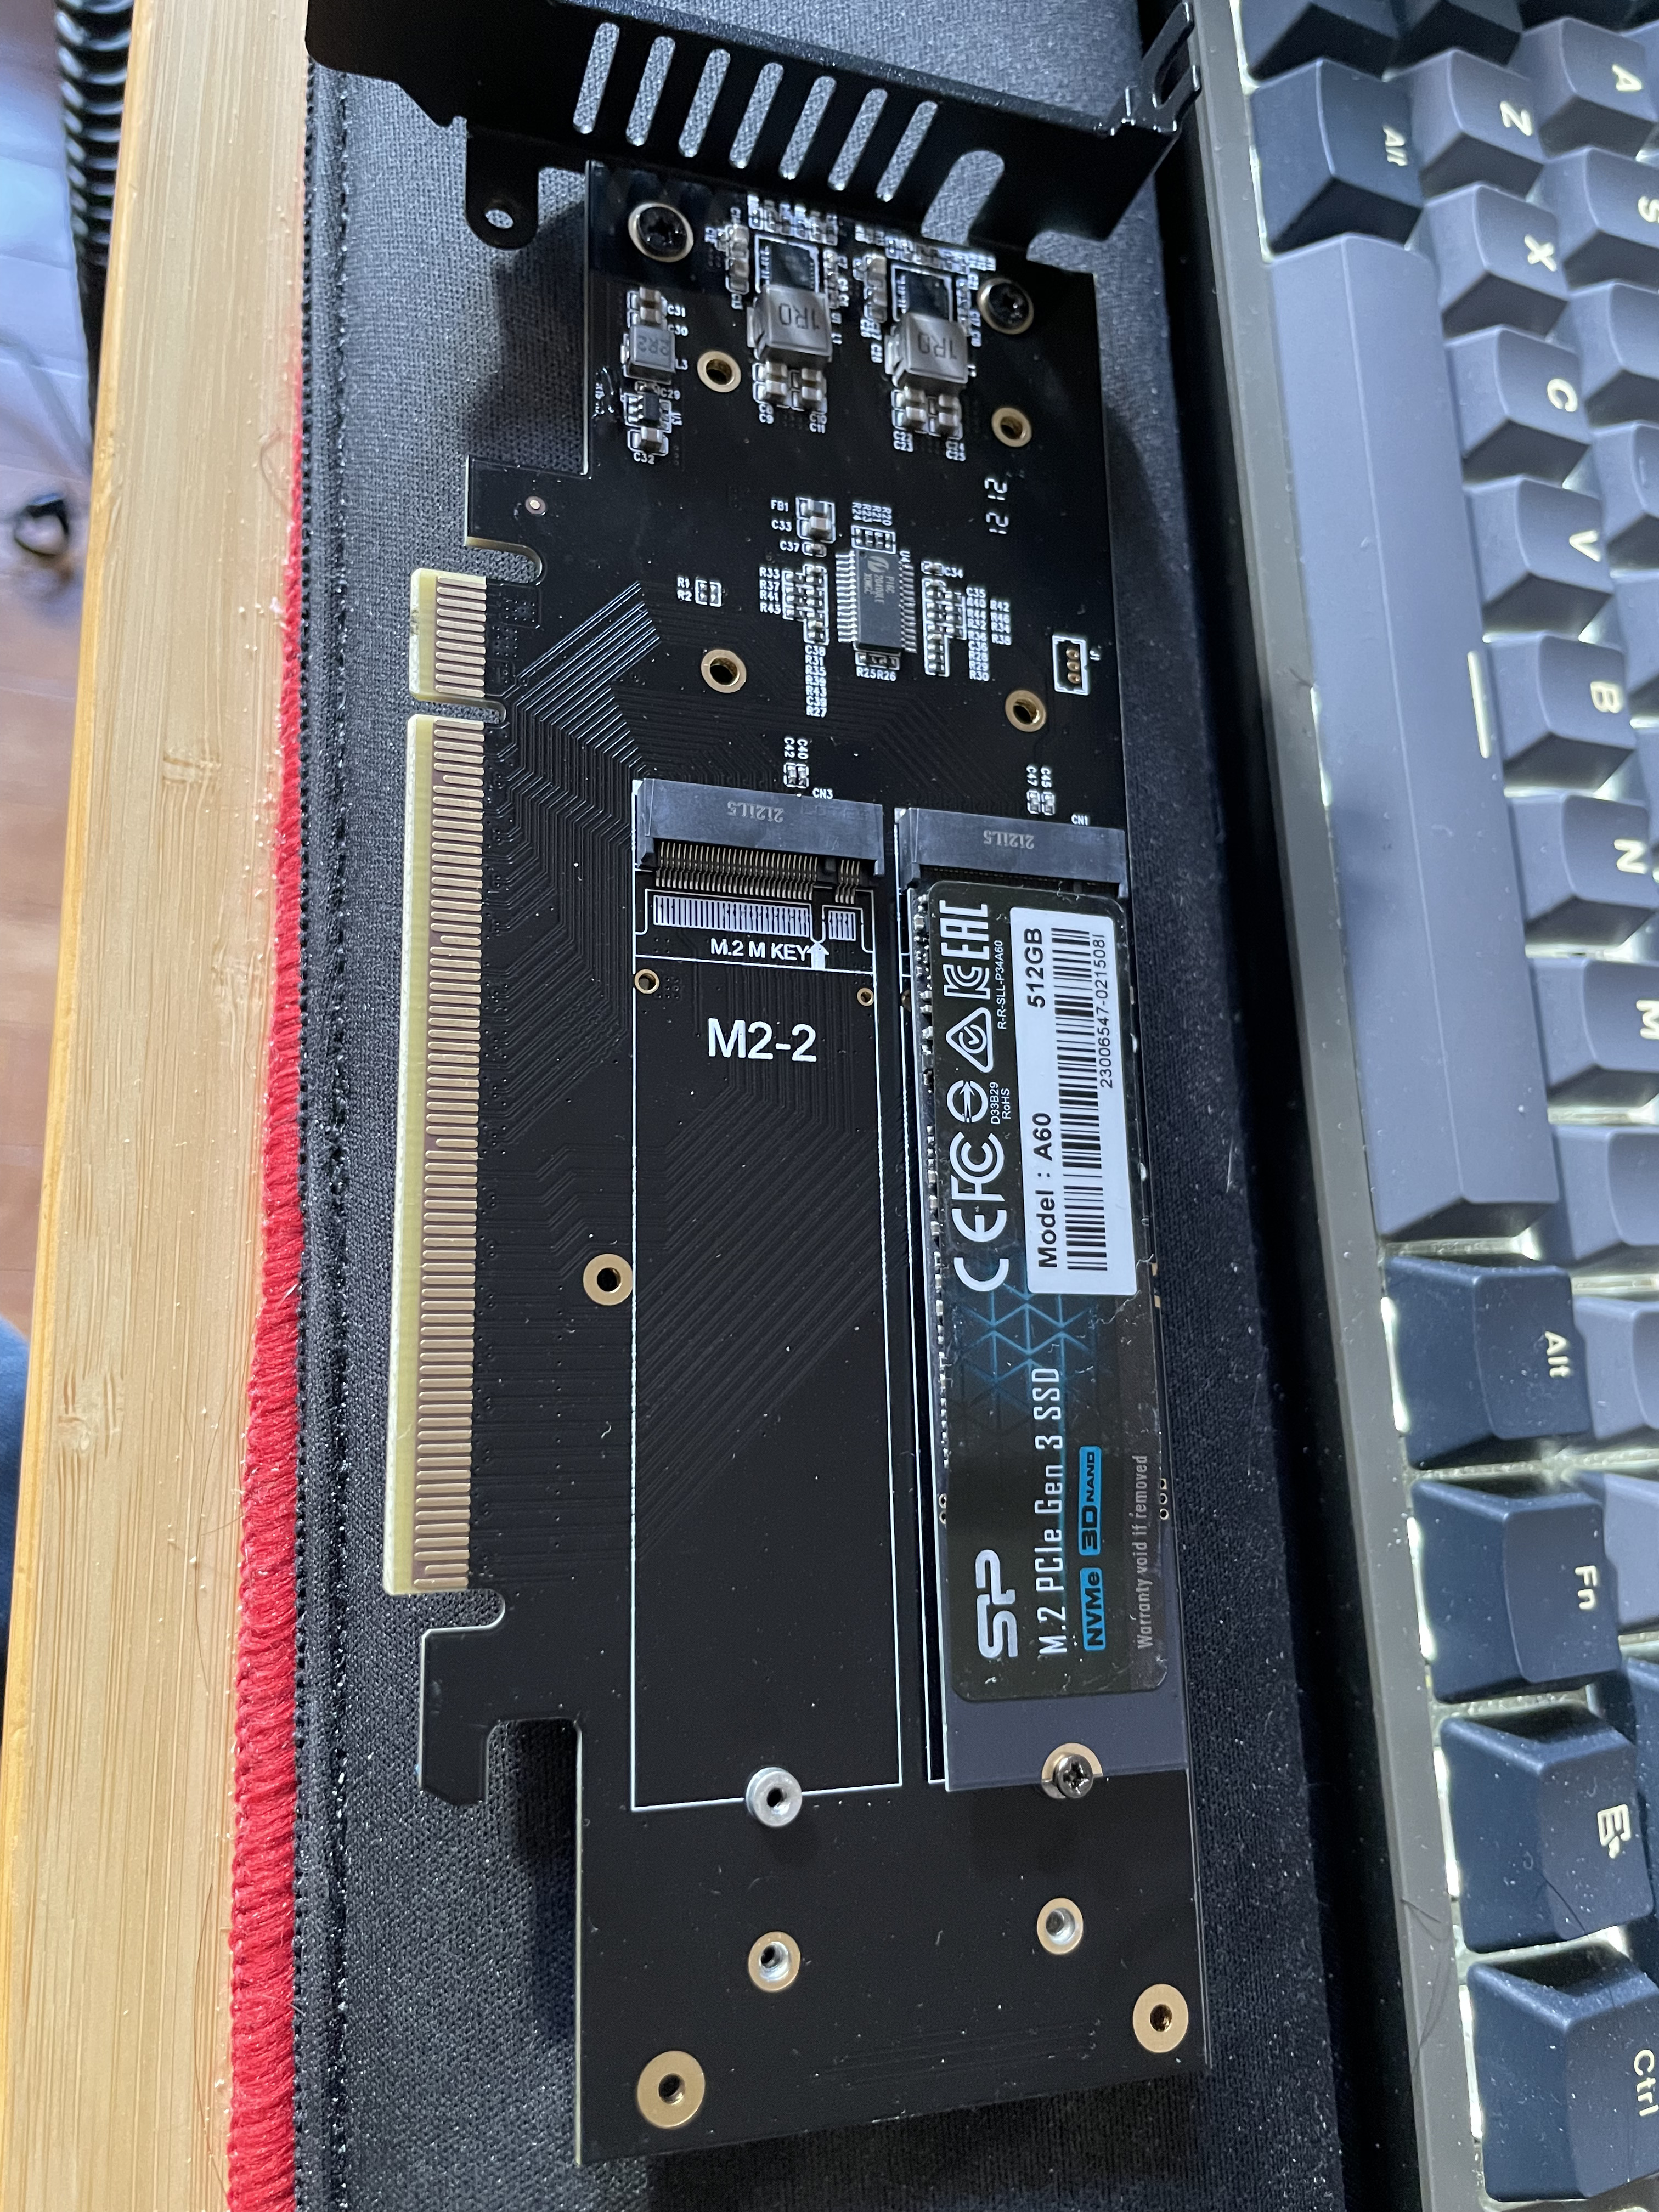
After all of this, I decided it was too much hassle and I wanted something more reliable for the system. I did what I should have done from the start… Used the ports the system already had in the systems… I went from 4 SATA SSDs to 3 SATA SSDS, and 2 NVMe drives. One in the onboard NVMe slot, and another in the PCIe x4 slot that I had. I tried a PCIe card that allows 4 NVMe drives by PCI bifurcation. This is a newer feature which only a few systems support, and these Optiplexs don’t. In either PCIe port. I also want to flag, even though the chipset in these says it supports 128GB of ram, and I can put in 32GB DIMMs and they work fine. The max on the Optiplex 5050 and 5060 is 64GB. I also added a small Noctua fan to the front of the case for additional airflow.
In the end, each of the VMWare nodes has 3 roughly 1TB SSDs, then 2 NVMe drives, one for vSAN cache, one for normal storage. I am booting the nodes off a USB drive in the back, not the most supported config, but has been working well for me. The machines have a dual 10gb nic in the x16 slot, then the secondary NVMe in the x4 slot.
Recently I have been working on some Microsoft SCCM automations. One issue I ran into was when UEFI booting into SCCM I got “Press Enter for network boot service”. Some people said you cant bypass it, others said maybe make it required update. Microsoft’s forums said its part of the firmware, they couldn’t control it; we know that’s wrong, because Linux network boots don’t have this issue and the prompt comes from their efi file.
I wanted to give a quick fix for people who run into this: upgrade your Windows ADK and WinPE to Windows 11. From my readings, Windows 8 ADK didn’t do this button press requirement, and I thought, I would try the newer ADK for Windows 11 instead of Windows 10 version 2004 (or earlier). The second I installed that Windows ADK and restarted, all of a sudden that prompt was gone. Happy booting!
I was attempting to upgrade my homelab which I pushed to VMWare vSphere 8.0 because of… YOLO… and after a recent 8.0.1 update I was no longer able to upgrade individual ESXi hosts. I had already updated vCenter to the latest version, now I wanted to upgrade the hosts. That is my normal course of action, vCenter, then hosts; as recommended. When I went to upgrade the hosts I was told:
"Health check fails to retrieve data about service 'vSphere ESX Agent Manager' on '3 Node And Friends'. Verify that the service 'vSphere ESX Agent Manager' is running and try again."
This had me SSH into the appliance and looking at logs. (To quickly mention EAM = “vSphere ESX Agent Manager“) Here are some of the fun errors I was getting in “/var/vmware/eam/eam.log”:
“Re-login to vCenter because method: currentTime of managed object: null::ServiceInstance:ServiceInstance failed due to expired client session: null”
“failed to authenticate extension com.vmware.vim.eam to vCenter”
Some older guides mentioned unregistering EAM and then re-registering it. This broke my install even worse, and I ended up reverting to a snapshot. (Always snapshot before upgrades…) When I reverted back to before the vCenter upgrade, I realized that EAM was actually failing before the vCenter upgrade; except now I had EAM back in my extension list both on https://vcenter/mob/?moid=ExtensionManager and in vCenter, which was missing after I followed the guide saying to un-register it.
Now that I had the plugin registered, again, I found this KB, and this persons blog very helpful. I ran the recommended commands:
And then EAM suddenly showed happy, and the log started showing useful things:
2023-06-06T16:53:37.573Z |  INFO | vim-monitor | ExtensionSessionRenewer.java | 190 | [Retry:Login:com.vmware.vim.eam:f86509907b4cb7c6] Re-login to vCenter b
ecause method: currentTime of managed object: null::ServiceInstance:ServiceInstance failed due to expired client session: null
2023-06-06T16:53:37.573Z |  INFO | vim-monitor | OpId.java | 37 | [vim:loginExtensionByCertificate:443bbd7c03dce9c6] created from [Retry:Login:com.vmware.vim
.eam:f86509907b4cb7c6]
2023-06-06T16:53:37.947Z |  INFO | vim-async-2 | OpIdLogger.java | 35 | [vim:loginExtensionByCertificate:443bbd7c03dce9c6] Completed.
Thats it! Now I can run updates again! If anyone has the same issue, drop a line in the comments. I hope this isn’t a big new vSphere 8.0 issue. I had upgraded this appliance from 7.0, and perhaps that or a cert issue caused issues.
Below is some of my eam.log to help people:
2023-06-06T02:20:29.728Z | ERROR | vlsi | DispatcherImpl.java | 468 | Internal server error during dispatch
com.vmware.vim.binding.eam.fault.EamServiceNotInitialized: EAM is still loading from database. Please try again later.
        at com.vmware.eam.vmomi.EAMInitRequestFilter.handleBody(EAMInitRequestFilter.java:57) ~[eam-server.jar:?]
        at com.vmware.vim.vmomi.server.impl.DispatcherImpl$SingleRequestDispatcher.handleBody(DispatcherImpl.java:373) [vlsi-server.jar:?]
        at com.vmware.vim.vmomi.server.impl.DispatcherImpl$SingleRequestDispatcher.dispatch(DispatcherImpl.java:290) [vlsi-server.jar:?]
        at com.vmware.vim.vmomi.server.impl.DispatcherImpl.dispatch(DispatcherImpl.java:246) [vlsi-server.jar:?]
        at com.vmware.vim.vmomi.server.http.impl.CorrelationDispatcherTask.run(CorrelationDispatcherTask.java:58) [vlsi-server.jar:?]
        at java.util.concurrent.ThreadPoolExecutor.runWorker(ThreadPoolExecutor.java:1149) [?:1.8.0_362]
        at java.util.concurrent.ThreadPoolExecutor$Worker.run(ThreadPoolExecutor.java:624) [?:1.8.0_362]
        at java.lang.Thread.run(Thread.java:750) [?:1.8.0_362]
2023-06-06T02:20:31.769Z |  INFO | vim-monitor | ExtensionSessionRenewer.java | 190 | [Retry:Login:com.vmware.vim.eam:9ae94019eb8cb9a2] Re-login to vCenter b
ecause method: currentTime of managed object: null::ServiceInstance:ServiceInstance failed due to expired client session: null
2023-06-06T02:20:31.769Z |  INFO | vim-monitor | OpId.java | 37 | [vim:loginExtensionByCertificate:b63ca4cf0b995a54] created from [Retry:Login:com.vmware.vim
.eam:9ae94019eb8cb9a2]
2023-06-06T02:20:34.775Z |  INFO | vim-async-2 | OpIdLogger.java | 43 | [vim:loginExtensionByCertificate:b63ca4cf0b995a54] Failed.
2023-06-06T02:20:34.775Z |  WARN | vim-async-2 | ExtensionSessionRenewer.java | 227 | [Retry:Login:com.vmware.vim.eam:9ae94019eb8cb9a2] Re-login failed, due
to:
com.vmware.eam.security.NotAuthenticated: Failed to authenticate extension com.vmware.vim.eam to vCenter.
        at com.vmware.eam.vim.security.impl.SessionManager.convertLoginException(SessionManager.java:329) ~[eam-server.jar:?]
        at com.vmware.eam.vim.security.impl.SessionManager.lambda$loginExtension$4(SessionManager.java:154) ~[eam-server.jar:?]
        at com.vmware.eam.async.remote.Completion.onError(Completion.java:86) [eam-server.jar:?]
        at com.vmware.eam.vmomi.async.FutureAdapter.setException(FutureAdapter.java:81) [eam-server.jar:?]
        at com.vmware.vim.vmomi.client.common.impl.MethodInvocationHandlerImpl$ClientFutureAdapter.setException(MethodInvocationHandlerImpl.java:731) [vlsi-c
lient.jar:?]
        at com.vmware.vim.vmomi.client.common.impl.MethodInvocationHandlerImpl$RetryingFuture.fail(MethodInvocationHandlerImpl.java:578) [vlsi-client.jar:?]
        at com.vmware.vim.vmomi.client.common.impl.MethodInvocationHandlerImpl$RetryingFuture$RetryActionImpl.proceed(MethodInvocationHandlerImpl.java:625) [
vlsi-client.jar:?]
        at com.vmware.eam.vim.security.impl.ExtensionSessionRenewer.retry(ExtensionSessionRenewer.java:149) [eam-server.jar:?]
        at com.vmware.vim.vmomi.client.common.impl.MethodInvocationHandlerImpl$RetryingFuture.setException(MethodInvocationHandlerImpl.java:541) [vlsi-client
.jar:?]
        at com.vmware.vim.vmomi.client.common.impl.ResponseImpl.setResponse(ResponseImpl.java:239) [vlsi-client.jar:?]
        at com.vmware.vim.vmomi.client.http.impl.HttpExchangeBase.parseResponse(HttpExchangeBase.java:286) [vlsi-client.jar:?]
        at com.vmware.vim.vmomi.client.http.impl.HttpExchange.invokeWithinScope(HttpExchange.java:54) [vlsi-client.jar:?]
        at com.vmware.vim.vmomi.client.http.impl.TracingScopedRunnable.run(TracingScopedRunnable.java:24) [vlsi-client.jar:?]
        at com.vmware.vim.vmomi.client.http.impl.HttpExchangeBase.run(HttpExchangeBase.java:60) [vlsi-client.jar:?]
        at java.util.concurrent.ThreadPoolExecutor.runWorker(ThreadPoolExecutor.java:1149) [?:1.8.0_362]
        at java.util.concurrent.ThreadPoolExecutor$Worker.run(ThreadPoolExecutor.java:624) [?:1.8.0_362]
        at java.lang.Thread.run(Thread.java:750) [?:1.8.0_362]
Caused by: com.vmware.vim.binding.vim.fault.InvalidLogin: Cannot complete login due to an incorrect user name or password.
        at sun.reflect.GeneratedConstructorAccessor58.newInstance(Unknown Source) ~[?:?]
        at sun.reflect.DelegatingConstructorAccessorImpl.newInstance(DelegatingConstructorAccessorImpl.java:45) ~[?:1.8.0_362]
        at java.lang.reflect.Constructor.newInstance(Constructor.java:423) ~[?:1.8.0_362]
        at java.lang.Class.newInstance(Class.java:442) ~[?:1.8.0_362]
        at com.vmware.vim.vmomi.core.types.impl.ComplexTypeImpl.newInstance(ComplexTypeImpl.java:174) ~[vlsi-core.jar:?]
        at com.vmware.vim.vmomi.core.types.impl.DefaultDataObjectFactory.newDataObject(DefaultDataObjectFactory.java:25) ~[vlsi-core.jar:?]
        at com.vmware.vim.vmomi.core.soap.impl.unmarshaller.ComplexStackContext.<init>(ComplexStackContext.java:30) ~[vlsi-core.jar:?]
        at com.vmware.vim.vmomi.core.soap.impl.unmarshaller.UnmarshallerImpl$UnmarshallSoapFaultContext.parse(UnmarshallerImpl.java:167) ~[vlsi-core.jar:?]
        at com.vmware.vim.vmomi.core.soap.impl.unmarshaller.UnmarshallerImpl$UnmarshallSoapFaultContext.unmarshall(UnmarshallerImpl.java:105) ~[vlsi-core.jar
:?]
        at com.vmware.vim.vmomi.core.soap.impl.unmarshaller.UnmarshallerImpl.unmarshalSoapFault(UnmarshallerImpl.java:92) ~[vlsi-core.jar:?]
        at com.vmware.vim.vmomi.core.soap.impl.unmarshaller.UnmarshallerImpl.unmarshalSoapFault(UnmarshallerImpl.java:86) ~[vlsi-core.jar:?]
        at com.vmware.vim.vmomi.client.common.impl.SoapFaultStackContext.setValue(SoapFaultStackContext.java:41) ~[vlsi-client.jar:?]
        at com.vmware.vim.vmomi.client.common.impl.ResponseUnmarshaller.processNextElement(ResponseUnmarshaller.java:127) ~[vlsi-client.jar:?]
        at com.vmware.vim.vmomi.client.common.impl.ResponseUnmarshaller.unmarshal(ResponseUnmarshaller.java:70) ~[vlsi-client.jar:?]
        at com.vmware.vim.vmomi.client.common.impl.ResponseImpl.unmarshalResponse(ResponseImpl.java:284) ~[vlsi-client.jar:?]
        at com.vmware.vim.vmomi.client.common.impl.ResponseImpl.setResponse(ResponseImpl.java:241) ~[vlsi-client.jar:?]
        ... 7 more
2023-06-06T02:20:34.777Z | ERROR | vim-monitor | VcListener.java | 124 | An unexpected error in the changes polling loop
com.vmware.eam.EamRemoteSystemException: Unexpected error communicating with the vCenter server.
        at com.vmware.eam.vim.server.impl.VimRoot.rootOperation(VimRoot.java:106) ~[eam-server.jar:?]
        at com.vmware.eam.vim.server.impl.VimRoot.currentTime(VimRoot.java:78) ~[eam-server.jar:?]
        at com.vmware.eam.vc.VcListener.main(VcListener.java:140) ~[eam-server.jar:?]
        at com.vmware.eam.vc.VcListener.call(VcListener.java:118) [eam-server.jar:?]
        at com.vmware.eam.vc.VcListener.call(VcListener.java:58) [eam-server.jar:?]
        at com.vmware.eam.async.impl.AuditedJob.call(AuditedJob.java:58) [eam-server.jar:?]
        at com.vmware.eam.async.impl.FutureRunnable.run(FutureRunnable.java:55) [eam-server.jar:?]
        at java.util.concurrent.ThreadPoolExecutor.runWorker(ThreadPoolExecutor.java:1149) [?:1.8.0_362]
        at java.util.concurrent.ThreadPoolExecutor$Worker.run(ThreadPoolExecutor.java:624) [?:1.8.0_362]
        at java.lang.Thread.run(Thread.java:750) [?:1.8.0_362]
Caused by: com.vmware.vim.binding.vim.fault.NotAuthenticated: The session is not authenticated.
        at sun.reflect.GeneratedConstructorAccessor57.newInstance(Unknown Source) ~[?:?]
        at sun.reflect.DelegatingConstructorAccessorImpl.newInstance(DelegatingConstructorAccessorImpl.java:45) ~[?:1.8.0_362]
        at java.lang.reflect.Constructor.newInstance(Constructor.java:423) ~[?:1.8.0_362]
        at java.lang.Class.newInstance(Class.java:442) ~[?:1.8.0_362]
        at com.vmware.vim.vmomi.core.types.impl.ComplexTypeImpl.newInstance(ComplexTypeImpl.java:174) ~[vlsi-core.jar:?]
        at com.vmware.vim.vmomi.core.types.impl.DefaultDataObjectFactory.newDataObject(DefaultDataObjectFactory.java:25) ~[vlsi-core.jar:?]
        at com.vmware.vim.vmomi.core.soap.impl.unmarshaller.ComplexStackContext.<init>(ComplexStackContext.java:30) ~[vlsi-core.jar:?]
        at com.vmware.vim.vmomi.core.soap.impl.unmarshaller.UnmarshallerImpl$UnmarshallSoapFaultContext.parse(UnmarshallerImpl.java:167) ~[vlsi-core.jar:?]
        at com.vmware.vim.vmomi.core.soap.impl.unmarshaller.UnmarshallerImpl$UnmarshallSoapFaultContext.unmarshall(UnmarshallerImpl.java:105) ~[vlsi-core.jar
:?]
        at com.vmware.vim.vmomi.core.soap.impl.unmarshaller.UnmarshallerImpl.unmarshalSoapFault(UnmarshallerImpl.java:92) ~[vlsi-core.jar:?]
        at com.vmware.vim.vmomi.core.soap.impl.unmarshaller.UnmarshallerImpl.unmarshalSoapFault(UnmarshallerImpl.java:86) ~[vlsi-core.jar:?]
        at com.vmware.vim.vmomi.client.common.impl.SoapFaultStackContext.setValue(SoapFaultStackContext.java:41) ~[vlsi-client.jar:?]
        at com.vmware.vim.vmomi.client.common.impl.ResponseUnmarshaller.processNextElement(ResponseUnmarshaller.java:127) ~[vlsi-client.jar:?]
        at com.vmware.vim.vmomi.client.common.impl.ResponseUnmarshaller.unmarshal(ResponseUnmarshaller.java:70) ~[vlsi-client.jar:?]
        at com.vmware.vim.vmomi.client.common.impl.ResponseImpl.unmarshalResponse(ResponseImpl.java:284) ~[vlsi-client.jar:?]
        at com.vmware.vim.vmomi.client.common.impl.ResponseImpl.setResponse(ResponseImpl.java:241) ~[vlsi-client.jar:?]
        at com.vmware.vim.vmomi.client.http.impl.HttpExchangeBase.parseResponse(HttpExchangeBase.java:286) ~[vlsi-client.jar:?]
        at com.vmware.vim.vmomi.client.http.impl.HttpExchange.invokeWithinScope(HttpExchange.java:54) ~[vlsi-client.jar:?]
        at com.vmware.vim.vmomi.client.http.impl.TracingScopedRunnable.run(TracingScopedRunnable.java:24) ~[vlsi-client.jar:?]
        at com.vmware.vim.vmomi.client.http.impl.HttpExchangeBase.run(HttpExchangeBase.java:60) ~[vlsi-client.jar:?]
        at com.vmware.vim.vmomi.client.http.impl.HttpProtocolBindingBase.executeRunnable(HttpProtocolBindingBase.java:229) ~[vlsi-client.jar:?]
        at com.vmware.vim.vmomi.client.http.impl.HttpProtocolBindingImpl.send(HttpProtocolBindingImpl.java:114) ~[vlsi-client.jar:?]
        at com.vmware.vim.vmomi.client.common.impl.MethodInvocationHandlerImpl$CallExecutor.sendCall(MethodInvocationHandlerImpl.java:693) ~[vlsi-client.jar:
?]
        at com.vmware.vim.vmomi.client.common.impl.MethodInvocationHandlerImpl$CallExecutor.executeCall(MethodInvocationHandlerImpl.java:674) ~[vlsi-client.j
ar:?]
        at com.vmware.vim.vmomi.client.common.impl.MethodInvocationHandlerImpl.completeCall(MethodInvocationHandlerImpl.java:371) ~[vlsi-client.jar:?]
        at com.vmware.vim.vmomi.client.common.impl.MethodInvocationHandlerImpl.invokeOperation(MethodInvocationHandlerImpl.java:322) ~[vlsi-client.jar:?]
        at com.vmware.vim.vmomi.client.common.impl.MethodInvocationHandlerImpl.invoke(MethodInvocationHandlerImpl.java:195) ~[vlsi-client.jar:?]
        at com.sun.proxy.$Proxy51.currentTime(Unknown Source) ~[?:?]
        at com.vmware.eam.vim.server.impl.VimRoot.rootOperation(VimRoot.java:101) ~[eam-server.jar:?]
        ... 9 more
2023-06-06T02:20:34.778Z |  INFO | vim-monitor | VcListener.java | 125 | Full stack trace: com.vmware.eam.EamRemoteSystemException: Unexpected error communic
ating with the vCenter server.
        at com.vmware.eam.vim.server.impl.VimRoot.rootOperation(VimRoot.java:106)
        at com.vmware.eam.vim.server.impl.VimRoot.currentTime(VimRoot.java:78)
        at com.vmware.eam.vc.VcListener.main(VcListener.java:140)
        at com.vmware.eam.vc.VcListener.call(VcListener.java:118)
        at com.vmware.eam.vc.VcListener.call(VcListener.java:58)
        at com.vmware.eam.async.impl.AuditedJob.call(AuditedJob.java:58)
        at com.vmware.eam.async.impl.FutureRunnable.run(FutureRunnable.java:55)
        at java.util.concurrent.ThreadPoolExecutor.runWorker(ThreadPoolExecutor.java:1149)
        at java.util.concurrent.ThreadPoolExecutor$Worker.run(ThreadPoolExecutor.java:624)
        at java.lang.Thread.run(Thread.java:750)
Caused by: (vim.fault.NotAuthenticated) {
   faultCause = null,
   faultMessage = null,
   object = ManagedObjectReference: type = ServiceInstance, value = ServiceInstance, serverGuid = f0ee8343-1721-4676-9069-1a837625c60b,
   privilegeId = ,
   missingPrivileges = null
}
        at sun.reflect.GeneratedConstructorAccessor57.newInstance(Unknown Source)
        at sun.reflect.DelegatingConstructorAccessorImpl.newInstance(DelegatingConstructorAccessorImpl.java:45)
        at java.lang.reflect.Constructor.newInstance(Constructor.java:423)
        at java.lang.Class.newInstance(Class.java:442)
        at com.vmware.vim.vmomi.core.types.impl.ComplexTypeImpl.newInstance(ComplexTypeImpl.java:174)
        at com.vmware.vim.vmomi.core.types.impl.DefaultDataObjectFactory.newDataObject(DefaultDataObjectFactory.java:25)
        at com.vmware.vim.vmomi.core.soap.impl.unmarshaller.ComplexStackContext.<init>(ComplexStackContext.java:30)
        at com.vmware.vim.vmomi.core.soap.impl.unmarshaller.UnmarshallerImpl$UnmarshallSoapFaultContext.parse(UnmarshallerImpl.java:167)
        at com.vmware.vim.vmomi.core.soap.impl.unmarshaller.UnmarshallerImpl$UnmarshallSoapFaultContext.unmarshall(UnmarshallerImpl.java:105)
        at com.vmware.vim.vmomi.core.soap.impl.unmarshaller.UnmarshallerImpl.unmarshalSoapFault(UnmarshallerImpl.java:92)
        at com.vmware.vim.vmomi.core.soap.impl.unmarshaller.UnmarshallerImpl.unmarshalSoapFault(UnmarshallerImpl.java:86)
        at com.vmware.vim.vmomi.client.common.impl.SoapFaultStackContext.setValue(SoapFaultStackContext.java:41)
        at com.vmware.vim.vmomi.client.common.impl.ResponseUnmarshaller.processNextElement(ResponseUnmarshaller.java:127)
        at com.vmware.vim.vmomi.client.common.impl.ResponseUnmarshaller.unmarshal(ResponseUnmarshaller.java:70)
        at com.vmware.vim.vmomi.client.common.impl.ResponseImpl.unmarshalResponse(ResponseImpl.java:284)
        at com.vmware.vim.vmomi.client.common.impl.ResponseImpl.setResponse(ResponseImpl.java:241)
        at com.vmware.vim.vmomi.client.http.impl.HttpExchangeBase.parseResponse(HttpExchangeBase.java:286)
        at com.vmware.vim.vmomi.client.http.impl.HttpExchange.invokeWithinScope(HttpExchange.java:54)
        at com.vmware.vim.vmomi.client.http.impl.TracingScopedRunnable.run(TracingScopedRunnable.java:24)
        at com.vmware.vim.vmomi.client.http.impl.HttpExchangeBase.run(HttpExchangeBase.java:60)
        at com.vmware.vim.vmomi.client.http.impl.HttpProtocolBindingBase.executeRunnable(HttpProtocolBindingBase.java:229)
        at com.vmware.vim.vmomi.client.http.impl.HttpProtocolBindingImpl.send(HttpProtocolBindingImpl.java:114)
        at com.vmware.vim.vmomi.client.common.impl.MethodInvocationHandlerImpl$CallExecutor.sendCall(MethodInvocationHandlerImpl.java:693)
        at com.vmware.vim.vmomi.client.common.impl.MethodInvocationHandlerImpl$CallExecutor.executeCall(MethodInvocationHandlerImpl.java:674)
        at com.vmware.vim.vmomi.client.common.impl.MethodInvocationHandlerImpl.completeCall(MethodInvocationHandlerImpl.java:371)
        at com.vmware.vim.vmomi.client.common.impl.MethodInvocationHandlerImpl.invokeOperation(MethodInvocationHandlerImpl.java:322)
        at com.vmware.vim.vmomi.client.common.impl.MethodInvocationHandlerImpl.invoke(MethodInvocationHandlerImpl.java:195)
        at com.sun.proxy.$Proxy51.currentTime(Unknown Source)
        at com.vmware.eam.vim.server.impl.VimRoot.rootOperation(VimRoot.java:101)
        ... 9 more

2023-06-06T02:20:34.778Z |  INFO | vim-monitor | VcListener.java | 131 | Retrying in 10 sec.
Where I work historically, we have used Dropwizard, a Java framework for creating web apps a lot. This framework went head-to-head with Spring Boot, in the last few years and has seem to drop out of favor with the community. Nonetheless, I thought for a new project I would dive into using that to get more acquainted with it. After trying to get two of the basic things I needed done, I ended up giving up on Dropwizard and pivoting to Spring Boot instead.
The first big library I tend to use with Java projects, especially web apps, is jOOQ. This framework creates simple objects and gives many ways to interact with your database. The best feature for me is you can have a Gradle plugin scan your database, then create all the objects automatically in Java. Not only does this save you from handwriting a bunch of SQL queries, but it also means when you update the database (probably using something like Flyway), your objects automatically get updated. Now when you compile your program, if you forgot to add that new field somewhere when editing an object, you get a compilation error instead of the application silently failing SQL queries in production.
Dropwizard does not natively support jOOQ, I went looking for a library to add the support I needed. I found benjamin-bader/droptools library. It seemed to do what I needed. I got it wired in, and soon everything was working! I could make objects and with one or two lines edit objects web requests. Wonderful. Then Dropwizard did a major update; version 3.0 was created to keep the javax namespace, and 4.0 was created to move to the jakarta namespace. These versions also moved a bunch of the internals of the Dropwizard libraries around, meaning supporting libraries like droptools would need updated.
That’s when I saw droptools had not been updated for 3 years… I decided I would open a GitHub issue. With not hearing anything for a few days I started tinkering with it. I got a updated build working for Dropwizard 3.0 and did a pull request back to the main repo. In doing this I realized with the Dropwizard 3.0 and 4.0 split, we would need at least 2 versions of the library created at one time. Then on top of that, jOOQ 3.16 was the last to support Java 11, and jOOQ 3.18 was out as the main community supported branch. This means we need to make 4 versions; 2 with Dropwizard 3.0, and 2 with 4.0, then each one having jOOQ 3.16 and 3.18. I rewrite the build pipeline from the Travis CI the repo had to Github actions, and got all 4 versions compiling with some regex to do the edits in the code that were needed. I then used my earlier article, to publish these 4 assets to Maven Central.
This allowed me to update to Dropwizard 4.0, and the Jakarta namespace.
Next, I need to get basic authentication working. My plan is to use Google OAuth as the login mechanism. I do not feel like writing my own for a side project, and out of the ones out there (Google, Facebook, Twitter, Github) I thought it had the most coverage of people, with the least surveillance factor. It is easy enough to get setup with a developer account and get the client-id and secret I needed for OAuth.
Now I had to wire up the OAuth on the application side, this is not too hard I have done this many times with applications at work, but usually there I am using internal libraries. Heading over to the Dropwizard docs didn’t give me exactly what I wanted. They are pretty sparce, and when it comes to setting it up, they mention how to do OAuth but then mention you need to write your own Authenticator and Authorizer for it. I don’t want to do that. I have done that before for servlet-based apps, but this is supposed to be a fun thing, and on the general internet I want a supported auth library. I went searching for an example of how to use the OAuth system. I could not find anything that got me what I wanted.
Then I remembered using Pac4J before with other Java frameworks, this is a security library that has support for many login methods, and many web frameworks. Dropwizard is listed as supported! But the last time it was touched by a human, and not a bot, was over a year ago, and that was just for a small CI fix… I’ll try to get it working anyway!
The dropwizard-pac4j library is what I need, and there is a dropwizard-pac4j-demo which walks you through setting everything up! I get the demo working, I added in Google login support, which wasn’t there by default. Then I spent a day… Where I wanted to get this auth working on Dropwizard 3.0 or 4.0. I don’t want to start working in the older 2.x framework to get stuck later. I downloaded dropwizard-pac4j and the demo locally and started editing them to get the dependencies updated and try to get everything onto the jakarta namespace.
This is where the dependency hell came in. dropwizard-pac4j-demo depends on dropwizard-pac4j, which makes sense. dropwizard-pac4j sets a lot of your project versions based on what it has in it. After updating a ton of dependencies to try to get it to compile it came down to DropwizardTestSupport.java failing to run because it relies on jax-rs-pac4j. jax-rs-pac4j is still in the javax namespace and hasn’t been touched by a human in 6 months or more. This library would need to be updated, because it links directly to the main Jetty Server project which has a dependency on jakarta.servlet.SingleThreadModel in ServletHolder.java, which has been deprecated and removed (discussion), then and I could not get the demo project to load with any combination of dependencies. They all wanted this Jetty 11 file, which should have jakarta.servlet.SingleThreadModel removed, but doesn’t.
I went back and tried to move to Dropwizard 3.0, going back to the javax namespace, but that opened up a bunch of similar issues and a ton of conflicting dependencies in different versions of code dropwizard-pac4j needed. I have my code on GitHub if anyone wanted to continue this journey, or in the future things are in a better place.
With all of that, I thought I would go and check the documentation for Spring Boot. There is a giant page, with in-depth, step by step instructions on how to get Google or GitHub auth working in your app. There is a night and day difference between the support and thoroughness of Dropwizard docs and Spring Boot. With seeing that, I had to decide to change my plans away from Dropwizard. Many on the Java subreddit will debate Spring Boot vs Quarkus; for me, who has only used servlets in the past with embedded Tomcat, I think starting with the popular Spring Boot makes the most sense.
As I have mentioned in previous posts, I am working on a side project where I work with podcast feeds. Part of the idea is being able to act as a sort of middleware for podcasts. Give the application your podcasts, and you will be able to do things like search transcripts; and, if a podcast has a long intro on each episode, remove that. Searching for where someone mentioned a thing in an episode can be hard to research by just scrolling through an episode; if computer transcripts are 95% effective, that is better than nothing. For trimming podcasts, I find when you go through a big backlog of podcasts, hearing the same 1-minute intro every 30 minutes takes a good chunk of time.
Being that I use Java a lot for work, and am comfortable there, I wanted to make this project with Dropwizard and React. The first bit of the project has been working on the audio recognition engine, which will be a whole post in and of itself. After that I needed to start getting the supporting libraries I wanted. I tend to try to make as much of my code native to the language I am using as possible. That means we want to do as much in Java itself as possible. There are a ton of libraries that call out to FFMPEG or a command line app to handle the feeds; I don’t want to do that. If a side effect of this project is helping the community and writing some additional libraries, that is a win in my book.
PodcastFeedHandler
The first library I needed was a library to read AND write podcast feeds. With this app being middleware, we need to be able to do both. I found MarkusLewis‘s Podcast-Feed-Library, this works great for reading feeds in, but does not support writing. I took a look at his library and architecture a library similarly, except added the ability to get your feed object and then write it out again. In the end I made https://github.com/daberkow/PodcastFeedHandler. This library is written entirely in Java with no dependencies. Using Java 11, I can have all the native XML parsing I need. The rest of my project is in Java 17, but I thought others may find 11 useful. I am not sure there are any fragments in the library that wouldn’t allow me to go lower, except its 2023, and 11 is an older LTS at this point. An exciting part of that sub-project was getting Maven publishing working. Now I can publish for my domain of ntbl.co.
This project also got me used to using Github Actions. I have used CircleCI before but thought I would try Github Actions as they give you unlimited runtime for public repositories. Thanks Microsoft! I have the library build, get signed, and upload via Actions. I wanted to make sure the library preformed as I wanted and reached out to JetBrains to get an Open-Source maintainer license for Intellij. They kindly approved me!
Java-LAME
The next part of the project was parsing and fingerprinting the audio to search for duplicate segments. I will get more into that at a later time. To be able to fingerprint I needed the WAV/PCM format of the audio. Podcasts tend to be MP3 or AAC files. There are a ton of libraries to convert media in Java, except most of them had a FFMPEG external dependency. That is something I wanted to avoid. By having 100 percent native code, I can more easily create the workers that will handle these duties. Anywhere Java can run, they can run on or be compiled to; instead of having external dependencies.
I found nwaldispuehl‘s java-lame, this is a copy of the fantastic native Java port of LAME; described as “This java port of LAME 3.98.4 was created by Ken Händel for his ‘jump3r – Java Unofficial MP3 EncodeR’ project: http://sourceforge.net/projects/jsidplay2/“. The library hasn’t been updated in a while but does everything I need. It can convert MP3s but needs a file location to be passed in before converting to a byte array. I do not want to have to write to disk. The workflow would be, download podcast, store on disk, read from disk, convert. We should be able to do all this in memory. Doing all these operations in memory also means the workers do not need a bunch of scratch disk space, which is a plus. It’s more memory intensive but cuts down on disk usage. In 2023, I would rather have a slightly more memory intensive application than be doing a ton of extra read/writes to SSDs.
Throughout this project I have been thinking of: if I use it a lot or have friends using the web app, and it is constantly reading and writing audio files, how can I minimize bottlenecks. I forked the Github repo for java-lame, then added in paths to allow in-memory MP3 feeding and processing. This allows me to add a S3 client to the workers, and natively work on those files without ever writing to disk.
This library has a bunch of more functionality than I am using. It was a full LAME port, including the command line system and processing. I am planning to remove that as I go to shrink the library. I also want to replace some of the core conversion to WAV/PCM into having it in-memory compression, and functions to handle chunking the files and processing them piece by piece.
I took a This American Life episode, 1 hour in length, 67MB as MP3. Converting it to WAV/PCM I needed created a 678MB file. About a 10x size difference. Compressing that data lossless-ly with standard ZIP compression got the file down to 437MB, about 65% the size the original WAV/PCM. I can retrieve the ZIP data as a stream, and being audio, I am not jumping around; thus, that works well for me. 678MB for a file doesn’t sound so bad, a worker then just needs 1GB of RAM or so to process it, right? My worry is other podcasts. Shows like Dan Carlin’s Hardcore History can easily be 5 hours per episode, that is a 200+MB MP3, and then would be 2-3 GB of RAM to process one episode. If I can take 35% off for relatively small compute overhead, I want to.
I will post more as I go through the project. If these libraries or the blog have helped anyone, feel free to drop a comment! I always appreciate it when people do.
(The photo is something I through together on Bing image creator, its Java with audio 😊 )
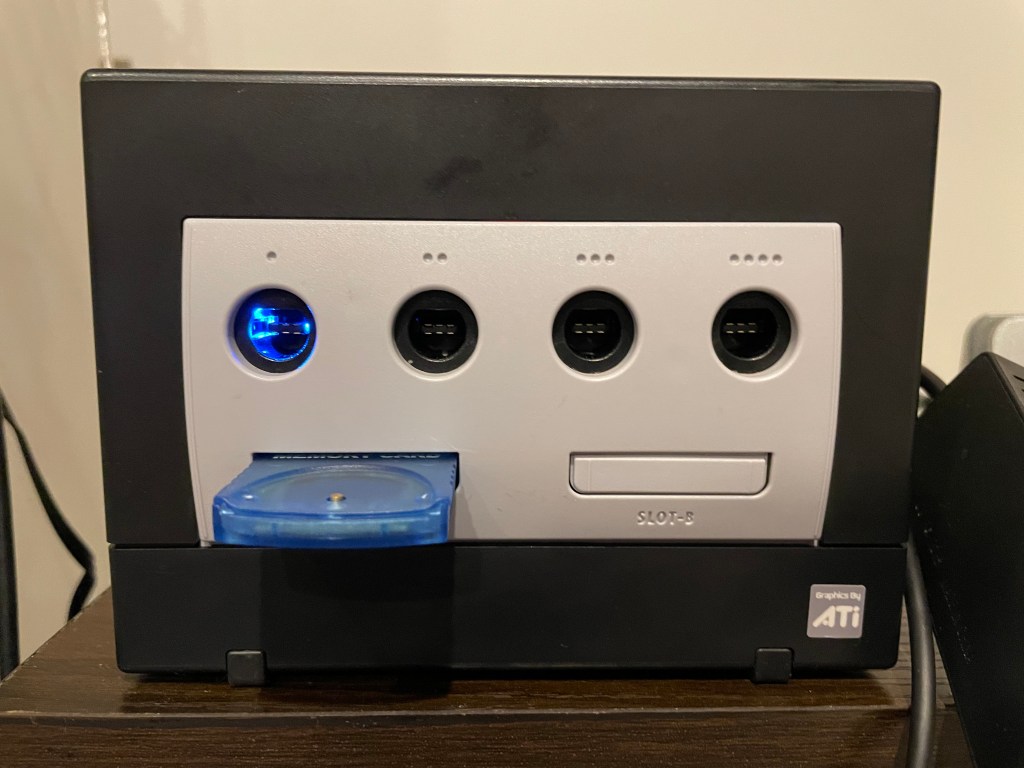
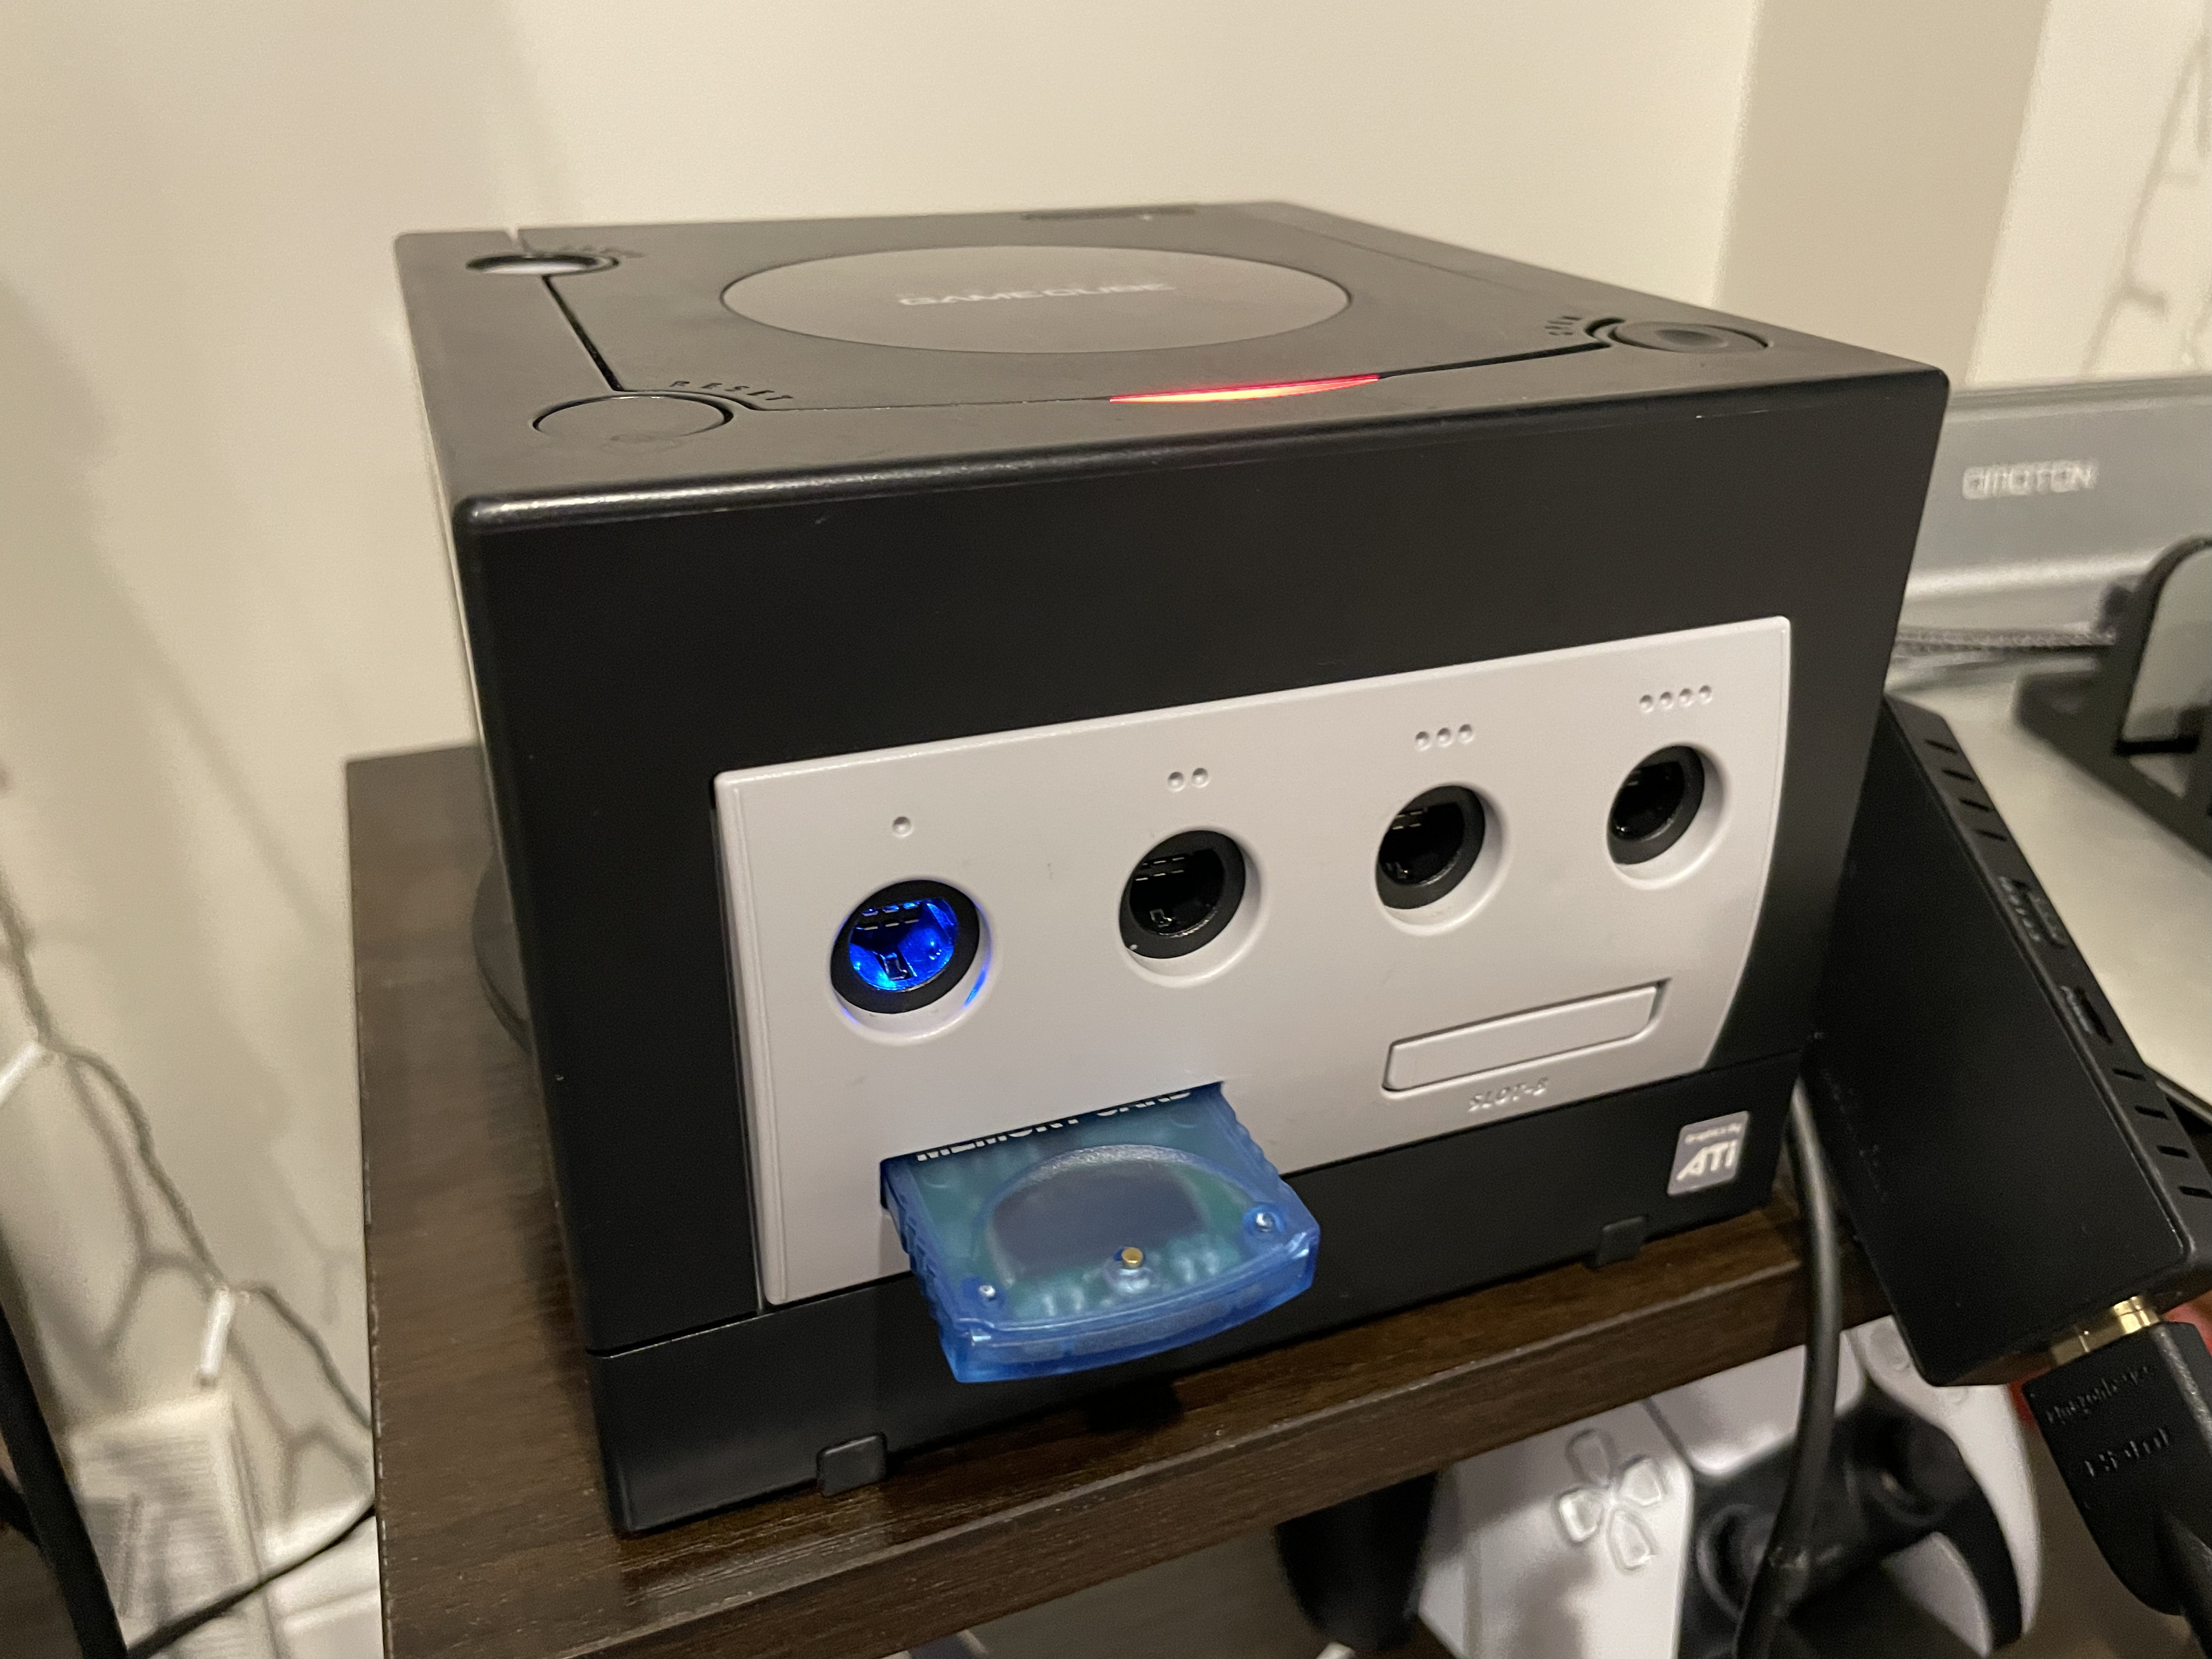
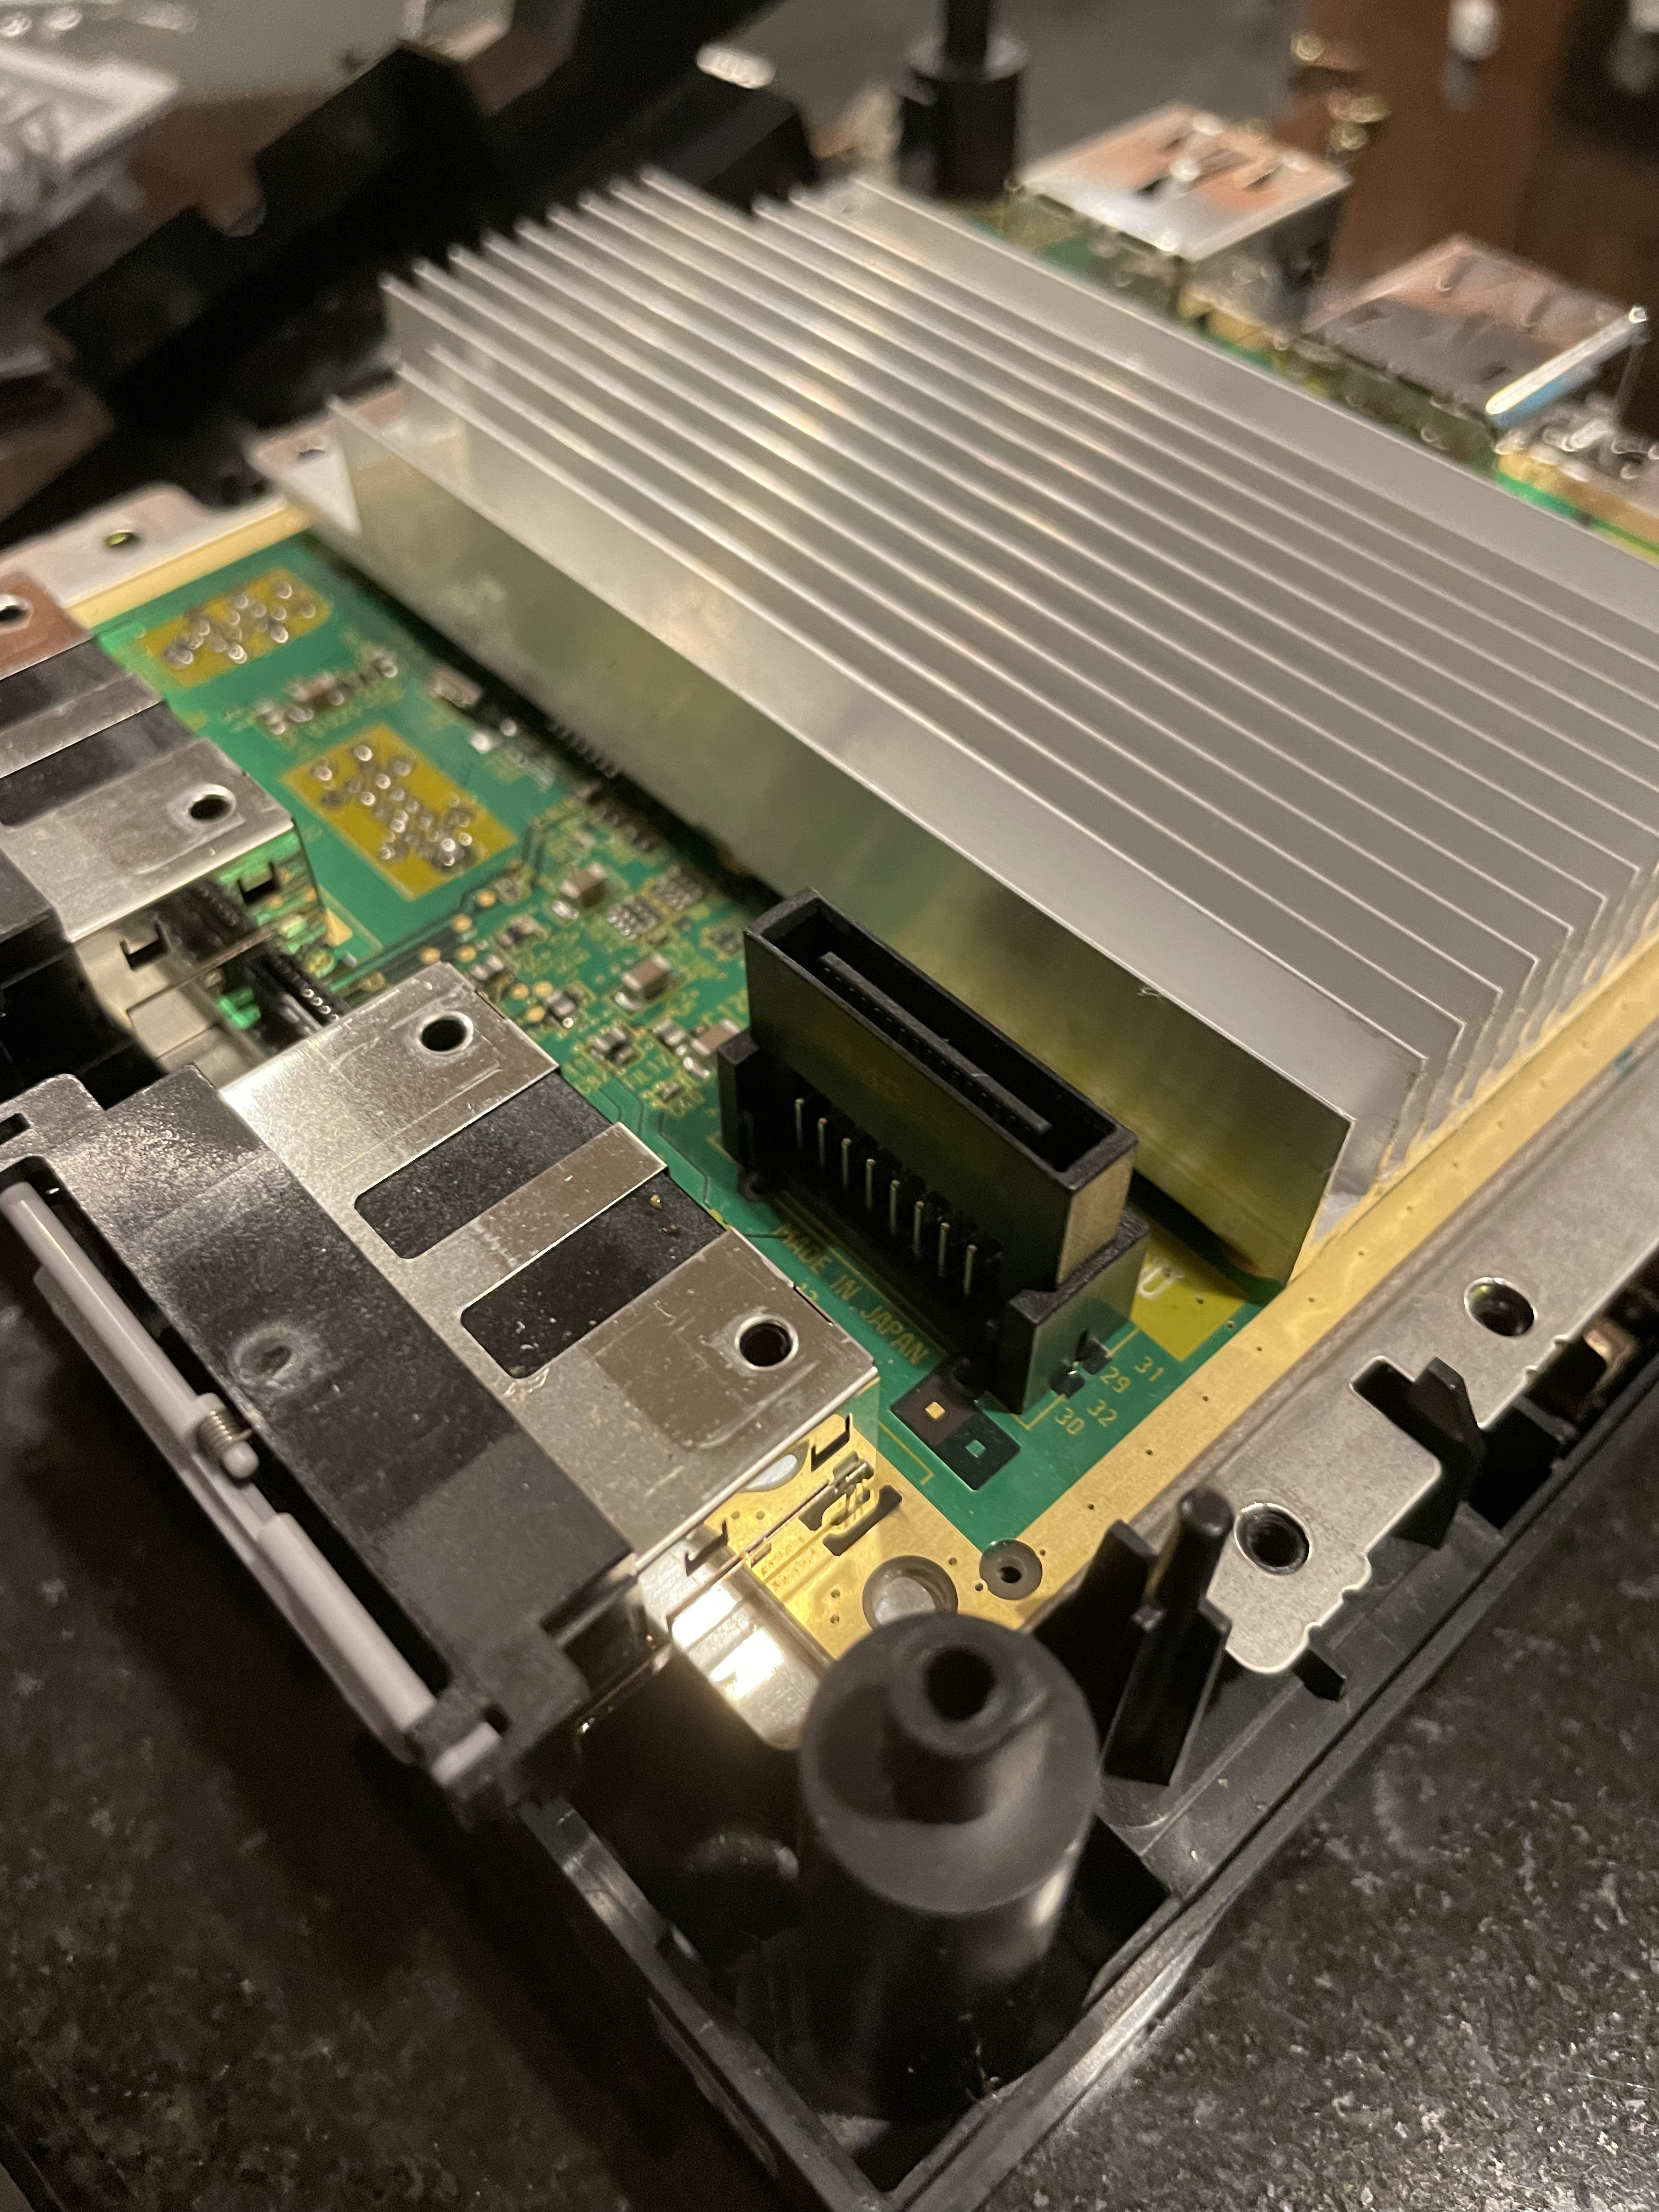
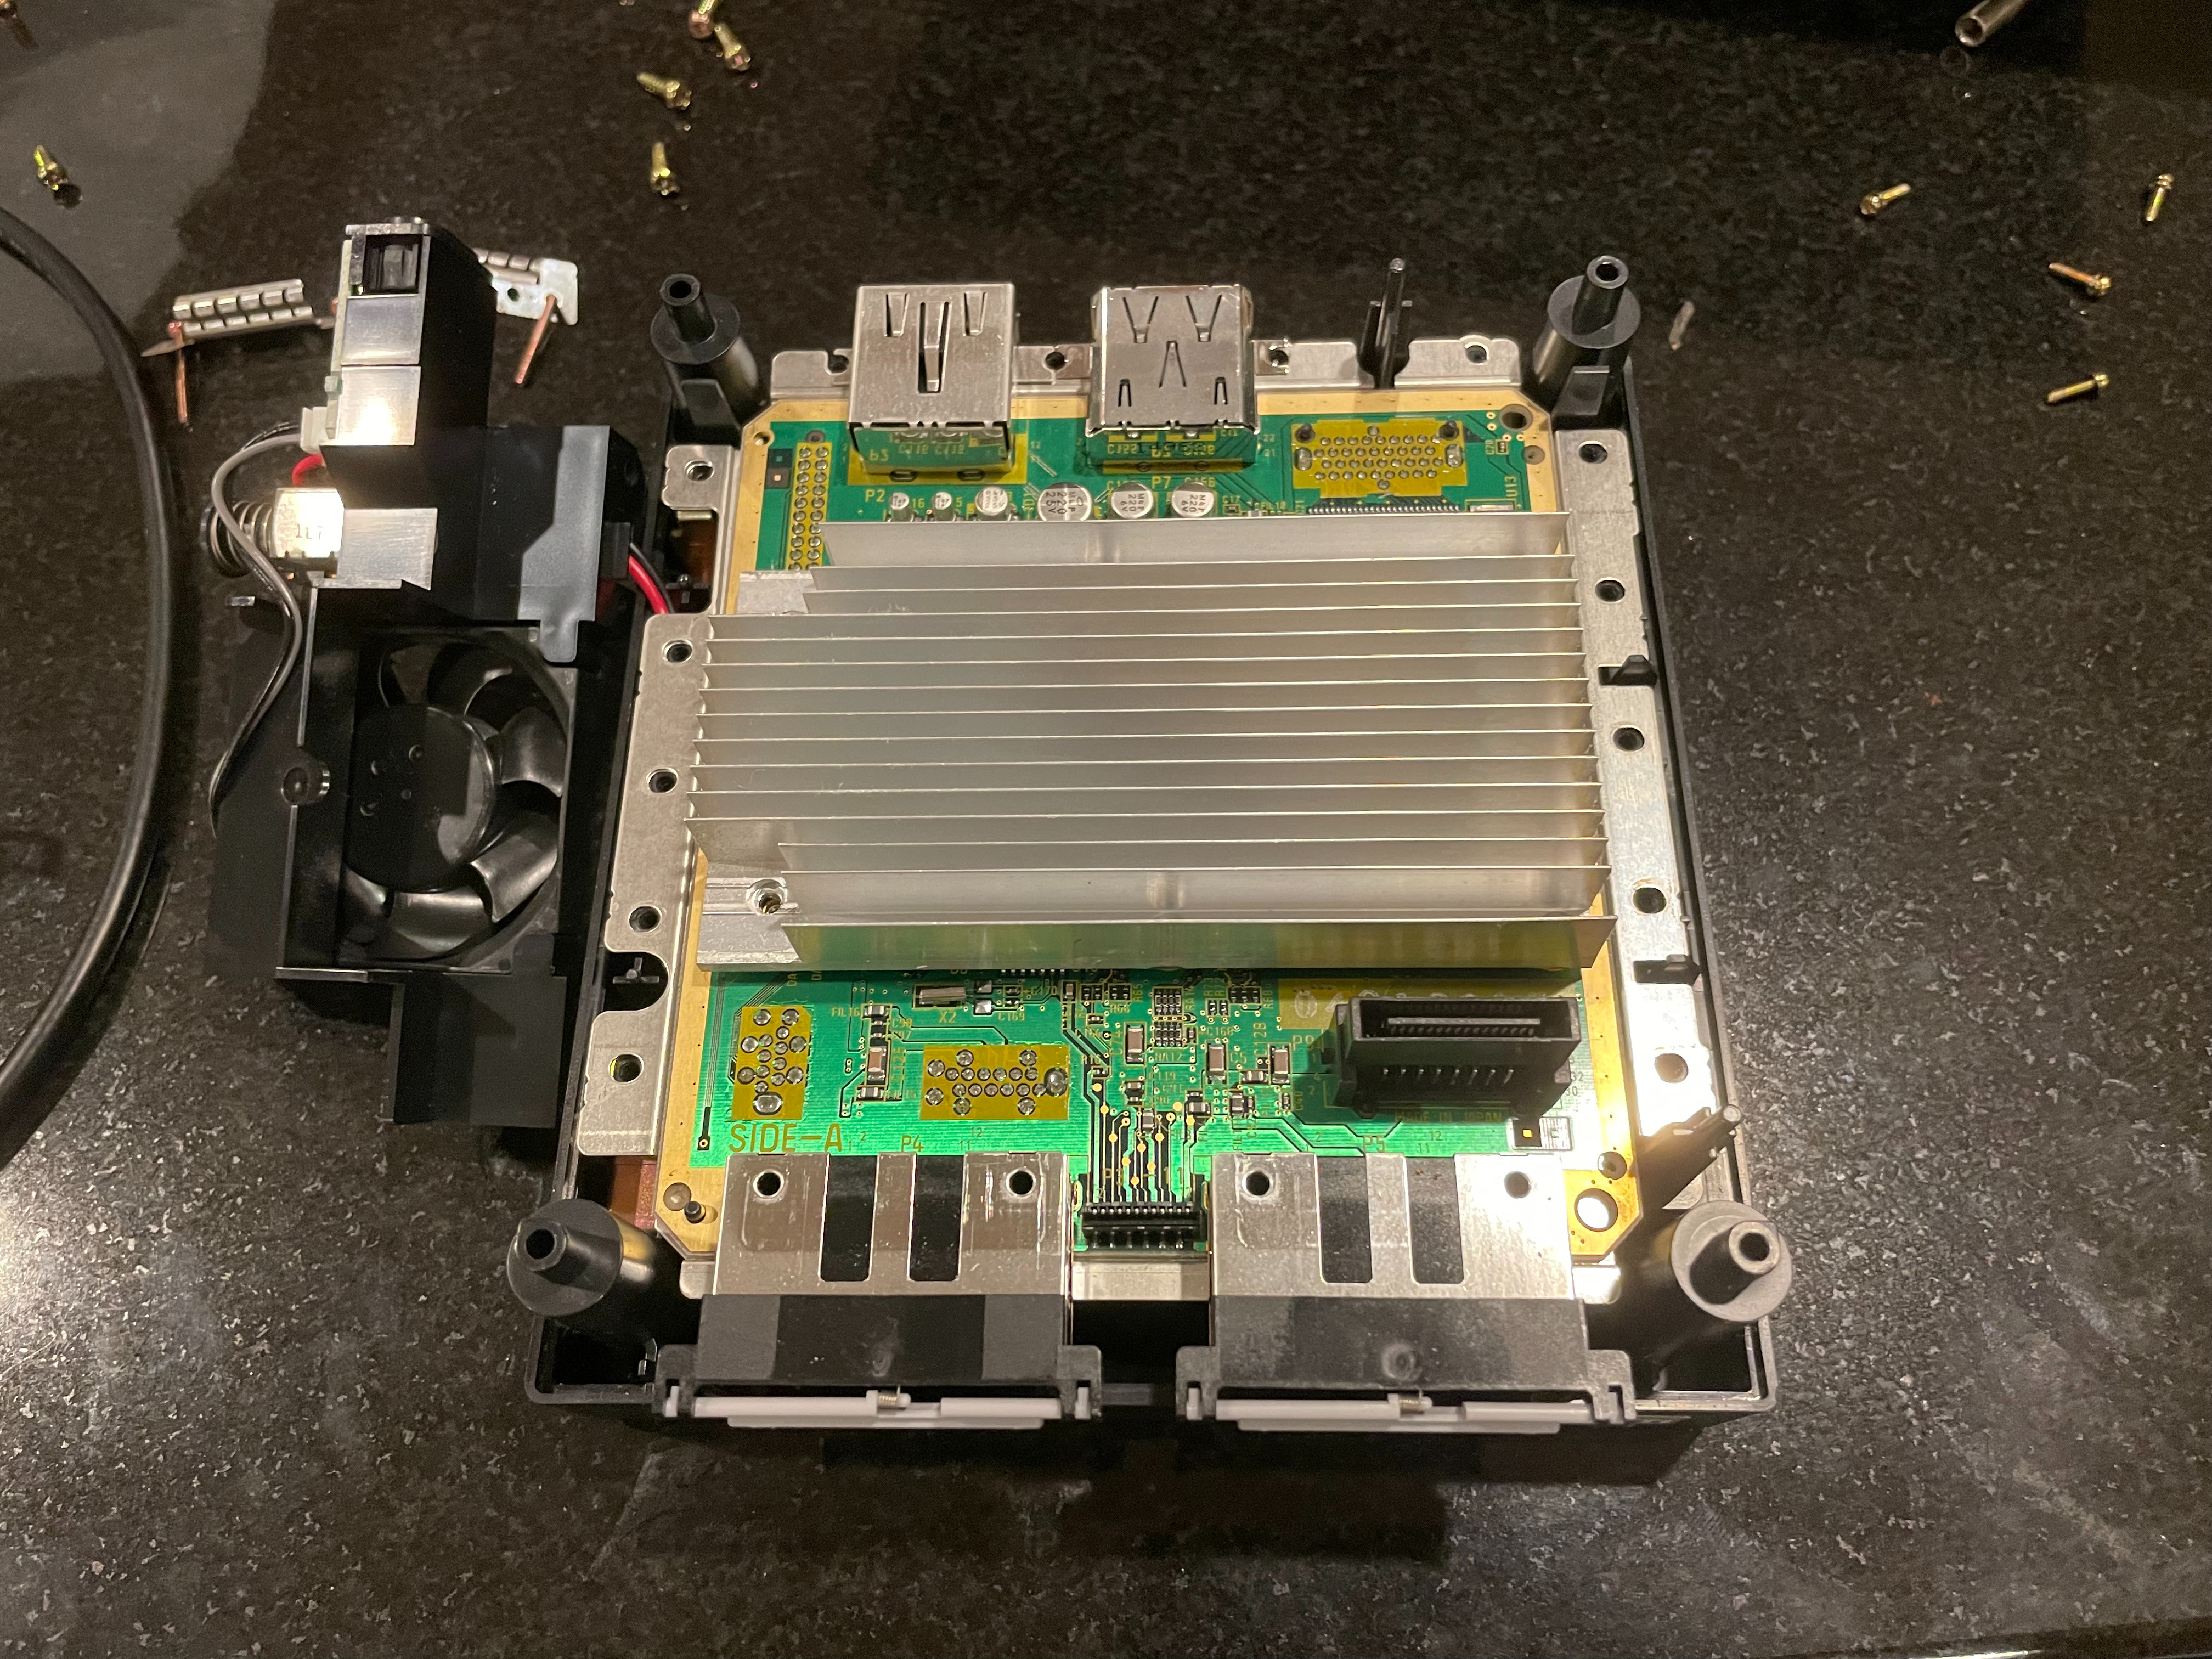
I have… many… older video game consoles. One thing I like to do to them after they have ended support and enter old age is add available mods to them. This offers updates after official support and features; such as downloading discs I own to a memory card or hard drive. Many times, older console CD/DVD drives will start to die, and with the way some systems (Xbox specially) cryptographically pair the motherboard and CD/DVD drive you can never replace the drive. Having a GameCube and recently seeing the amazing work of Maciej Kobus on PicoBoot, I had to give it a go. PicoBoot uses a Raspberry Pi Pico (an Arduino competitor) to jump into the boot process of the GameCube and load Swiss, the GameCube software manager.
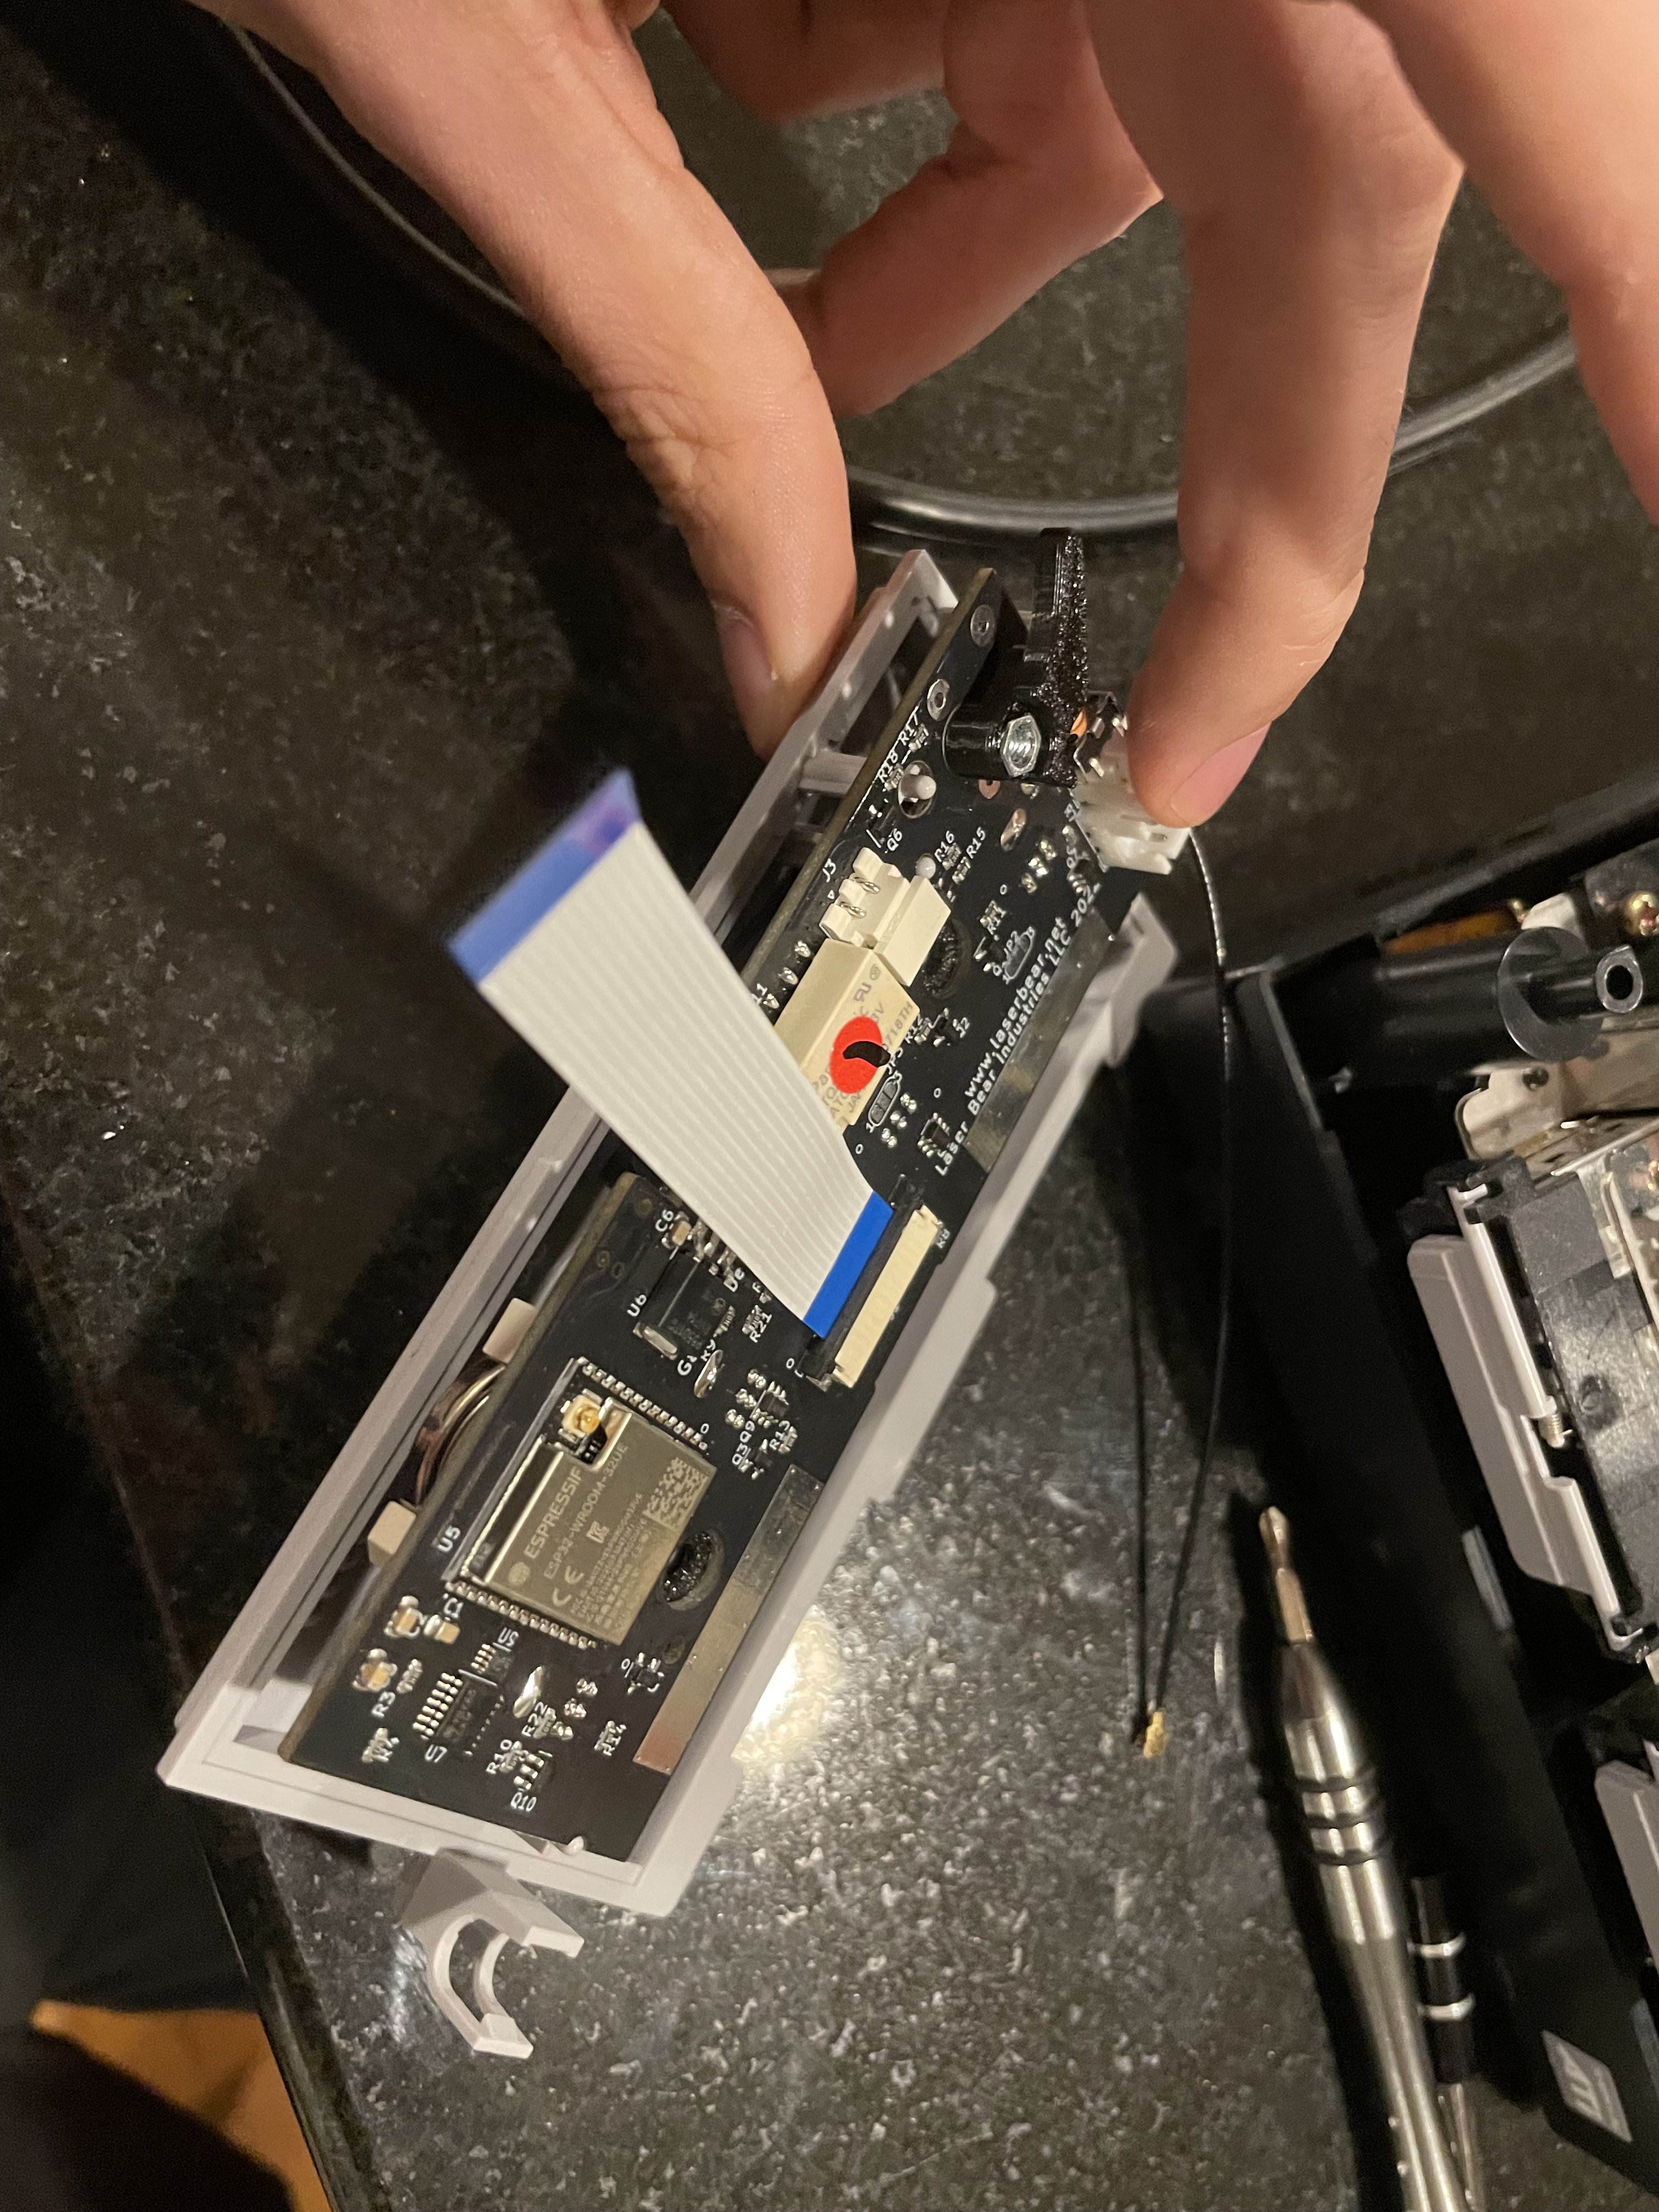
The other piece of hardware that started me down this whole path was the LaserBear BlueRetro replacement controller board. This board replaces the board controllers plug into and allows you use to modern bluetooth controllers instead! You can pair any Xbox/PS3-5/Nintendo controller with bluetooth to the console, and when you do the controller port lights up blue!
This introduced me to the BlueRetro project, and awesome project which aims to allow you to use those modern controllers on classic consoles! There are many sellers using this open-source code to make products, many of them on Aliexpress and other stores. The most impressive thing is the adapters tend to be a reasonable price on Aliexpress from many vendors with good reviews!
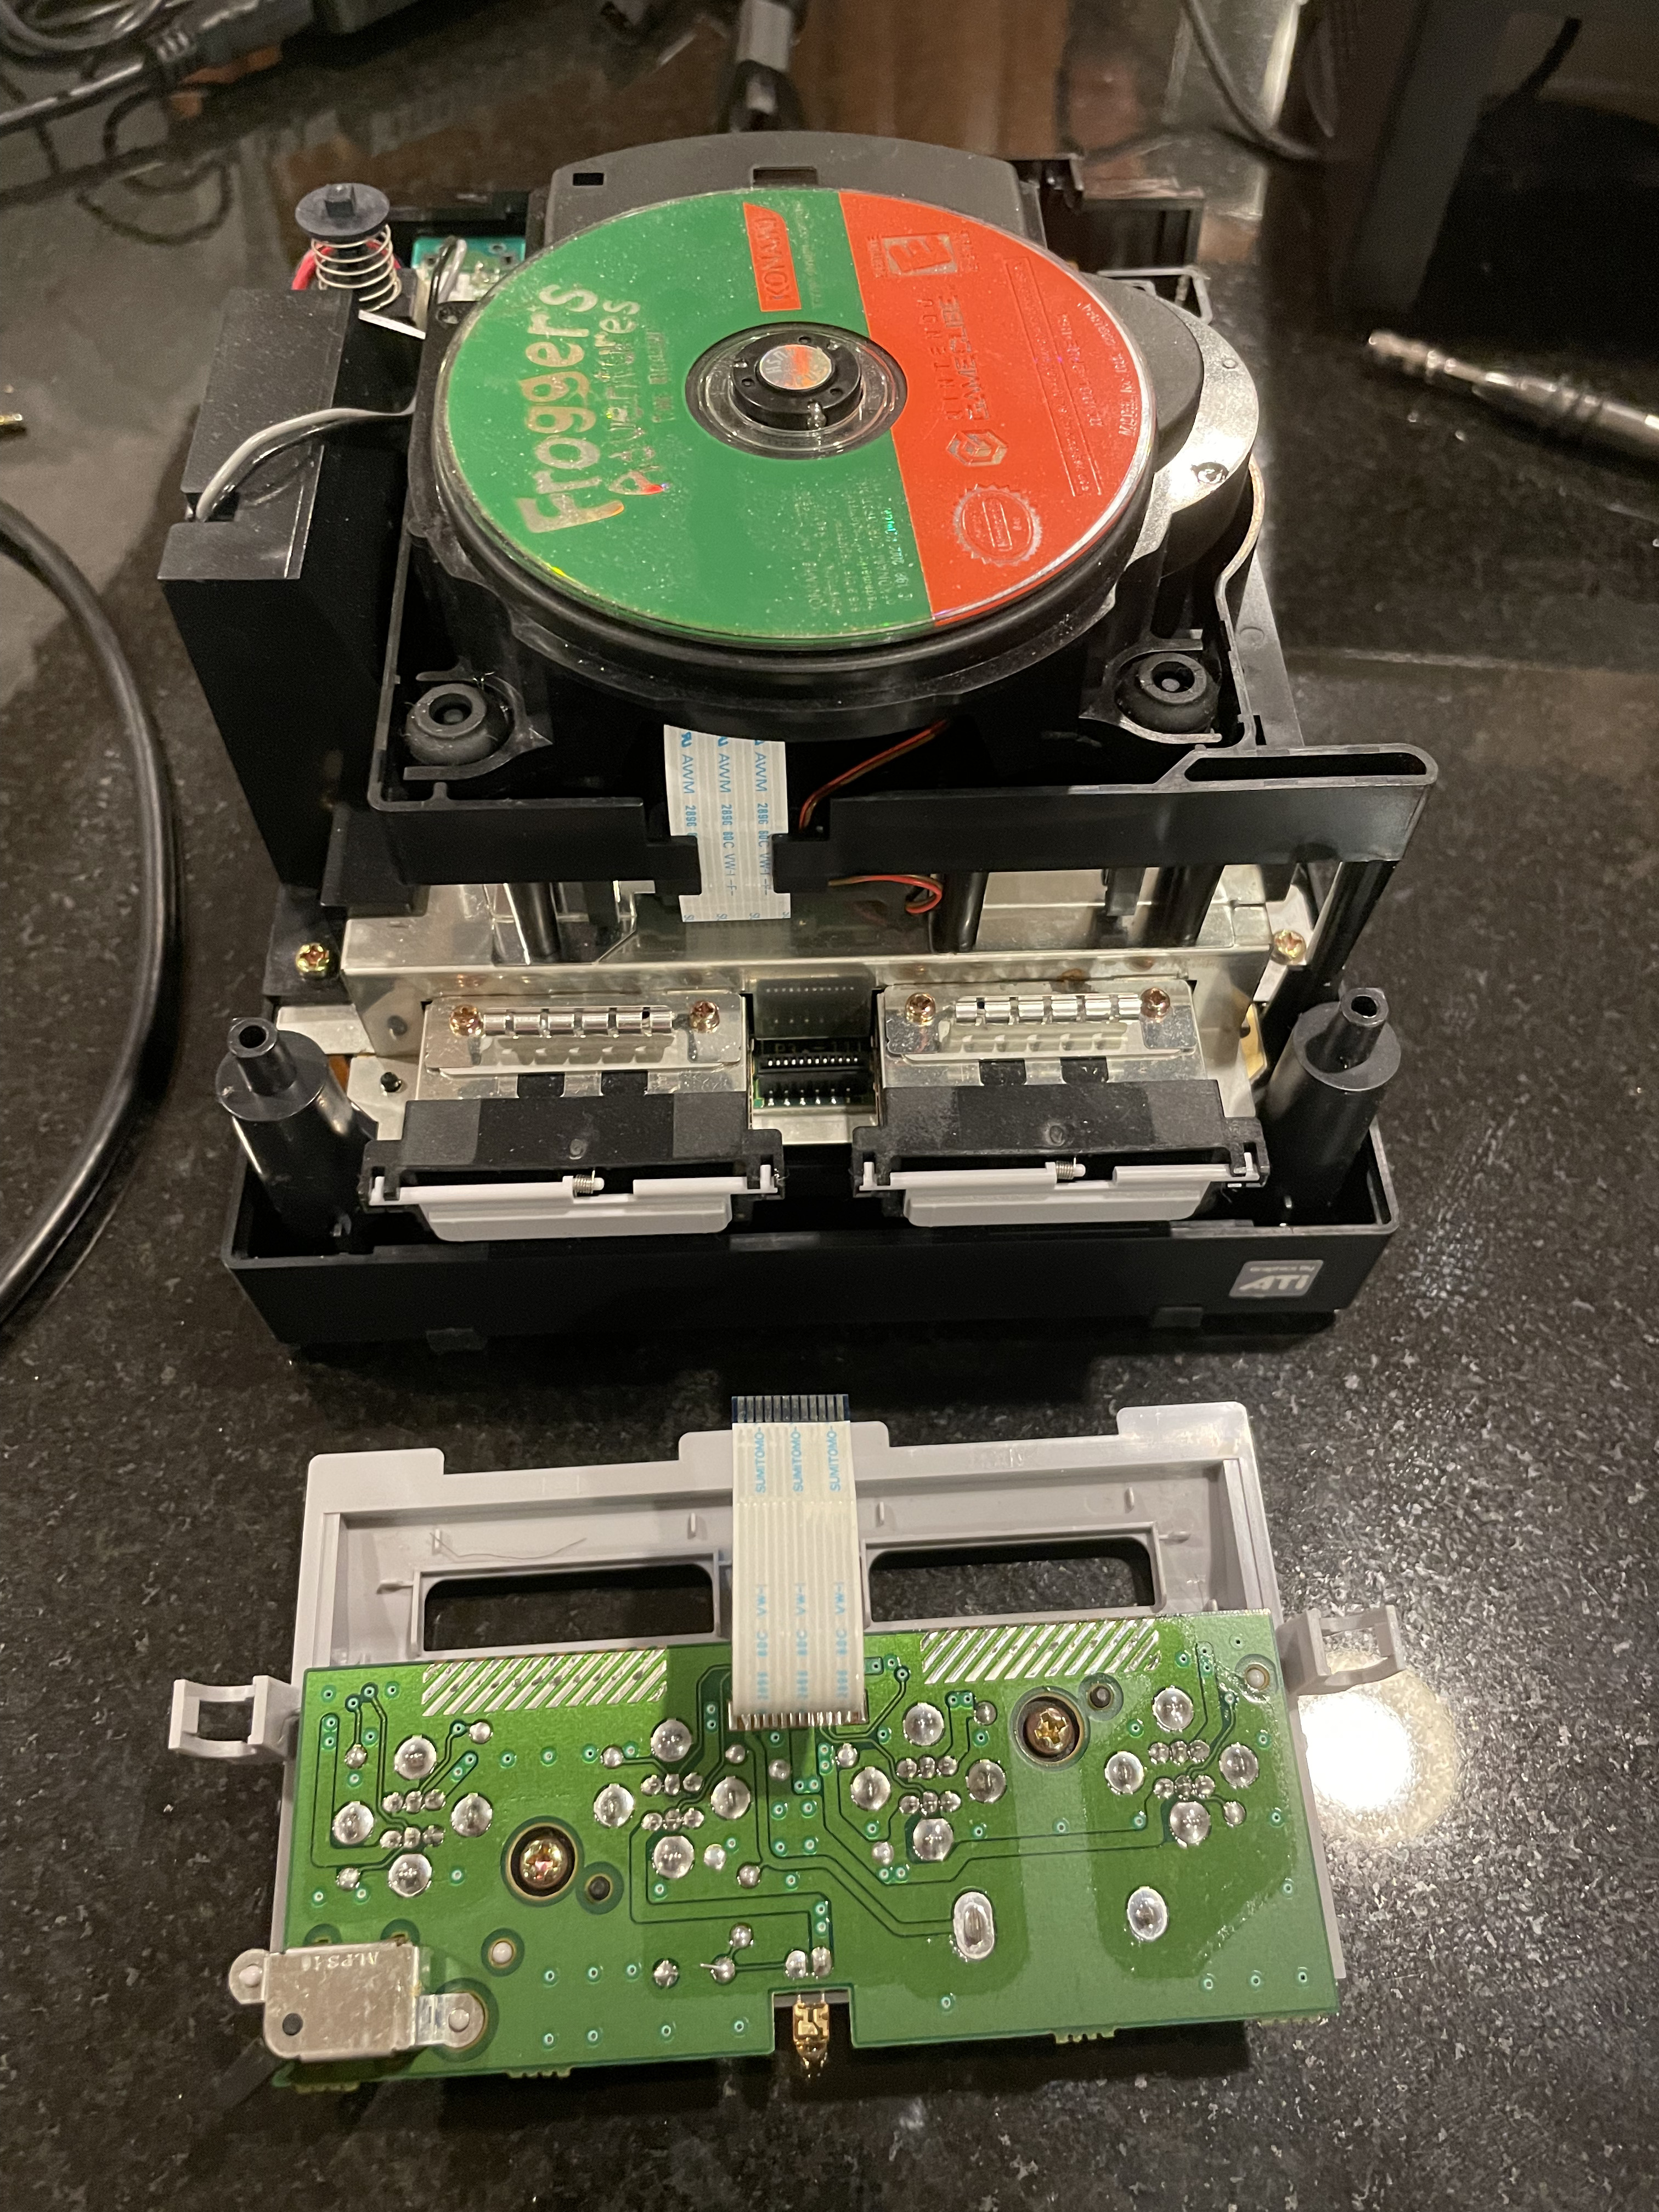
The Laserbear mod is straight forward, and they include a great guide. It involves removing the old controller board, placing the new one’s ribbon into the slot, and then moving 2 power wires. Very straight forward, no soldering.
On the flip side is the PicoBoot install. I have not used a Raspberry Pi Pico before; I am more familiar with Arduinos and older microcontrollers. The code uploading method is very neat, you hold a button, then the device mounts as a drive on your computer. you copy the binary file onto the drive, and when you eject the device it writes the payload. The next part of the install involves soldering, and this soldering is a bit tiny. The install is only 5 wires, but you are working on a small board, with wiring that cannot be that long because of how the mod works with the boot process.
Luckily there are many guides on YouTube on how to do this. And on the first try I had it working, and in the end stuck it behind where the BlueRetro lives. For PicoBoot to load, you also need a SD card adapter for the GameCube. Those are available on eBay/Amazon/your local mod shop for cheap.
The PicoBoot in the end was a little too close to the controller board for my liking, I added electrical tape to the top of the Pico to make sure no contact was made between these lovers. This was a fun afternoon, and now I can get a longer life out of this little guy. I also got a HDMI cable for the GameCube, the model of GameCube I have allows for digital out, but those cables are expensive so I am using the analog out right now.
I recently started a new, grander, project for my spare time. The project involves working with Podcast feeds, and I was going to use this as an opportunity to use a framework I haven’t before, Dropwizard. I found a Java library that did what I needed in MarkusLewis – Podcast Feed Library; except this library only read feeds, I want to be able to read AND write. I decided to make my own, and I wanted to host the library, allowing anyone else to use it if they want. I created the repo and got a basic version working. This is the repo which can be referenced as an example.
I am using GitHub Actions as my CI/CD pipeline. I thought I should easily be able to host the final Jar files there for Gradle. Turns out, this is sort of true… If you host your library on GitHub itself, as this doc goes over, you can easily upload and host the packages; except there is no un-authenticated access to it. No matter what, an end user has to auth with Gradle/Maven before downloading the assets. Instead of dealing with that (specially for a public repo), I thought I would give a try to getting my package into Maven Central. Once I figured out the process, and found out how to publish with up to date Gradle, it as straight forward. I thought I would document it for the greater internet, and my future self (I have already used it). I know others have done this as well, except I wanted to do it with Gradle instead of Maven, with GitHub Actions doing all the work.
Throughout this guide there are items you need to record to bring to the next step, I have underlined the important ones.
Steps:
Setup Repo
Register For Maven/Sonatype
Setup GPG for Repo
Configure GitHub
Publishing
Setup Repo
Setup a normal GitHub repo, and setup a blank Gradle project. More on the repo/Gradle config later.
Register for Maven/Sonatype
Sonatype is the company who runs Maven Central. They allow free hosting and registration for Java Libraries; the main requirement is for it to be under 1GB in size per file. This adventure starts over at their Jira to register for an account, this Jira account will be your credentials for all future interactions with Maven Central, so make them secure, and have a long password! Once you have an account, use the above like to go to their Jira again to create an issue. This ticket grants you permissions to publish to https://s01.oss.sonatype.org/. You can also login there with the credentials created for Jira. You will have to verify either your GitHub account, or your domain before publishing. A bot handles all this and I had it done in 20 minutes or so. I have a domain I wanted to use, and there is a guide on how to go through this process.
Once you register a group ID you can use this account to publish anything under that ID; for example, I registered my domain of ntbl.co (making the group ID in Java terms “co.ntbl”. First, I published the library above, then I added a fork of a Java-Lame library; I tried to submit a ticket for the second library to be sure, and the bot tells you that you are already good to go.
Setup GPG for the Repo
One requirement for posting assets to Maven Central is to GPG sign the packages. This means we need to generate a key, and then upload the private portion of the key to GitHub secrets, and the public to a public key repository. Below are the commands to do this, the key ID is an example one I have, you will need to replace it with yours:
Line 1 creates the keys, for name you enter the full project name, for example: co.ntbl.podcastfeedhandler . Group ID + the project root name. The email can be any email you have. Then the passphrase which will be used and uploaded to Github secrets. I suggest using a password generator and making it long, you should never have to actually type this in. Next, the exports are for you to back up the key incase the system you are creating it on dies and the data is lost in the GPG instance. You shouldn’t generally need it after this is setup, but it felt like best practice.
Record the output of the 7th line (export-secret-keys), that will need to be added to the Github secrets in the next step.
Configuring GitHub
The last command publishes the public keys to a global repo which is checked against. If this publish is not done, then the verification of the package will fail.
The two items we need to upload to GitHub for GPG are the password added when the key was generated, and the private key we got from the 7th command.
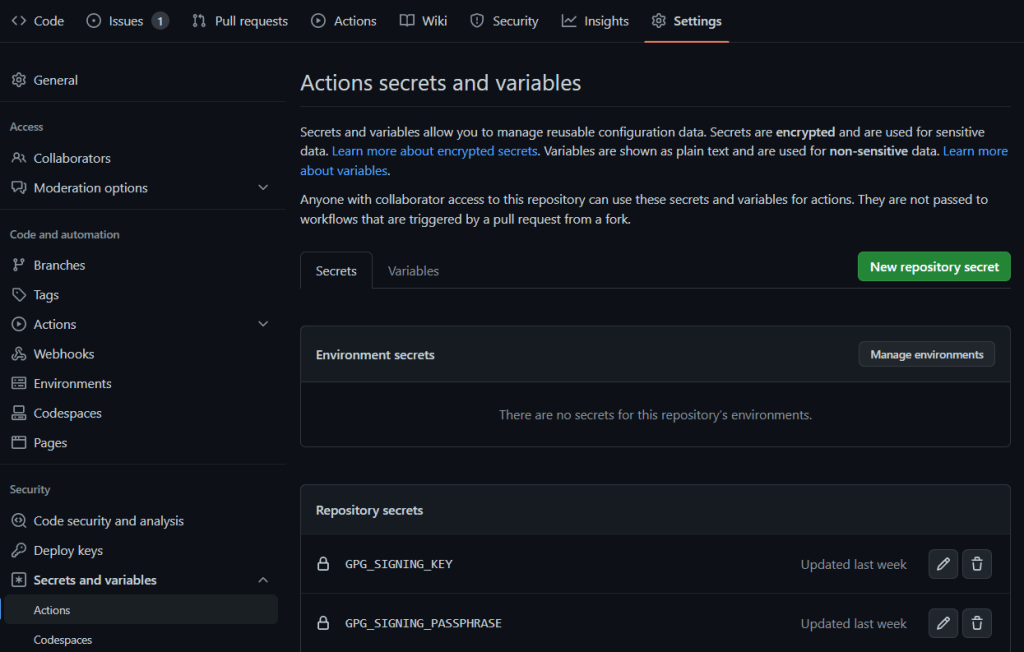
Go to your GitHub repo, then go to the Settings tab. Using the left-hand navigation, go to “Secrets and variables”, and the “Actions” submenu.
We need to create 4 secrets; these need to be kept secret:
GPG_SIGNING_KEY – The private key, copy the text from the “–export-secret-keys” command, this formats it correctly. The string should start with “—–BEGIN PGP PRIVATE KEY BLOCK—–“
GPG_SIGNING_PASSPHRASE – The password added when generating the key
OSSRH_TOKEN – This is the password you set for Sonatypes Jira
OSSRH_USERNAME – The Sonatype Jira username
Below is a minimal example build.gradle for your project. I removed a lot of normal extra things you would add to a buidl.gradle, to see a full example, visit this GitHub repo.
A few things to point out. Under publishing you need to enter all the information for this repository/project. If you have another publishing section in your Gradle file you will need to condense them together. Having multiple leads to Gradle getting confused and usually using the first one it sees. You will also see some variables such as “MAVEN_USERNAME”, these get the values of our secrets during the GitHub actions publish process, which we will go over next. I am getting the version, and using the end of it containing “SNAPSHOT” to say if we should publish to a snapshot repo or prod.
I also am using the build.gradle version as the canonical version. This variable could be in a Gradle settings file, or properties, but for ease I have it in the build file. I want 1 version file location; having multiple leads to more confusion during releases. The createProperties task creates a properties file that is added to the build to give the code itself a way to see which version it is. There are more elaborate ways to do this, but it works for me. This function does need the resources folder to be in the “src/main” folder; if your project is not using this the easiest way to add an “empty folder” is add the “resources” folder and then add the following .gitignore to it. This will make sure the contents of this folder are never saved.
# Ignore everything in this directory
*
# Except this file
!.gitignore
Requirements for posting to Maven central are: including source, checksums, Javadocs, and signing your packages. I am using useInMemoryPgpKeys to sign in GitHub Actions. This is part of the signing plugin. I have seen others use sign configuration.packages instead of sign publishing.publications, I found that not to work in many trials.
GitHub Actions
In your repository, create a .github folder, then a workflows folder. Below is my publish.yml, or it is available here. This file is currently set to publish when a new release is tagged, you can also change this to commits or some other trigger.
Here we convert GitHub secrets to local environment variables. Note the change in name from OSSRH_USERNAME to MAVEN_USERNAME and OSSRH_TOKEN to MAVEN_PASSWORD. This is simply to make the variables more clear, and they can be whatever you wish. We also validate Gradle for this final build. Another note, in my setup we are not passing assets from earlier builds into this publish stage, we are rebuilding the jar completely, depending on the size of your job, this may or may not make sense. If you have all this setup correctly, you should be able to commit the code, tag a release with “0.0.1-SNAPSHOT” or any version ending in SNAPSHOT and it should publish to the snapshot repo.
Publishing
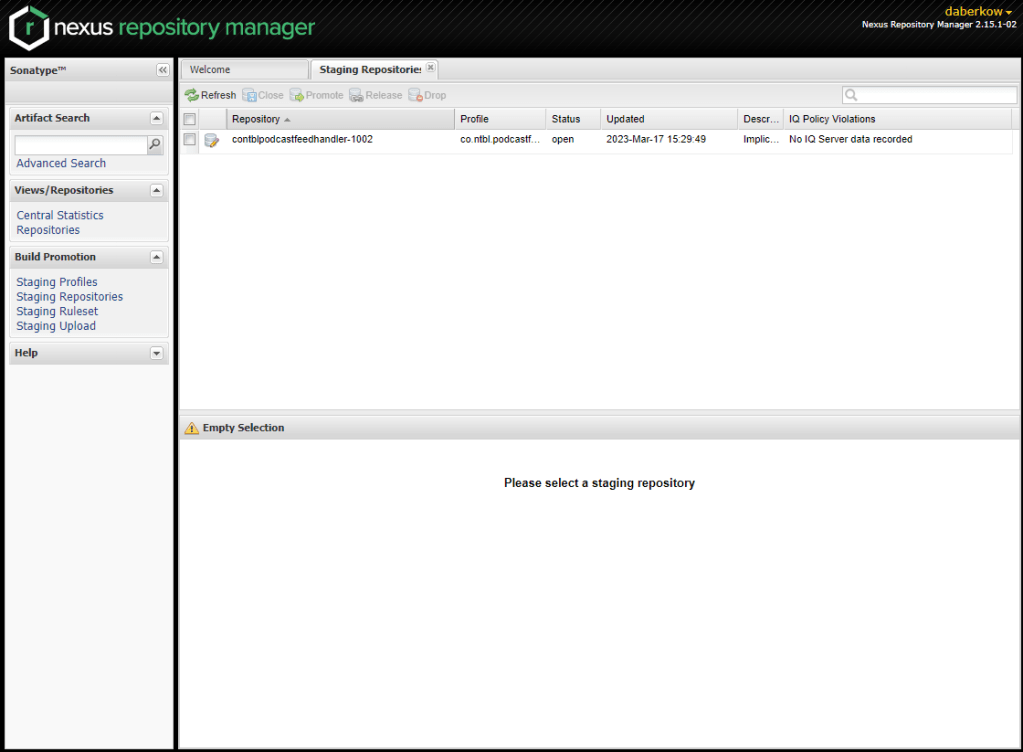
Now that we have working snapshot releases, we need to do a full release. This involves you using the credentials created with the Sonatype Jira account earlier and logging into the Nexus panel. When you are ready, go to GitHub, and mark a new release with the version not ending with SNAPSHOT. The GitHub action should finish successfully, yet your asset is not up at https://repo1.maven.org/maven2/ yet. Head over to https://s01.oss.sonatype.org/ and click “Log In” in the top right.
Select “Staged Repositories” on the left. Note: this server seems to be very busy during the day, doubly so if it is a weekday. You will frequently see “There was an error communicating with the server: request timed out”. Come back later or keep hitting refresh.
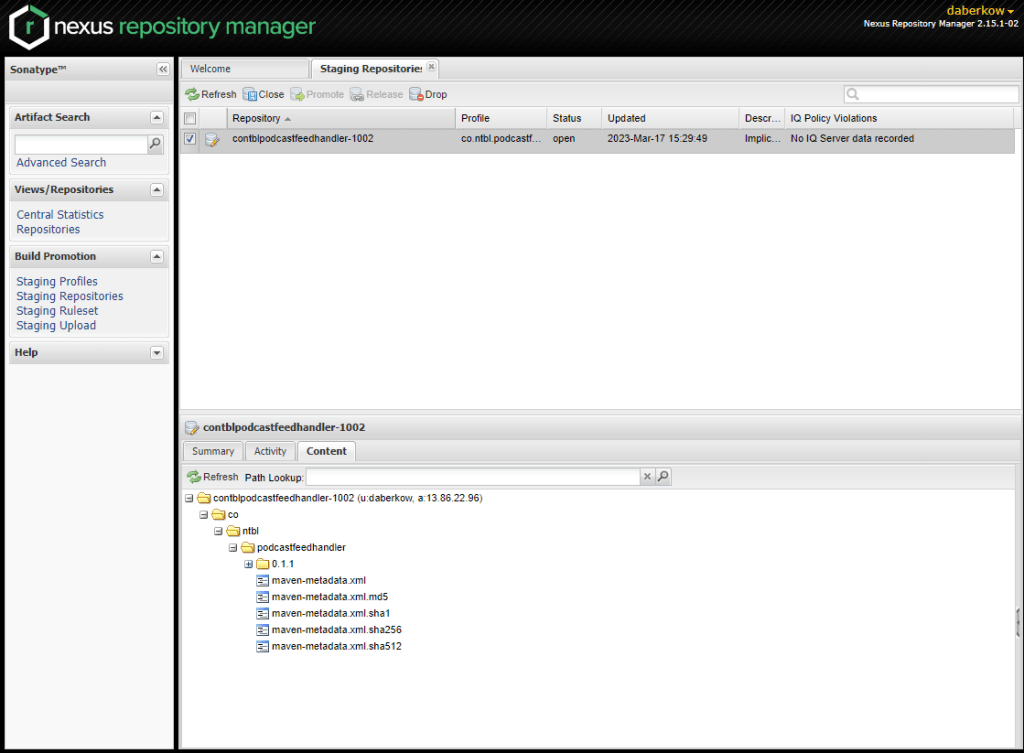
Clicking a repository will allow you to browse the contents, and make sure it looks how you want it to. When you are ready you click “Close” at the top of the pane to finalize this version. Closing the repository starts all the checks on the repository, this includes making sure GPG signatures are there, the sources, Javadoc, and checksums are there. If they are not, you will get an error and be forced to Drop the release and try again. You also will get a vulnerability scan, including dependencies, to your email on file.
After the repo successfully closed, you can click Release! This is another stage where you can get many timeouts and be forced to wait till the server is less busy. After it successfully releases, it takes about 30 minutes for it to show up in the global Maven repo.
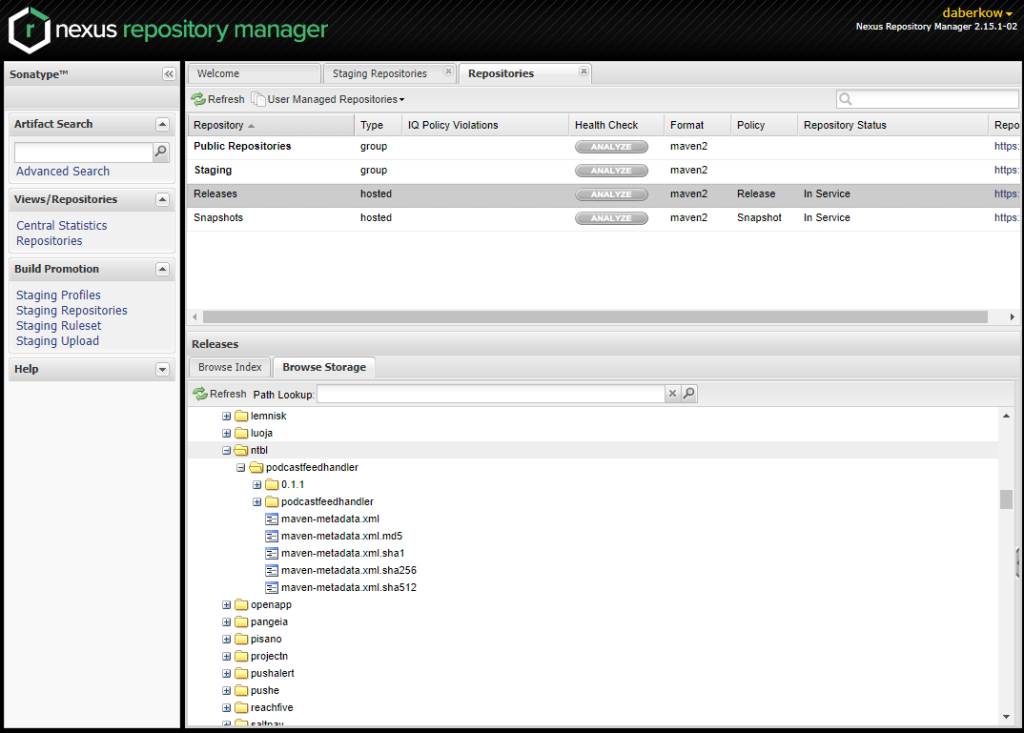
Selecting “Repositories” at the left allows you to browser the global Snapshots and Releases repositories; I have found this screen updates quicker than other locations to see if your assets are starting to propagate, including faster than the main Maven repo.
After about 30 minutes, your release should start to show up at Maven Search, although it can take longer. Another popular place to check packages is mvnrepository, I have found this site seems to take about a day to find new packages.
I hope this guide can help someone (and probably my future self), feel free to drop a comment if it helps or if something is unclear!