I have a bad habit of buying networking gear when my work/life gets hectic. In a recent time of chaos I decided I should update a Ruckus H510 AP I have to a H550. I saw one on eBay, gave an offer and it was accepted! When the unit came, it still had the config of a news company. I had to factory reset it like mentioned in previous articles. The odd thing is it would not come up for me to access. I could see the “Configure.Me” Wifi network, but when I went to it nothing. I tried going to the web page and got nothing, I set the default IP and couldn’t contact it via wired. I then took out Wireshark and started looking for what happened when I joined its Wifi.
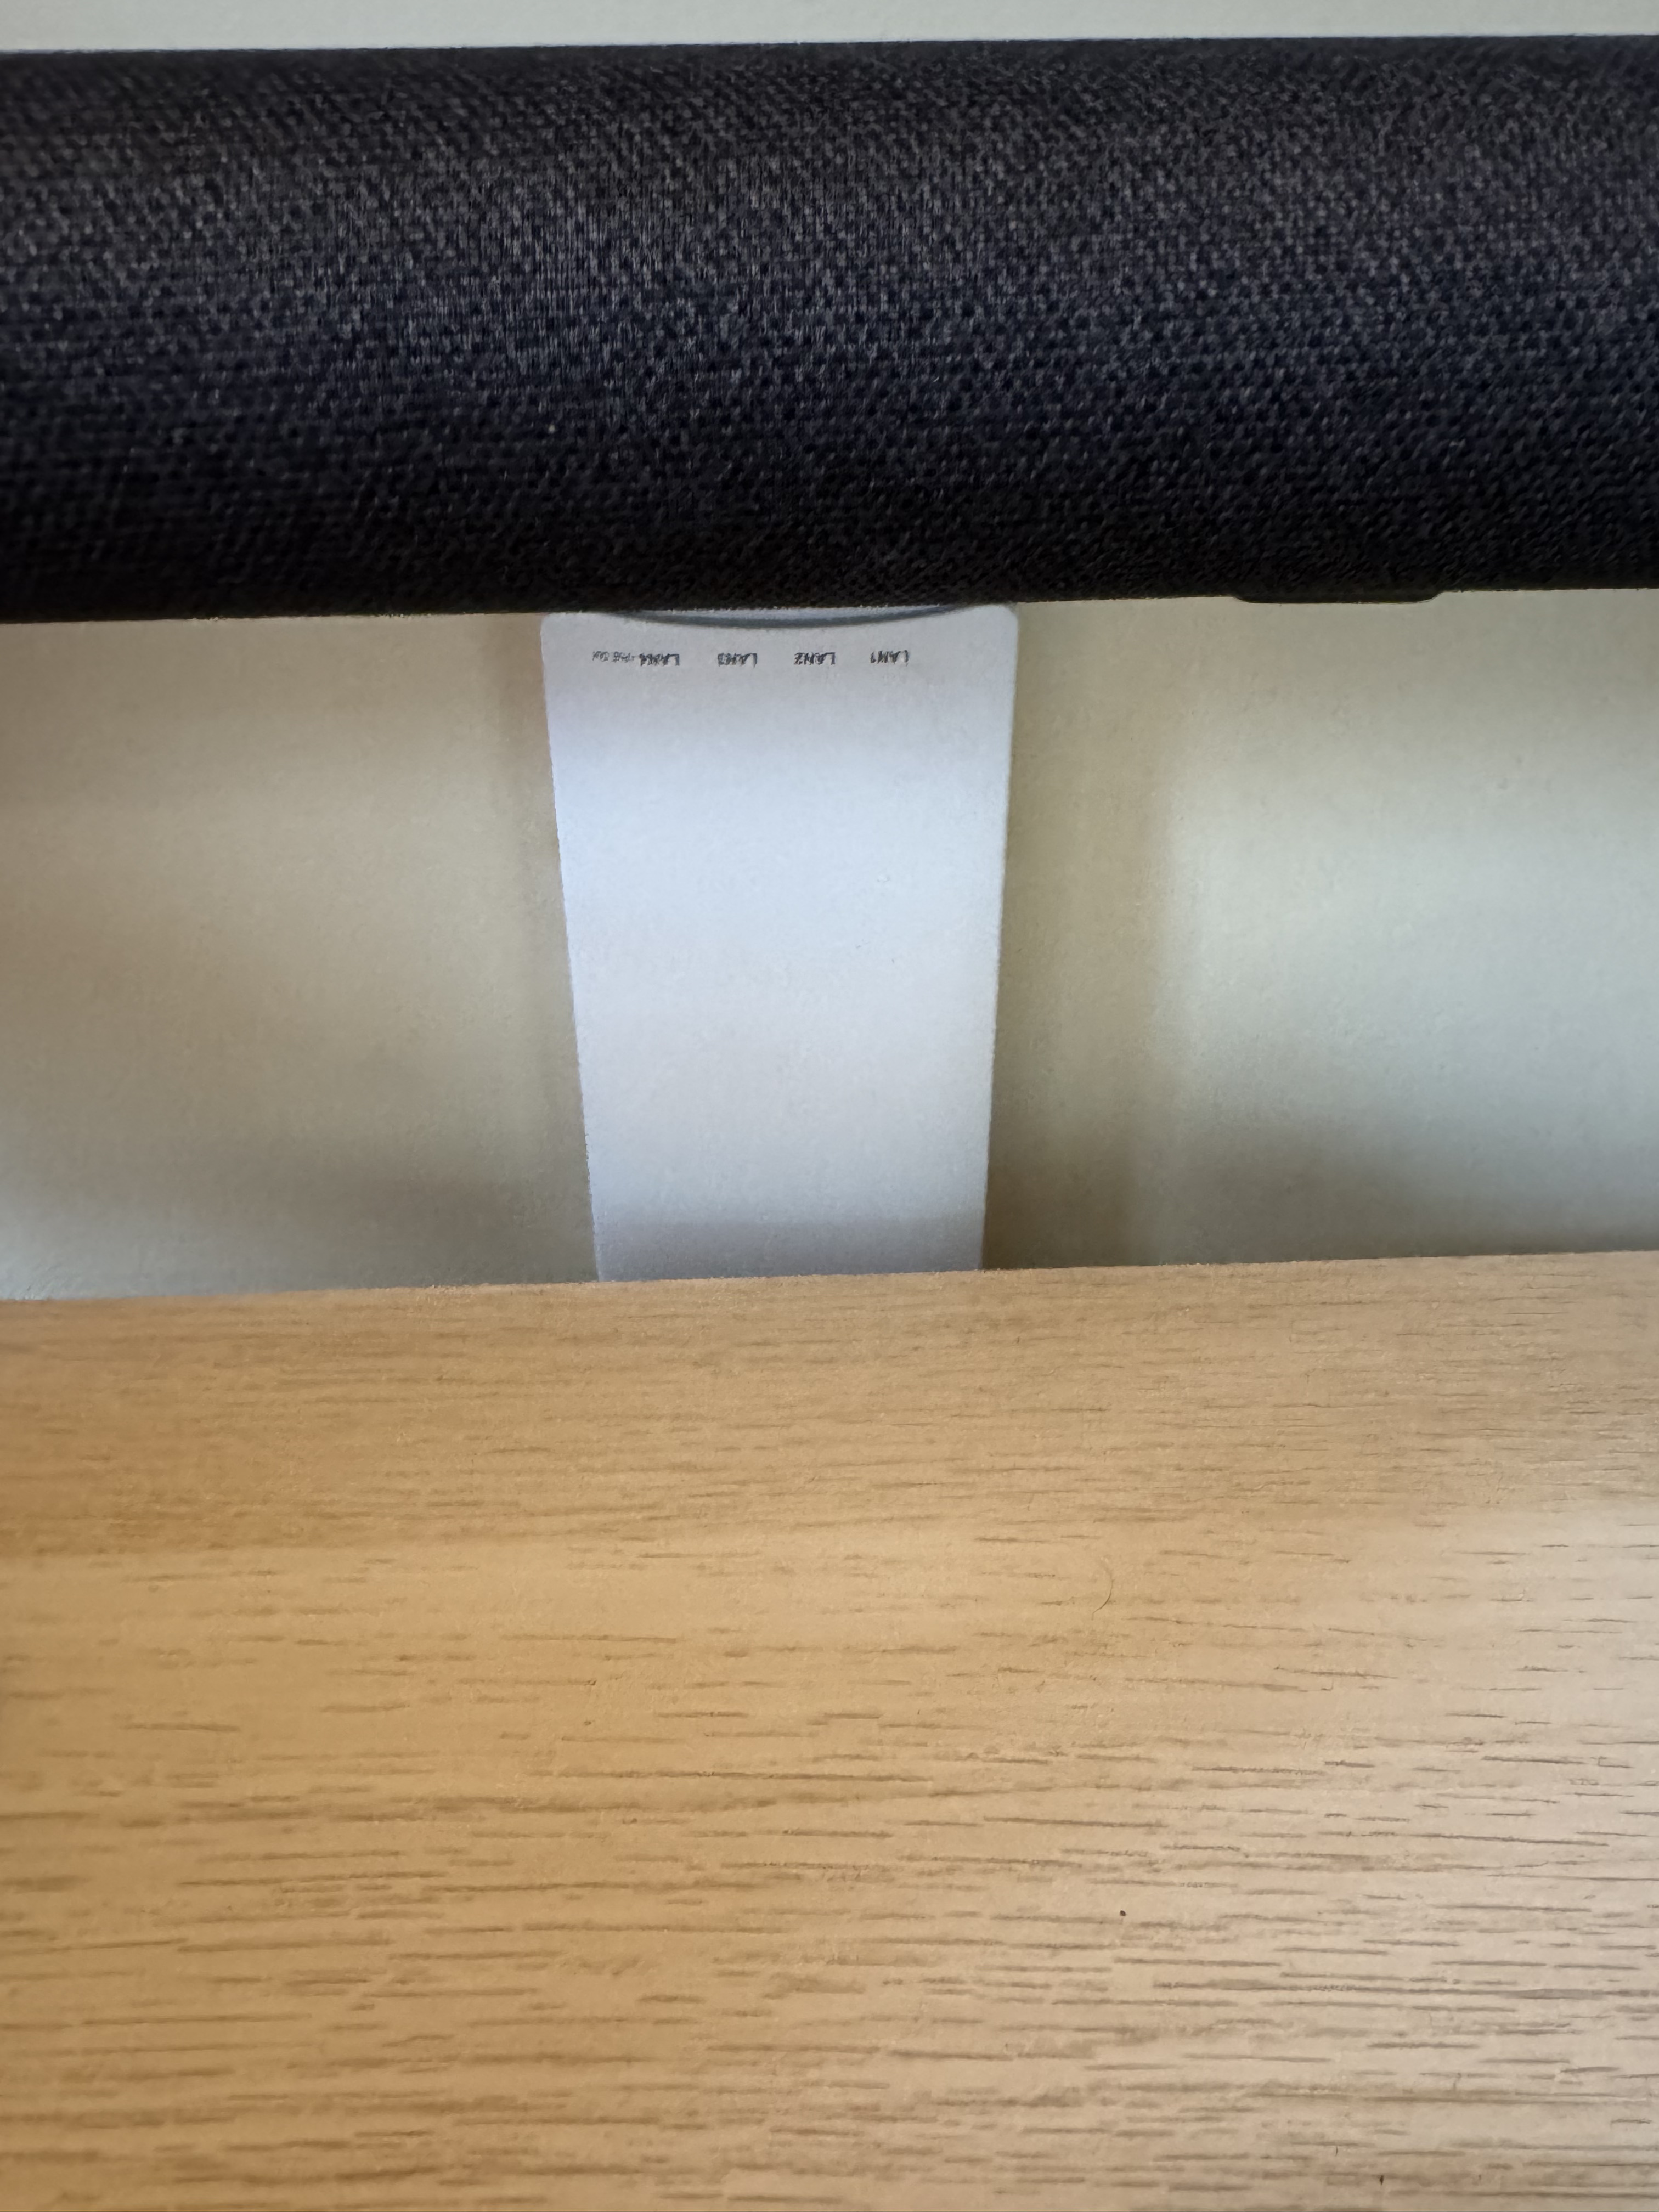
One other thing I didn’t realize… The H550 is taller than the H510… and I had a shelf right above the spot it was mounted. So I did the right thing, and mounted the new one upside down, so the taller part goes down and doesn’t hit the shelf.
While I was here getting more Wifi 6 goodness in my home (I have been running mostly Wifi 5 (802.11ac Wave 2) I thought I would look for deals. I saw someone selling a R550 for sale for parts. It said that when turned on it had a red light. I know that these access points can take a good 3-5 minutes to start, and while they do, they have a red light on… What are the chances that this access point just has a bad firmware image, or… nothing is wrong with it and this person just didn’t wait…
I offered $50 for the broken access point that usually goes for $250, and they accepted! Then I waited for the device to come, and later that week, I plugged it in, powered it up, and… it booted fine! I flashed it over to Unleashed and suddenly I had another great Wifi 6 access point.
I have mostly moved all my access points to Wifi 6 at this point which means I can go above firmware 200.15 (the last for the Wifi 5 systems), but I still haven’t since its still recommended to stay there by some places. And I am pondering setting up the old H510 as a small access point and ethernet port at my workbench.
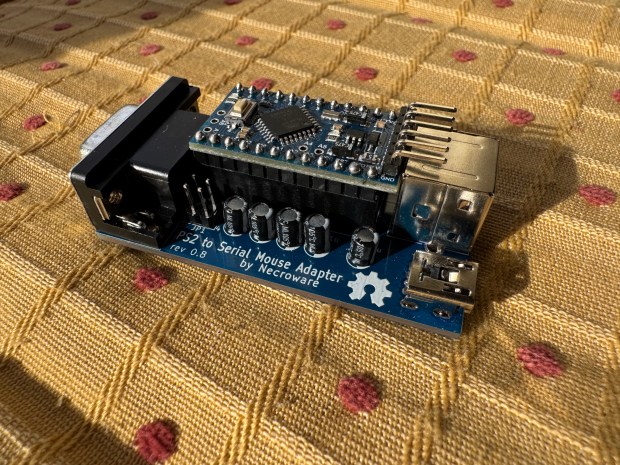
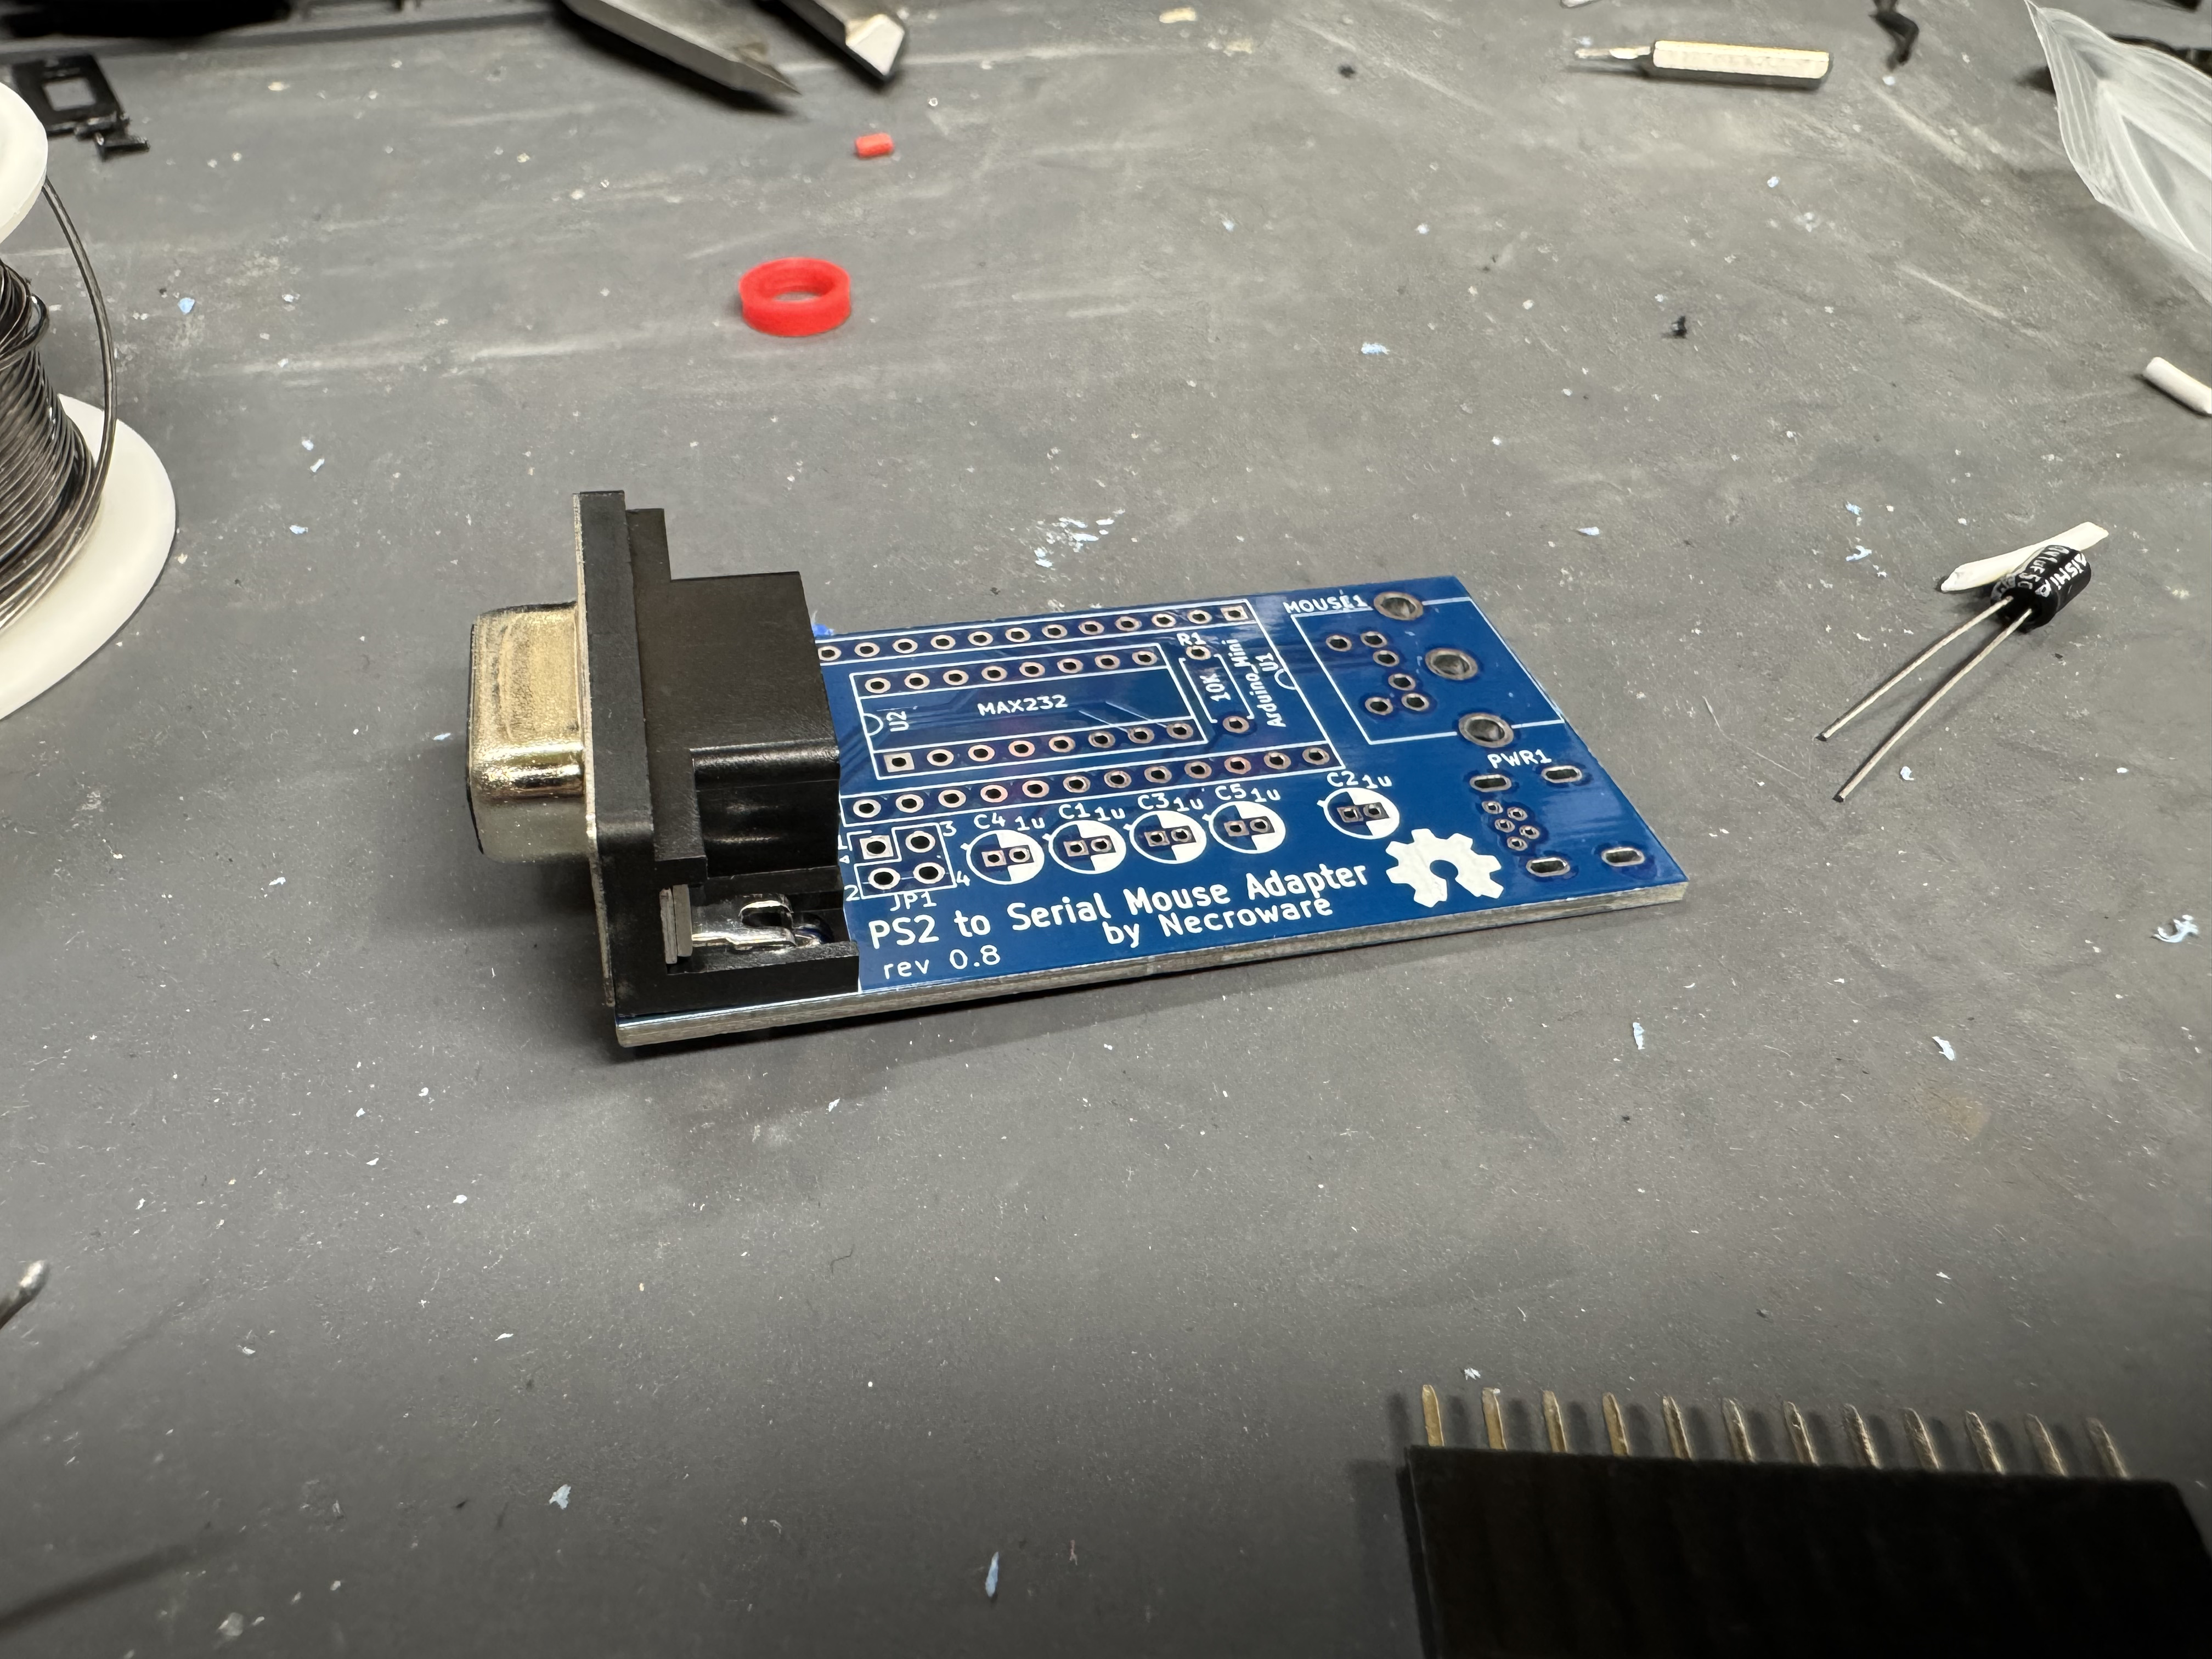
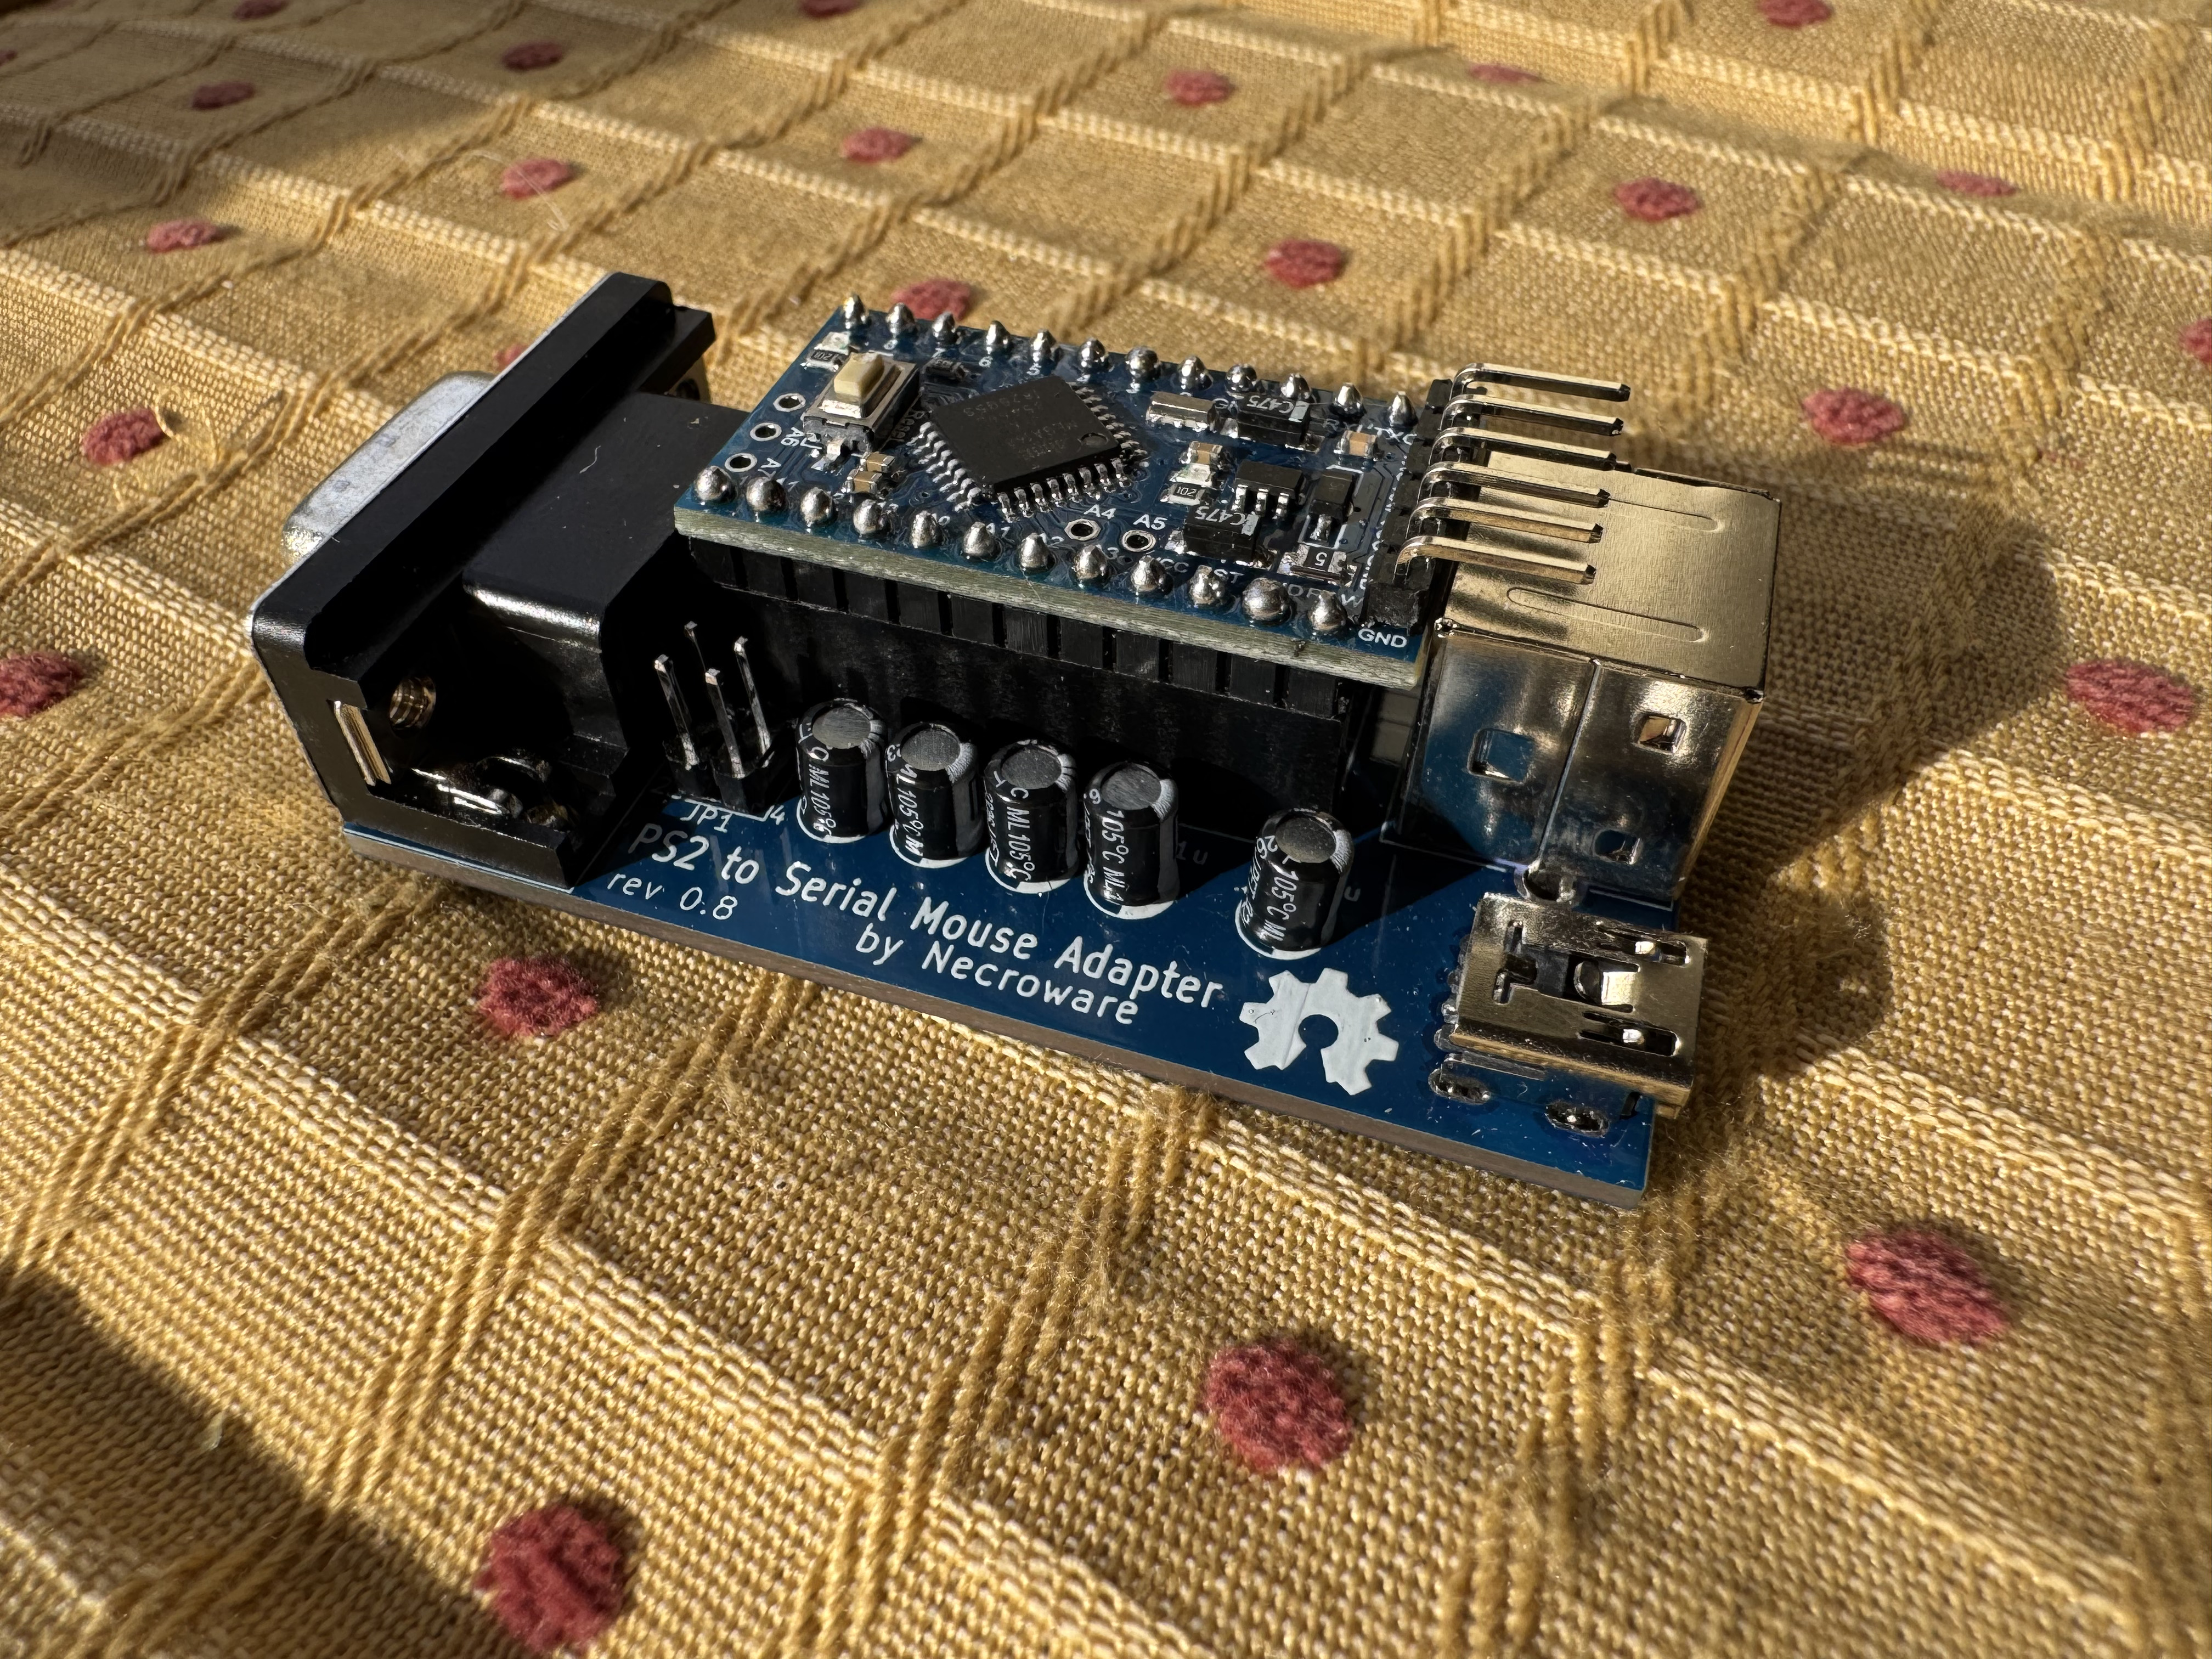
As part of my LAN Before Time rack project, I’m setting up classic PCs with a VGA and PS/2 KVM to manage them. However, one of my systems—a 486—lacks a PS/2 port for the mouse. A simple PS/2-to-serial adapter wasn’t enough; it required a proper signal conversion to work.
After some searching, I found this adapter kit on eBay: PS/2 to Serial Mouse Adapter. It’s based on an open-source project: necroware/ps2-serial-mouse-adapter. The kit didn’t include instructions, and the project assumes you already know how to assemble it; I decided to document my build process step by step.
A Quick Note on KVM Compatibility
This adapter worked flawlessly when I plugged a PS/2 HP Laser Mouse directly into the 486. However, when connected through my KVM, it worked for a few seconds before stopping. After some digging, I found a pull request from last year that mentioned a KVM fix. Flashing that updated firmware completely resolved my issue! Unfortunately, the main repository hasn’t been updated in two years, so hopefully, it gets some attention.
What’s Next?
Below, I’ll walk through assembling the adapter. After that, I’ll cover how to flash the updated firmware using a USB-to-TTL converter. These converters are cheap and easy to find—here’s the one I used: USB to TTL Adapter. Finally, I will show a case I designed and 3D printed for the device.
Steps
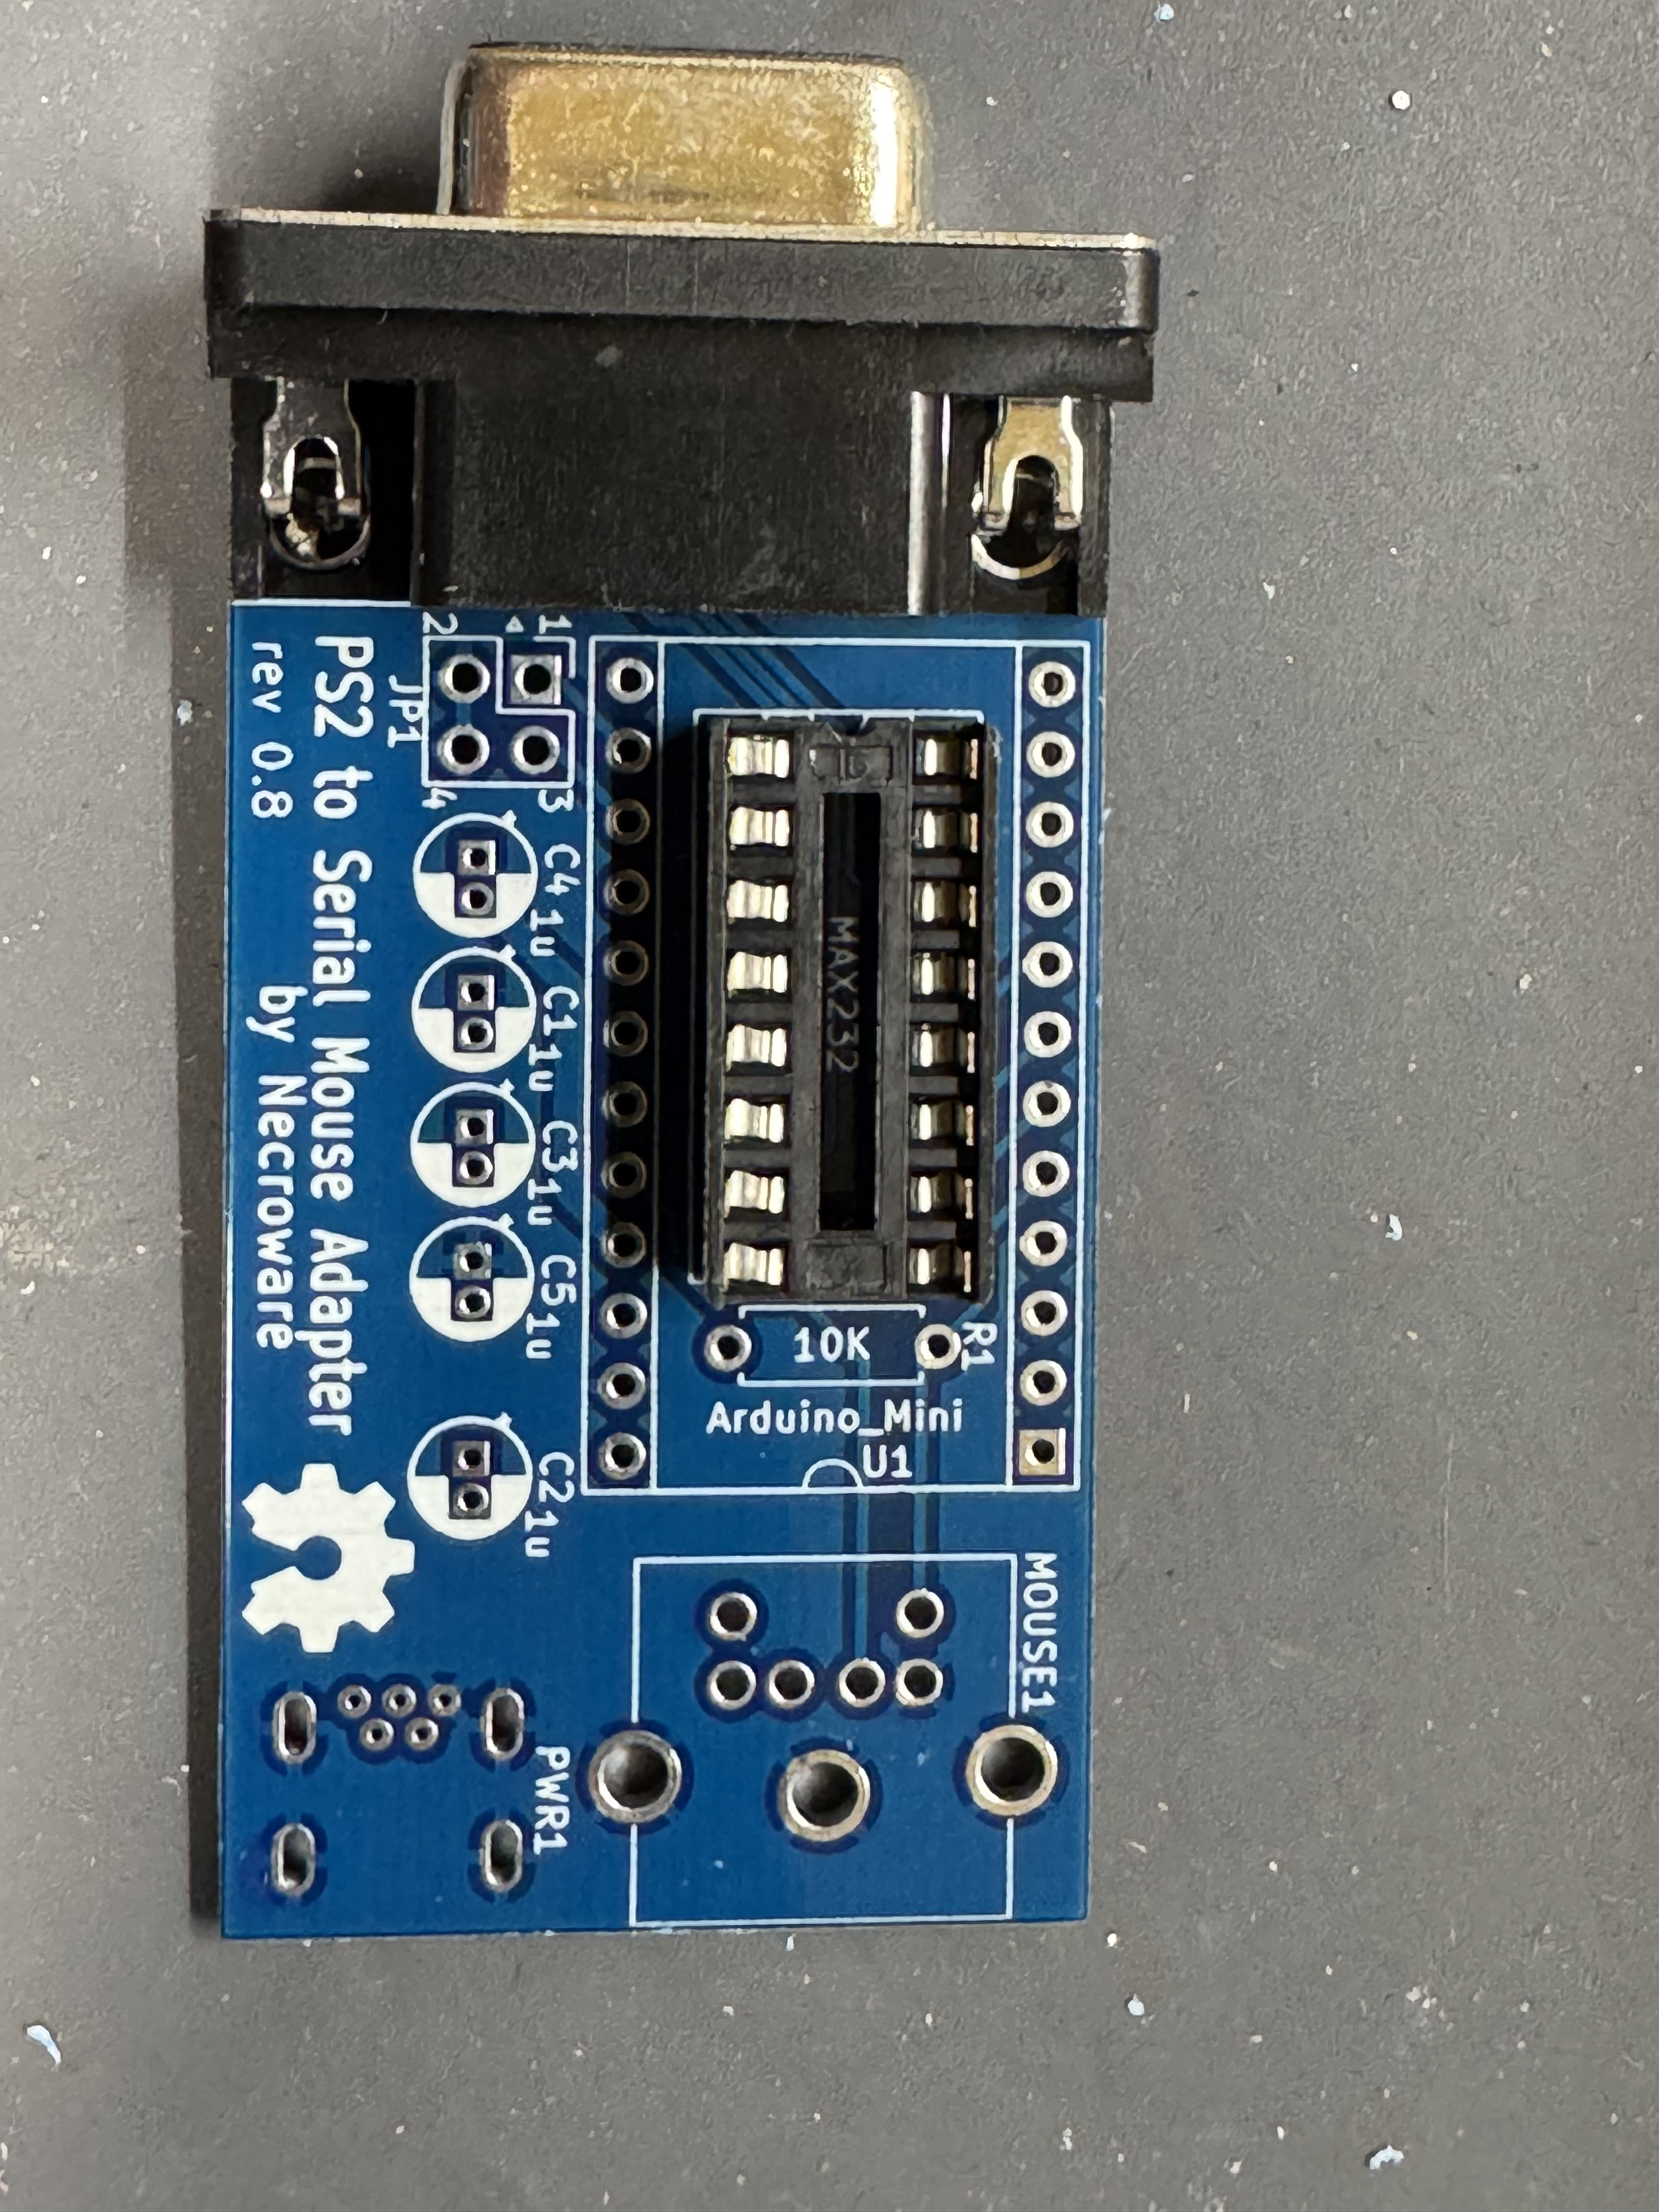
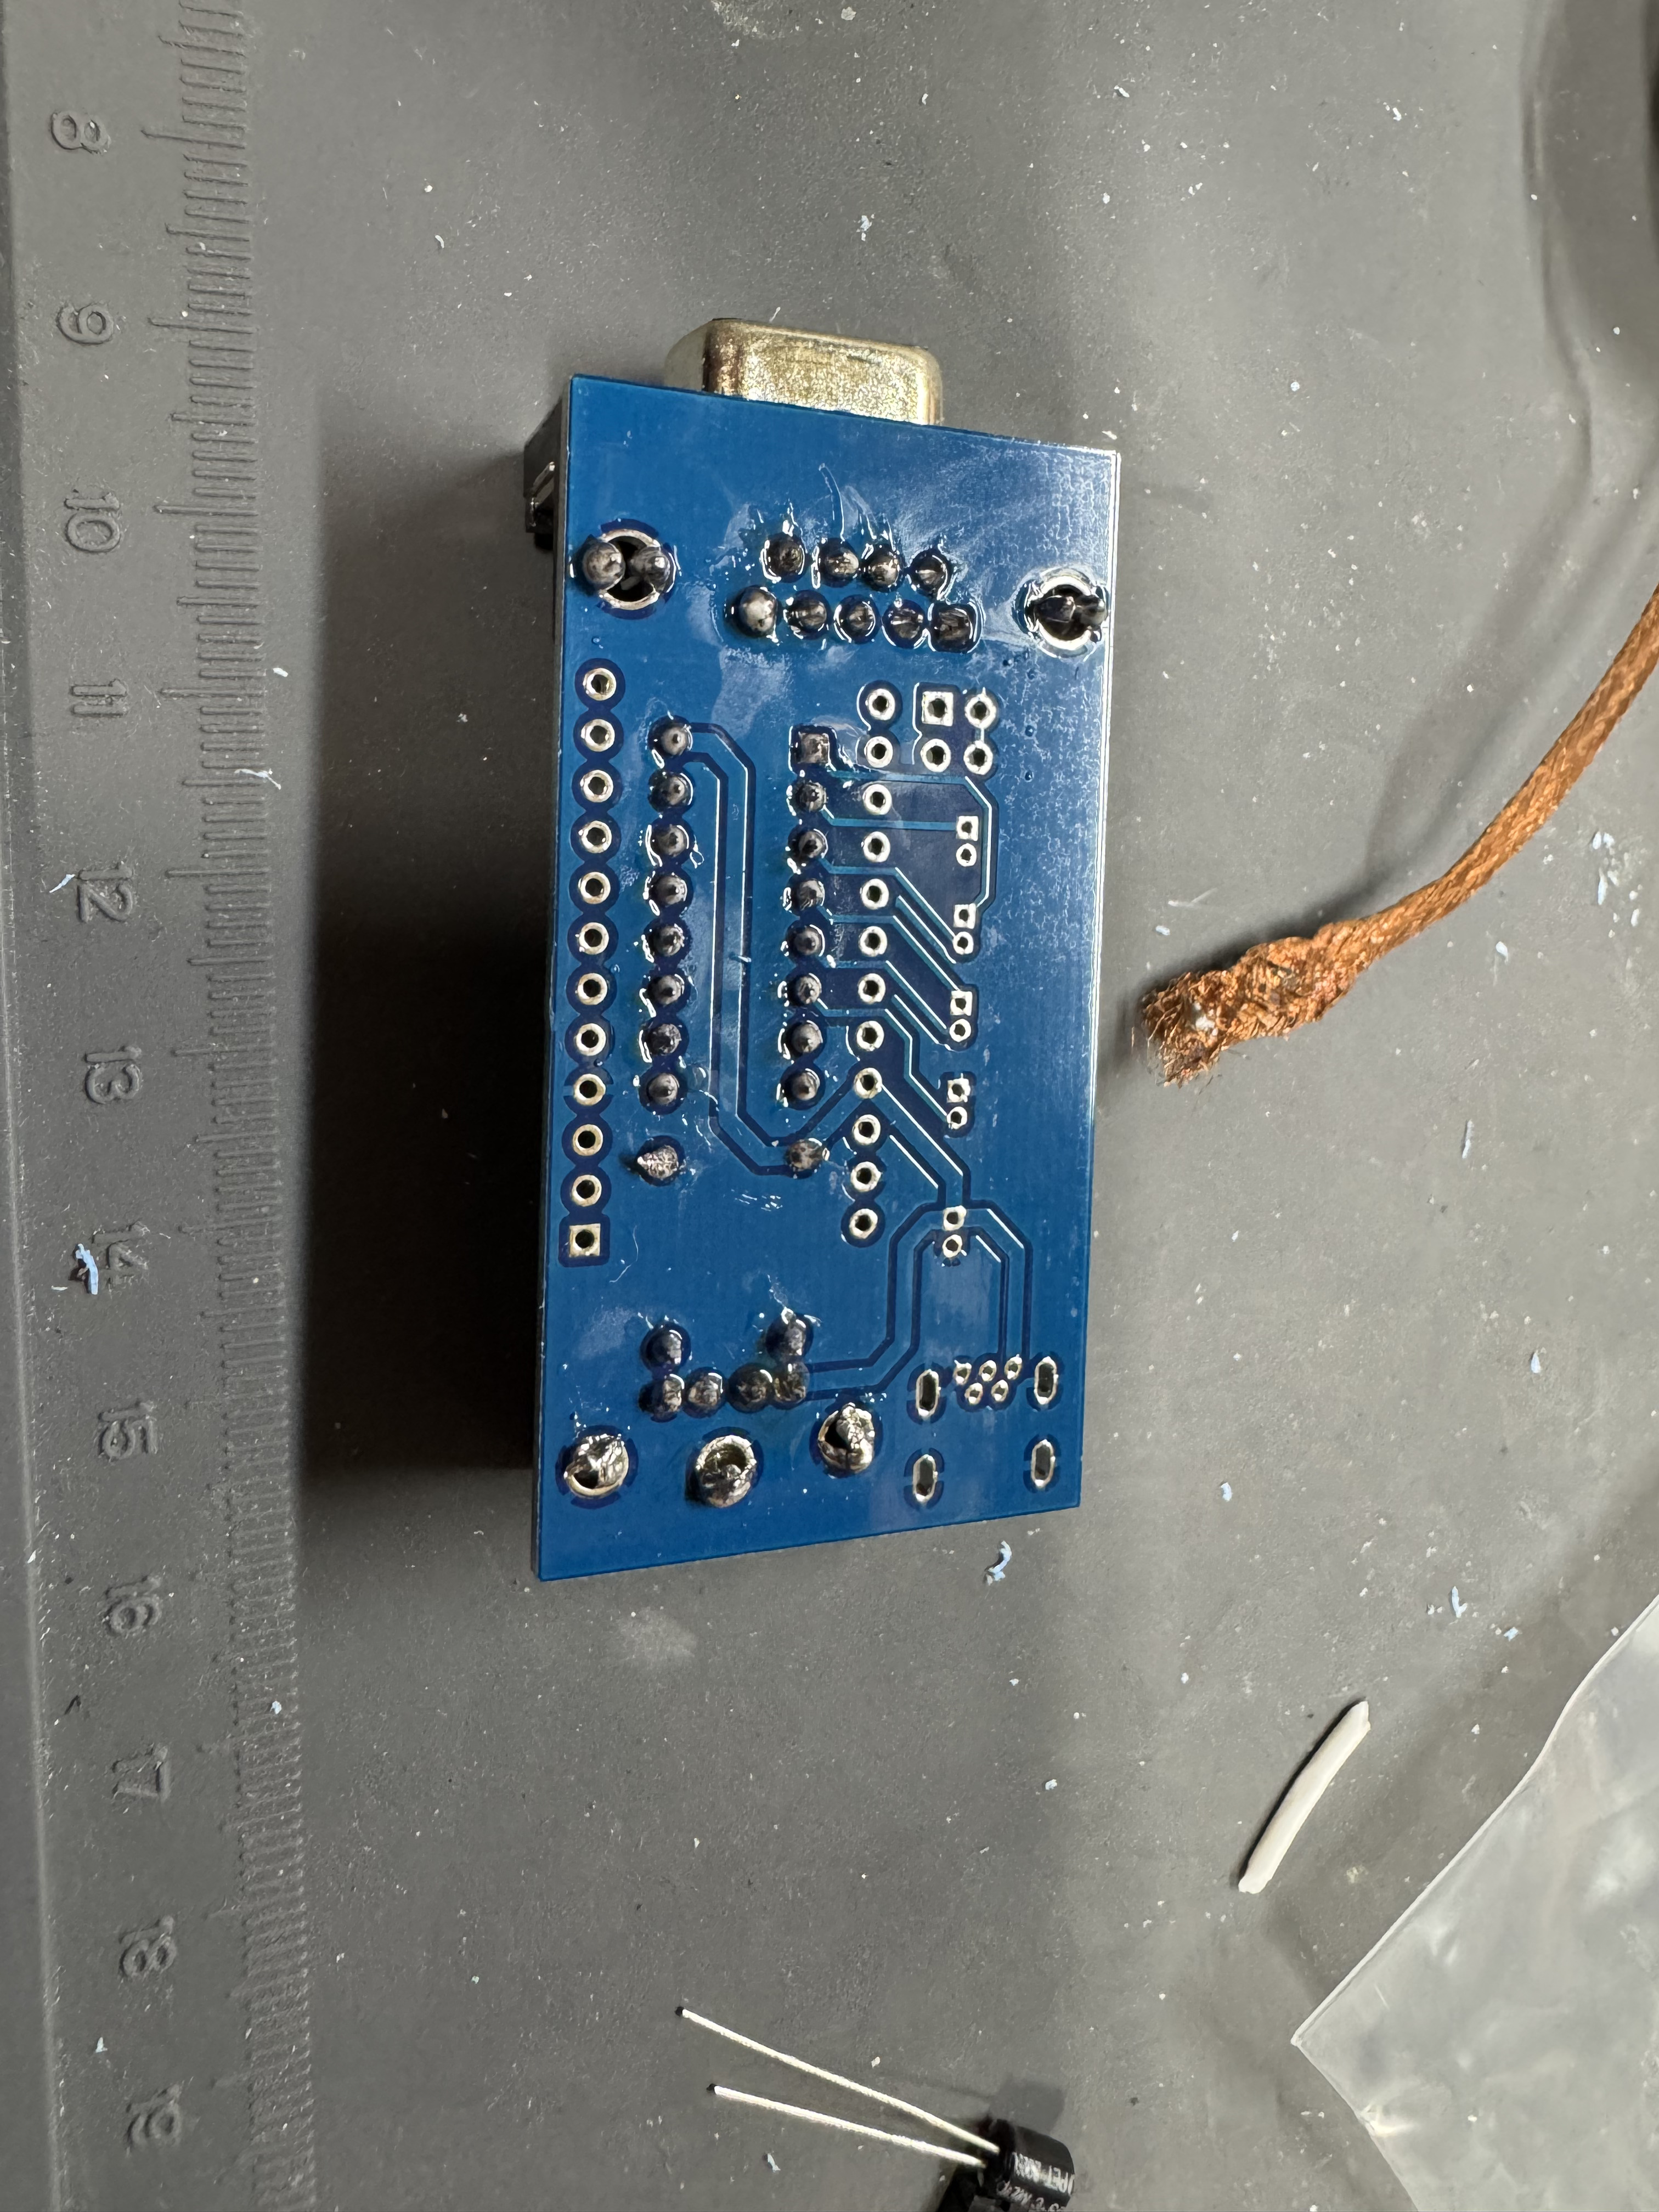
Put the serial connector through the top side of the board and solder it in place on the bottom, starting with the mounting legs and using plenty of solder. These take a lot of the strain of the connections. Then carefully do each of the data pins, making sure not to bridge any.
Insert the lower chip socket, and solder in place on the underside.
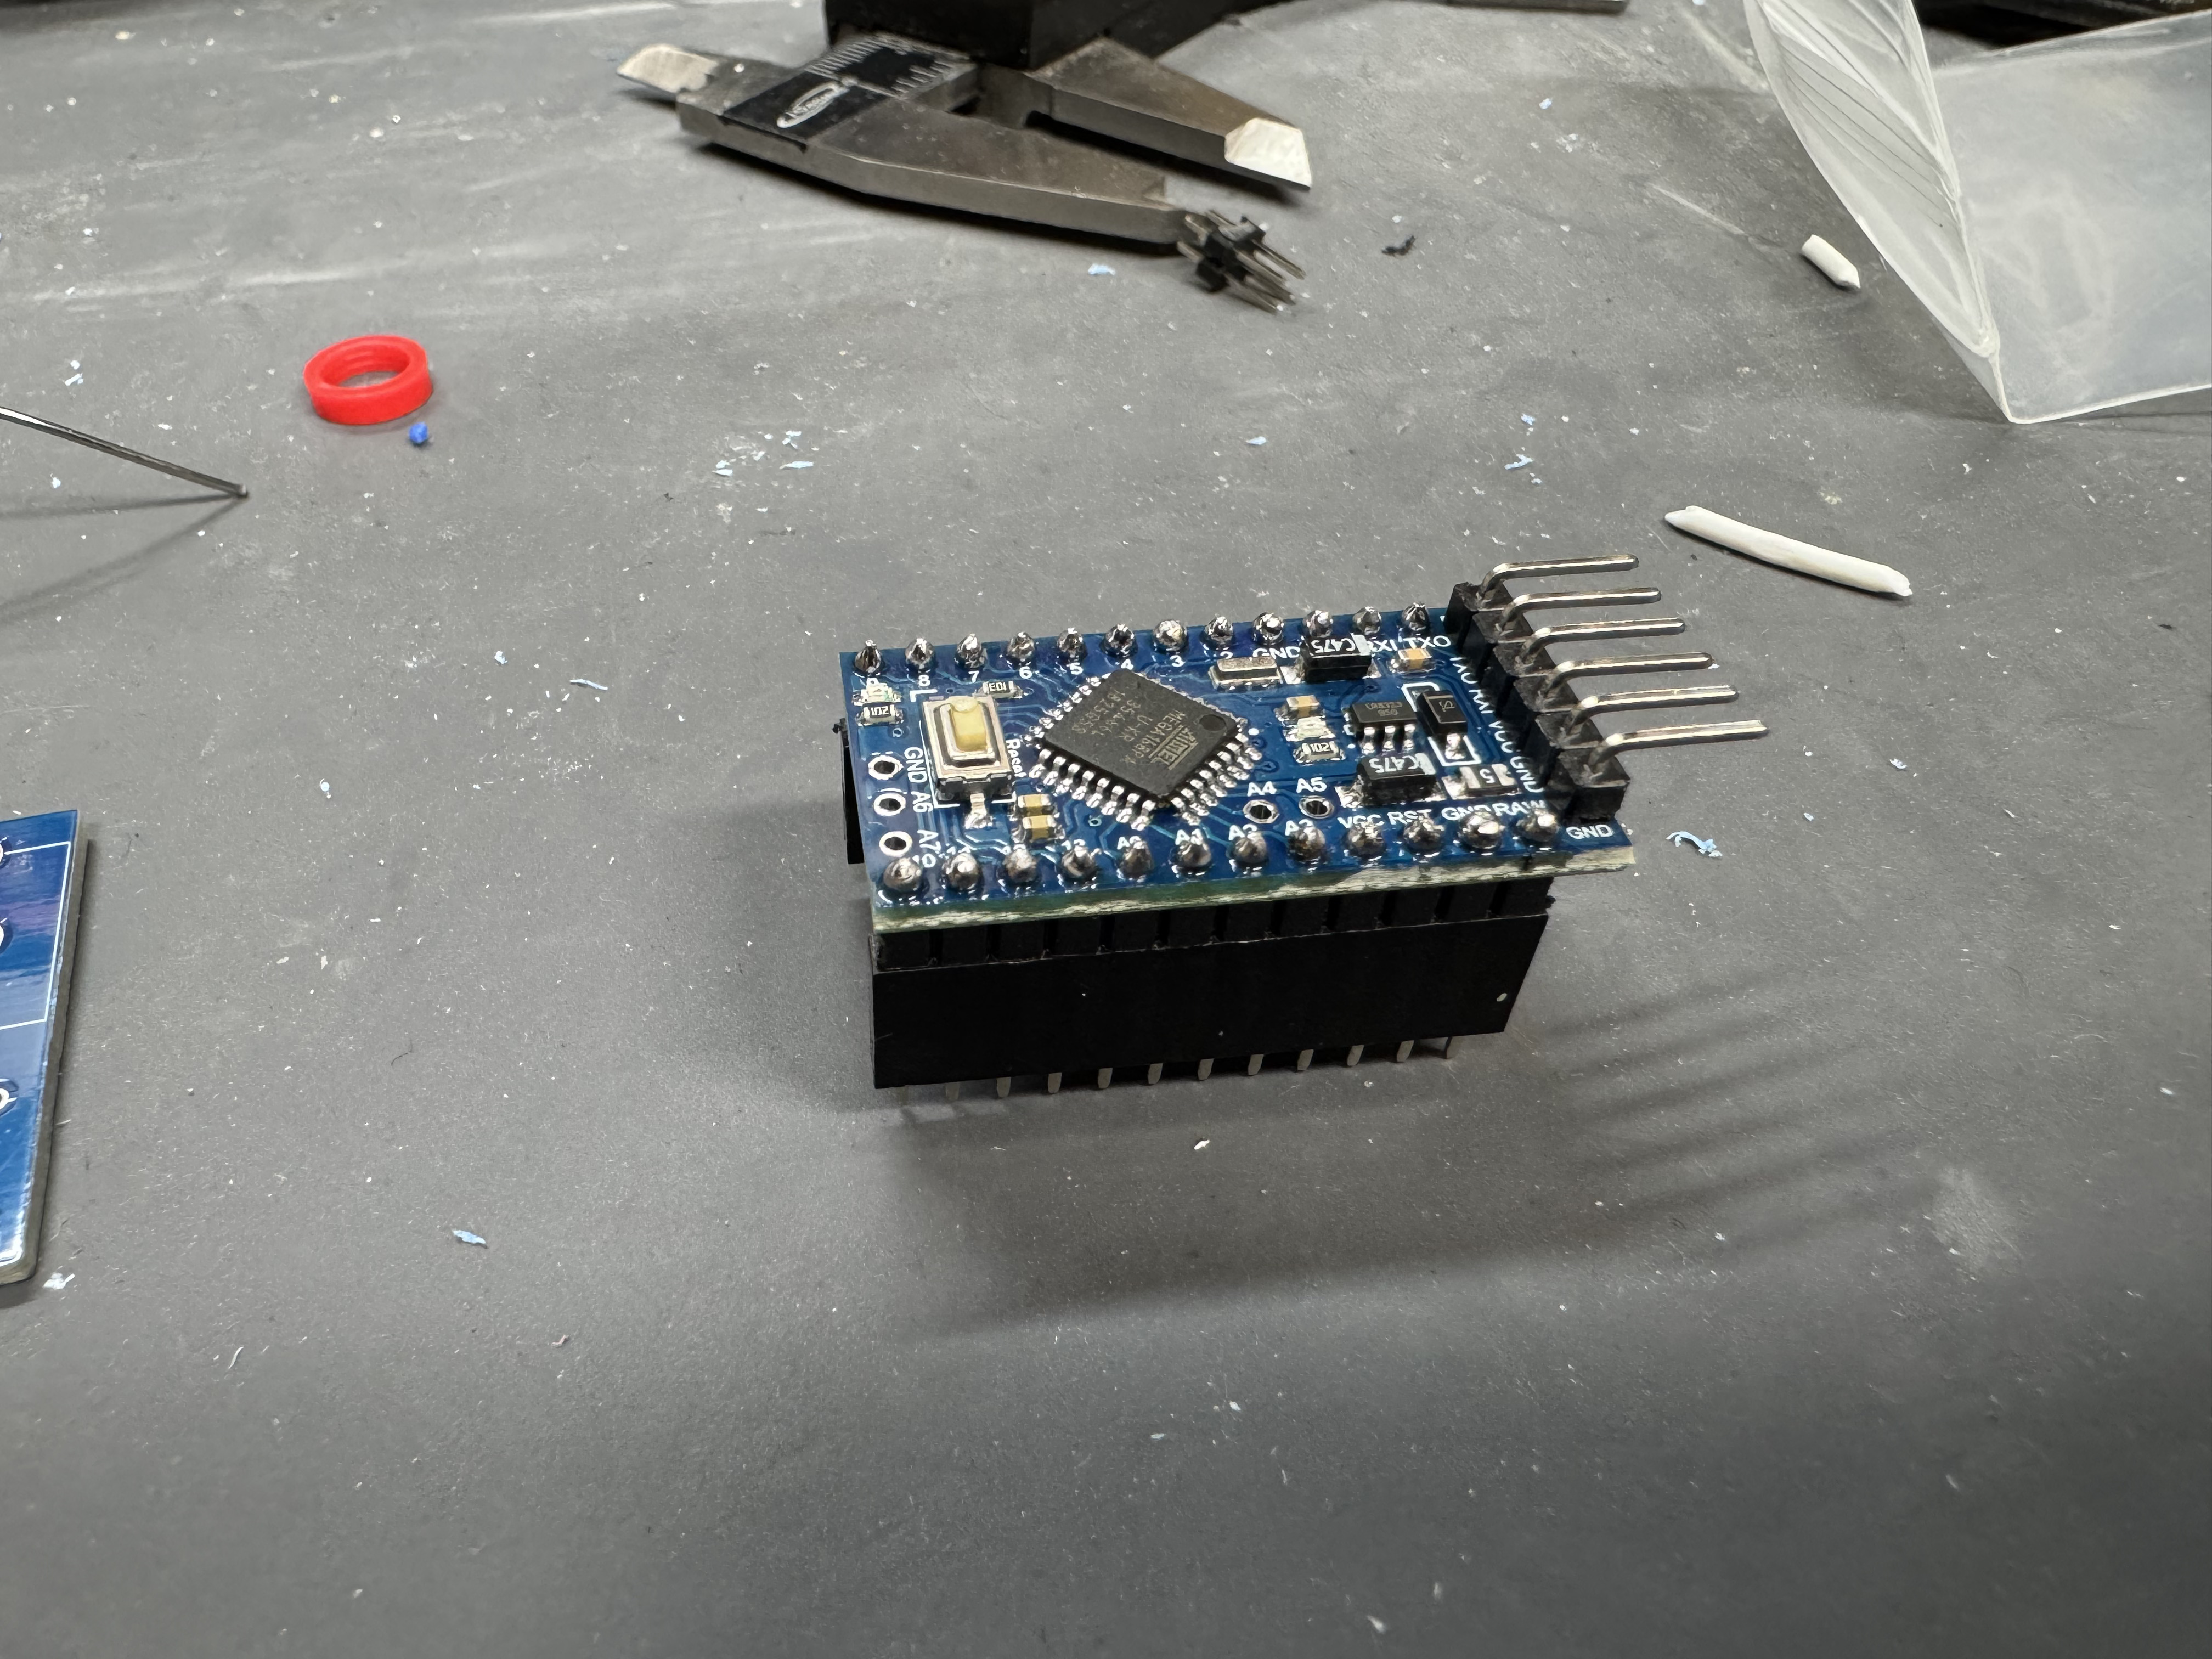
The Arduino Pro has 3 different parts we need to solder. The first is the head with the 90 degree pins at the end. This will allow us later to flash the controller if we want to move to other firmware. Put those through the top (the side with the chip) and then solder them in the underside.
Next, put the Arduino header pins in the bottom. I put them into the header connector to hold them in place. Do not put too much heat on each pin with the plastic part below. (Not my best soldering job)
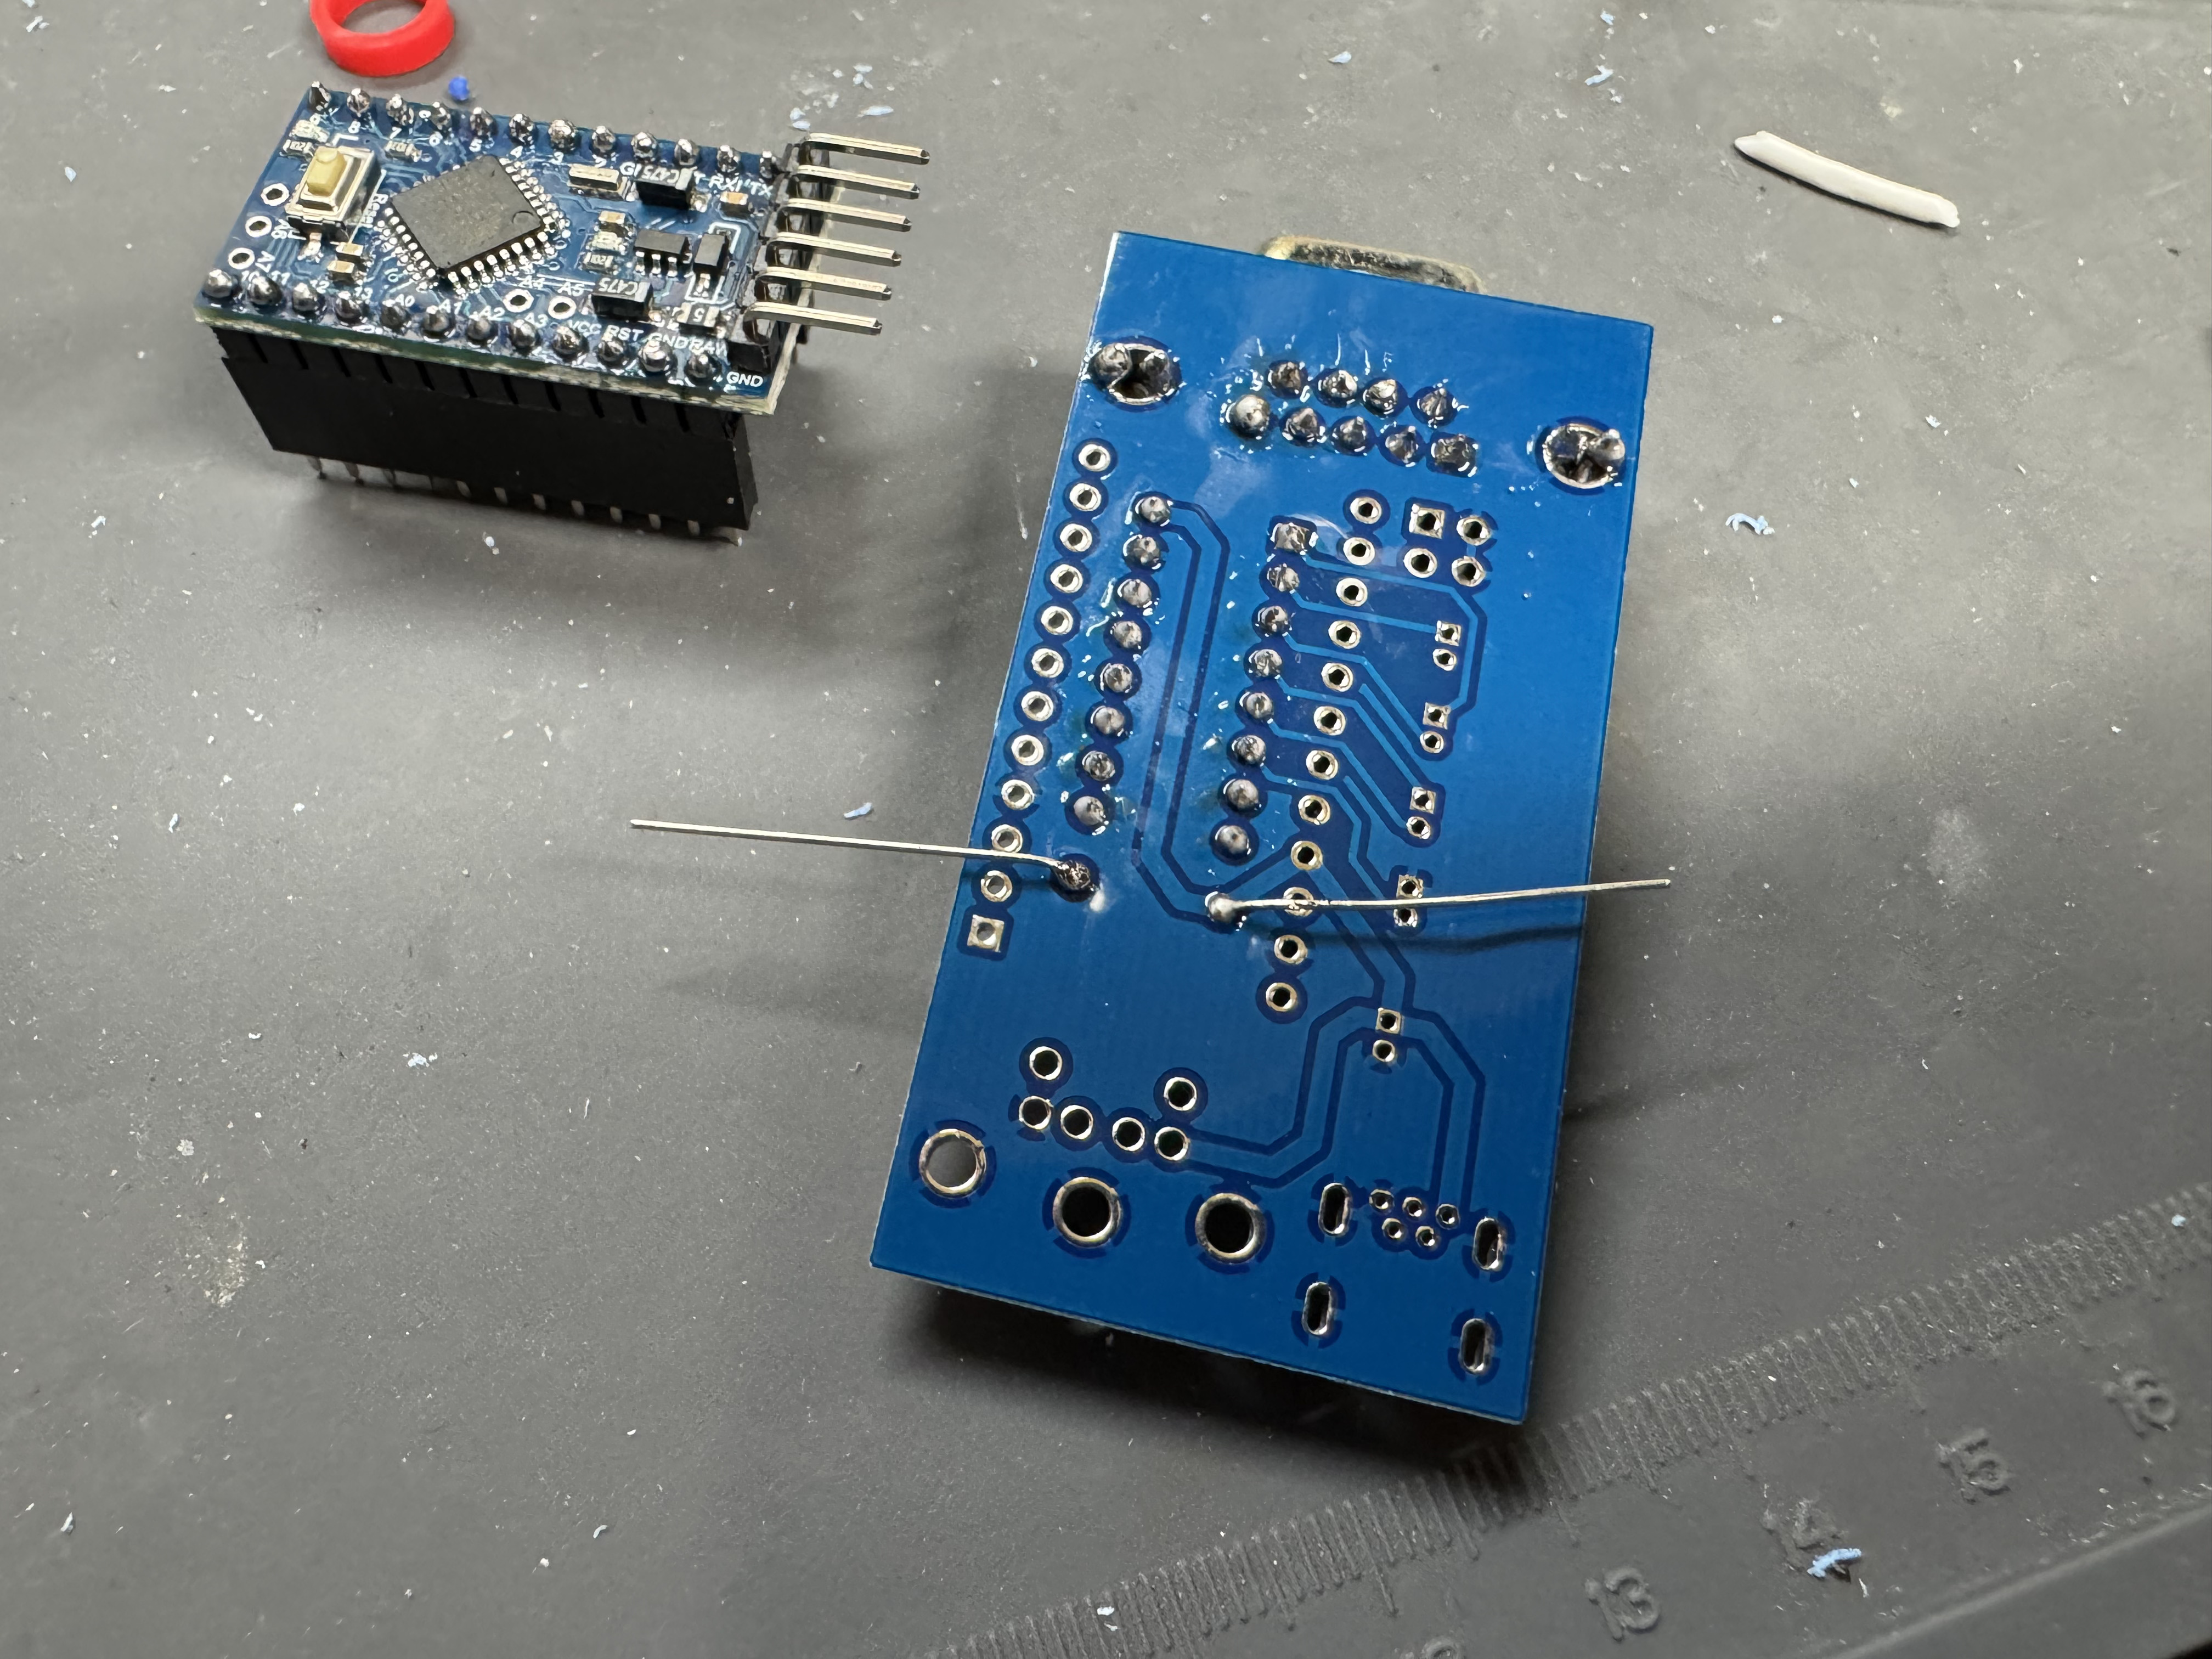
Solder in the 10k resister, here I am soldering it on the bottom while it went in through the top. After it is in, cut of the excess legs.
Solder in the PS/2 port, use a good amount of solder on the mounting points so it doesn’t move when inserted, then solder the data pins.
Solder in the micro-usb port, careful of the tiny pins.
Add the jumper pins, solder them in.
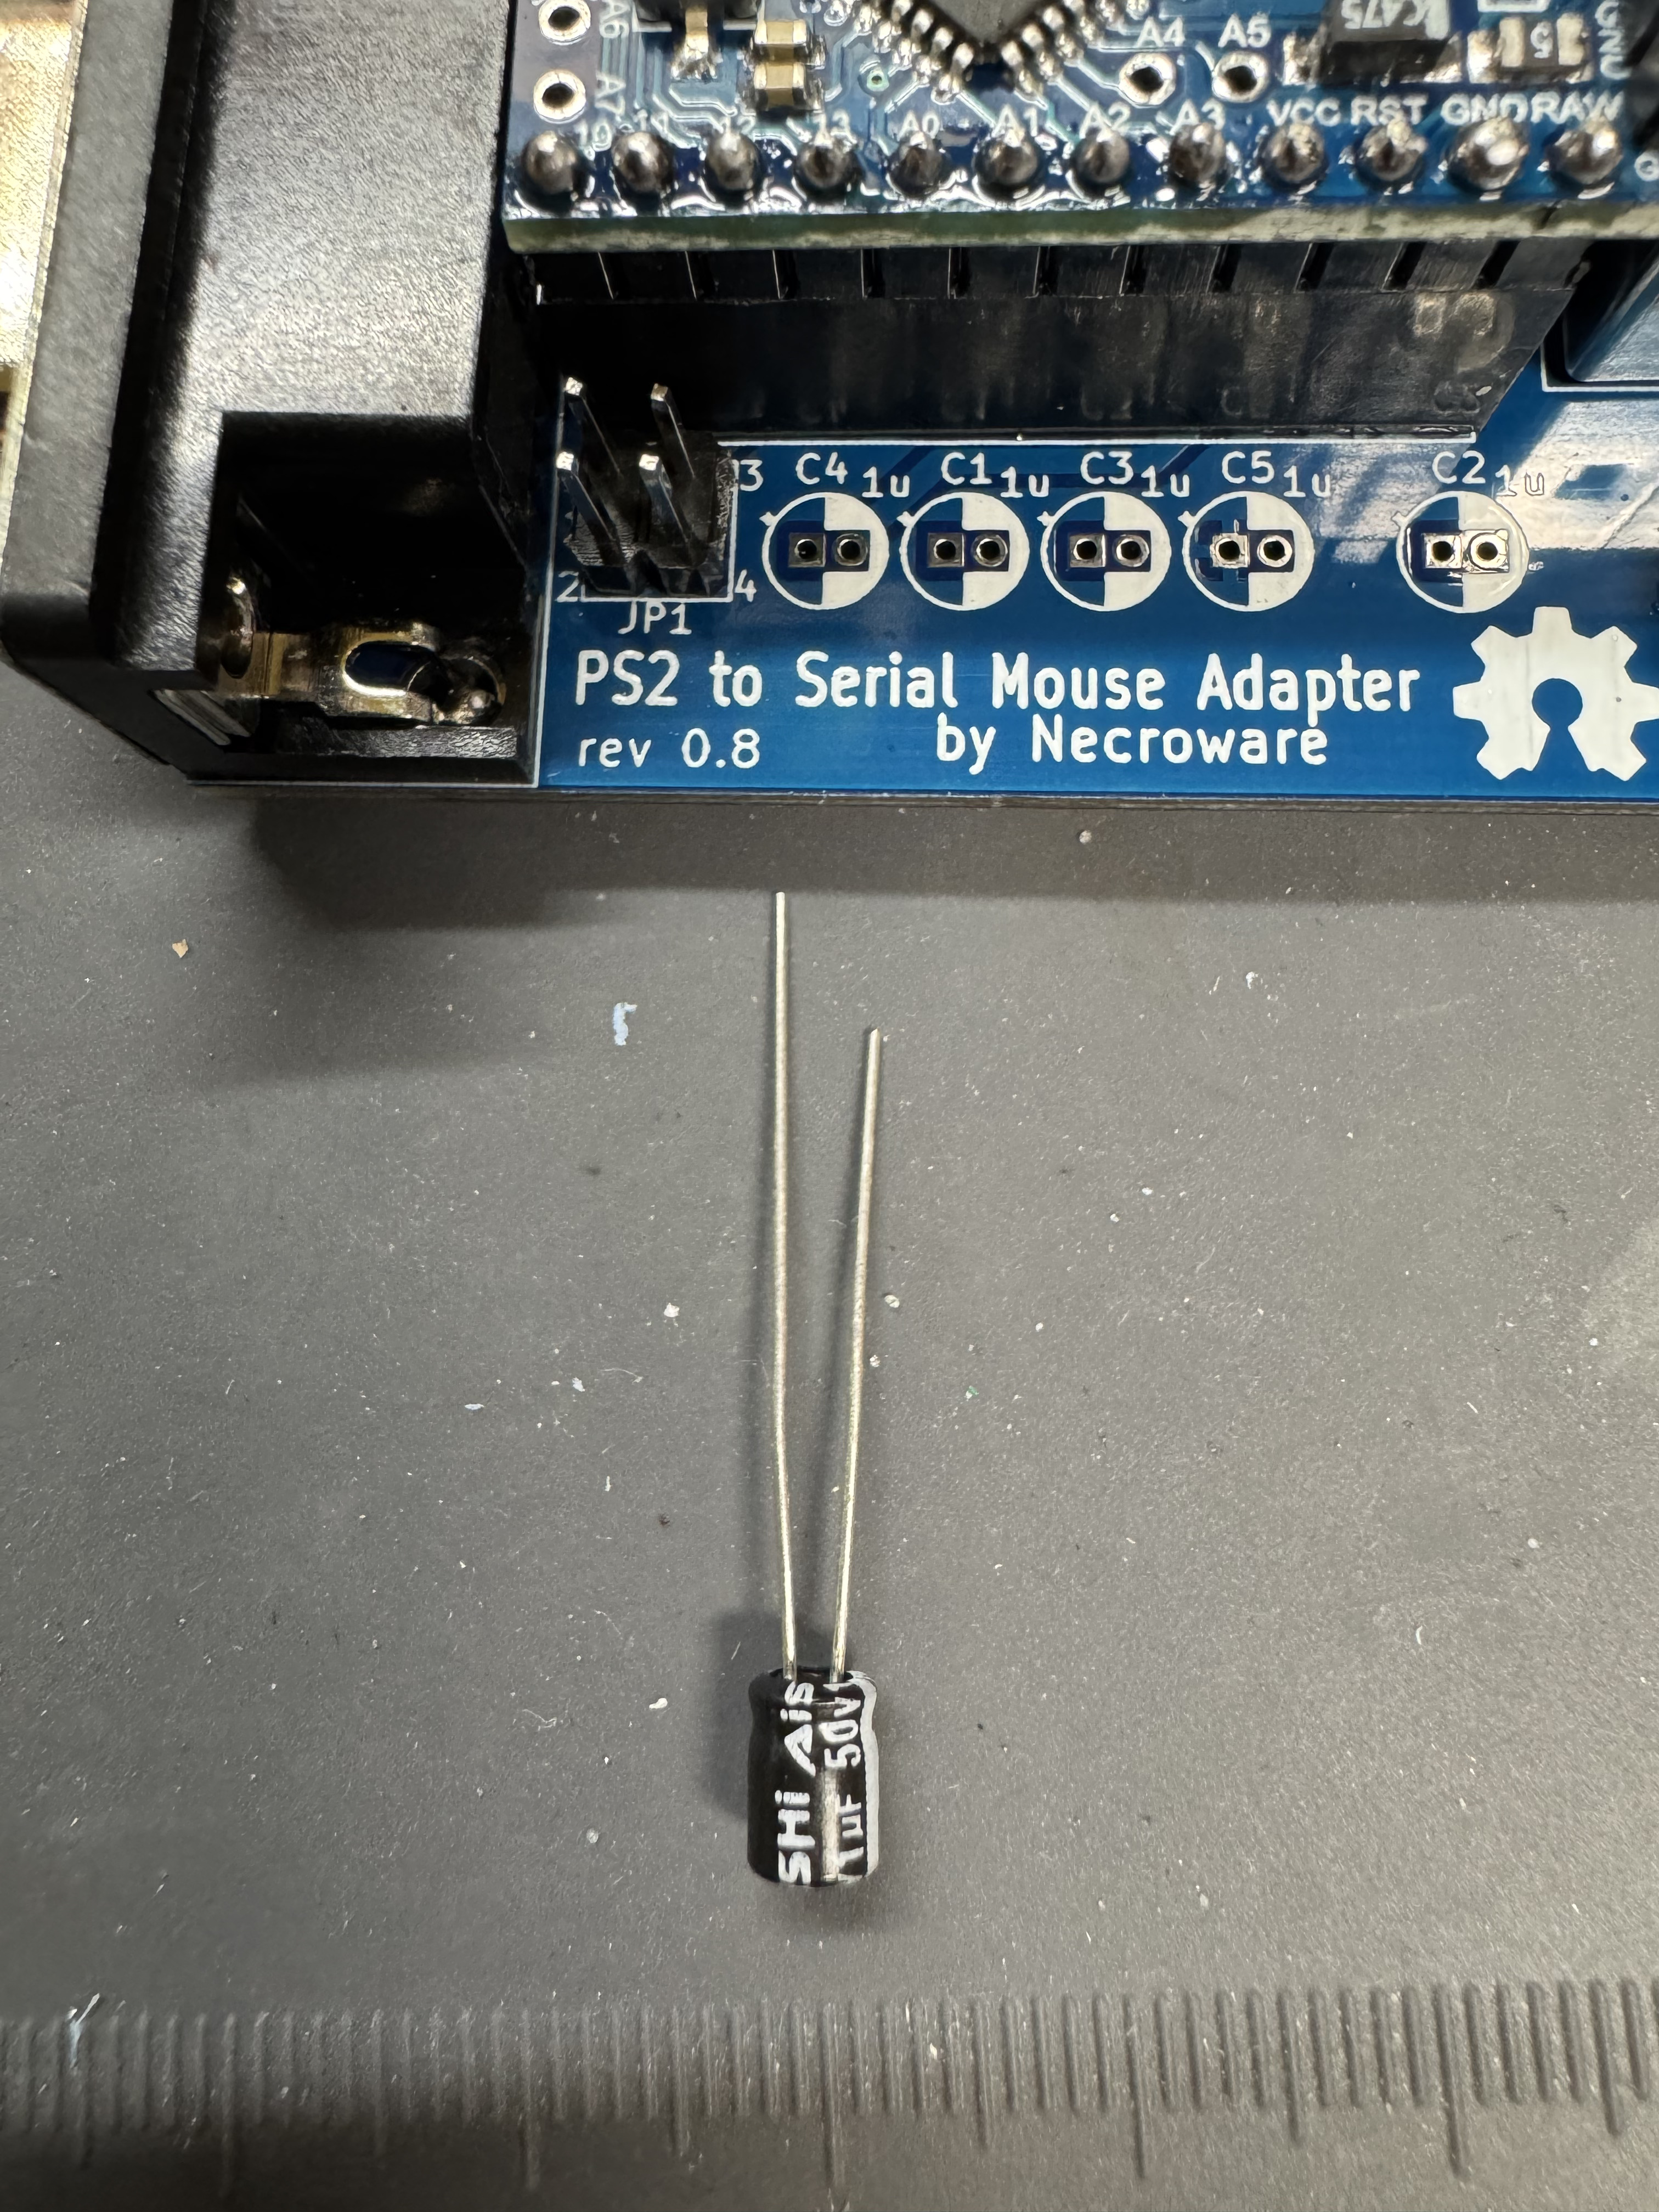
Now time for the capacitors, these are polarized, note the right side of the silk screen is white that should line up with the white side of the cap. (the shorter leg side)
Finish up by soldering all the pin headers for the controller to sit on the board.
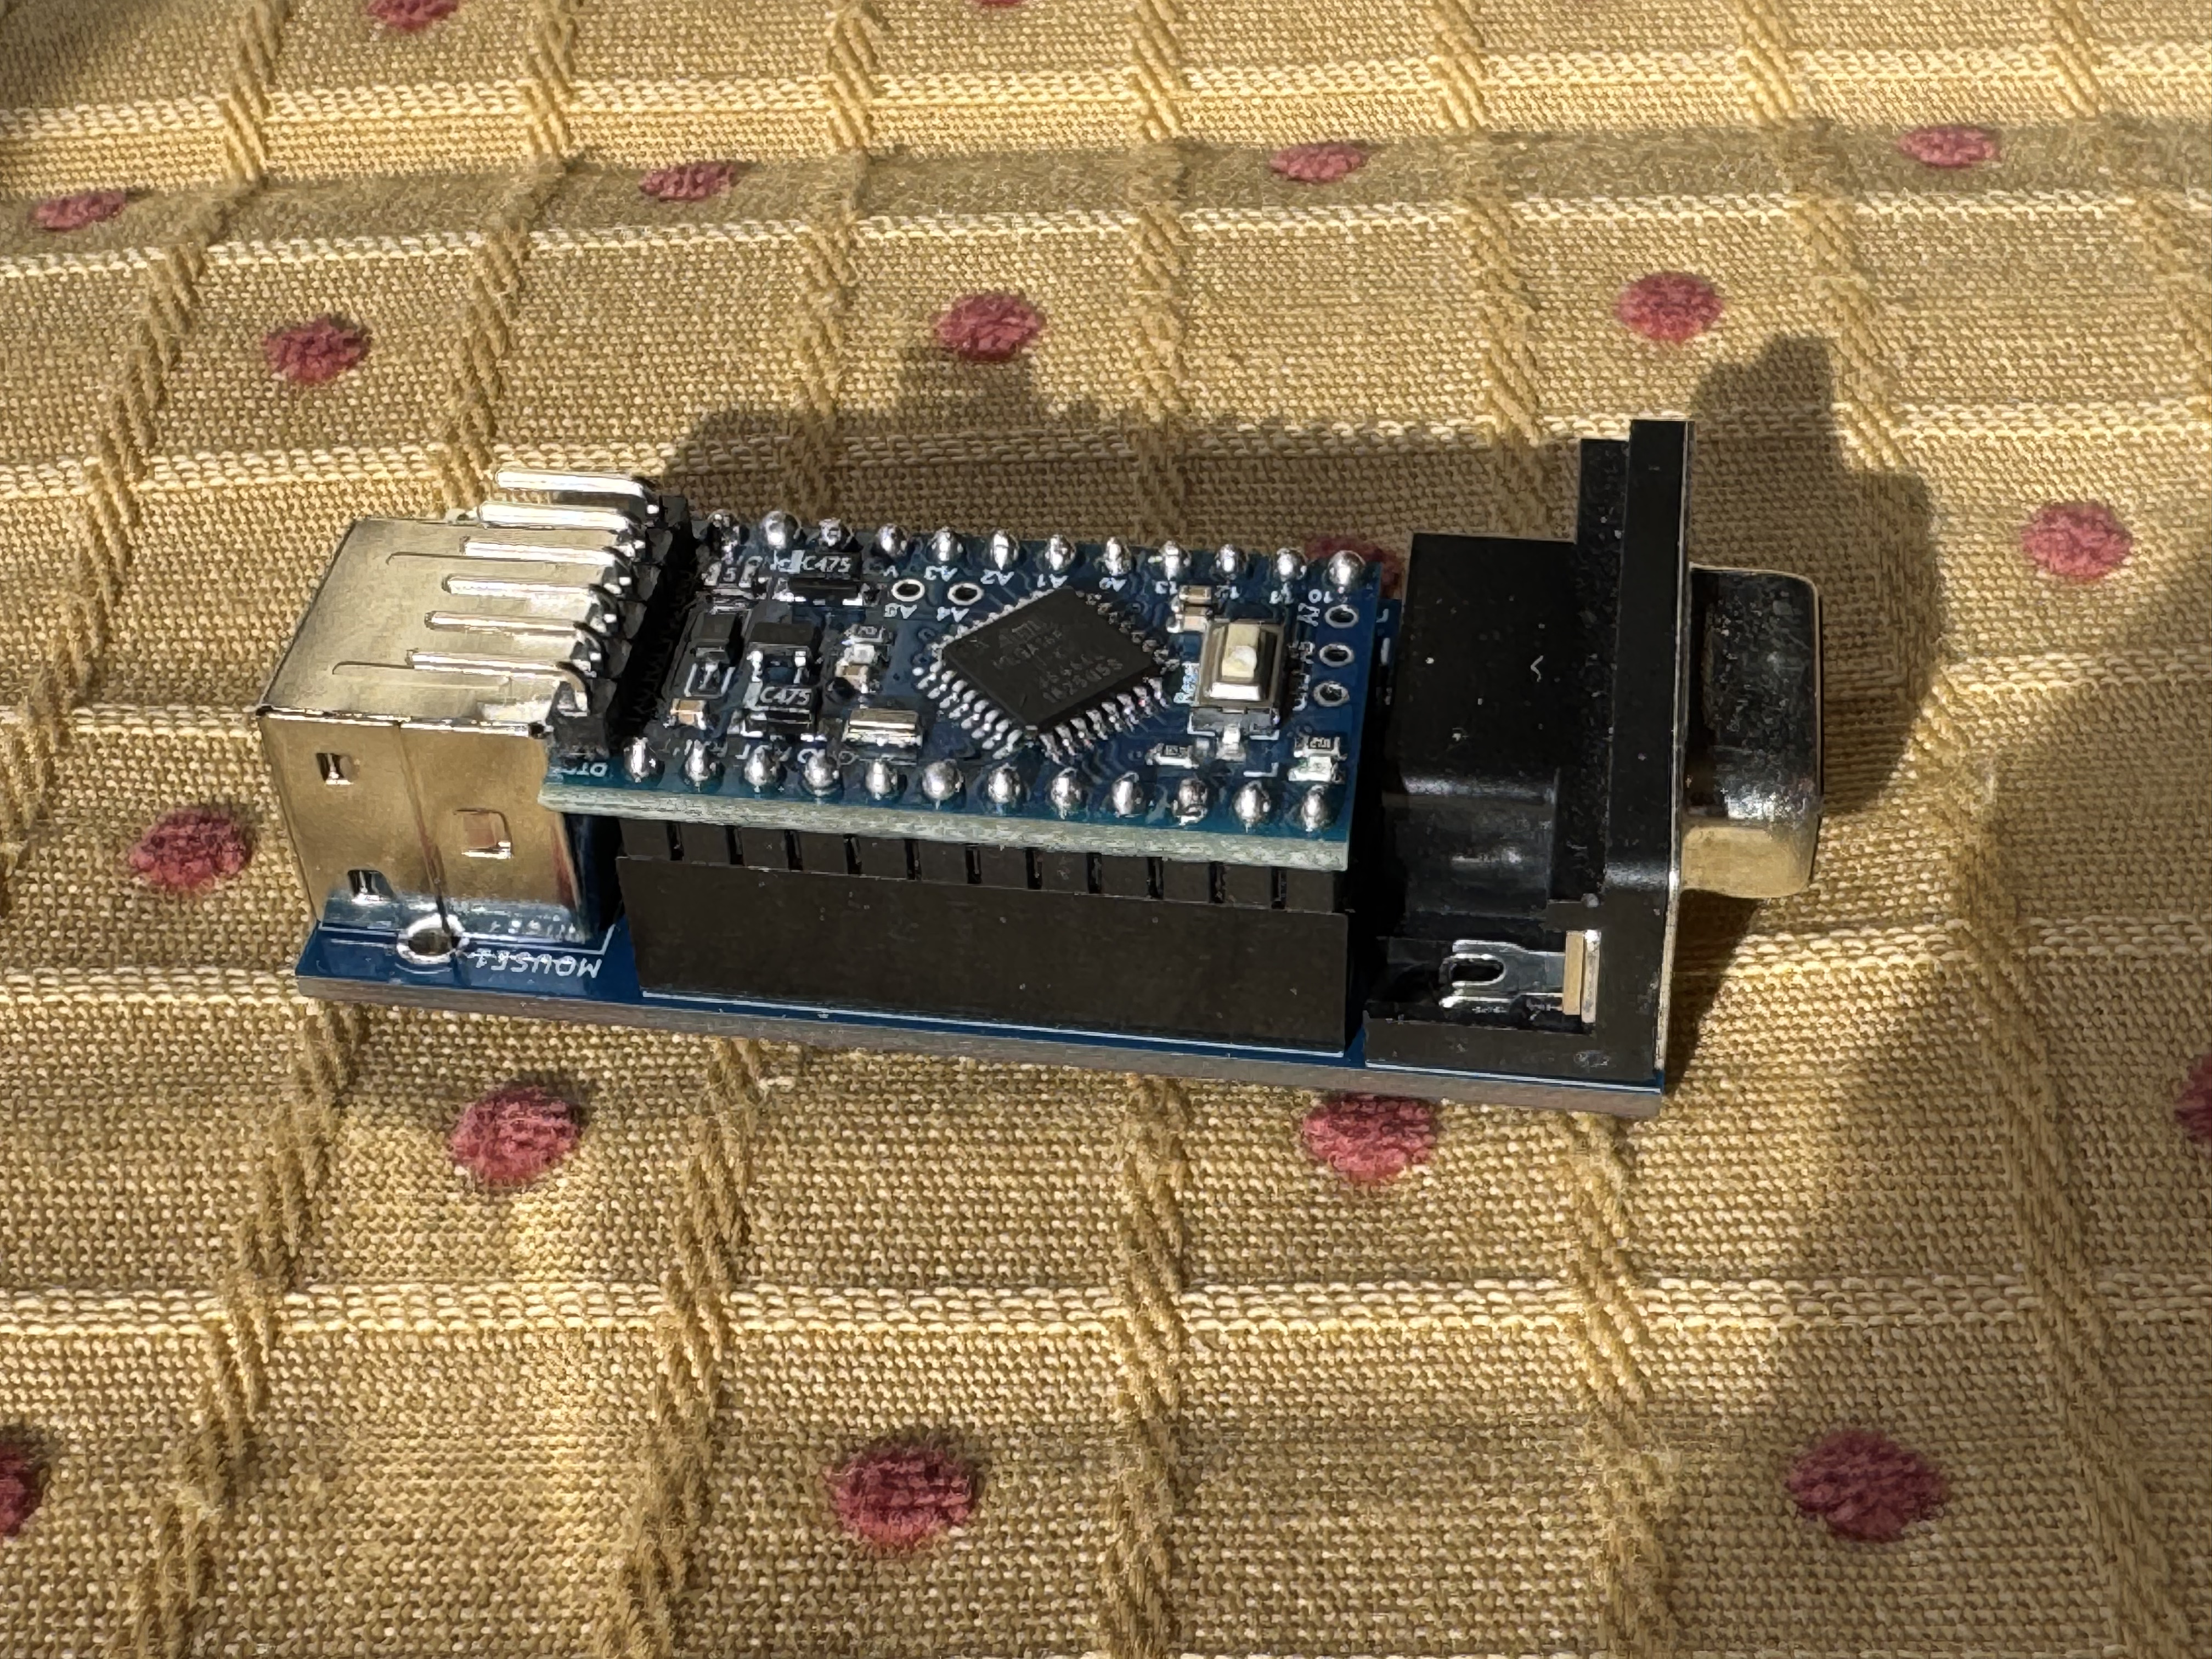
The board should now be complete! If you bought it from the seller I did, (who has been great, and I have bought other items from) then you have the main repos firmware on it. I won’t go too far in depth for this, but if you clone the fork down you can then use Platform.IO to flash the firmware. There are guides out there to do this on. Platform.IO is great when doing Arduino projects.
If you go the same kit I did, then it comes with a “pro16MHzatmega168” not the “pro16MHzatmega328” used in the Pull Request. Change the two lines where the 328 is mentioned to the 168-model string. If you do not, you will get a “timeout connecting to Arduino” when attempting to flash.
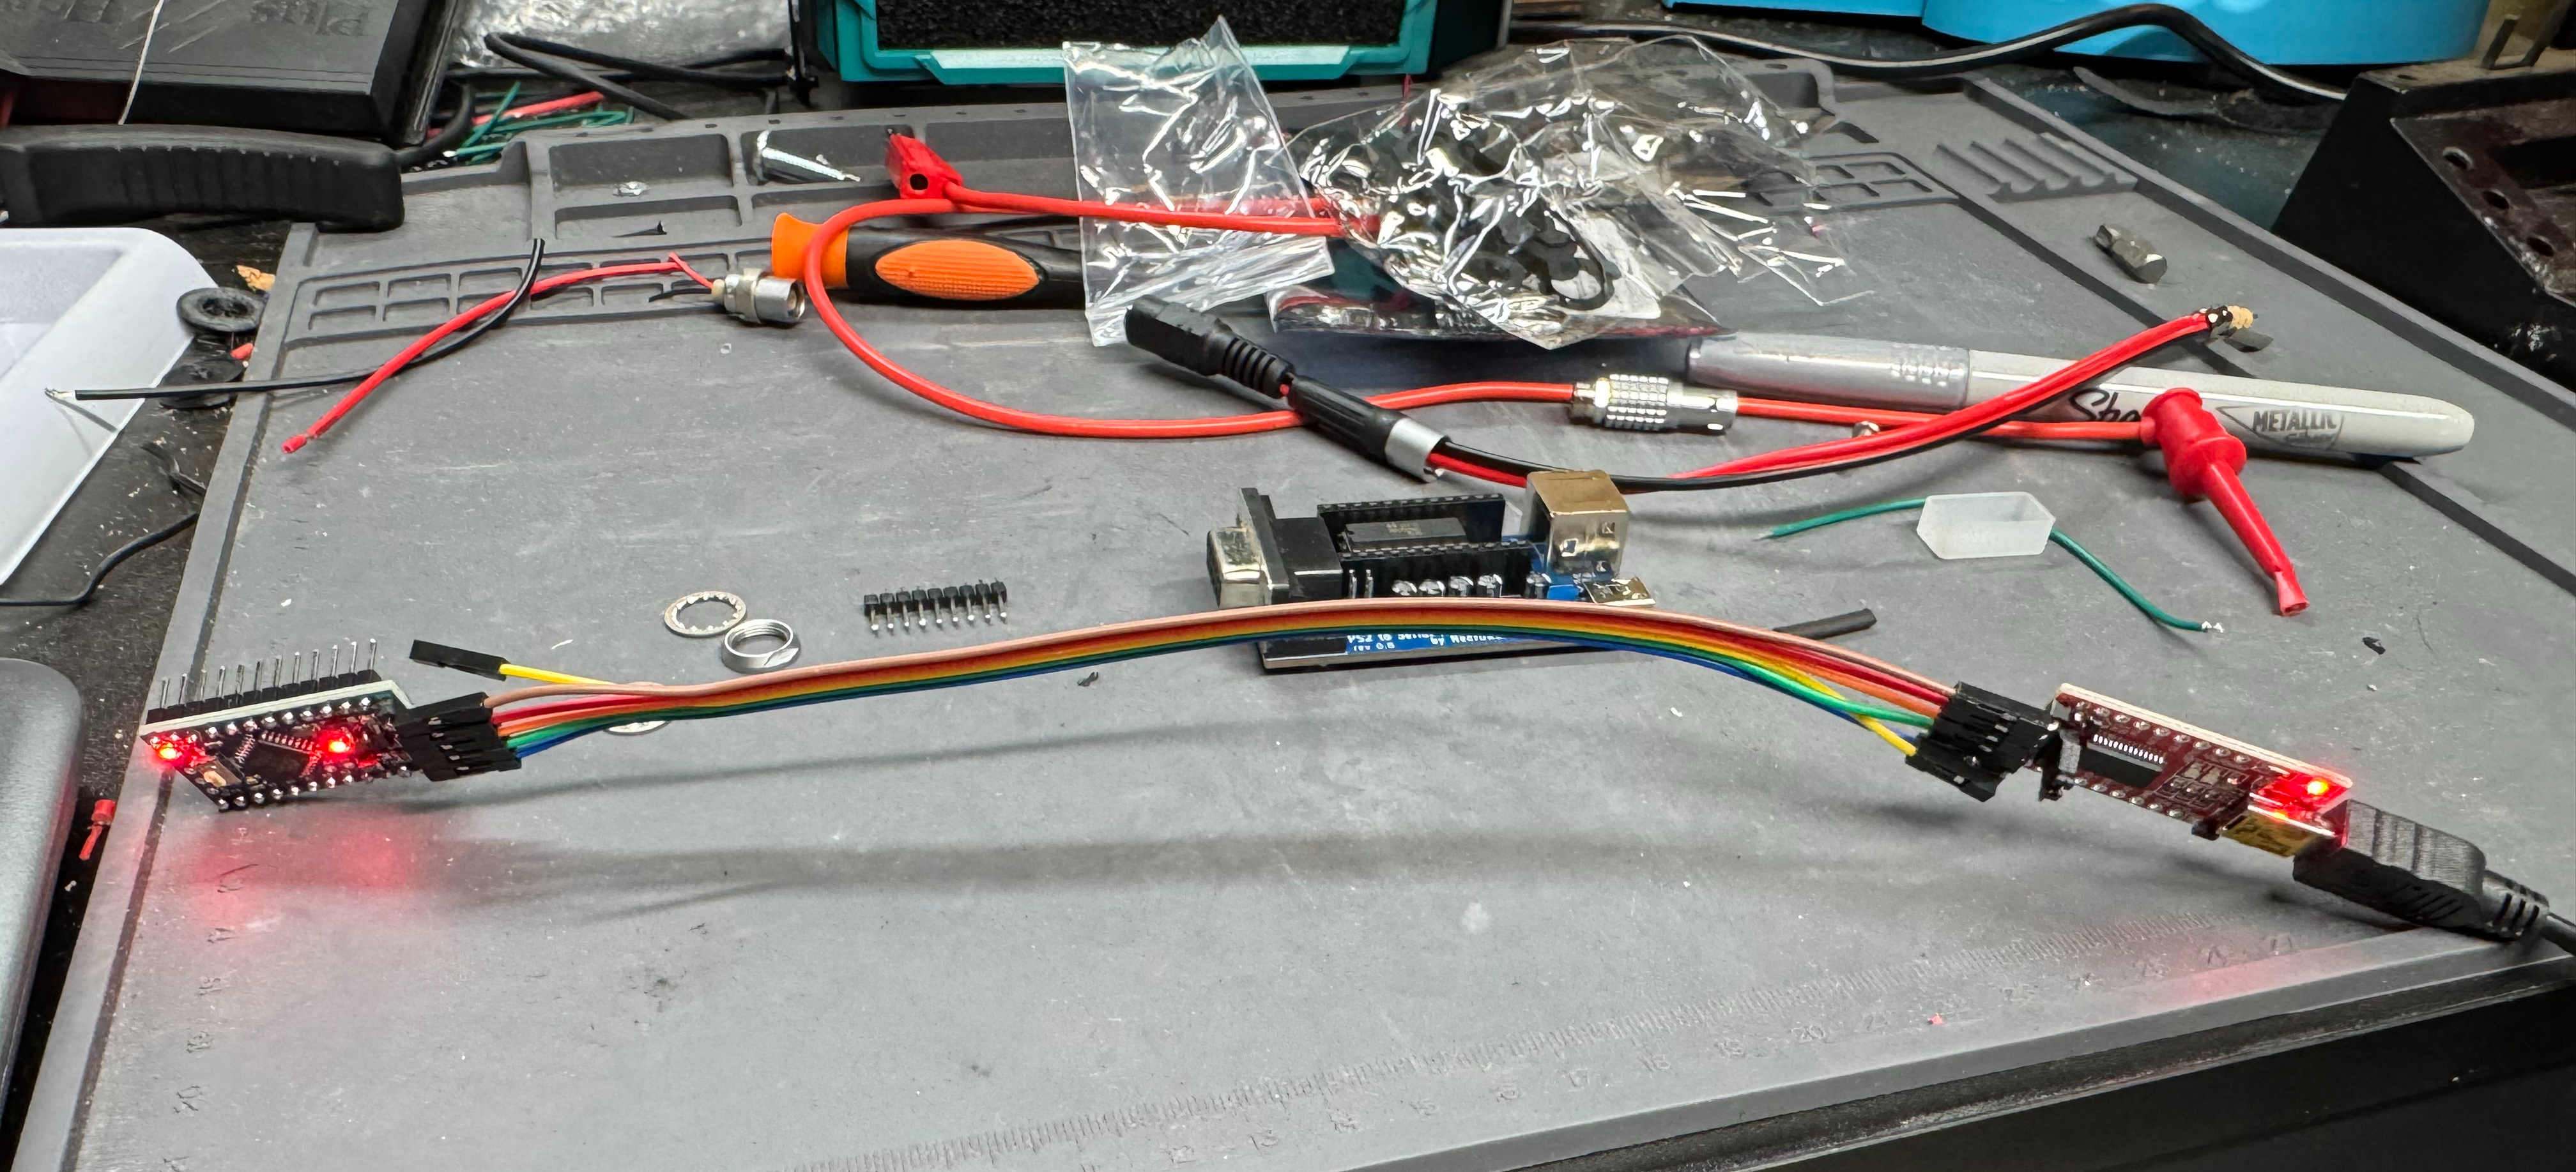
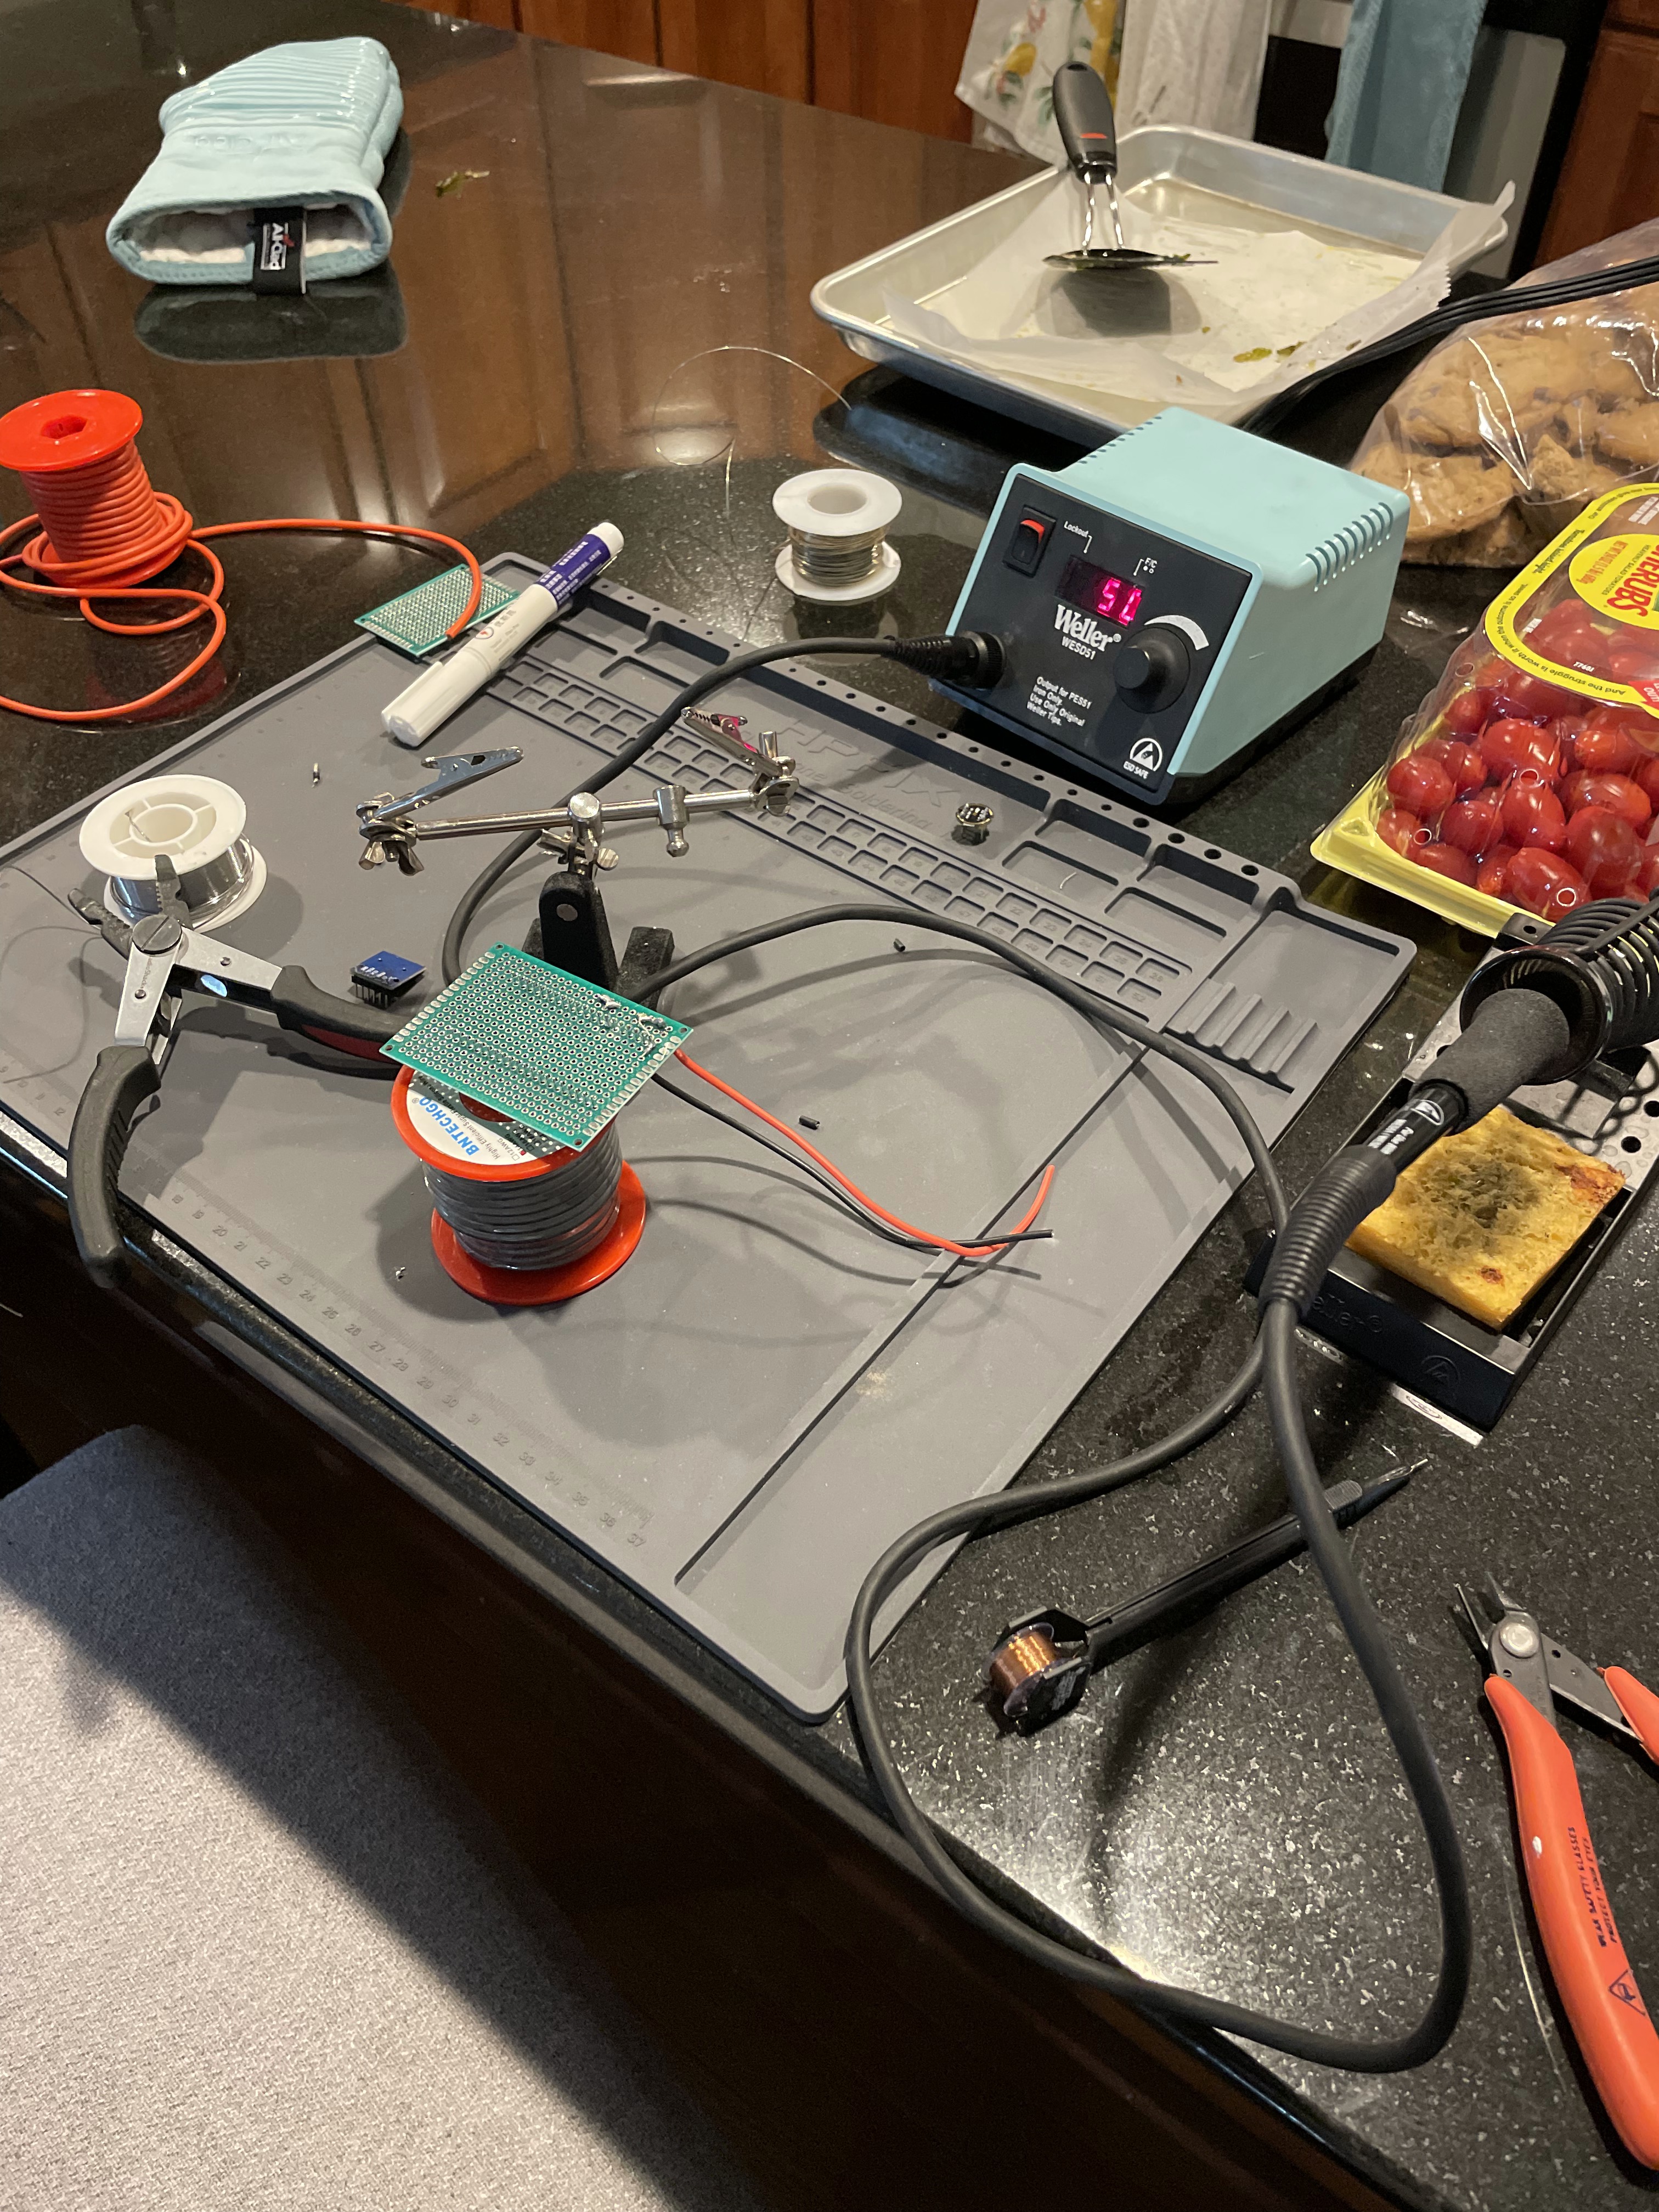
As mentioned, you need a TTL converter, then to flash the chip. The TTL converter (which I hadn’t used before) pins actually line up with the pins on the Arduino Pro. You need to hold it there for a total of 30 seconds while it flashes. You can just stick the header pins of the Arduino through the holes of the converter, then hit send via Platform.IO.
Flashing the new firmware on my messy desk, I did not need long cables like this…
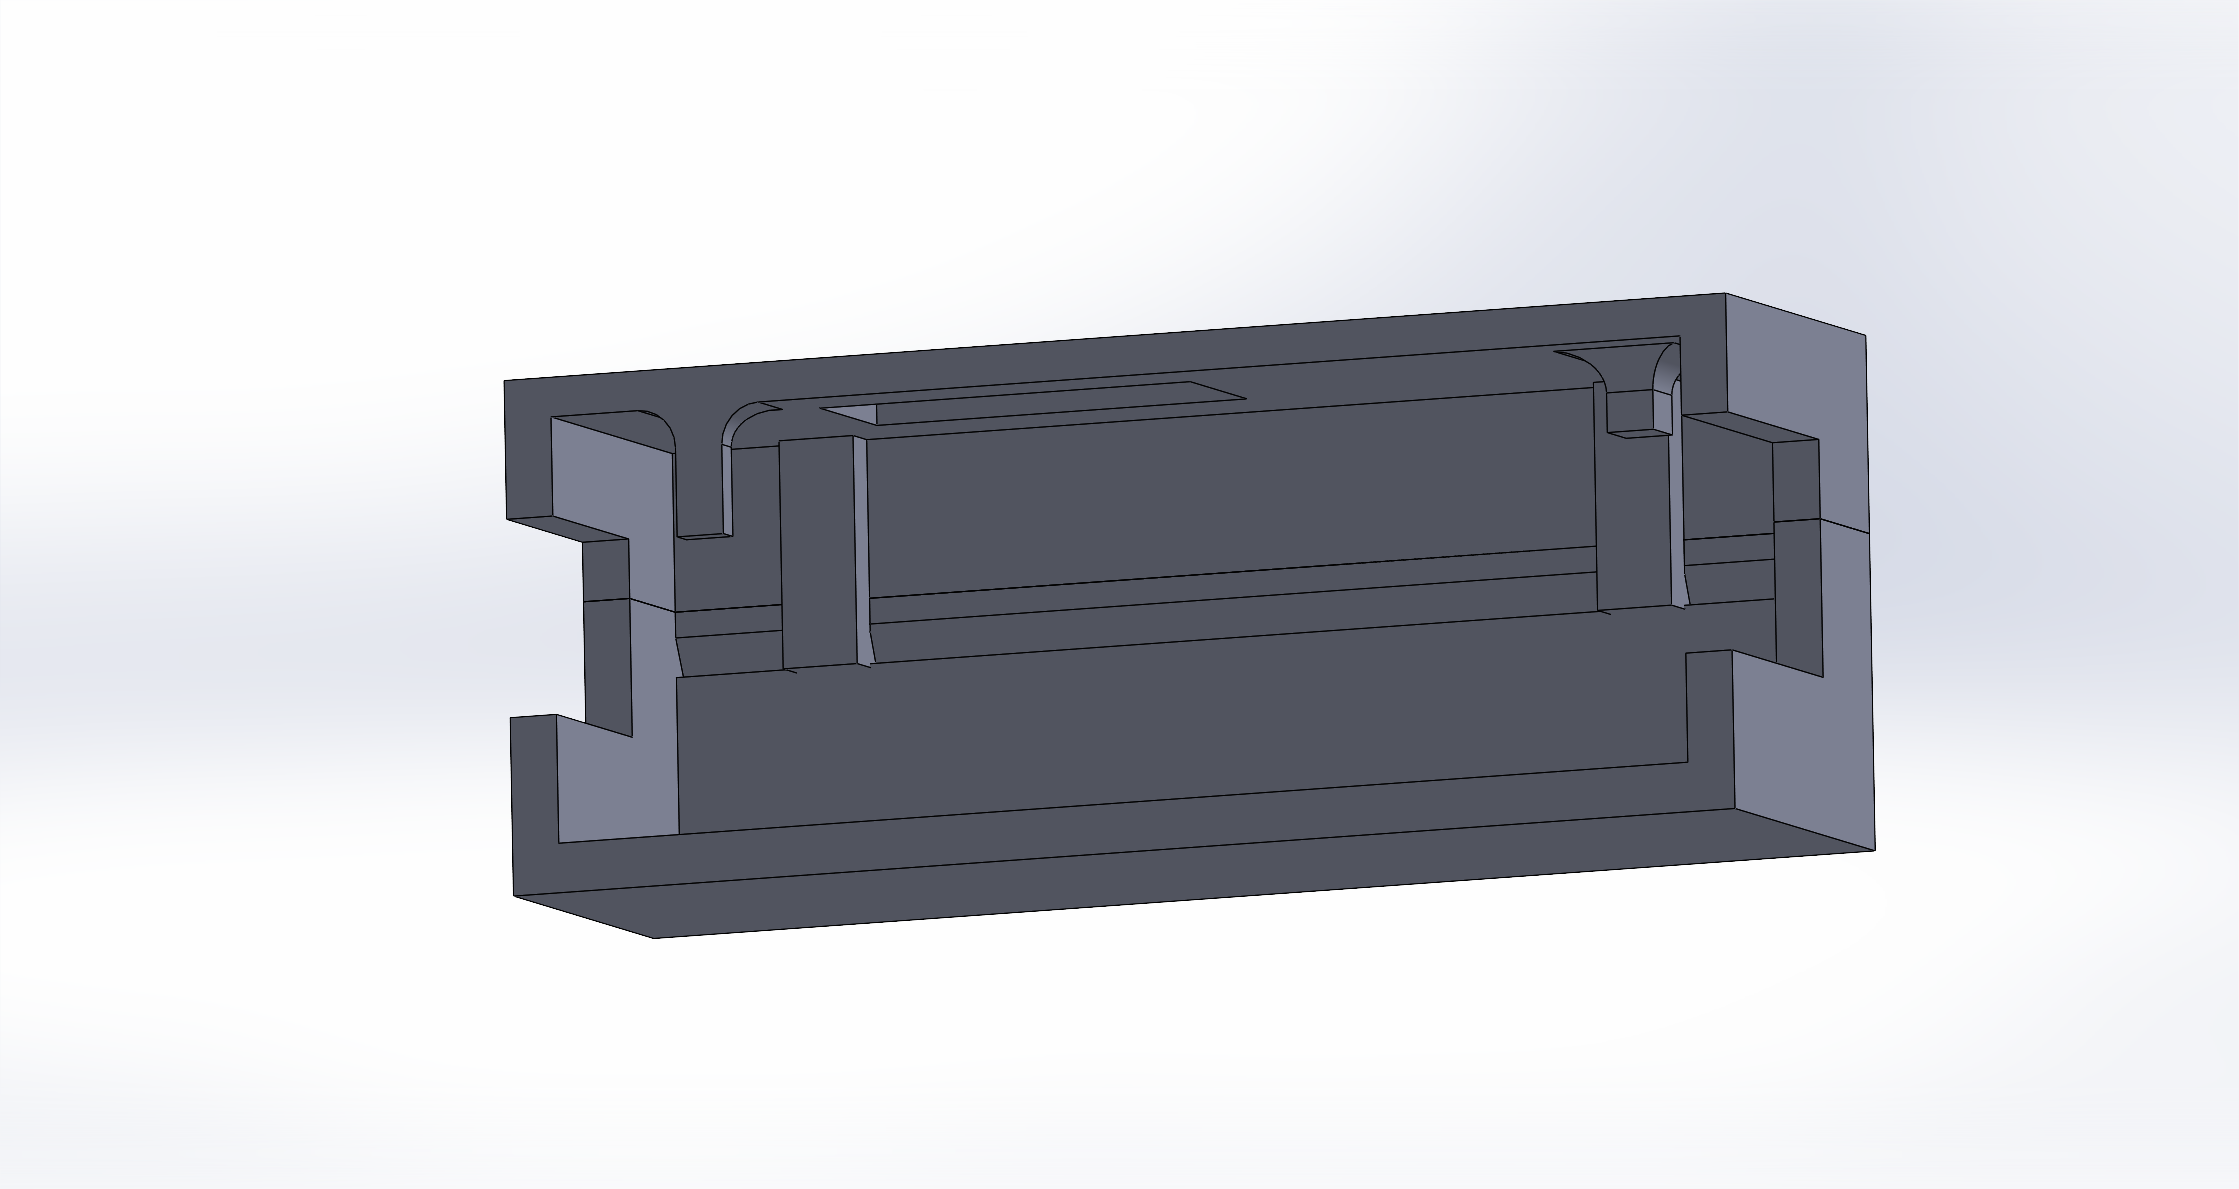
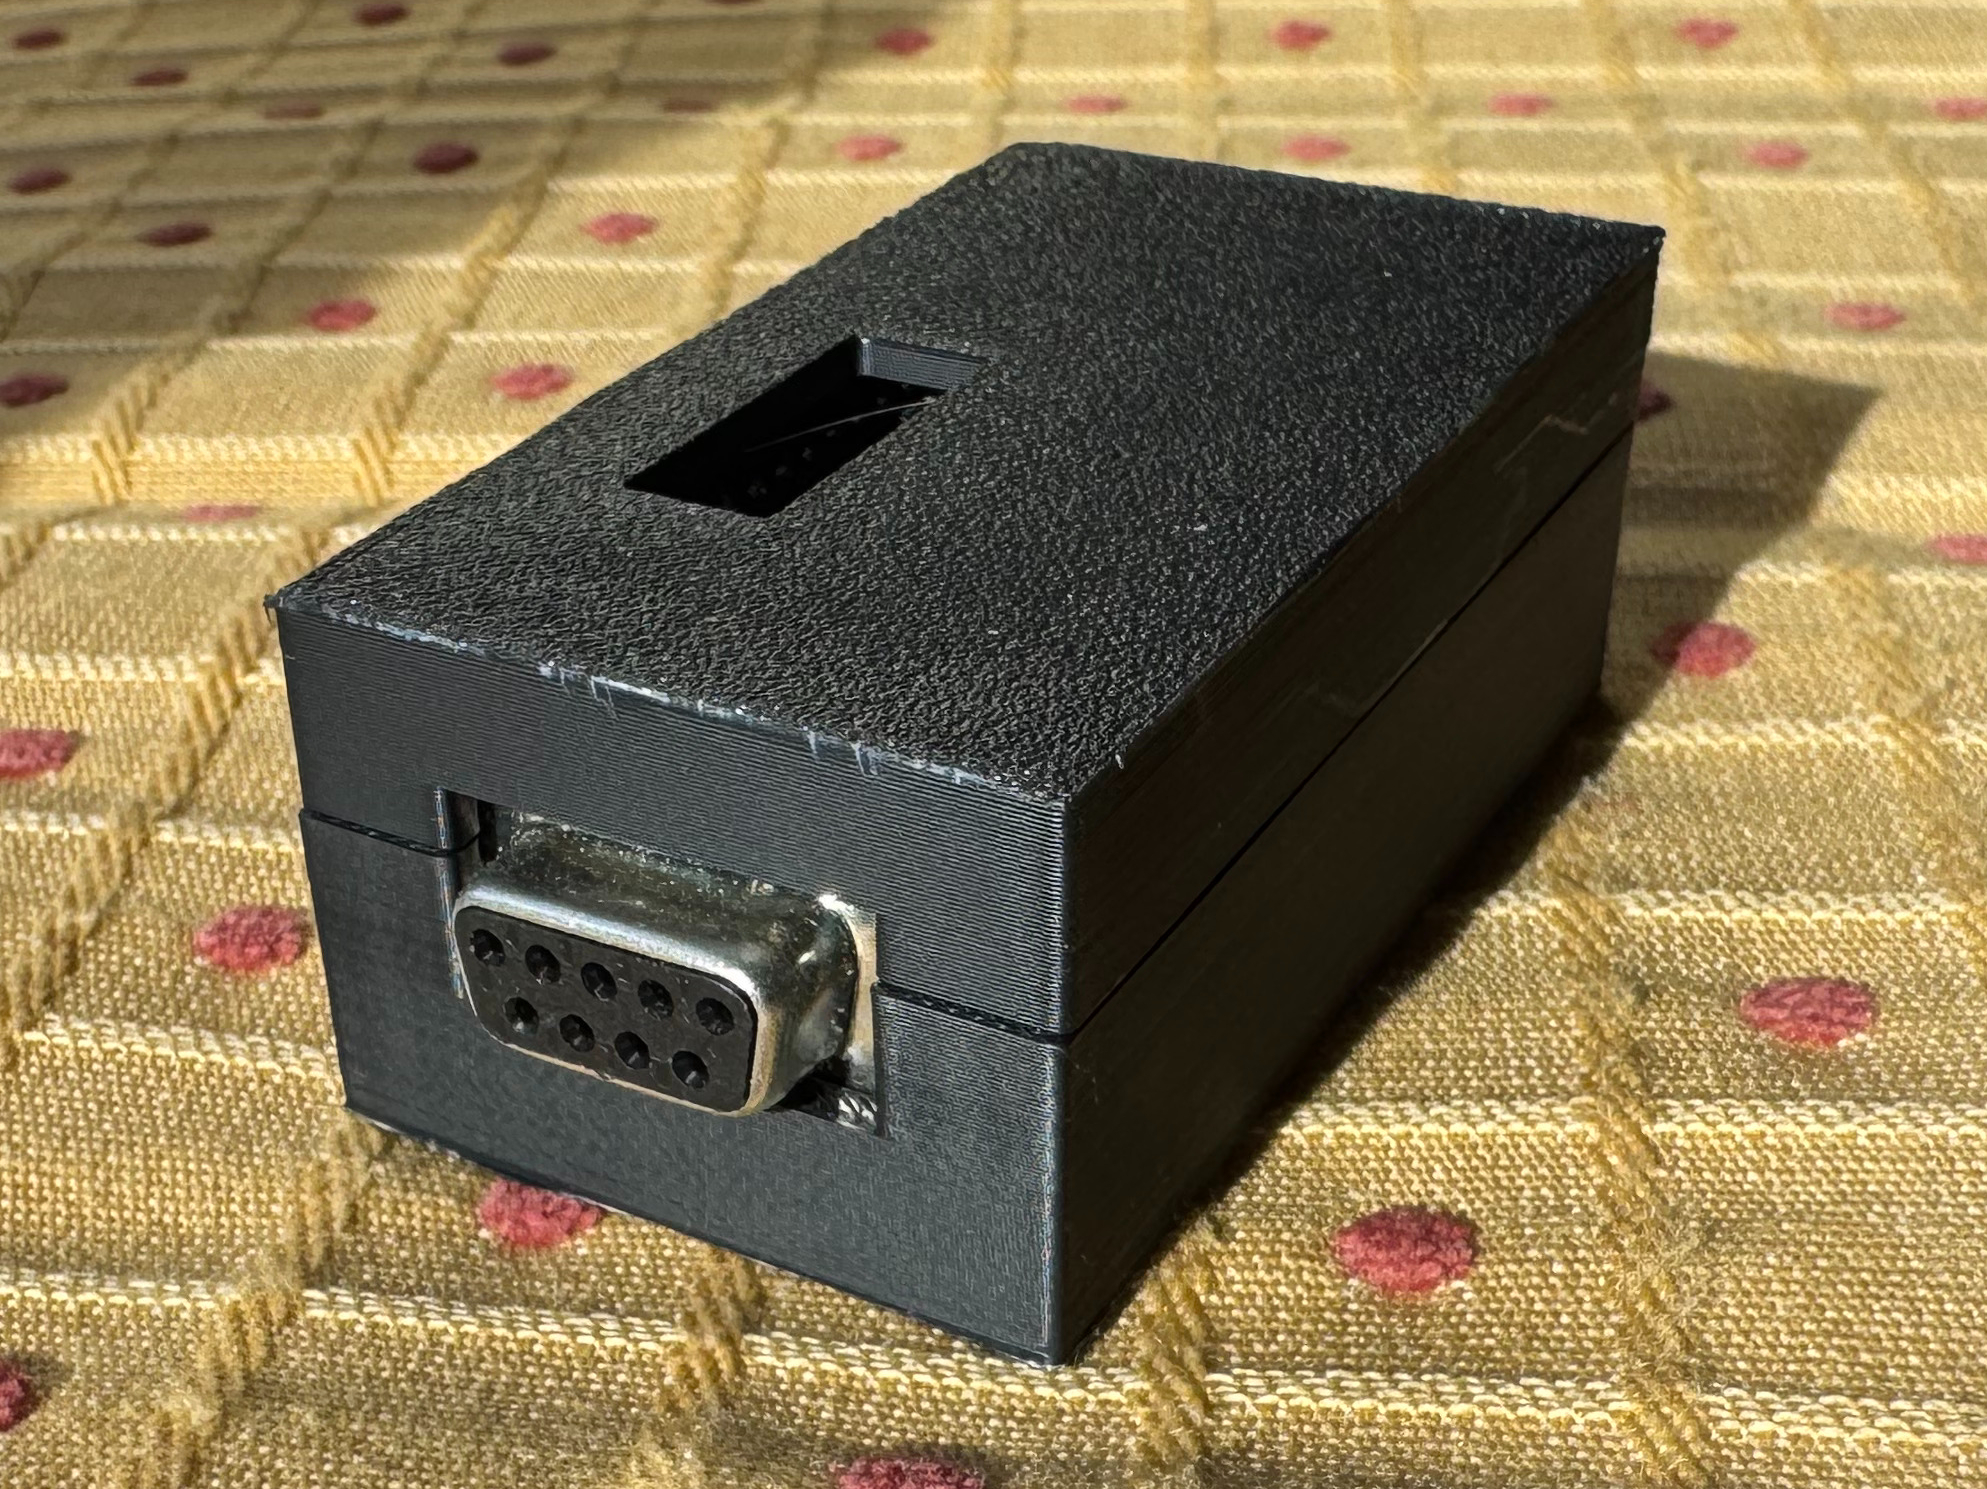
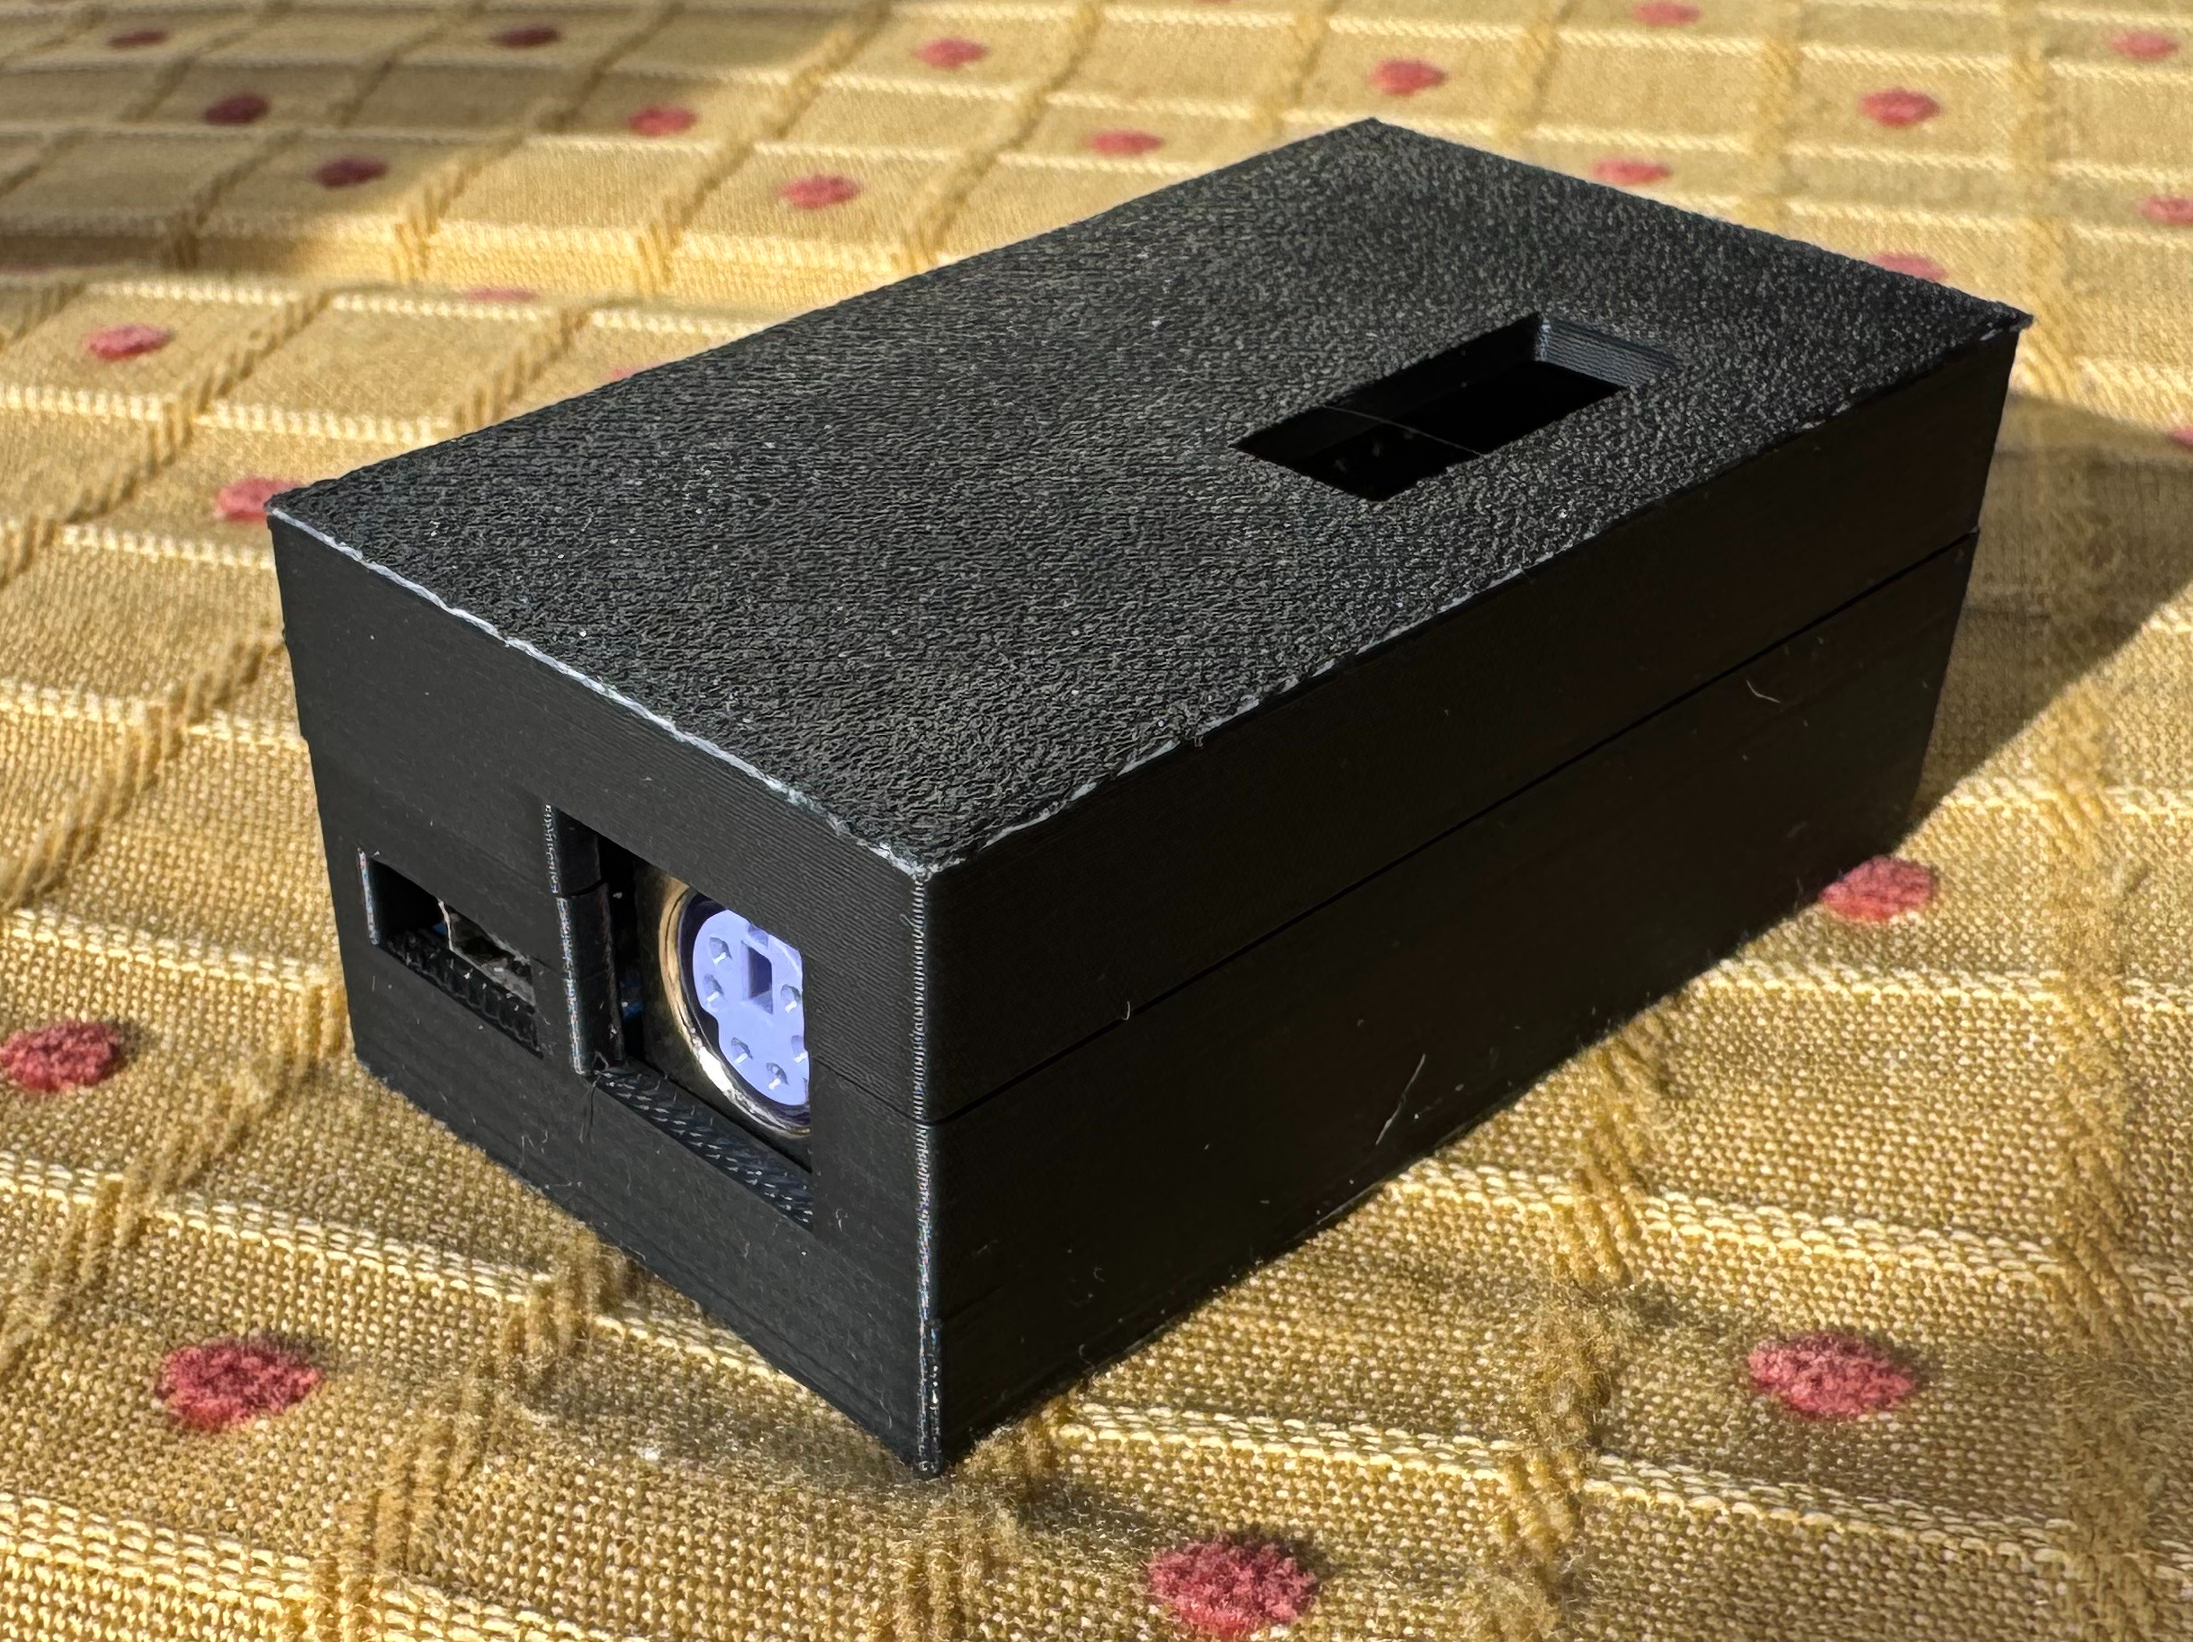
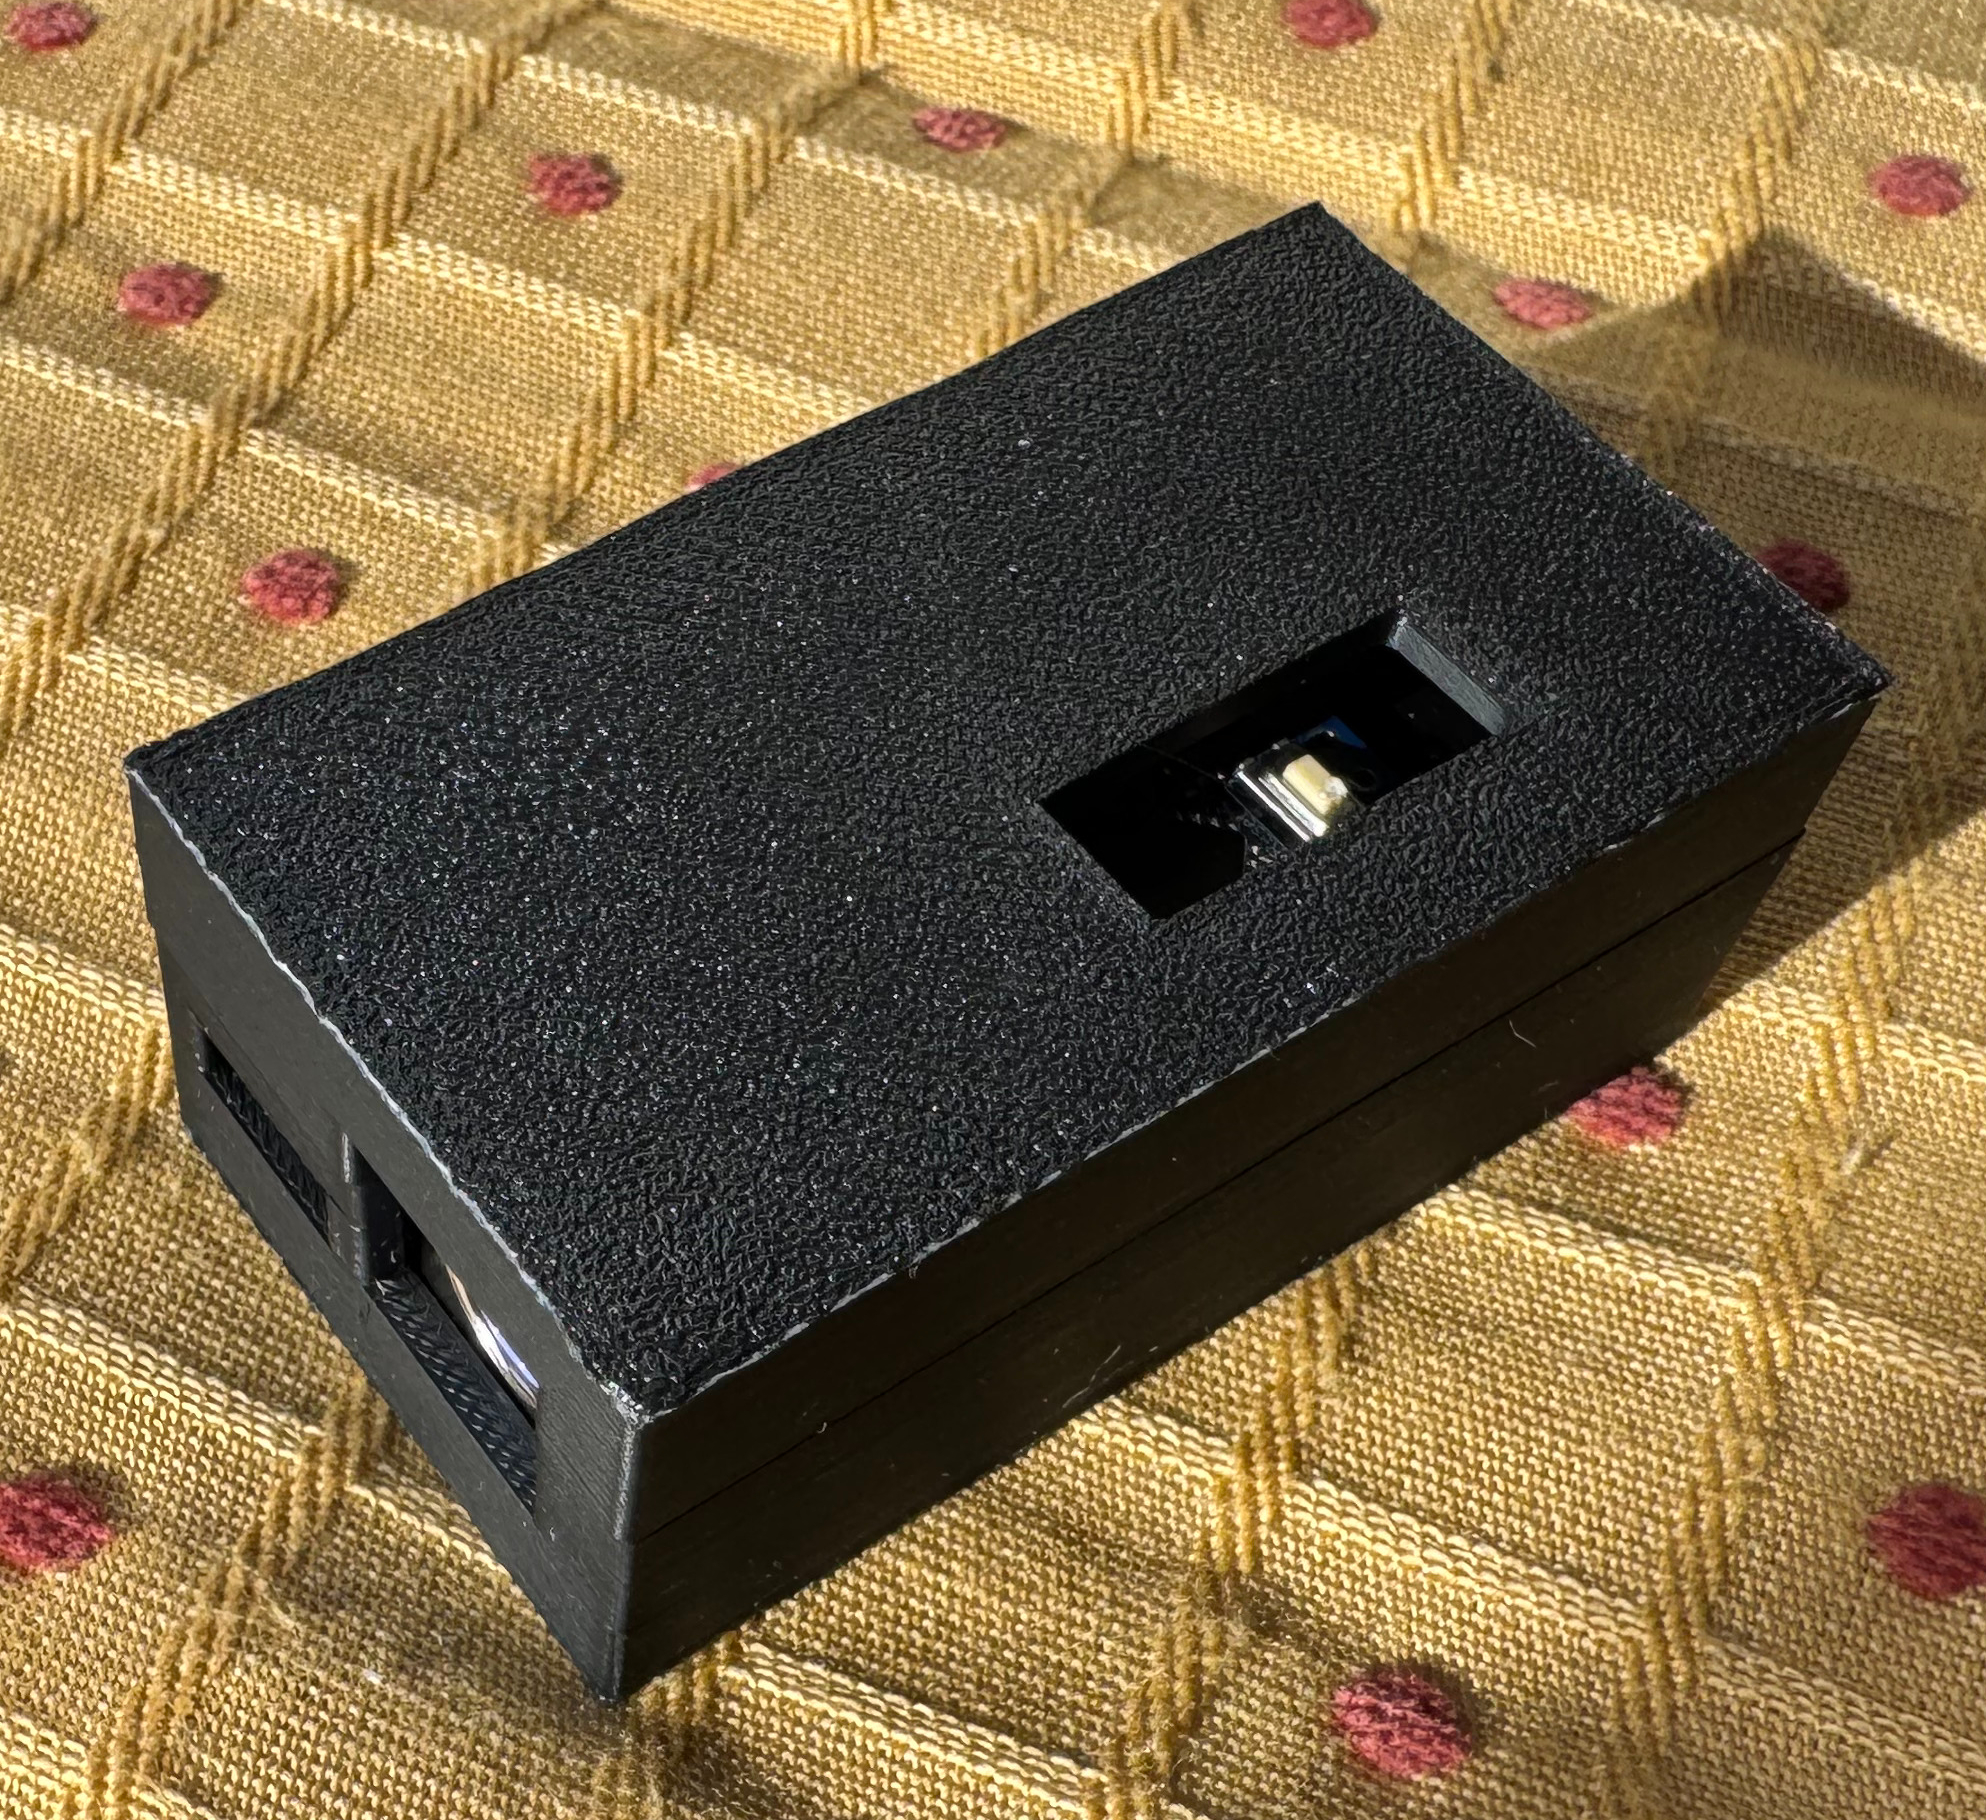
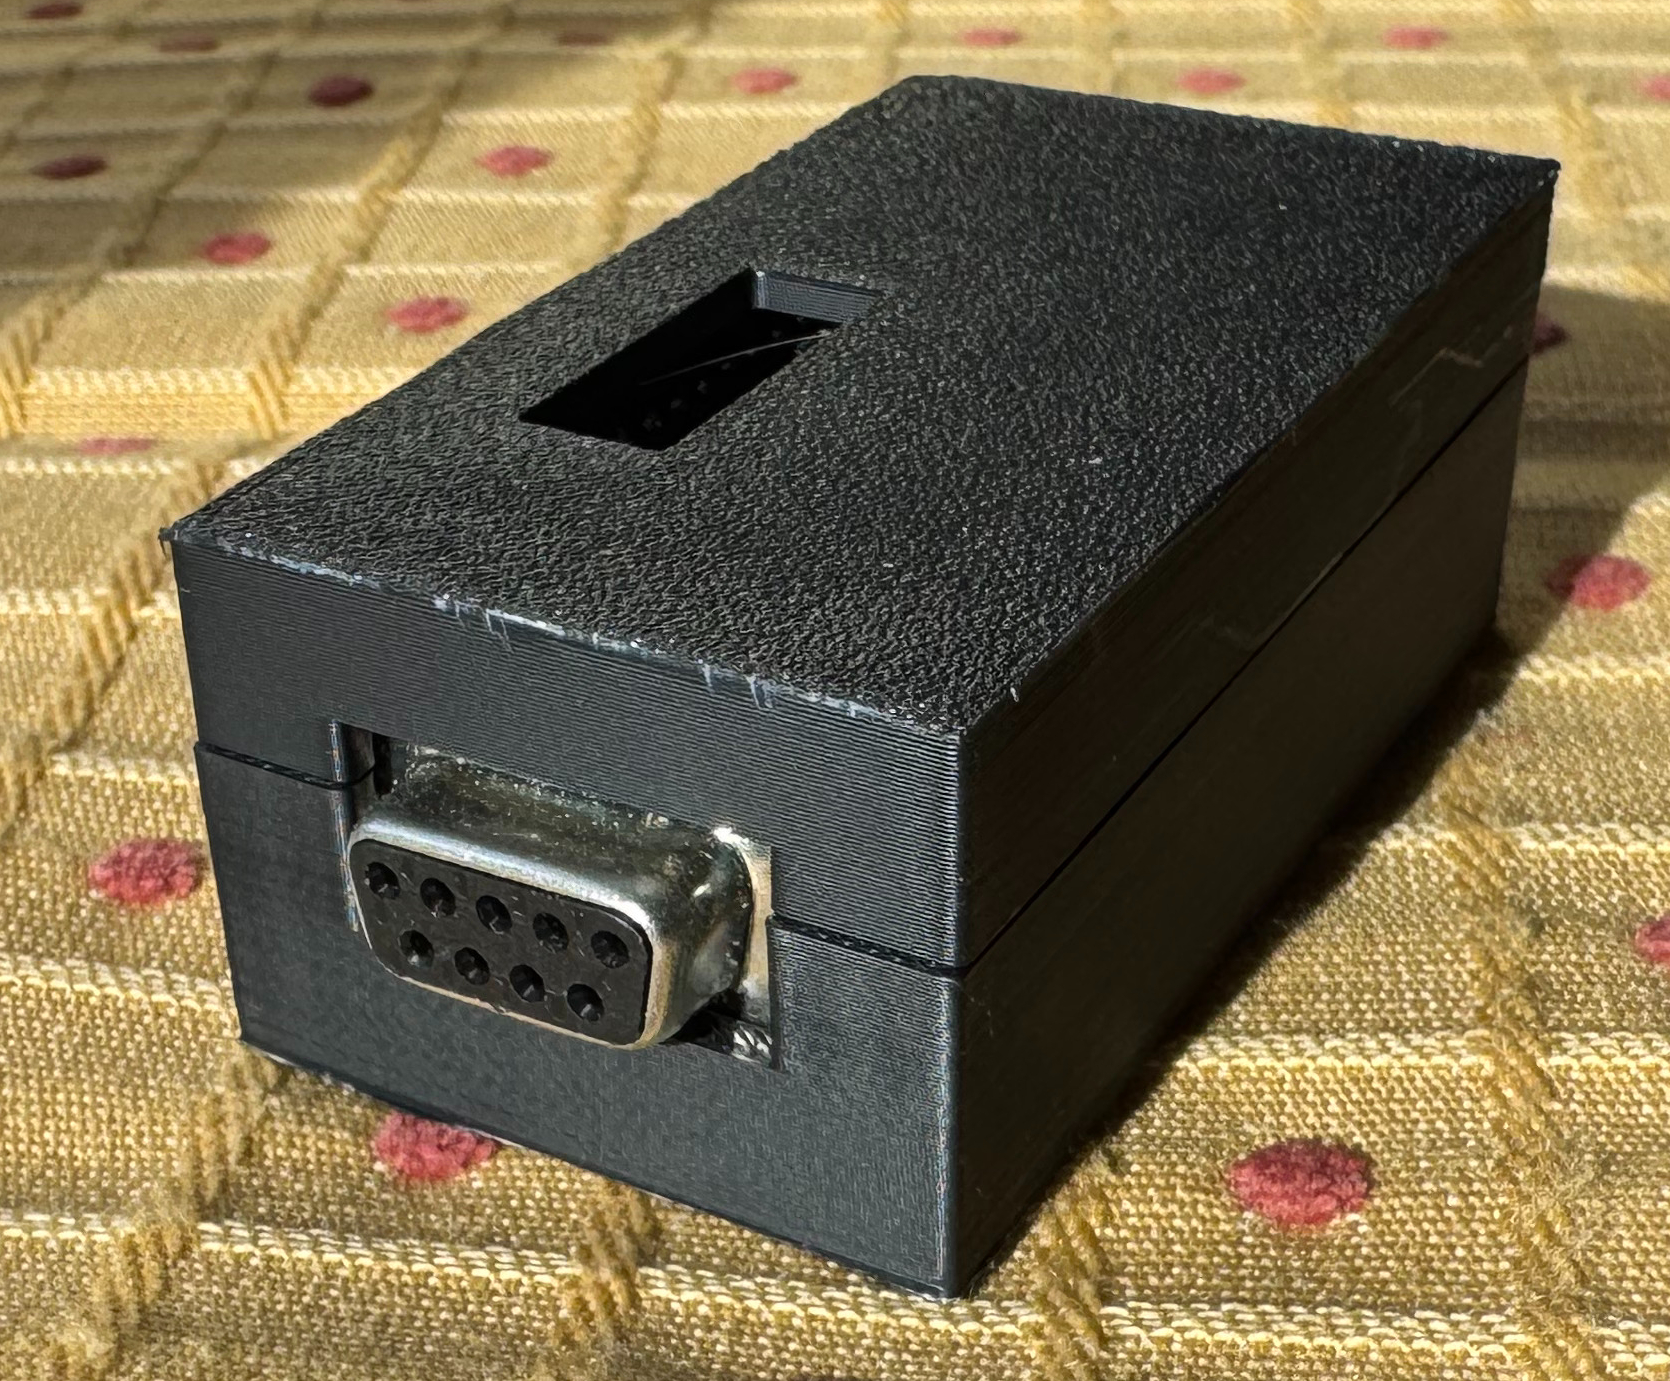
3D Printed Case
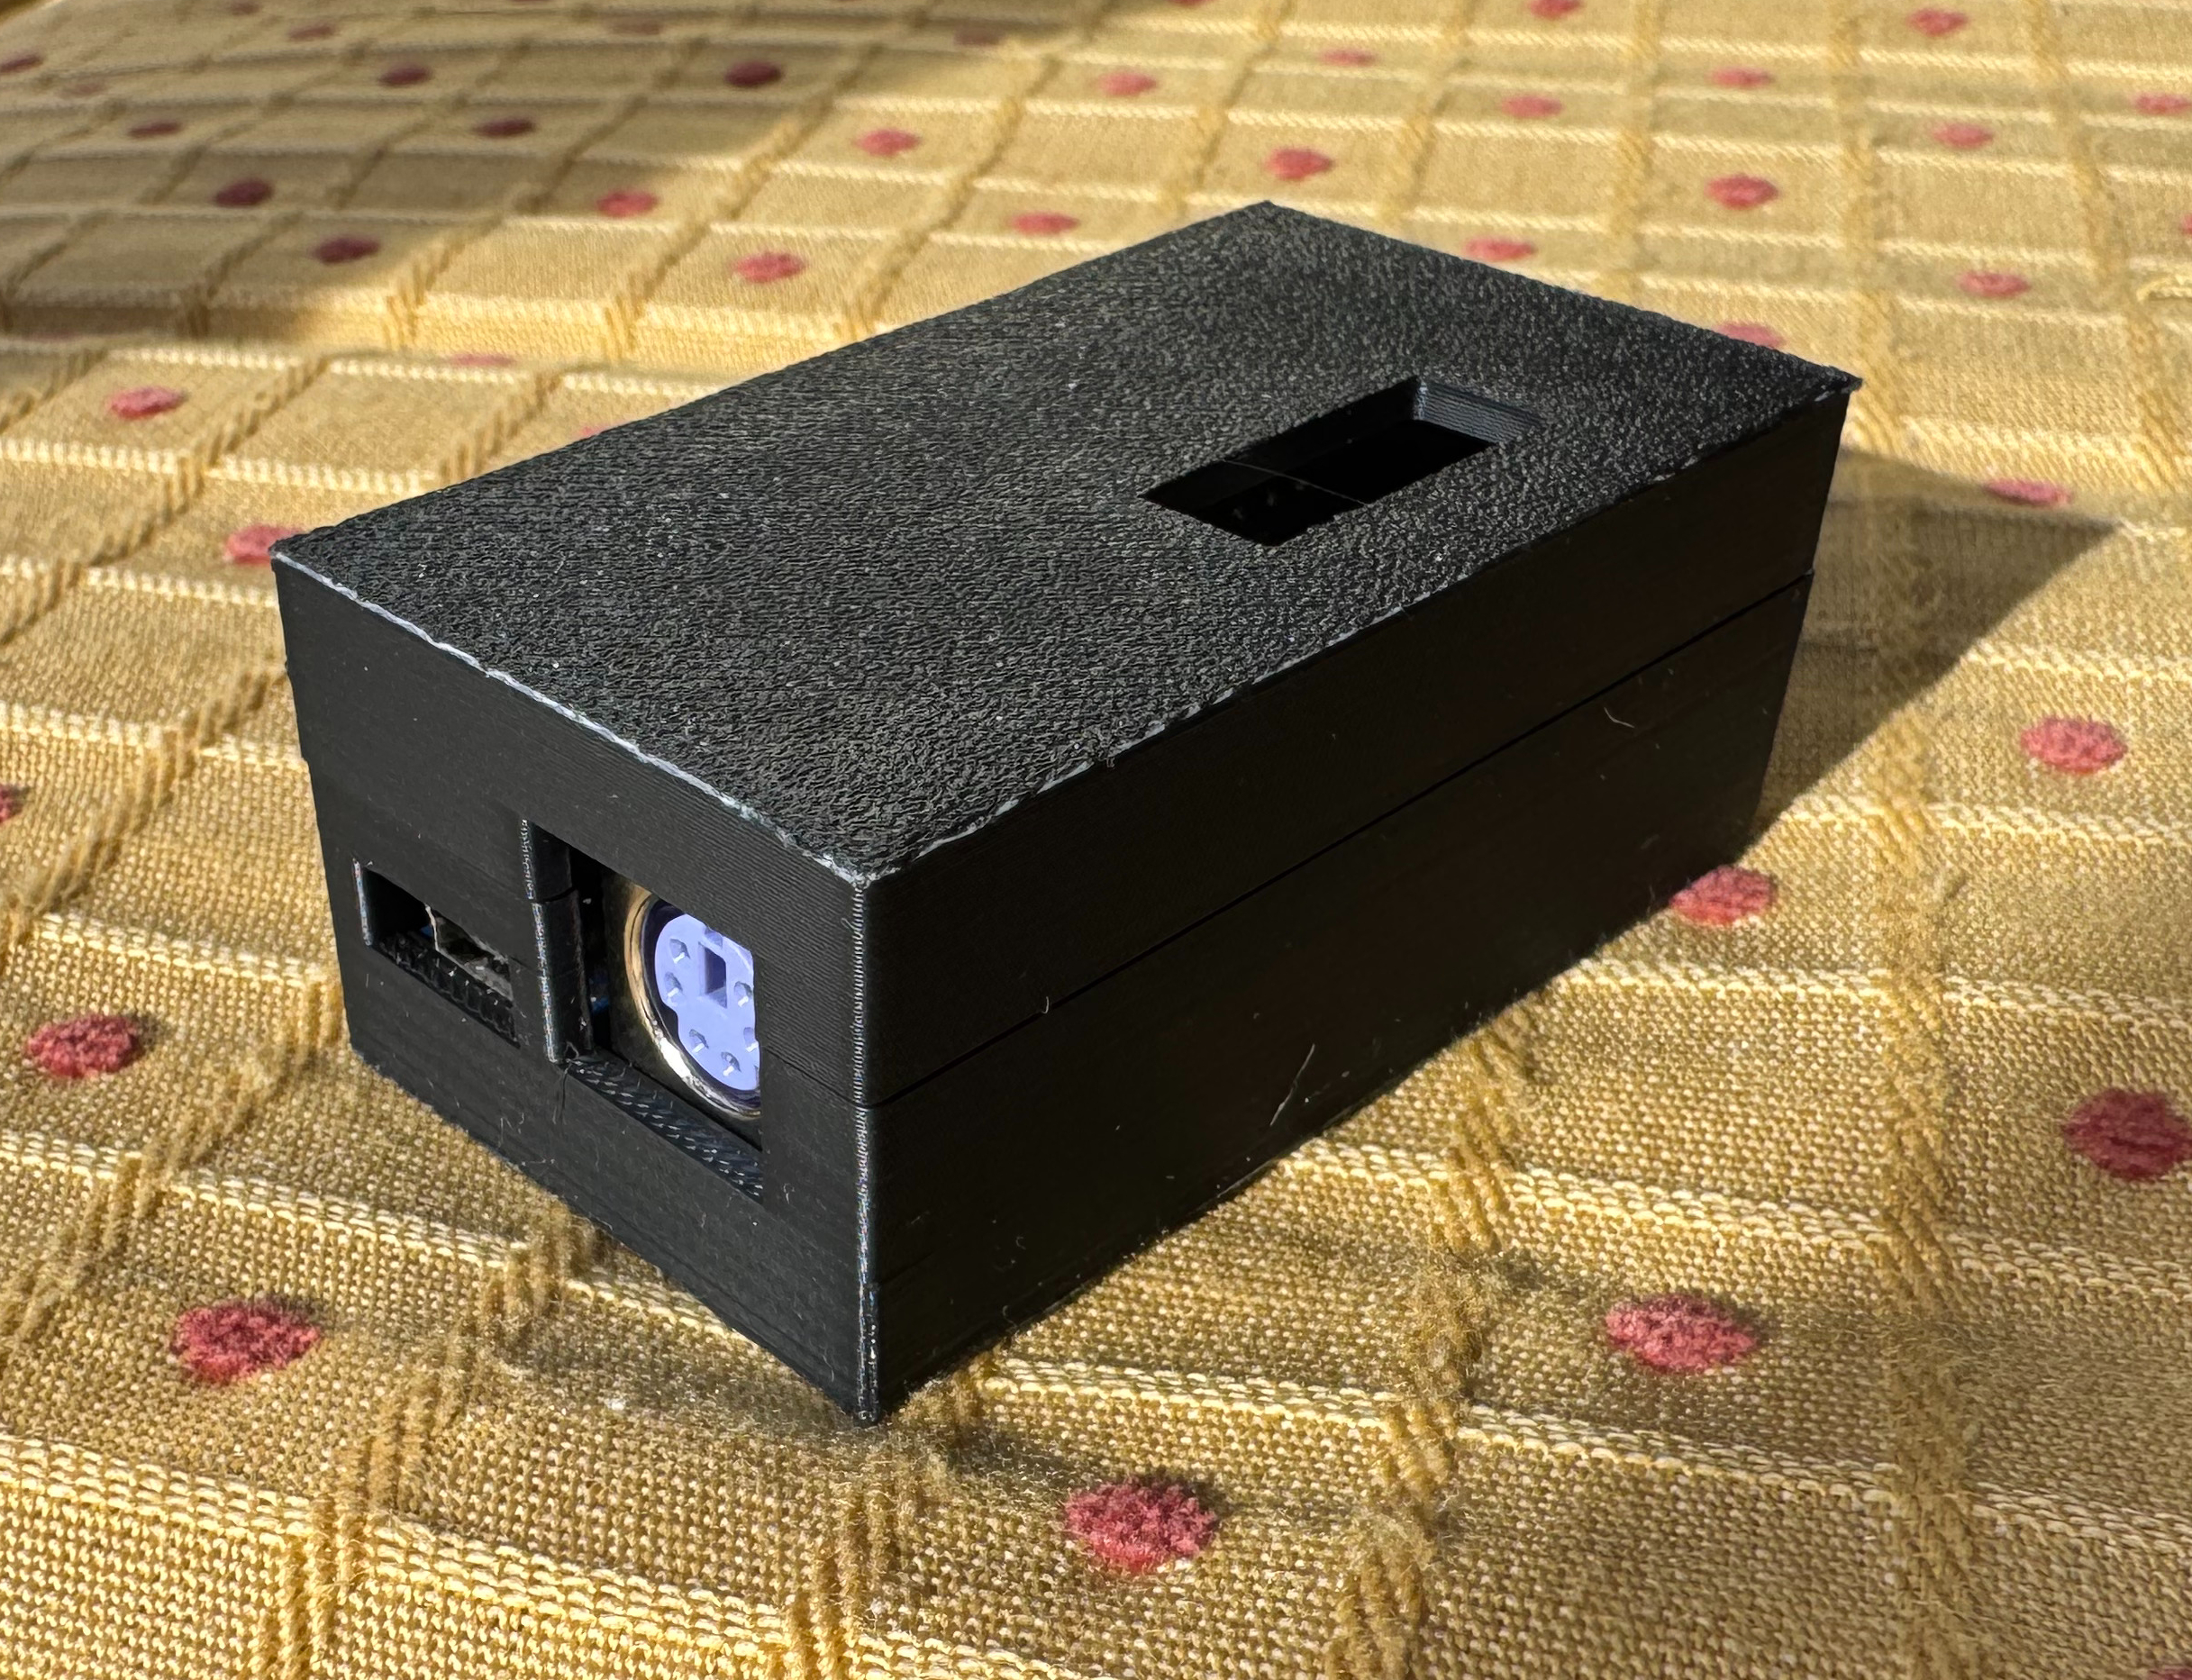
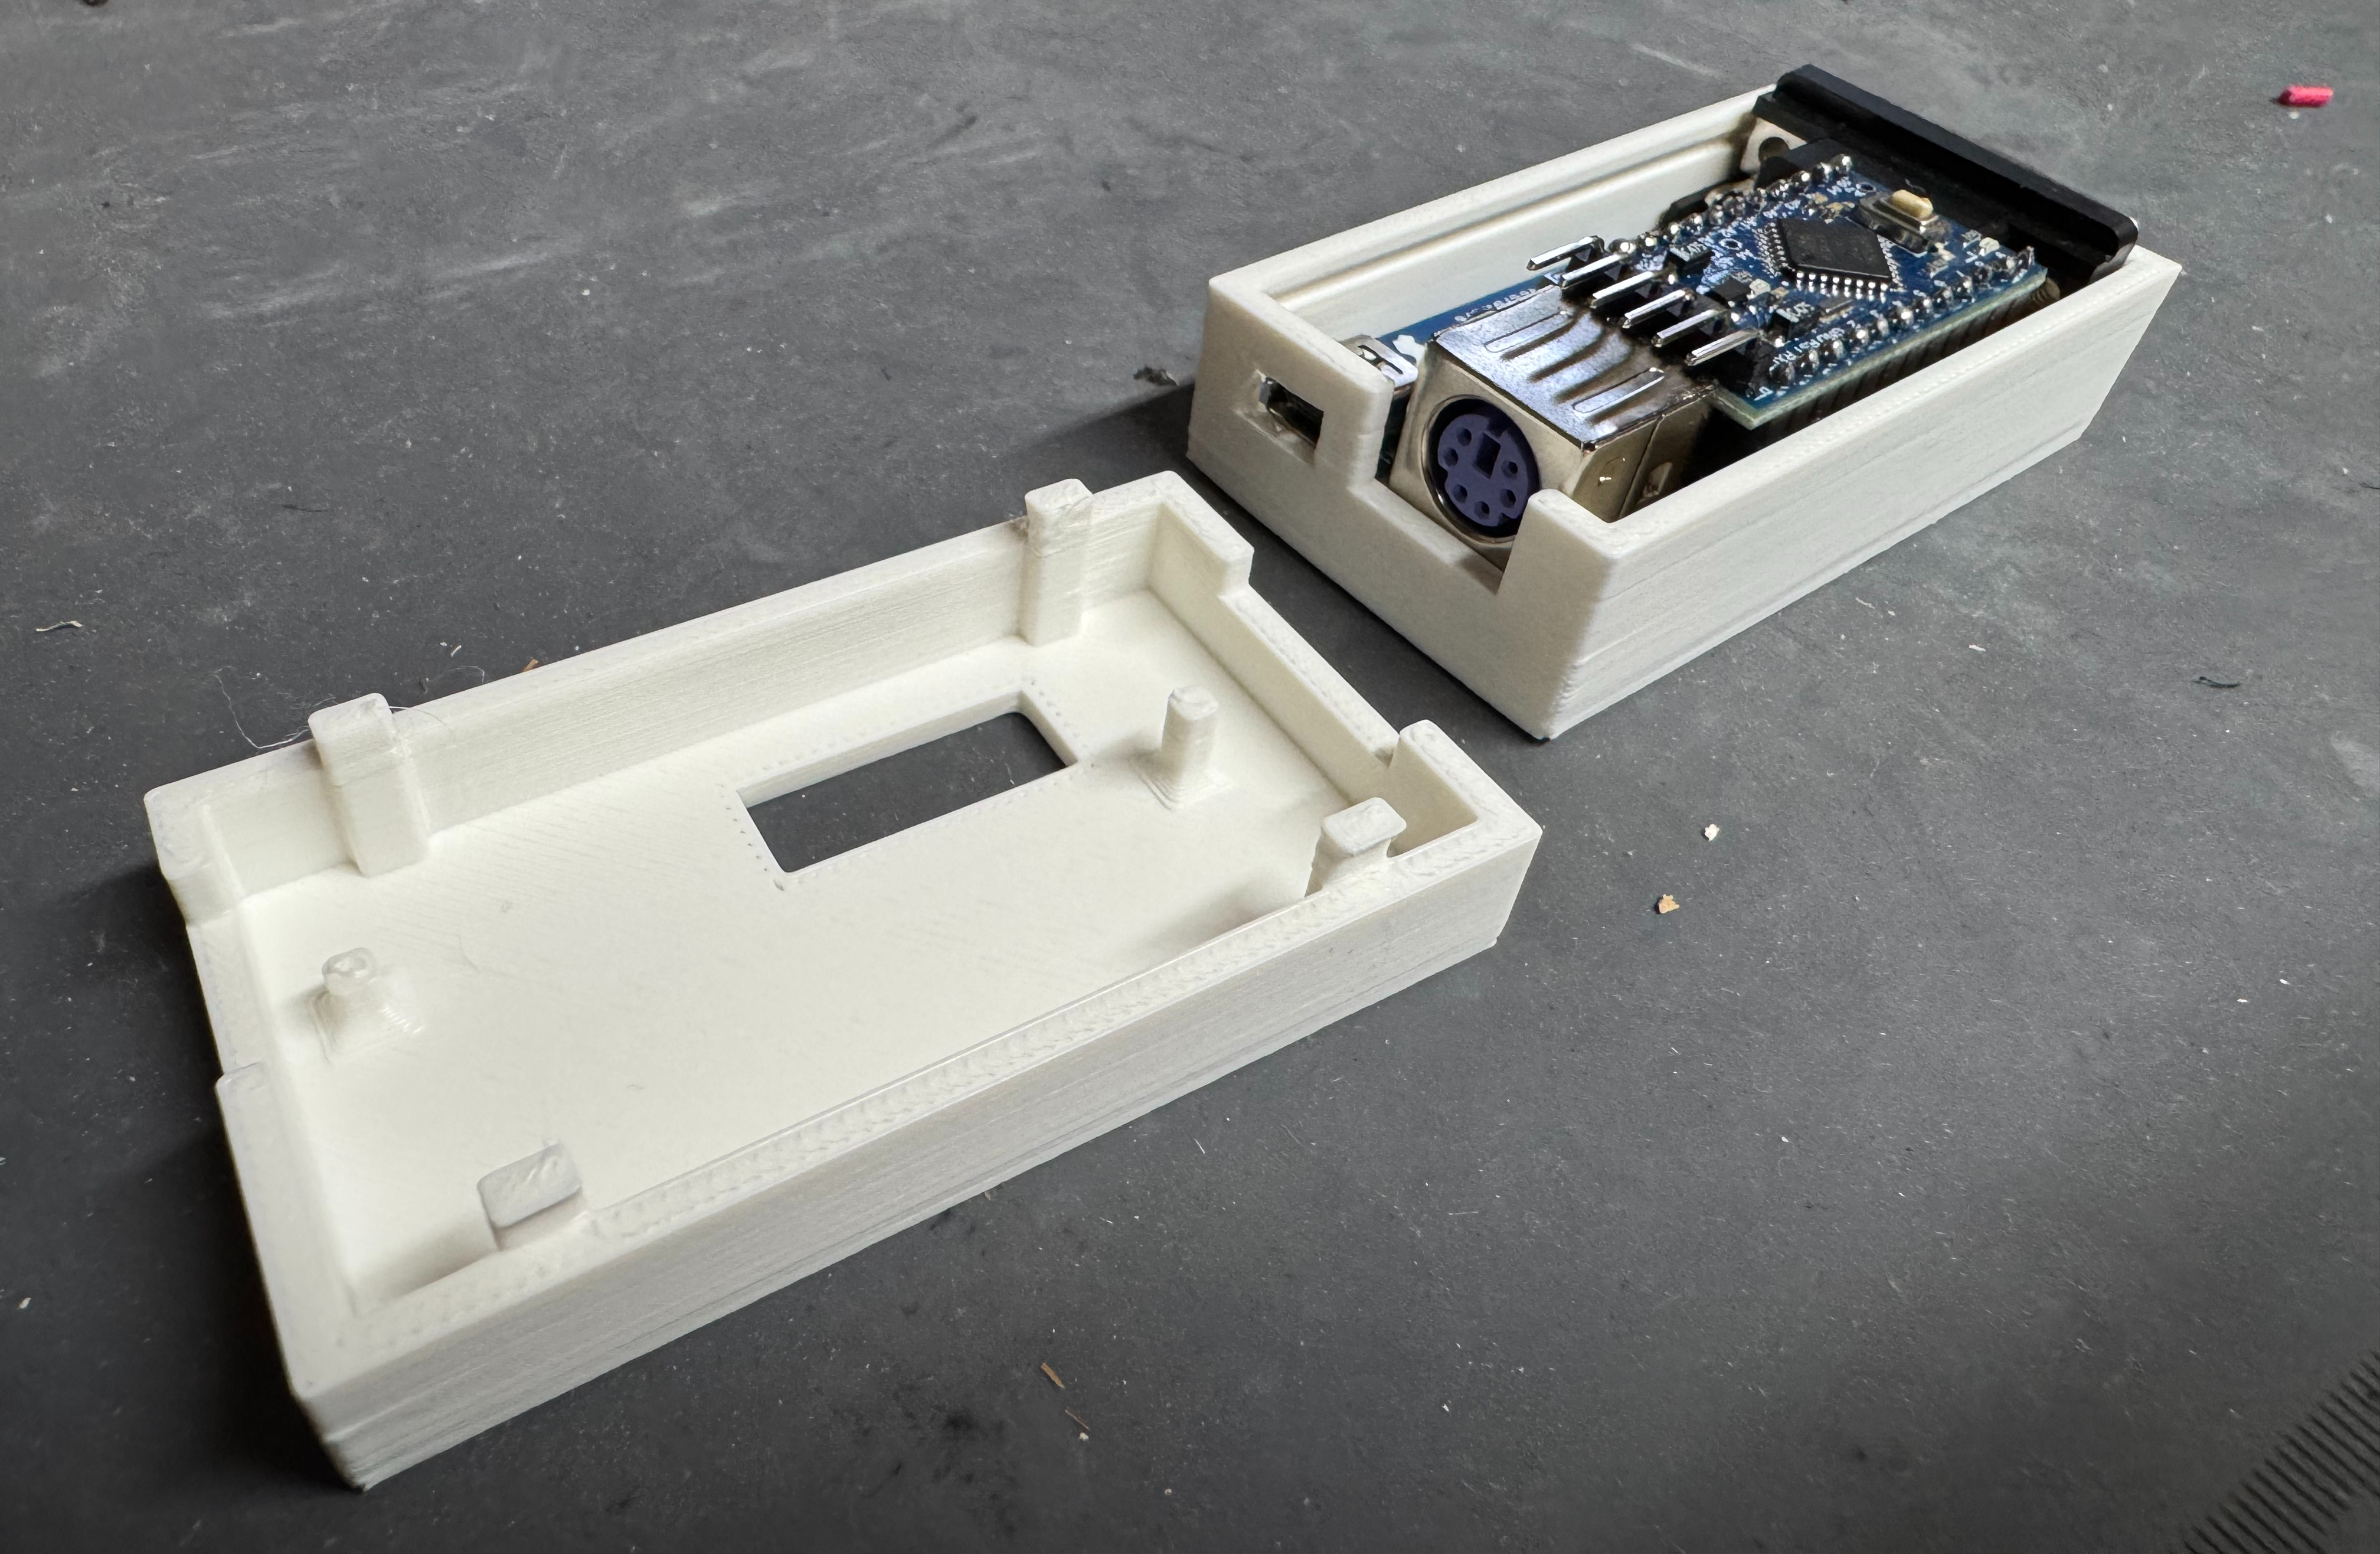
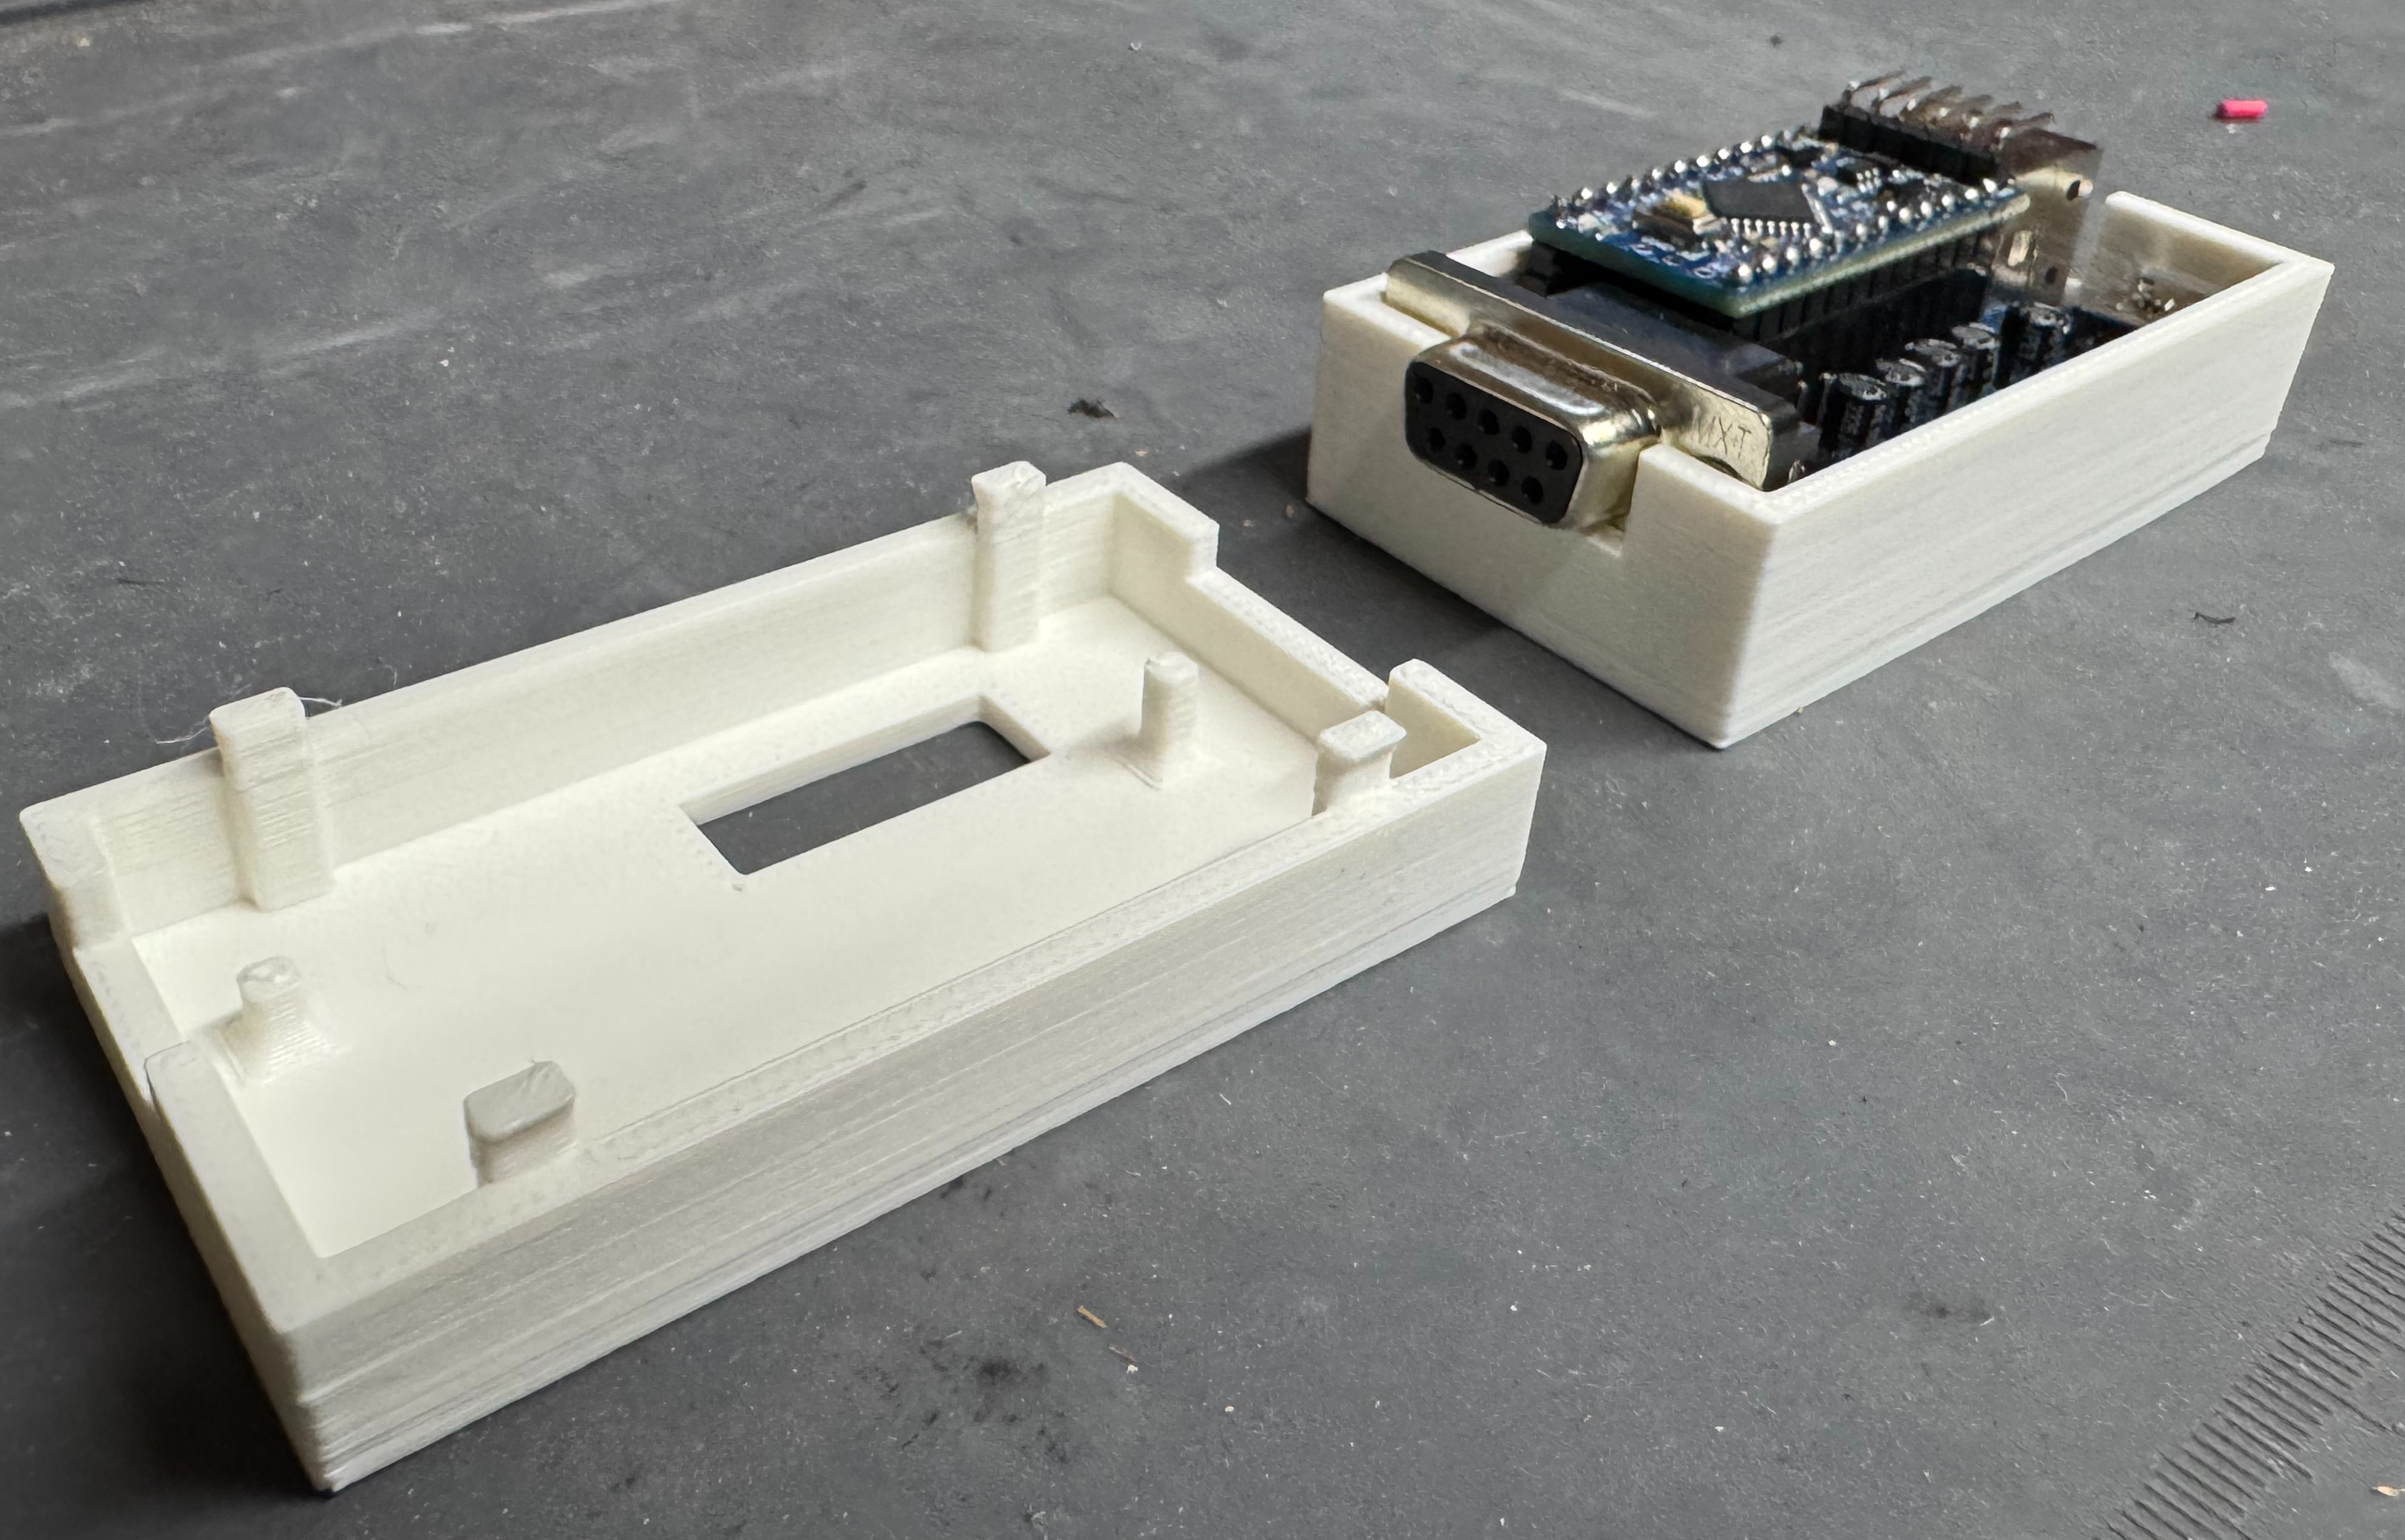
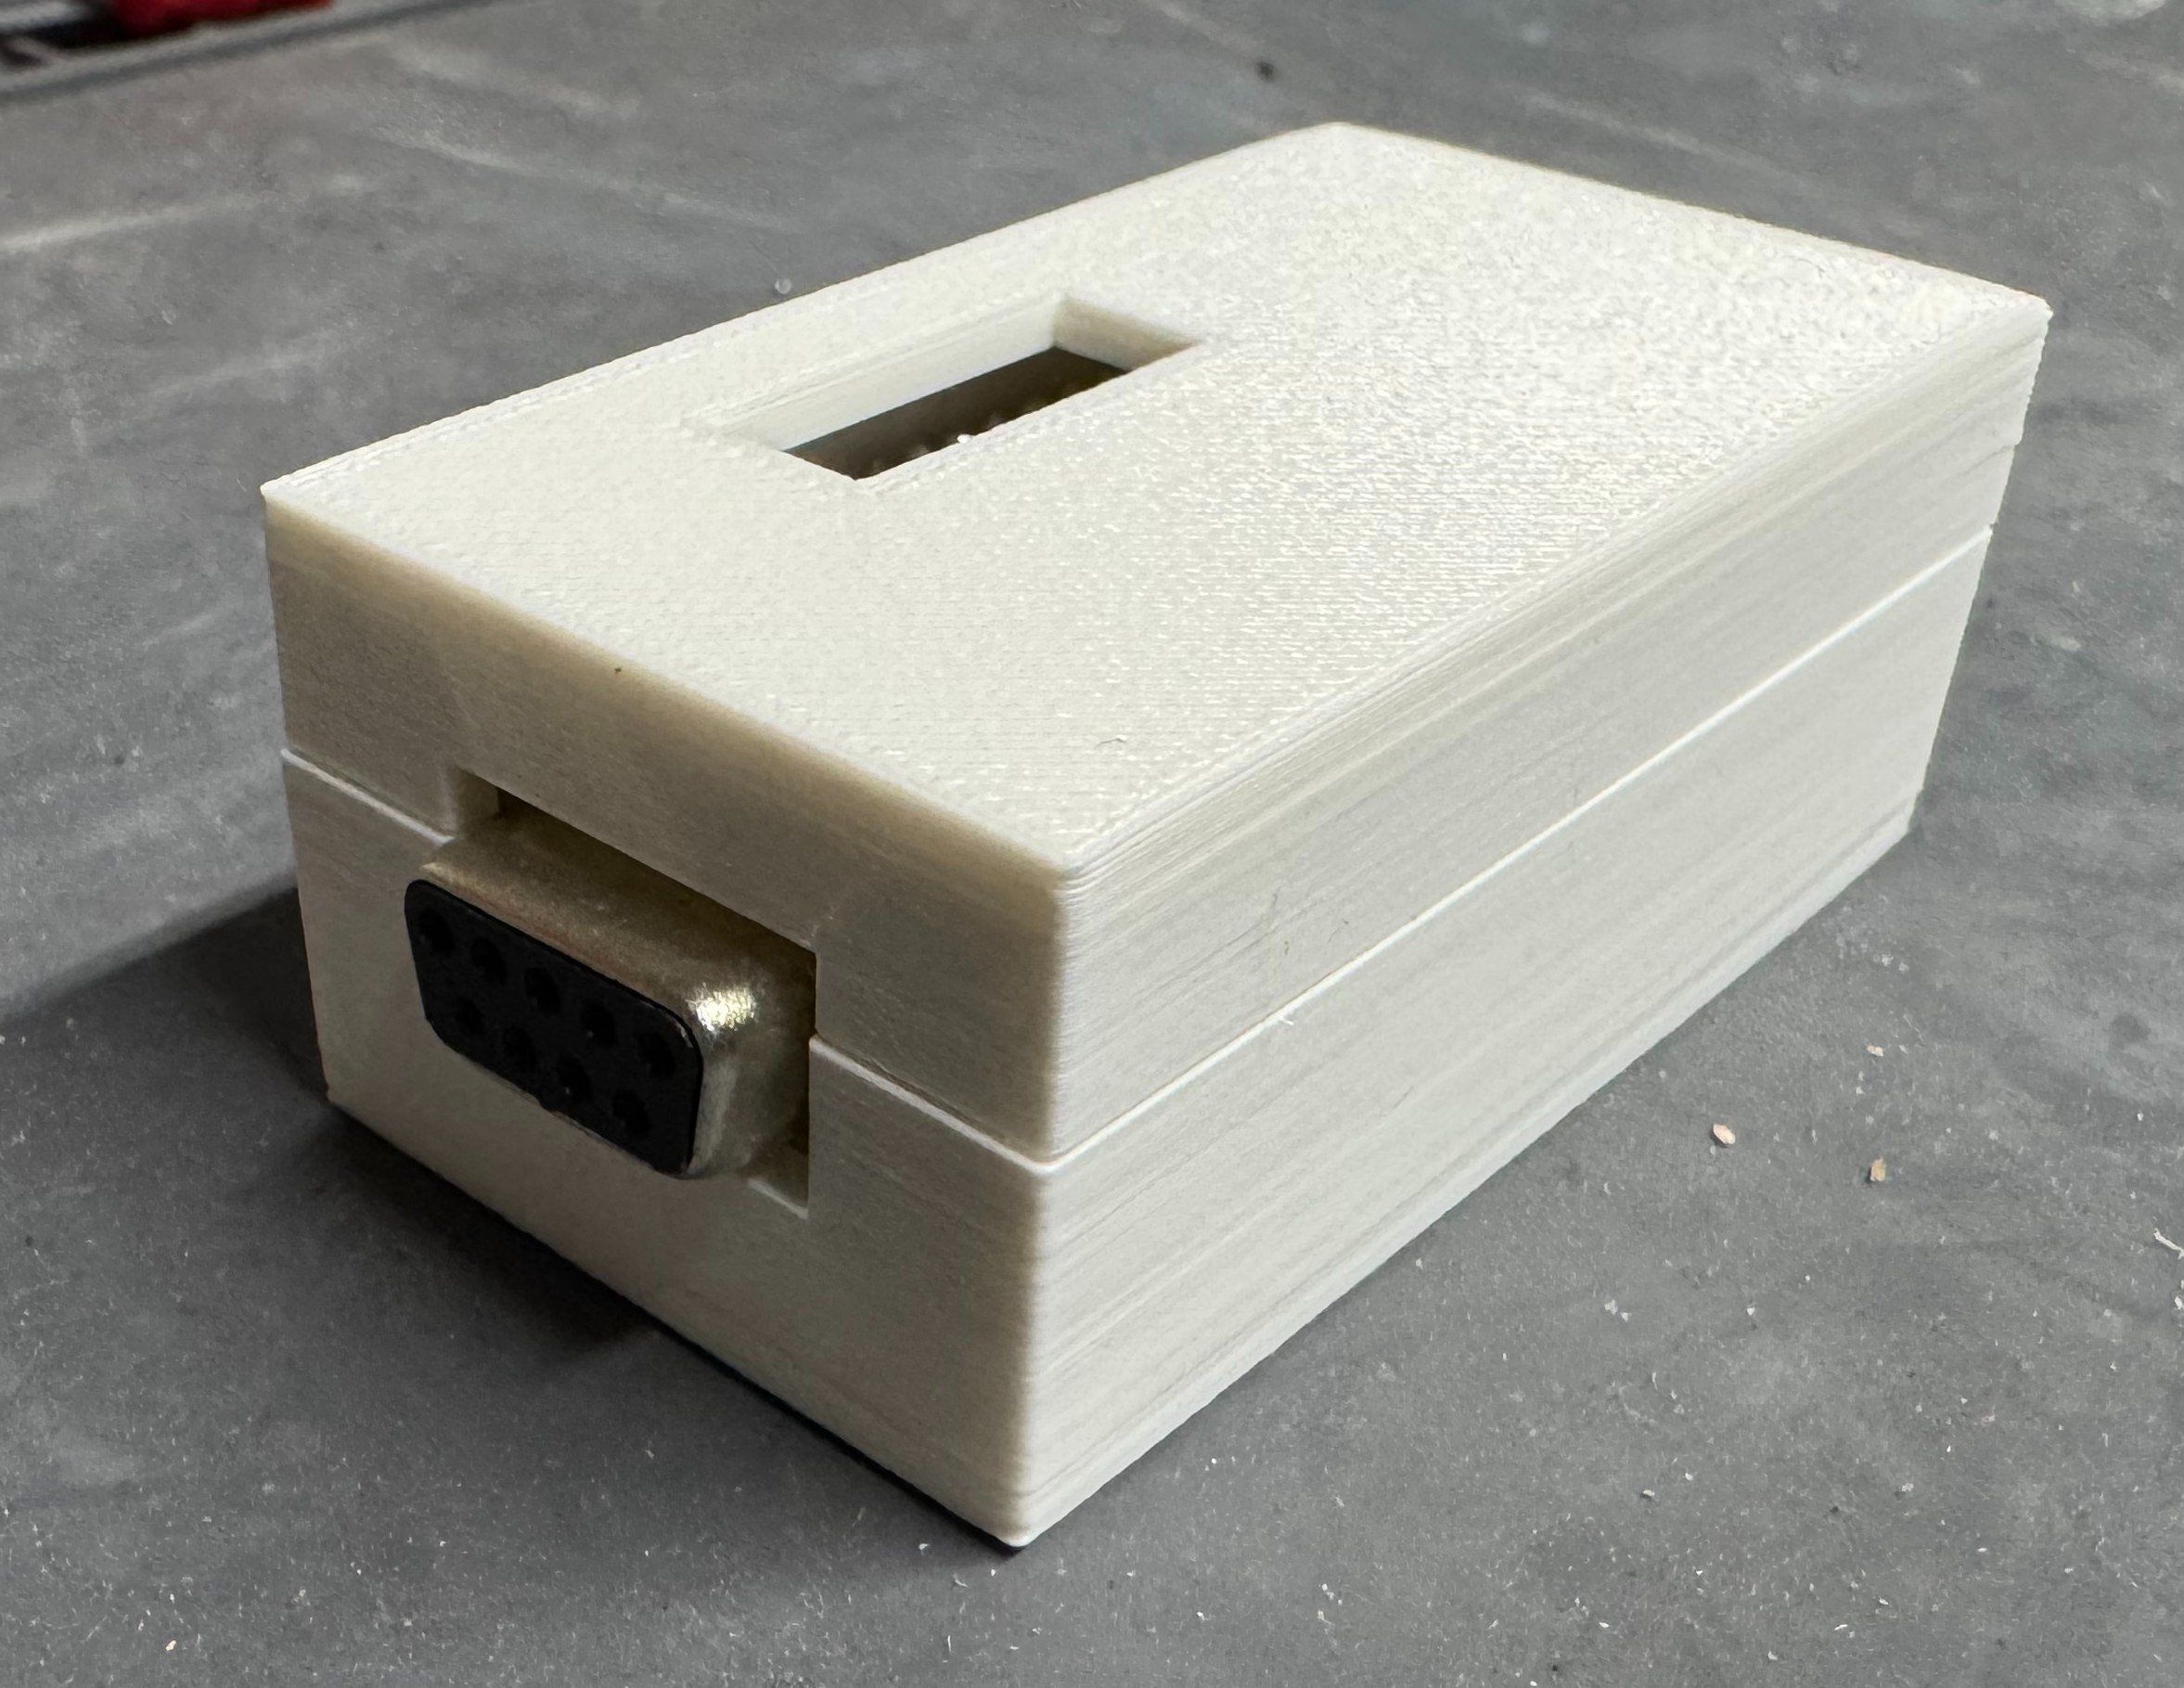
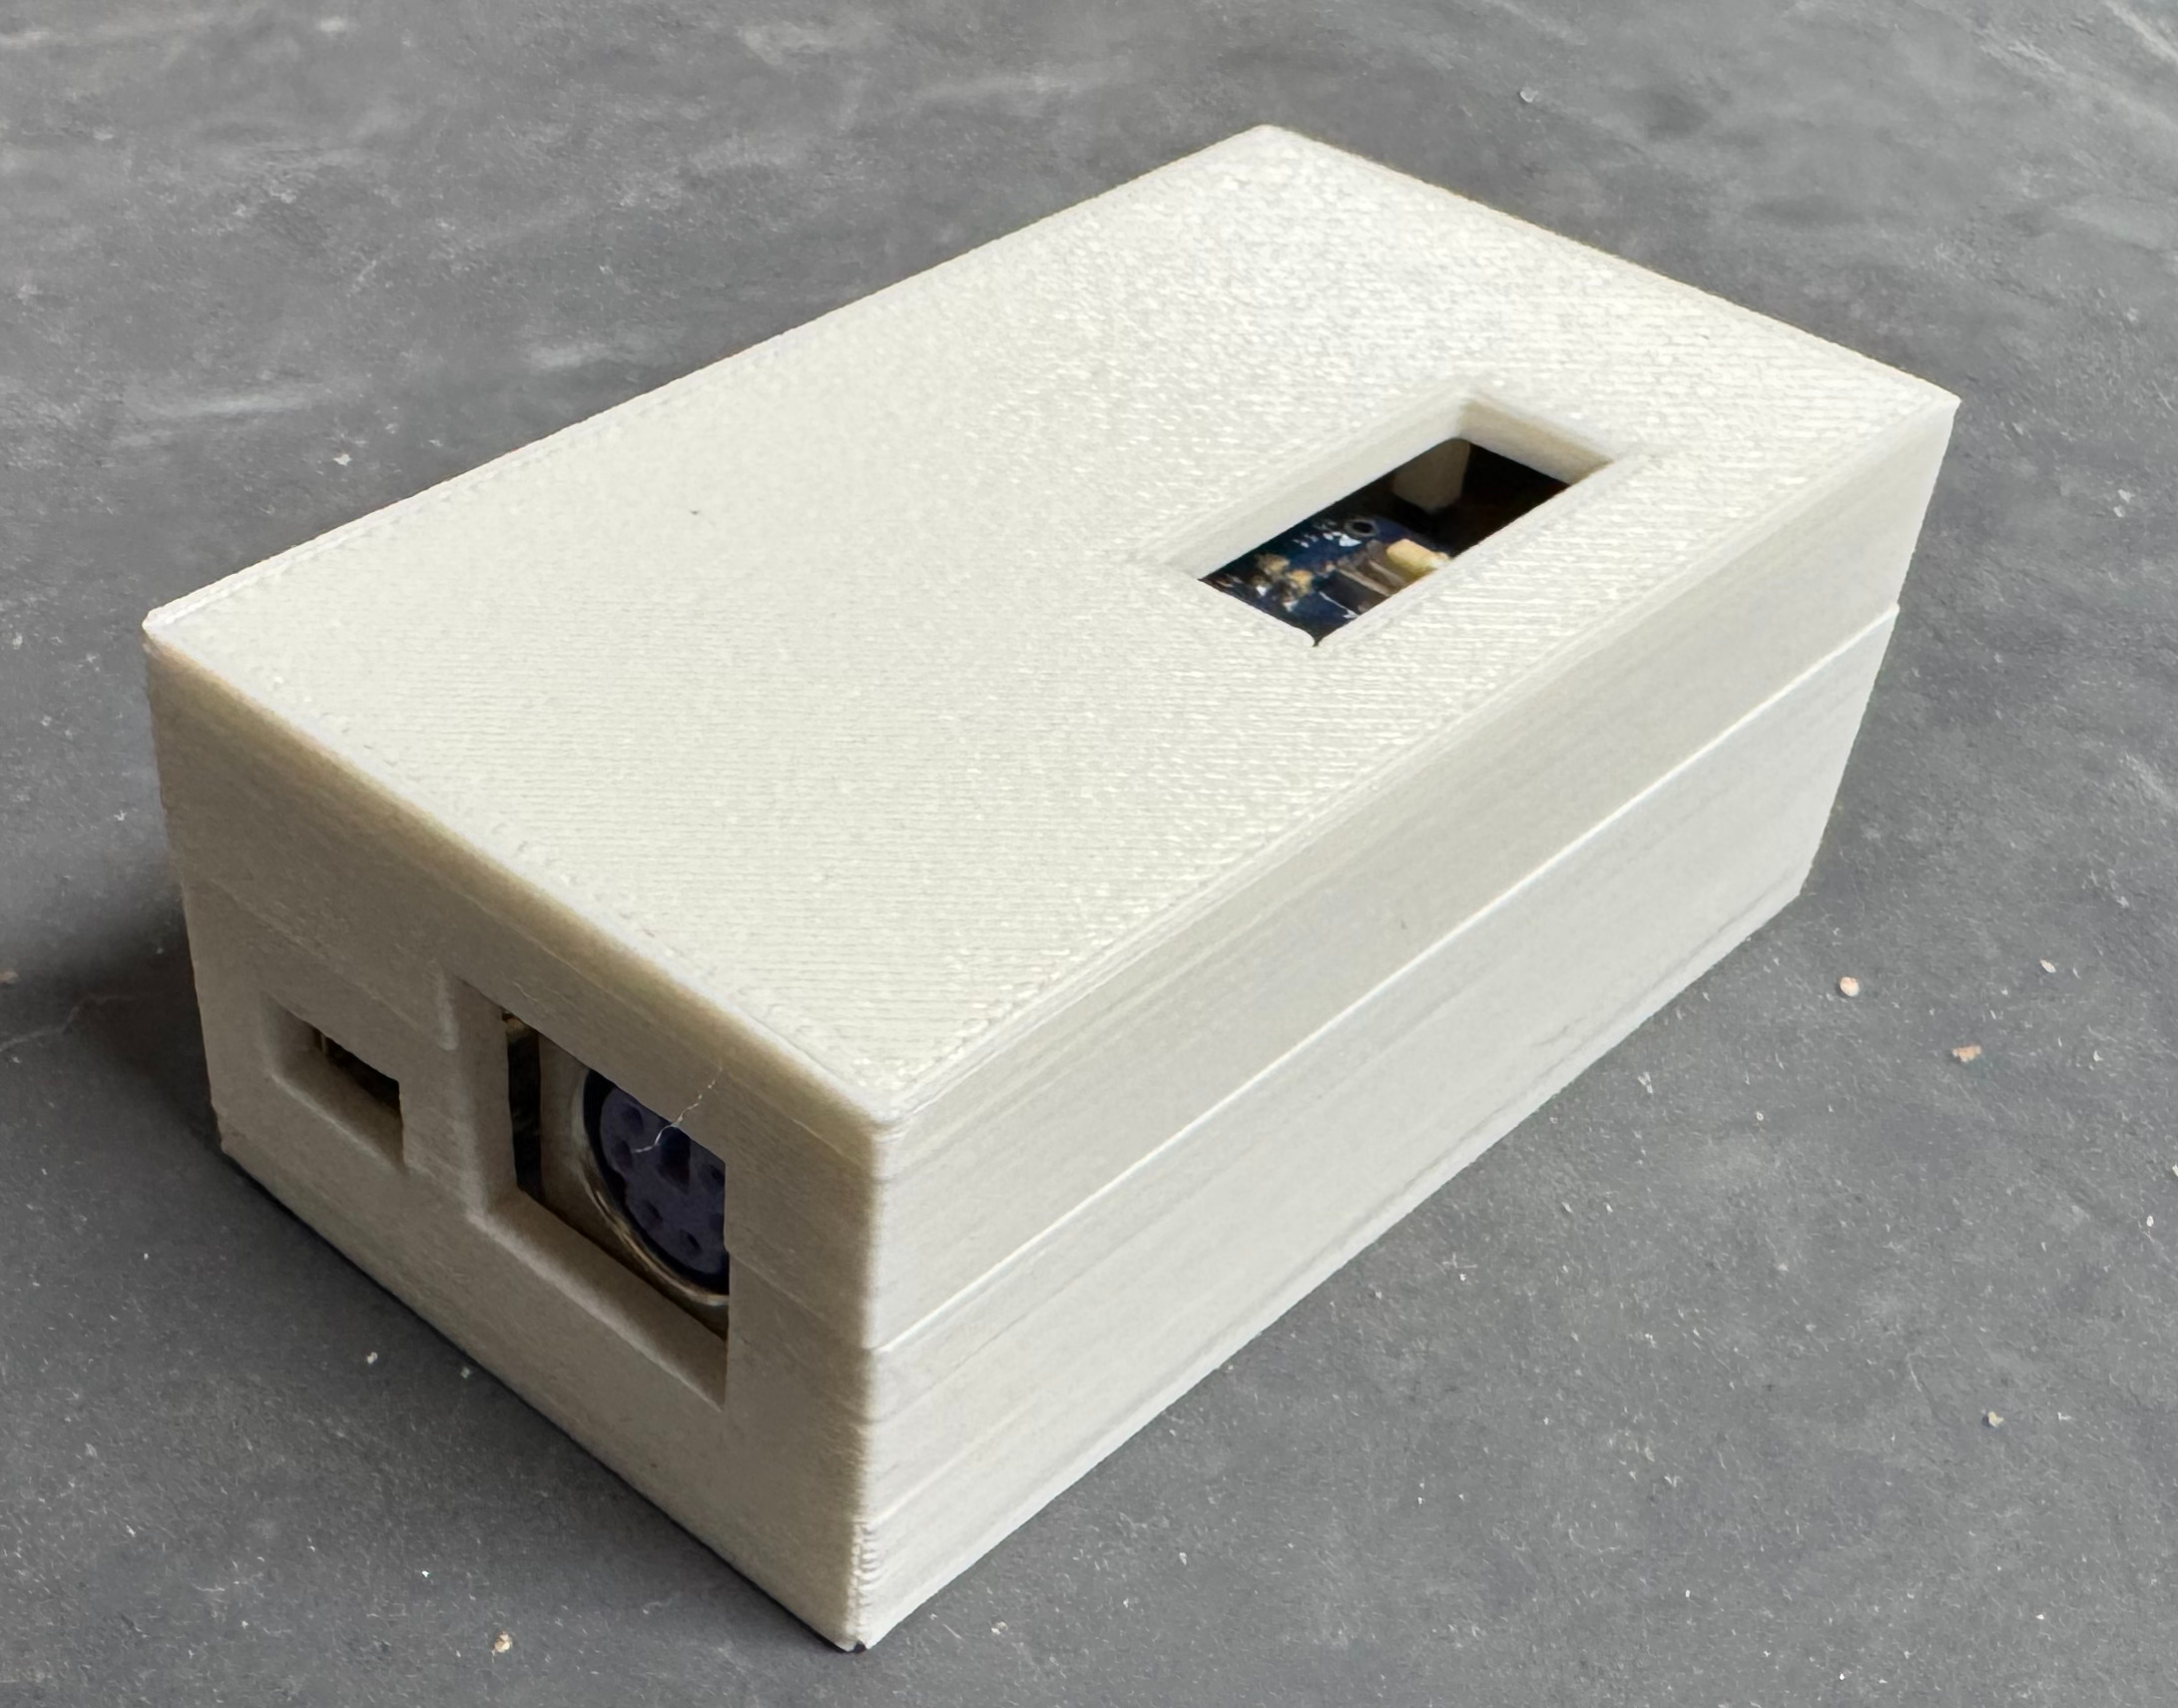
This is a device I will keep behind my old PC, and I didn’t want it to be a raw circuit board. I didn’t see any cases to 3D print, so I put one together. This was the first time I made a case that used little feet to snap the top and bottom half together; no screws! I also put little towers in to hold down the PCB in place. It took a few revisions, but I think came out nicely. There is also a little window to hit the reset button if needed. The black case was the second revision, the white case is the first.
A while ago I was working on a system to handle network boot operations. The main server is written in Java, and I needed to be able to read contents out of ISO files. The easy solution would have been to extract the ISO to the hard drive. I was trying to avoid that to save space; and with all the different images, not have thousands of tiny files littering the drive.
Then I found stephenc repo (java-iso-tools) for reading ISO files in Java. This library worked great! It had examples which helped me get started, and was fast to dive though a file. It supported the traditional ISO-9660 formatted files, which I needed, and I was good to go. Years later, the people over at CentOS and Redhat Linux had the idea to start putting giant SHA hashes as file names. Suddenly the disc images I was getting contained filenames that were 128 characters in length; and sadly java-iso-tools was failing to parse these names. To explain why, we need a bit of a dive into how the ISO-9660 standard works.
ISO-9660 is Developed by ECMA (European Computer Manufacturers Association) as ECMA-119, and then was adopted into ISO-9660. Thus, technically I was able to get the standards documents and investigate how ECMA-119 worked. Images start with a header; pointing to several tables, and the root folder file. The information about files on the disc span out from that root file. The root file, is the root directory on the image. From there every file is either a directory (with/without children) or a file which can be read.
The standard has had many changes to it over the years. While the original ECMA-119/ISO-9660 standard dates back to the start of the CD-ROM, over time people added to the standard. With PC’s at the time running MS-DOS and being able to save files to a FAT file system as 8 letter then 3 letter for extensions, the formatted needed added onto so one day CentOS could have 128 character file names. Some early additions to the format were Rock Ridge, and the Enhanced tables. When reading the first bytes from an image, there are several byte blocks which state which version of the standard they work with; this was forward thinking in this way. The basic tables help simple devices easily be able to read the discs. They can offer short file names, and point to the same binary data other tables later do. Then the enhanced tables can offer more information, and be able to add additional features to the disc. Some of these features can include things like file permissions.
At this point I had decided I needed to fix the problem and was going to write my own library to do it. While it sounds crazy, I enjoy writing these low level libraries. I started with the ECMA-119 standard, and going through the flow, like I was a CD-ROM device reading an image. I would later add on code for Rock Ridge, and reading all the enhanced tables, and even adding on a UDF parser.
I don’t want to spend too much time going through the standard. If you are interested: ECMA-119/ISO 9660 Standard, ECMA-167/ISO_IEC 13346/Original UDF Standard, Rock Ridge, UDF 2.60, there is a collection of the standard documents in depth. This post is more to talk about the project in general, and how I enjoyed working on it. A few constraints I set upon myself were I wanted it to be 100% in Java 8. That way it could be natively compiled if someone wanted to do that, wouldn’t just be connecting to some native binary tool, and would work with older Java code bases. The project currently targets Java 11 being the LTS out at the time I was working on it. I know there are many code bases out there which are Java 8, and I actually dont think there is any code except some tests using Java 9+ features. If someone had a Java 8 project, they could remove the tests and compile to 8. We live in a little bit of an odd time now, where a project like this targets more enterprise users who tend to be back on older versions. And at the same time Java 24 is coming out. I wanted to give high level classes that a user needing a simple tool could use; but at the same time have deeper level objects publicly available.
I was using this in the earlier mentioned network booting environment.There I can be building 100+ servers at a time; speed, small, and fast code were important. I ended up adding as test some performance benchmarks. I test the old library as my control, then I do normal file lookups as well as pre-indexed. I developed a system where certain heuristics of the image are taken and can be stored. Then you can feed in this initial “vector” I called it, of the image and a file vector. If the image matched the initial vector for a few characteristics, we could reasonably assume its the same image originally scanned, then instead of reading all the header tables, we jump to the location of the file vector with trust. This does leave it up to the developer to make sure they are matching pre-indexed images with vectors; but if you do, you can much faster serve files.
This project was fairly straight forward to test, I had many and there are many ISO images out on the internet. And plenty of them are Linux Images! I also had the older library which I could use as a control to test against. I ended up writing many tests which help when people send Pull Requests to make sure nothing has broken. This project I needed done to support what I was working on. There were a few places where I didn’t fully flush out the metadata, but left it to the end user to, if they cared about that data type. I spent a lot of time in Hex Fiend hex editor marking segments and trying to understand where code I had was breaking down.
Over the years of working in Open Source, and going to a technical college, I have seen many strong technical projects that are very impressive code, and can do a ton of interesting things. And then the developer focuses on interesting things they can make their code do, and spends no time putting documentation together. At the same time there are many project that get the job done, but aren’t anything special; these projects put a few documents together and maybe an example, and then get all the usage. The area developers hate to spend time, but can be the most valuable is documentation. That pushed me to spend a lot of time commenting the code, and writing a large README file showing how to work with the library.
I hope you will take a look at the project, maybe use it, and feel free to drop issues as they arise! I have been using the library in production for years now. It doesn’t get a ton of updates, because there hasn’t been a lot I need to add to it. When a PR or Issue arise I take care of it. And with the project being published under my work, I get a lot of automated PRs to help upgrade the library.
I have had two of these little Ruckus ICX7150 switches for years now. They are great little units with 12(ish) 1gb switch ports, and 2 SFP+ cages. My primary one hosts the Wifi APs in my house since the switch is also POE! I have bumped it to its latest recommended firmware on the Ruckus support page, and not had to do much of anything else.
Until recently when I went to SSH into the switch and Windows 11 built in SSH client no longer accepts SHA1 hashes that the switch gives. Or more specifically:
no matching key exchange method found. Their offer: diffie-hellman-group14-sha1,diffie-hellman-group1-sha1
There are two ways of going about fixing this, the first is to tell SSH it is allowed to access less secure clients, adding the following to C:\Users\your_user\.ssh\config does this:
HostKeyAlgorithms = +ssh-rsa
PubkeyAcceptedAlgorithms = +ssh-rsa
KexAlgorithms +diffie-hellman-group1-sha1
ForwardX11 no
ForwardAgent no
This isn’t the best, because we are just lowering generally accepted security practices, but it works.
The next thing I found out is that while 8.0.x is still the recommended release, FastIron 9.0 and 10.0 are out! One of the big recent features of 9.x is much newer crypto standards for SSH. 8.x simply doesn’t have them present.
I upgraded my switch from 8.0.95n to 9.0.10j_cd6; both the switch firmware, not routing. Apparently some releases have a “continual development” release which is smaller than a 0.0.1 release. I haven’t had any issues with the upgrade, it went the same as any other.
A quick note, these days if you attempt to scp it actually uses sftp as the backing protocol, to upload the firmware file to the switch use the following command:
conf t
boot system flash secondary
wr mem
reload

After the switch reloaded, which seemed to take a bit longer than normal with firmware updates, I was right back to my normal working switch and SSH worked happily.
I use Solidworks Connected Makers edition to do a lot of my 3D Modeling. I had used Fusion 360 in the past, but they kept changing the license and what file types you could export, so I moved to Solidworks. As many posts from the community say, sometimes it’s like the company is trying to make you mad. Every year or so we get the next update, that you have to do because it’s a web-connected (for no reason) platform; and somehow the install breaks and won’t work. I spent a sometime trying to find all the different bits to delete to get it to install properly and wanted to document it. Once you get Solidworks in working order, it works well. It’s getting it there that is difficult.
I had a failed install, the Solidworks site thought the application was installed, but when I clicked run, I got “failed to launch application, not found”. I uninstalled anything related to Solidworks or Dassault Systemes. Then I found and deleted the following.
Go to HKEY_LOCAL_MACHINE\SOFTWARE\Microsoft\Windows\CurrentVersion\Installer\UserData
Search for “Solidworks”, I found items like \S-1-5-18\Products\0911033B9E8C8E647ABE3D57D2083CB1\InstallProperties, where DisplayName was “Solidworks 2020”, delete anything related to Solidworks at the Products level.
Even in the best conditions, on a fast machine it will take a LONG time to install, 3+ hours, looking like nothing is happening, I left it overnight. The x MB/y MB installed will not always progress for a while.
The install seems to install 4.5 billion MSI files, and then after each runs “.NET Optimization Service”; if your install is progressing, that service should periodically jump in CPU usage. My install halted at 76% 6122MB/14942MB installed for a long time; again, I left it overnight and it managed to finish.
I hope this helps someone. If others have issues or fixes, please leave a comment; maybe together we can get this program to work. In the end, mine worked after being left overnight, and now everything is functioning well with the 2025 release.
Update:
I went to reinstall and got the following errors:
Failed to get msi version for UpgradeCode [{B54313C8-7B46-297F-3AC1-85D9EFD5ECB7}].
Technical details:
The property is unrecognized
Error code: 1608
Invalid data in HKEY_LOCAL_MACHINE\SOFTWARE\Microsoft\Windows\CurrentVersion\Installer\UserData\S-1-5-18\Products\BE85C2B02A76B522062B1D99E055DD33
Action CheckInstalledMsiVersionAction from feature CODE\win_b64\SWXDesktopInsPreqWPT failed.
Action ID: SWXDesktopInsWPTInstalledAction
Failed to get msi version for UpgradeCode [{00F50064-7000-11D3-8CFE-1050048383C9}].
Technical details:
The property is unrecognized
Error code: 1608
Invalid data in HKEY_LOCAL_MACHINE\SOFTWARE\Microsoft\Windows\CurrentVersion\Installer\UserData\S-1-5-18\Products\E5A00A437891E38418011307471668D7
Action CheckInstalledMsiVersionAction from feature CODE\win_b64\SWXDesktopInsPreqVBA71 failed.
Action ID: SWXDesktopInsVBA71InstalledAction
I ended up searching for those hashes in the registry, “BE85C2B02A76B522062B1D99E055DD33“, and “E5A00A437891E38418011307471668D7“. Then deleting registry keys where a sub part mentioned Dassault Systems. After that I could progress with the install. Again, this seems to happen if you had Solidworks 2020 installed at any point.
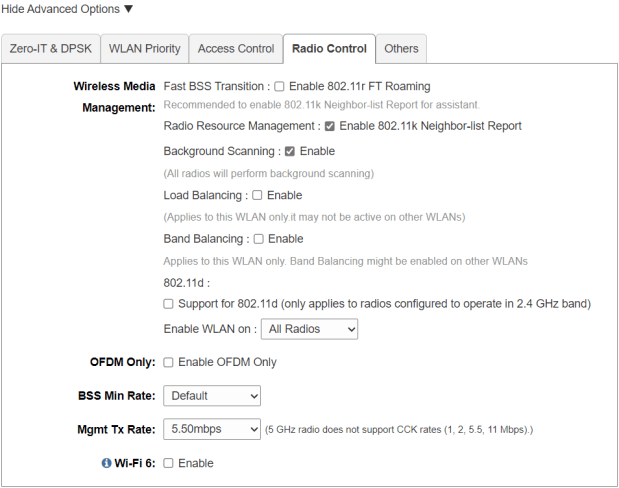
My original version of this post I put together over a year ago. I was having issues with a 4 AP Ruckus Unleashed network I have in my house. I thought the issue came from 1 of the access points (APs) being WiFi 6(AX), and the rest being WiFi 5(AC); I wrote the post about disabling WiFi 6 on the 1 AP, then wanted to see if my issue were resolved over the next week. It was not. The issue was mostly around Apple devices refusing to roam. You can walk far away from 1 AP, and towards another, and you wouldn’t roam for a LONG time without manually disabling and enabling WiFi.
After more digging, and seeing people online chat, I was pointed to an Apple post (which has since disappeared) saying to move your “WiFi DTIM to 3”. DTIM (delivery traffic indication message) handles how often an access point echos out information about itself.
Changing this setting has seemed to make roaming on Ruckus work much better. Ironically, or not, this is one of those settings network engineers argue about. Here is a different Apple support post saying it HAS to be 1. Cisco, says the value should always be a 1 or a 2. Hopefully this info helps someone else if they are having issues, give it a try.
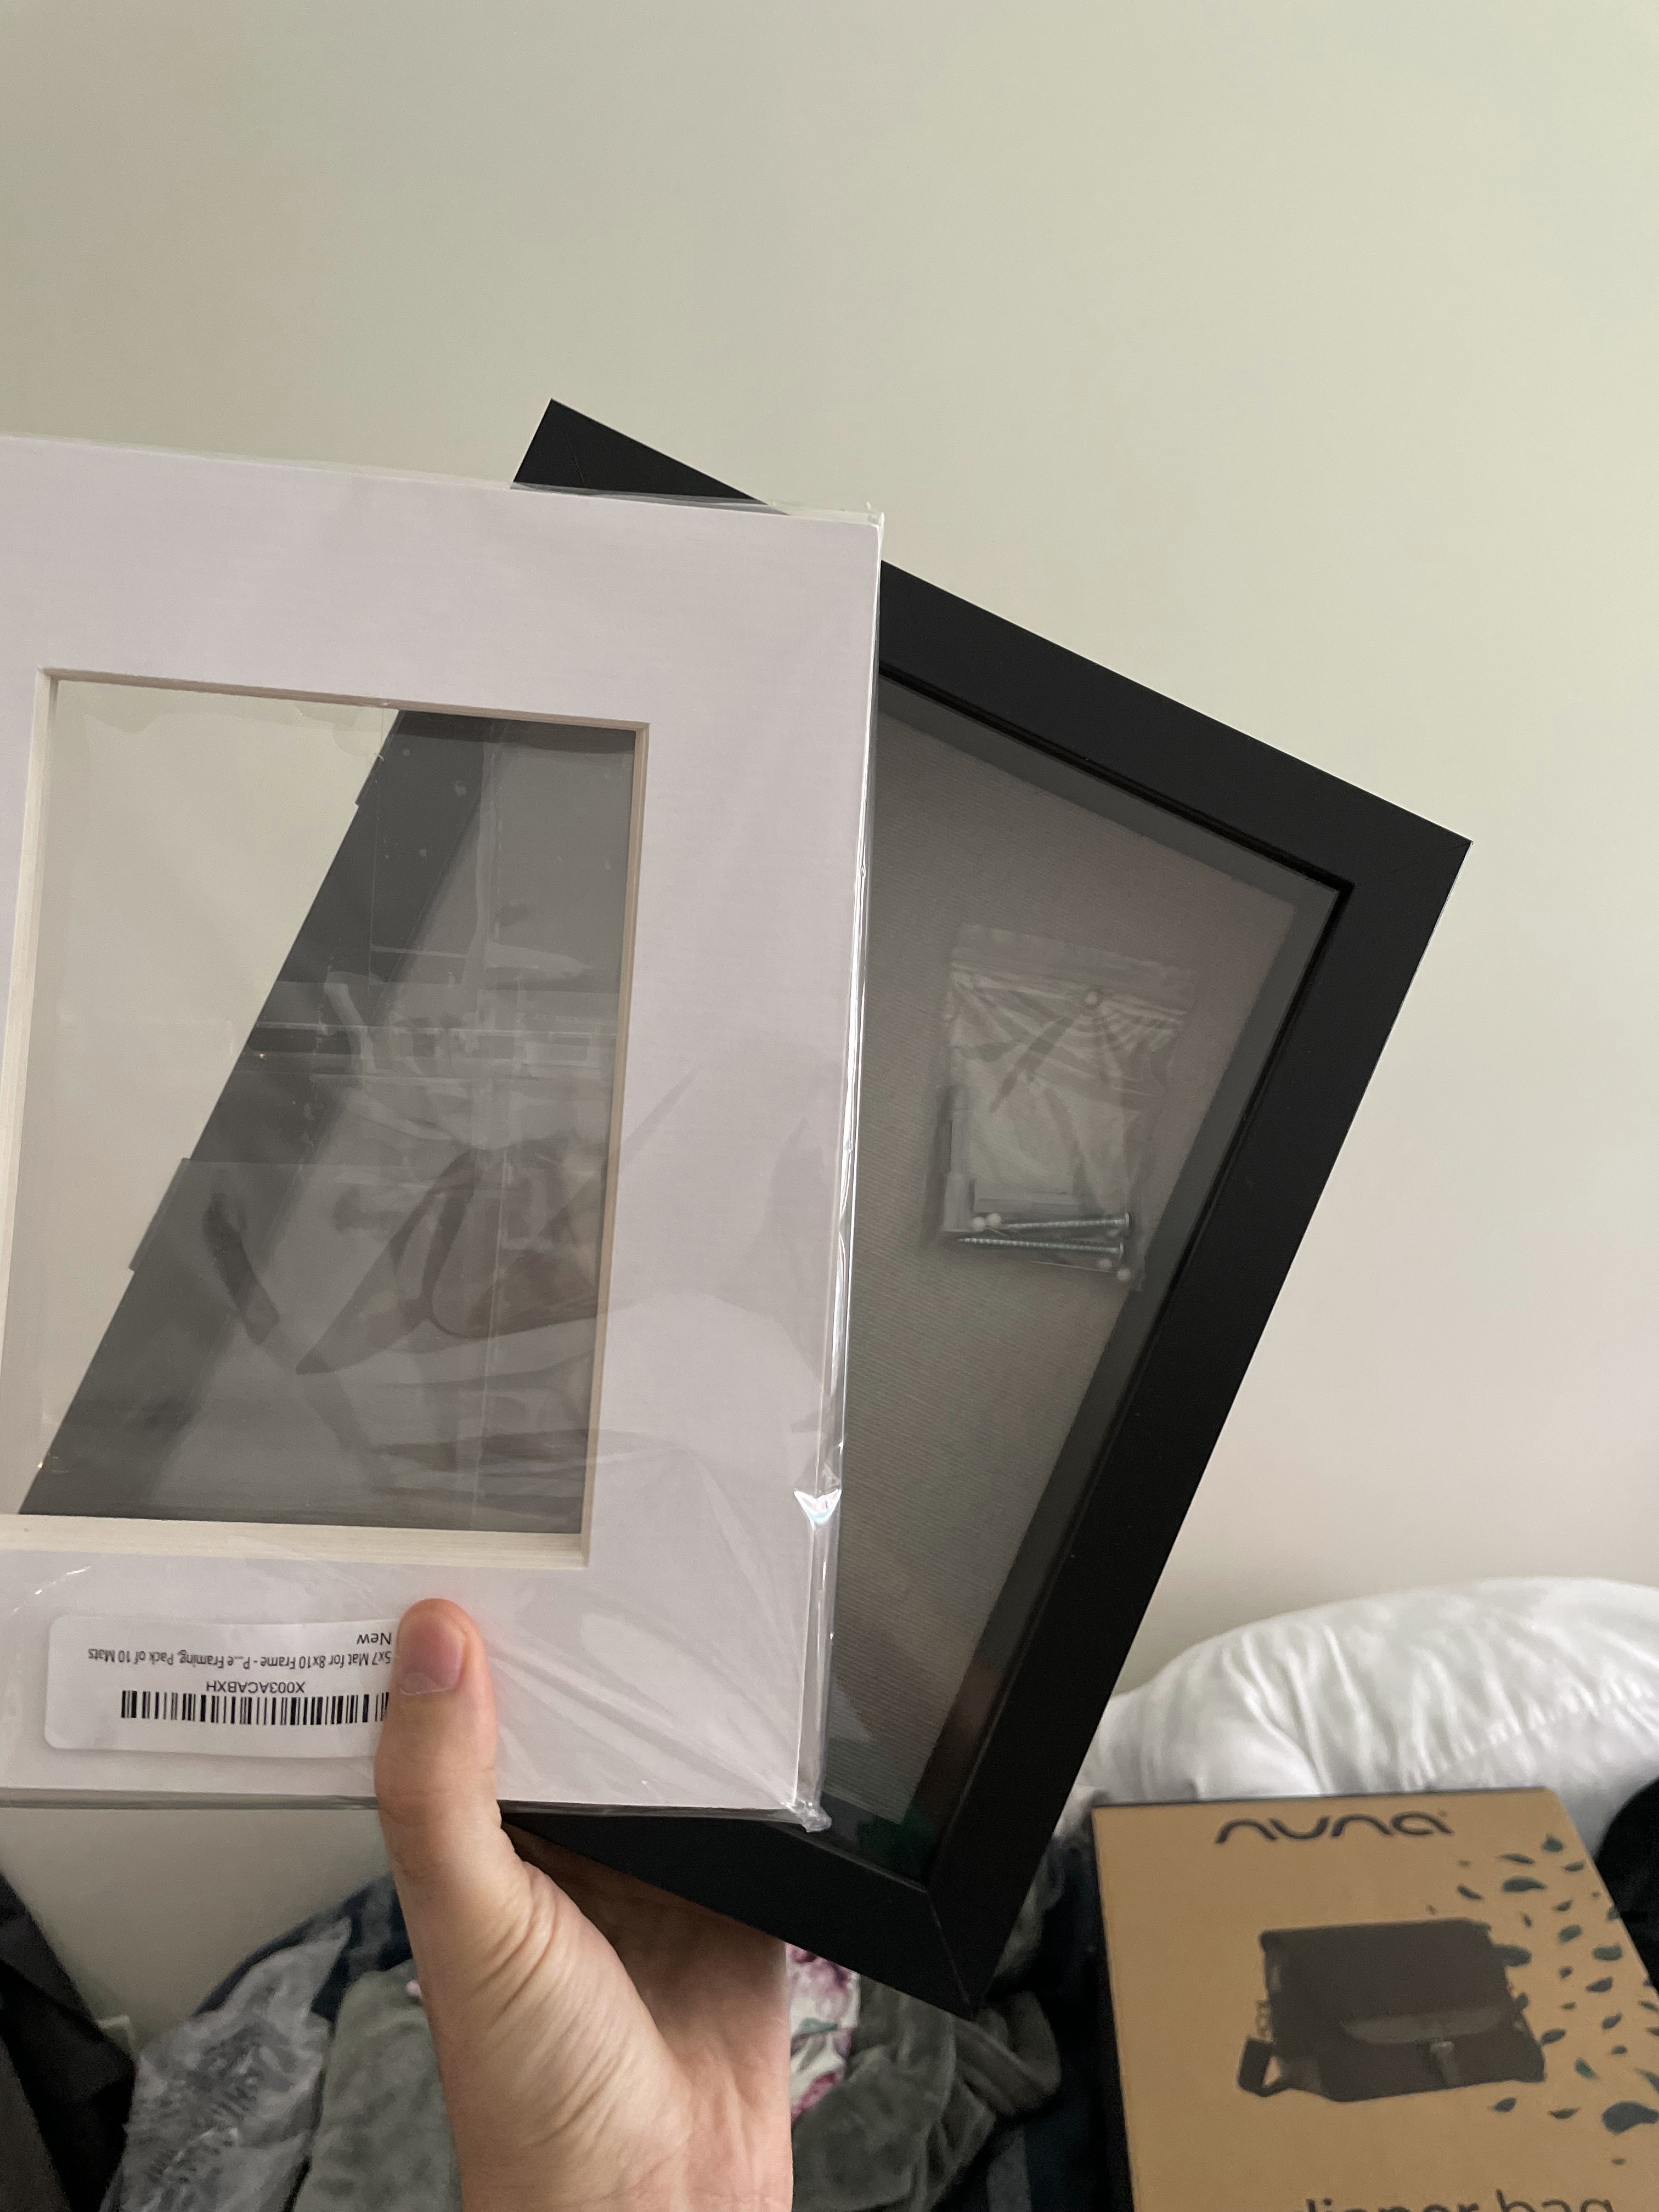
I enjoy working on projects that can mix a bit of art with tech/electronics. I was playing around with the idea of doing something with a shadow box which could go up on the wall. Something to do with lighting and an ESP32 came to mind. The eventual goal was to get the ESP32 onto the Wi-Fi, allowing you to control the lights and mode of a device from your phone and perhaps HomeKit. I got part of the way there, adding a button to change modes; but then I got off on another project as I am to do. I wanted to document my progress, and state for later; as well as put the code and designs up online before I go off and work on a more ambitious project.
General Design
I started playing around with 3D designs, so that a light could shine through; the designs were really 2D, but I used SolidWorks to do all the modeling, then adjusted the heights until the light came through well. I glanced around online at artwork people had, as well as periodically looking at Dribbble.com. I came around to the idea of a skyline; a city at night where the different buildings could light up, and blink. Then the idea added on; the buildings could blink to music, adding a microphone onto the controller would allow the lights to reflect the volume of audio.
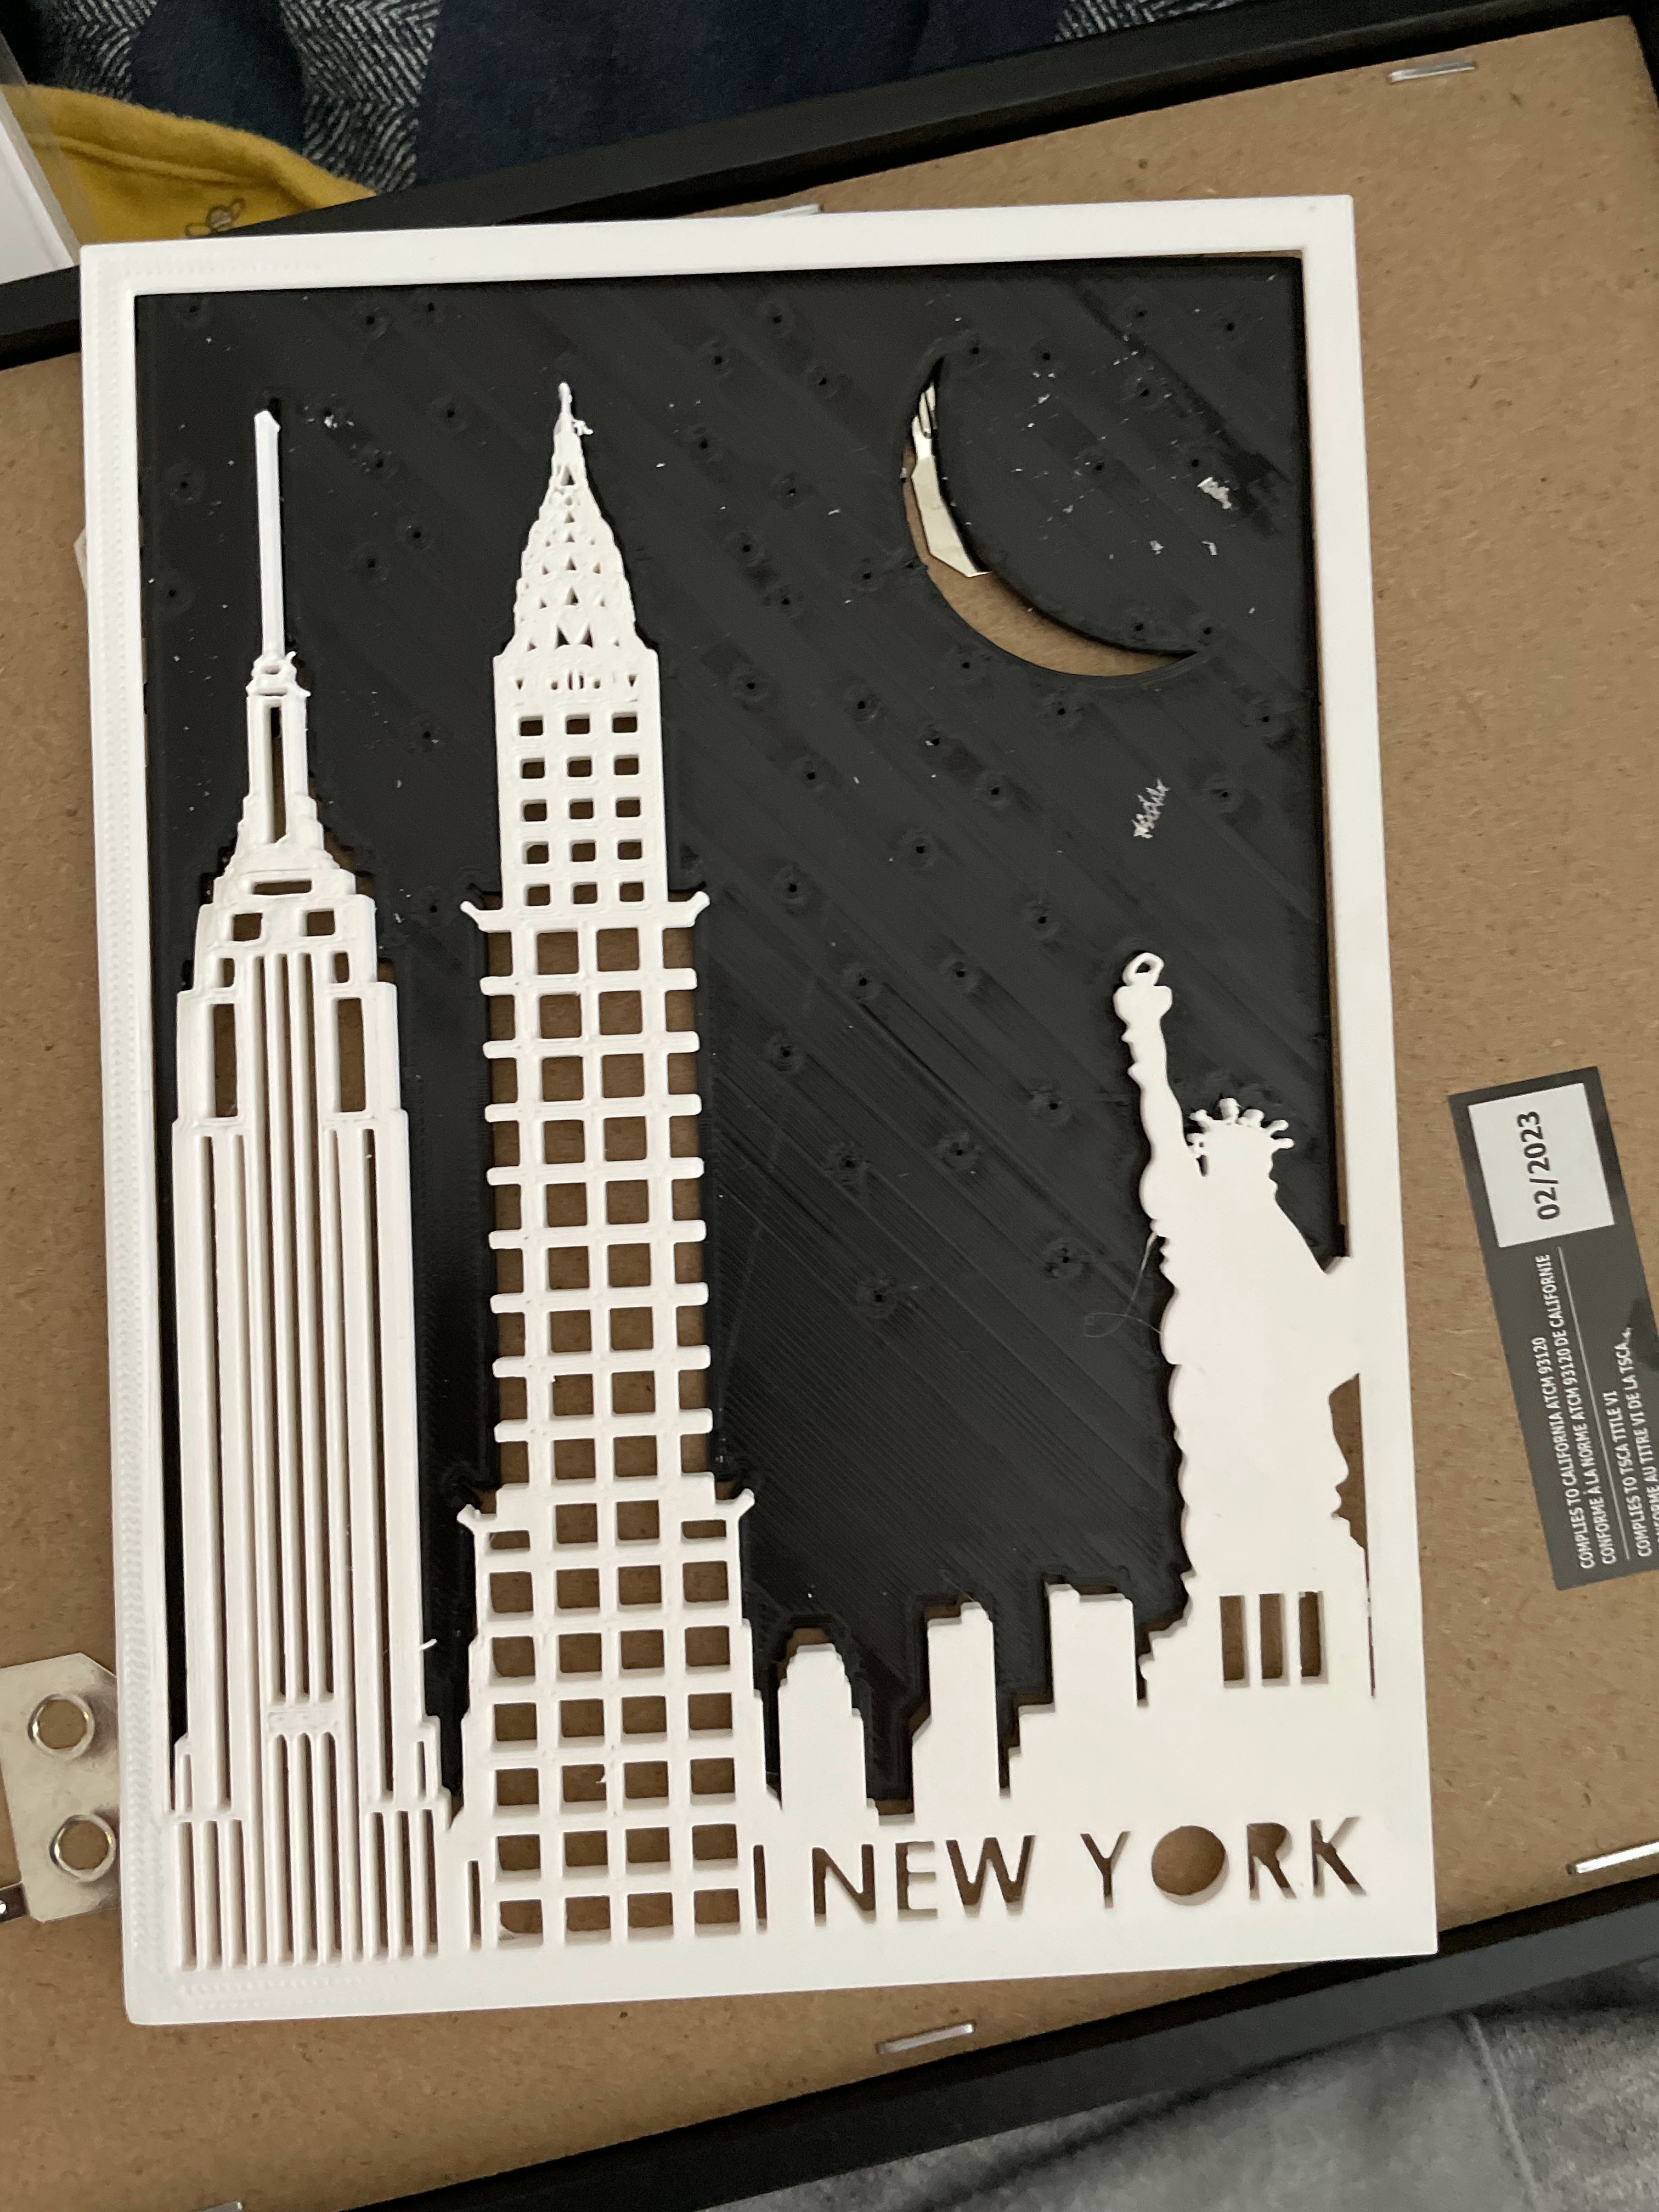
I at first tried to print out individual, large, buildings and this proved to be too much and take a very long time. If you look at some of the below early renders, you can see how complex those buildings are.
I decided on the New York city skyline and started modeling the buildings. I needed a mix of decent sized windows, so the 3D print did not take forever; and small enough that the light effect came across well. I modeled several buildings, a few different ways, and did test prints. A few times I printed them taller than the printer could go, and that made me split the buildings in half. I did not like how putting them back together looked and decided to shrink the buildings a bit. I currently have a Creality Ender 3 Pro, making my bed size roughly 200mmx200mm.
Electronics
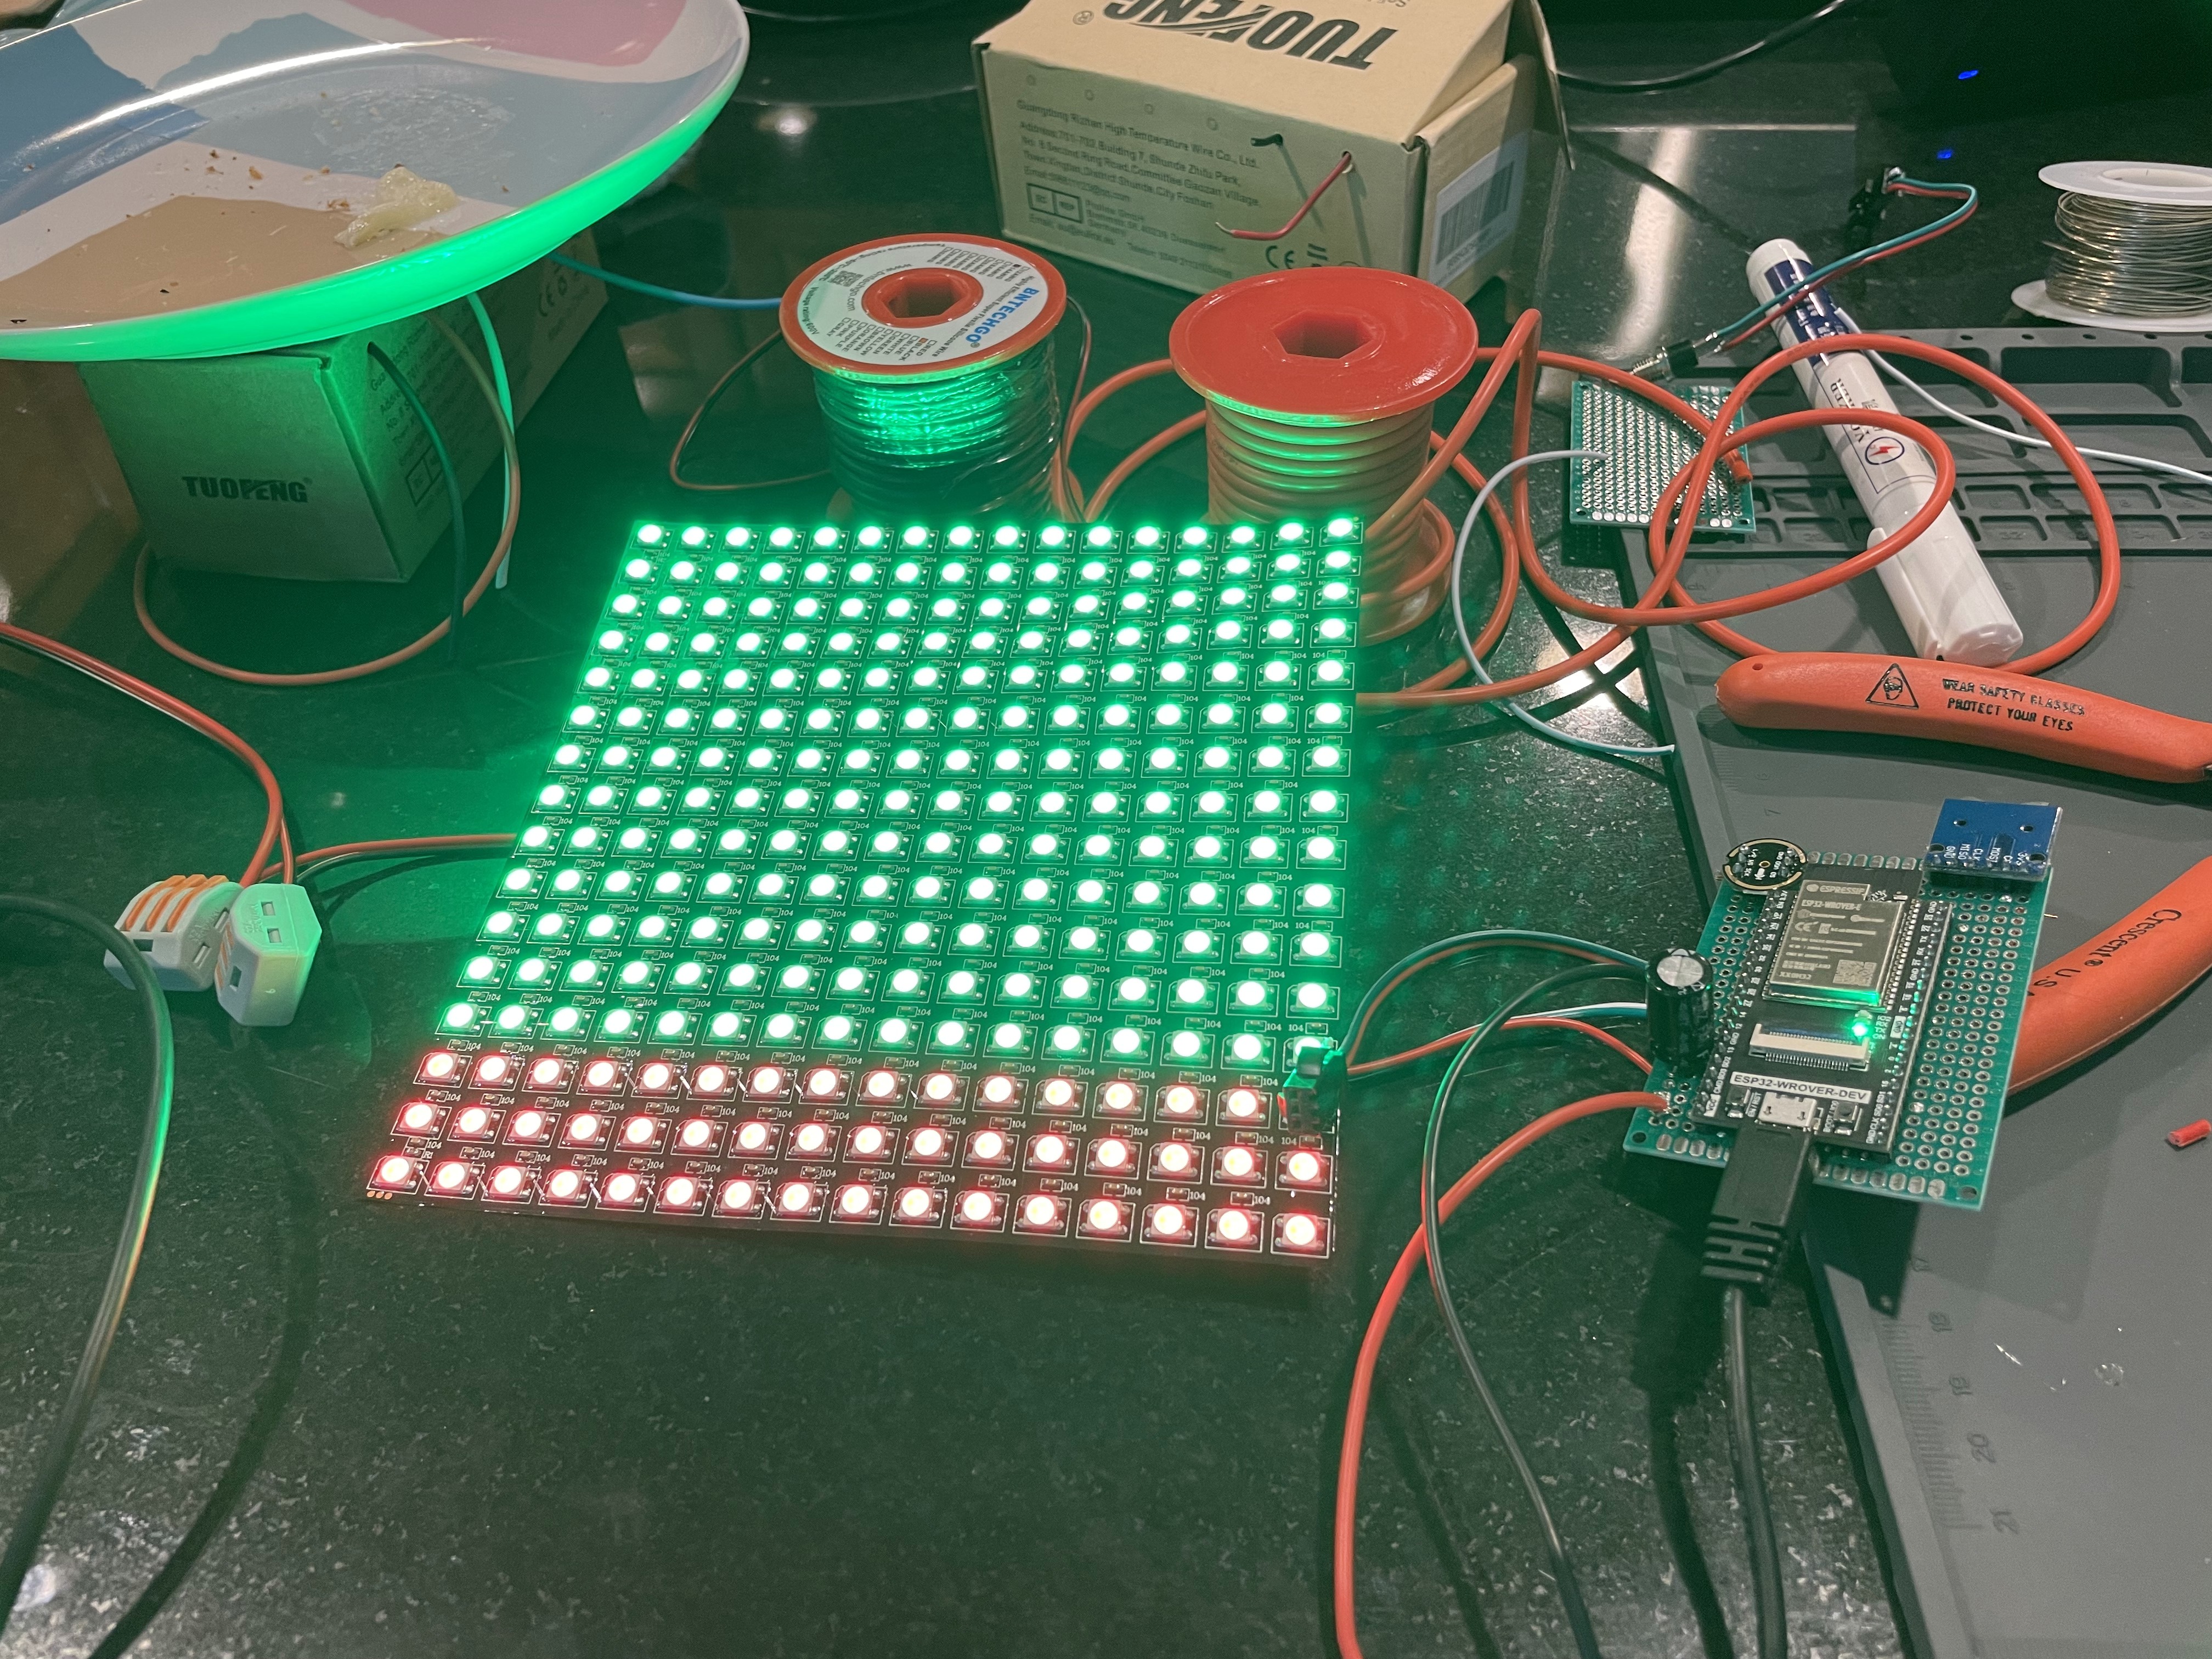
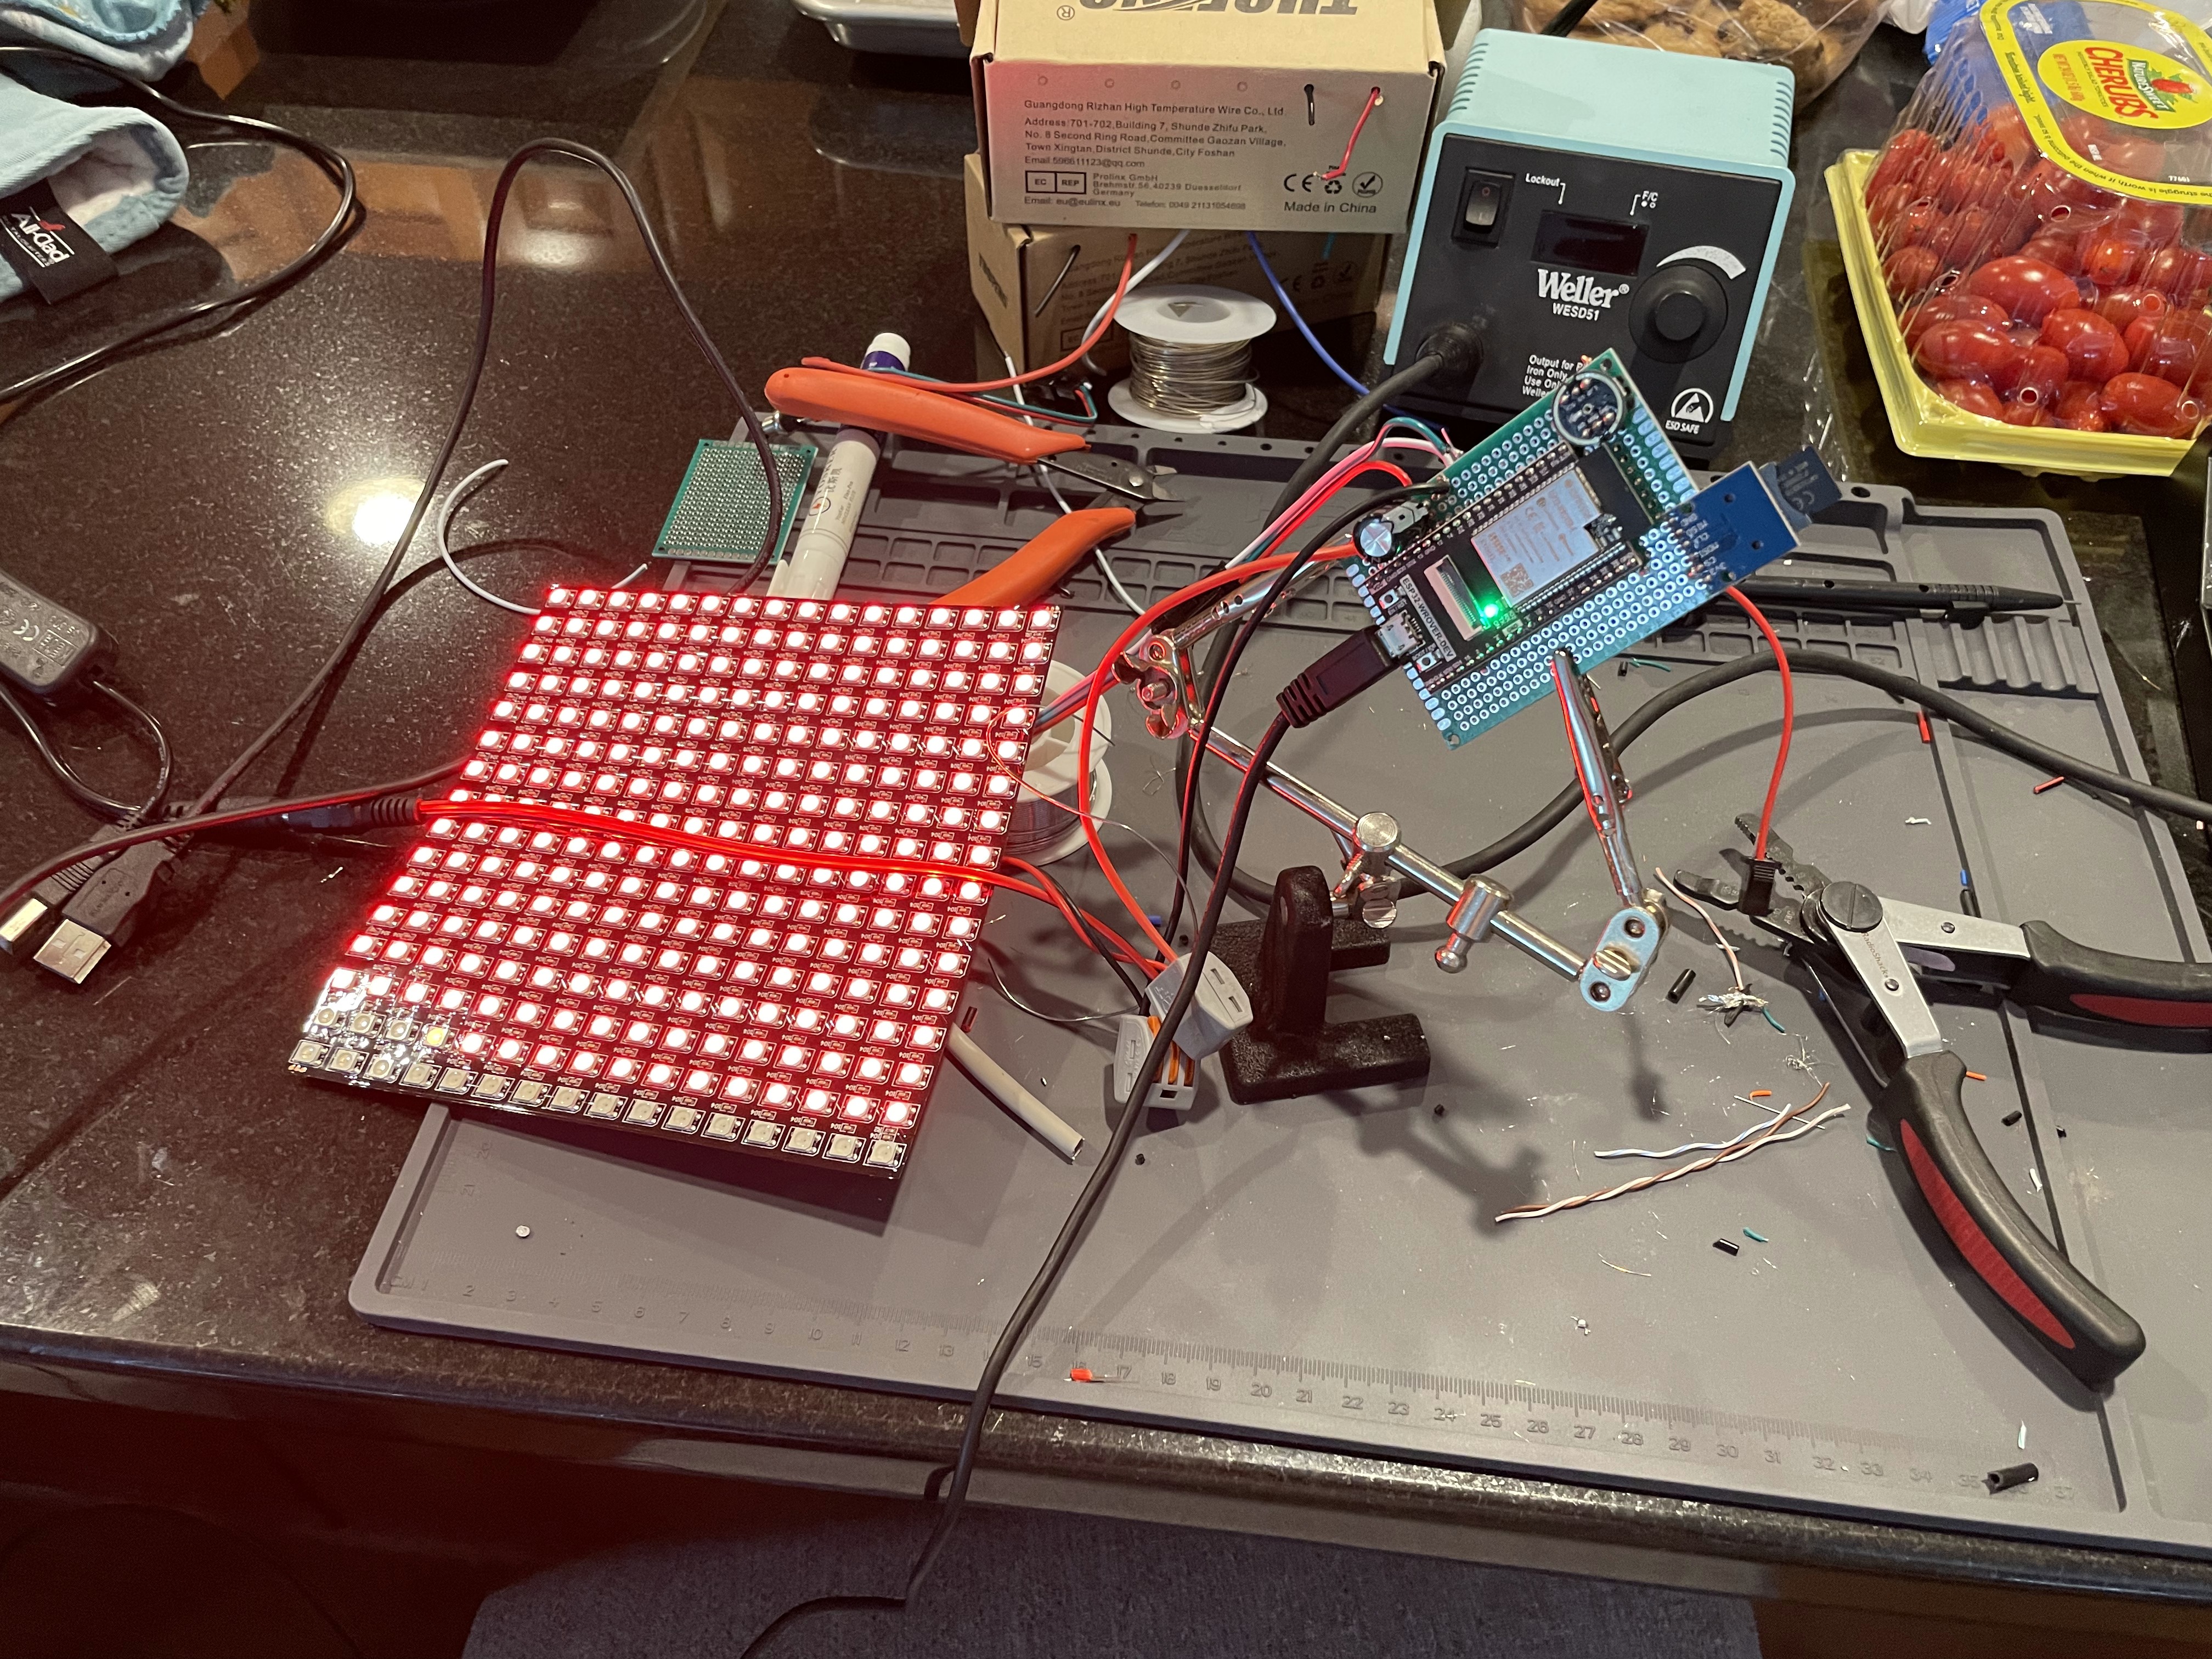
The plan was always to use an ESP32; I had not used them before and for a few dollars getting the capability to use the Arduino IDE along with Wi-Fi and Bluetooth made me interested. I also had not done much with LED strips before either. I dabbled with both on my workbench, and decided for this purpose an LED grid would be easier than working with strips. Those can be had for a few dollars online. I also got a diffusion sheet, a thick sheet of plastic that softens the light from the LED.
I worked on the Arduino code for a little while. I ended up writing a bit of code that averages the volume over time from the tiny microphone I hooked up to the ESP32, and then uses that to equate to a light level on the LED grid. The different columns in the grid matched different frequency ranges; this ended up giving a neat lighting effect with distinct types of music triggering different buildings. I need to calm it down a bit, but I didn’t put enough time into the code to get it exactly where I want it. Another code the box offers currently does a much much slower fade across the LED grid, but its sensitivity is too low, and the only way I got it to react was tapping the box; this can be seen in the video below.
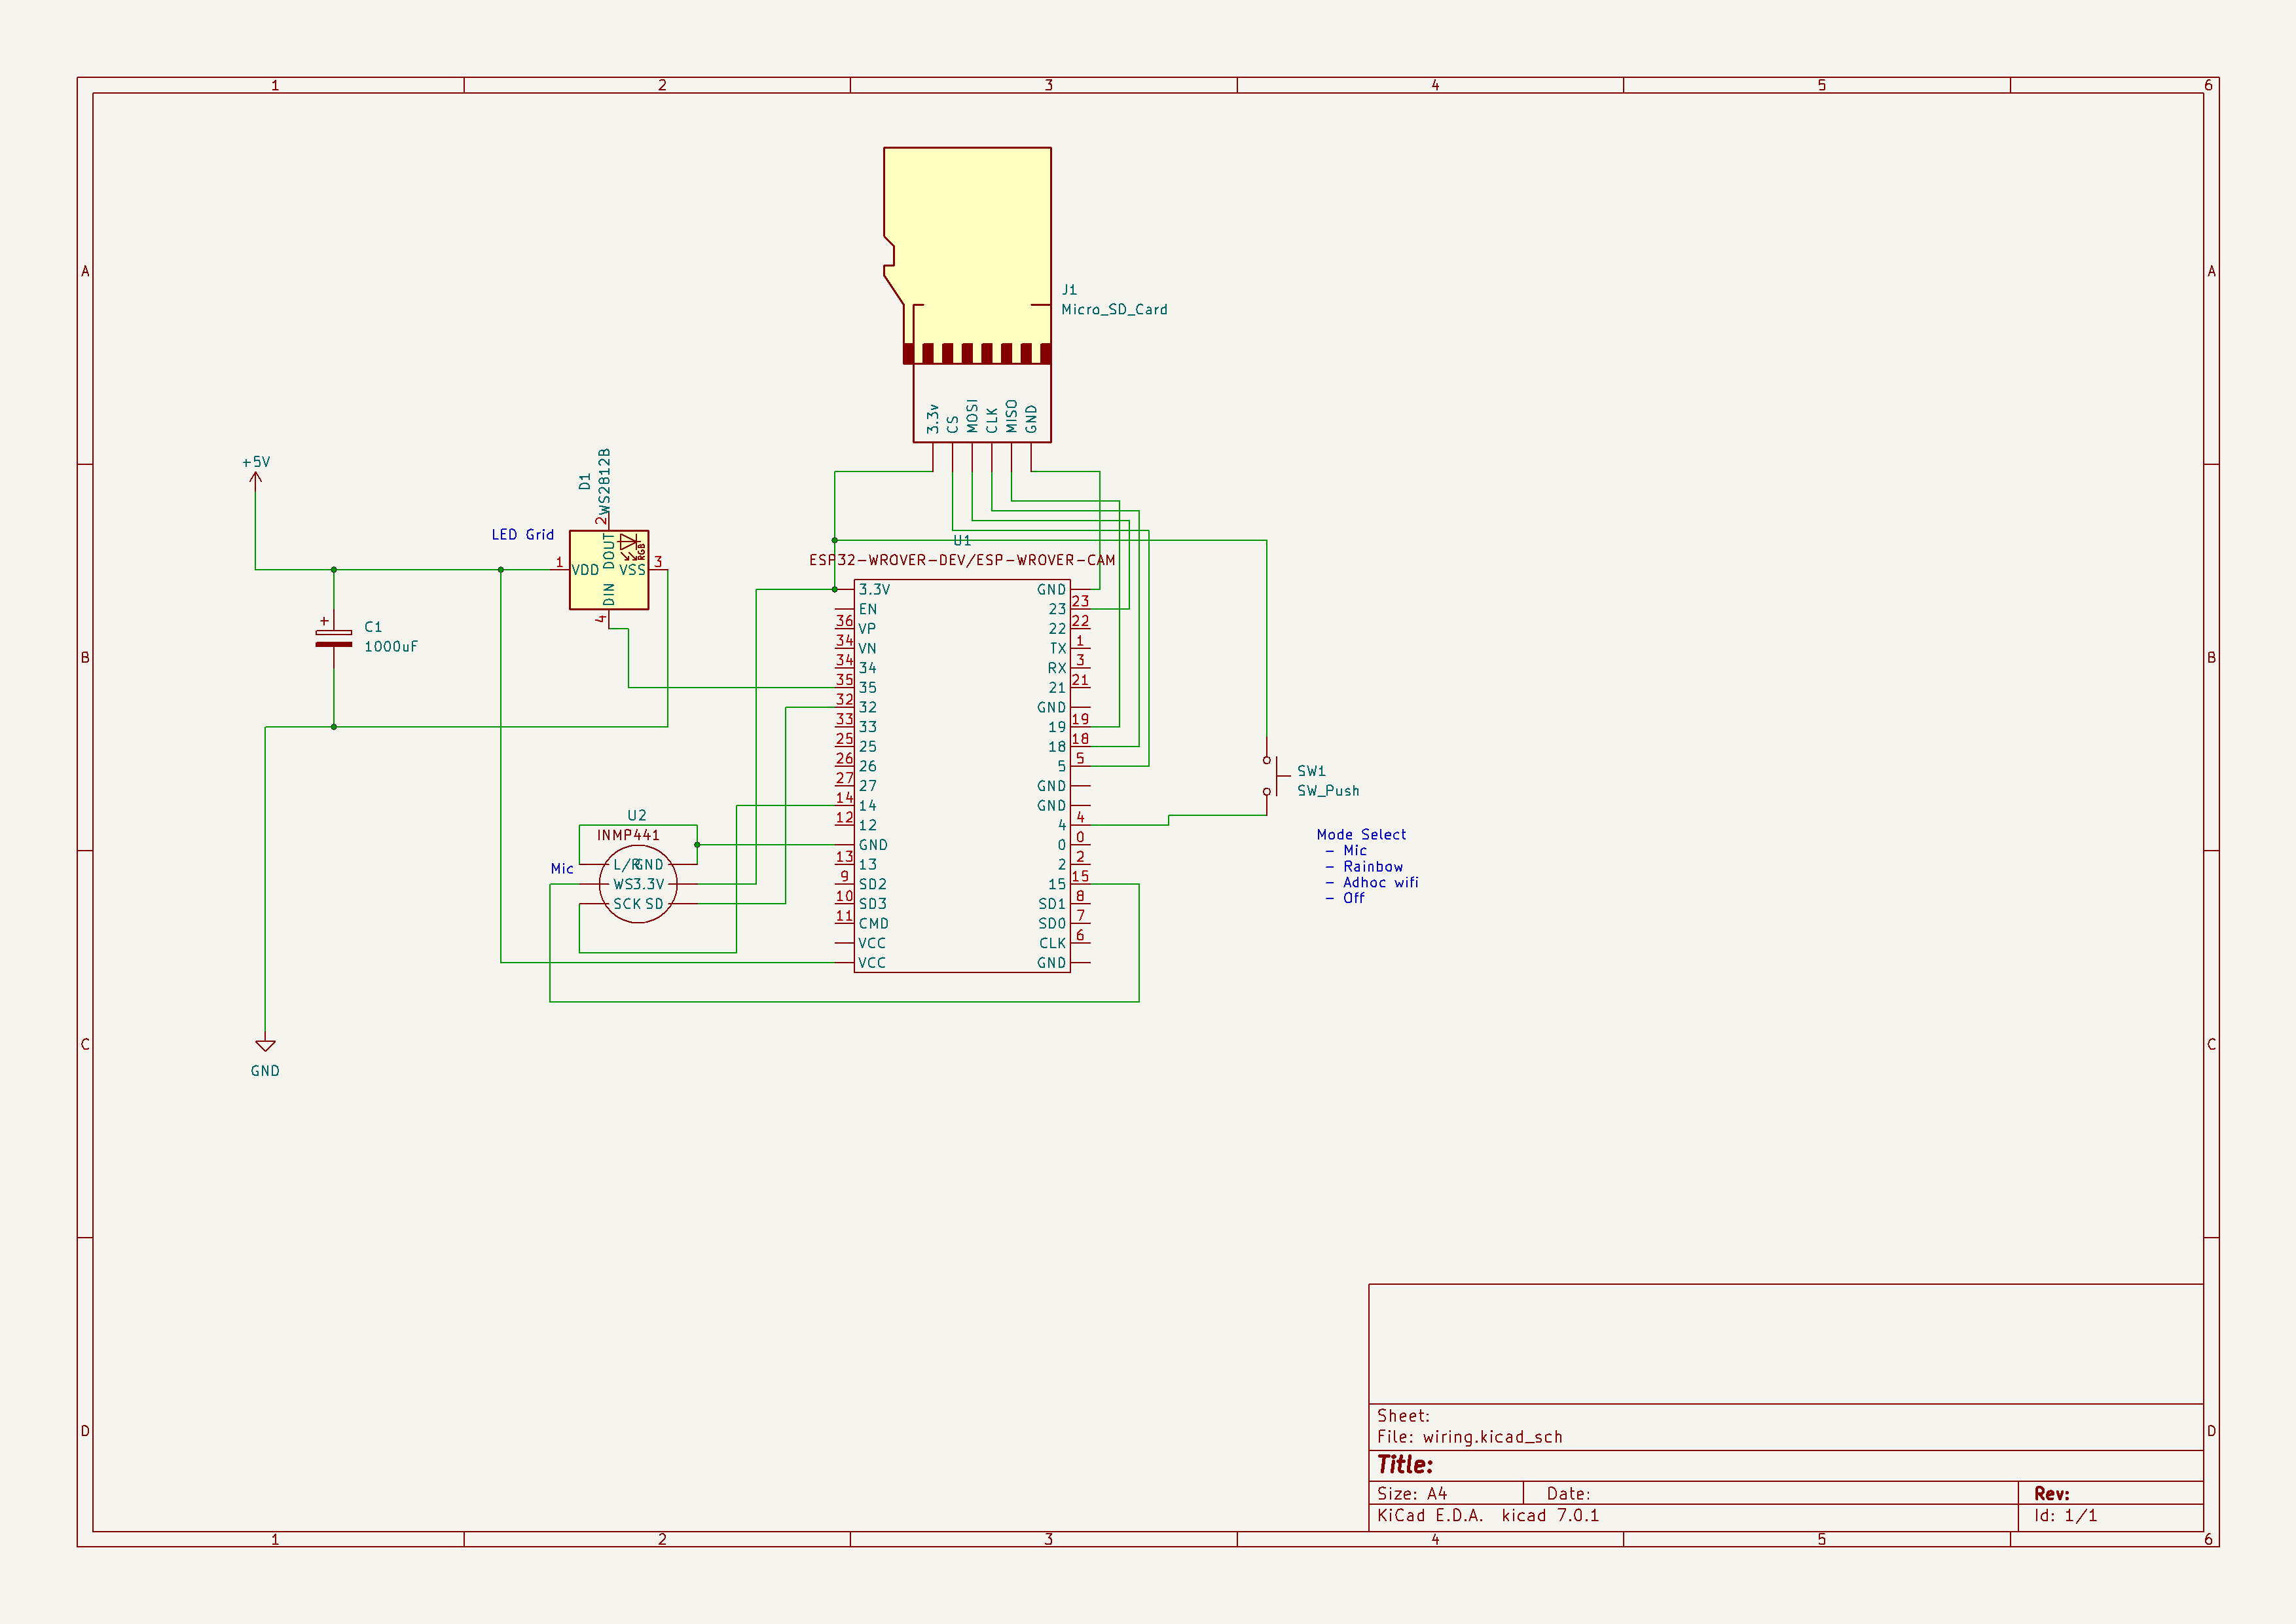
I also used this as an opportunity to use KiCad for my wiring diagrams. The diagrams for this are not that complex, but I wanted to be able to quickly reference what went where. All these files are in the Github for the project. There is a button on the side of the box which cycles modes the system is in. There is an always on light, a mode to go to the music/audio in the room, slow light effects from audio (but not sensitive to the mic enough), and last was going to be a Wi-Fi mode (but I never got that working). I was going to mount an SD card for longer storage of assets for the Wi-Fi network; with the Wi-Fi not being implemented, this needed up not being needed, but a good learning experience.
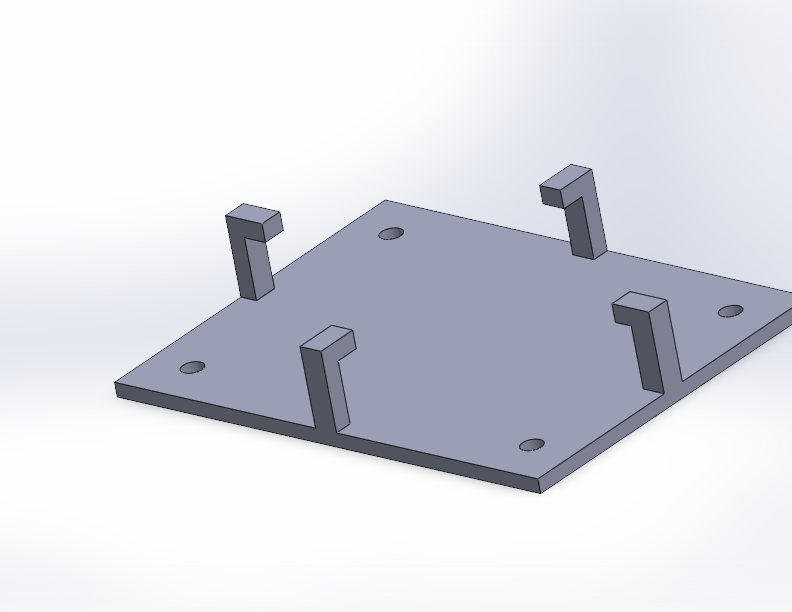
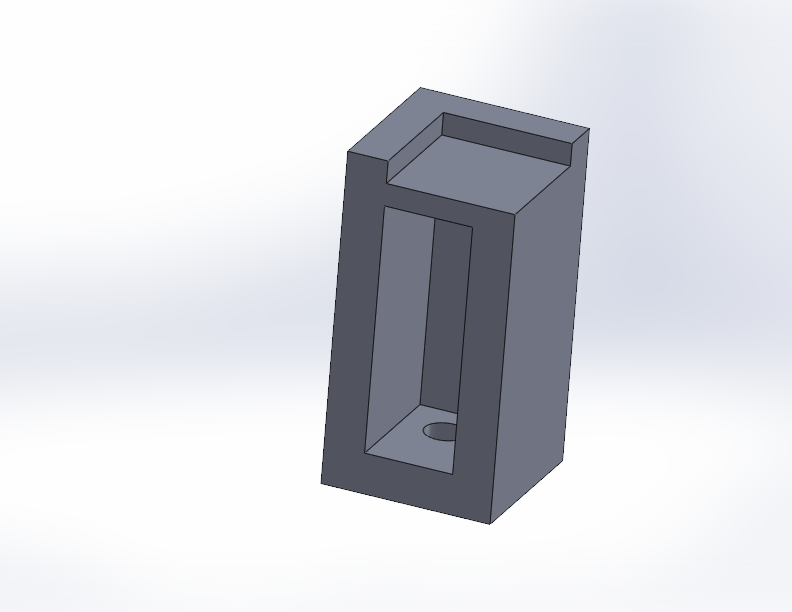
There were small issues along the way, like how I wanted to make a power bus come in, and 3D printing little risers to hold everything off the back of the shadow box enough to get a good effect through the front window. Those were slowly overcome, mostly by trial and error, and I worked through the project. I fed the whole thing from a 5V wall plug. This would give power to the LED grid, and the ESP32.
I ended up simplifying the building models to speed up prints, and it generally looked nicer. The bigger windows were easier to print, and the effect functioned better. I attempted to make a mount for the LED light grid, that would have a front snap onto it to lock in the grid. I at first made the mounts too small for this, then got lazy and used hot glue over pushing forward small snapping plastic pieces.
In the end, I think the project came out well. I thought I may make more of them, for different cities, and then have a wall of them; and get the controller to the point where you could Wi-Fi control it. Except I have another project idea that has taken me away. Perhaps I will one day return to this, until then here is a video of it running (actually 3 videos spliced together), and the files will be on Github. I don’t have a ton of photos from putting it together, but here are a few.
For the last few years, I have been using a Mikrotik CRS309-1G-8S+. A small, low power, 8 port, 10gb/s switch. It worked well for me. One of the main things I liked about it was the low power usage. There are always discussions on different homelab forums about which switch to use. Some people like to use Arista or Cisco gear. I enjoy that gear and use it at work, but with my small and low power homelab an Arista switch would triple my power usage (a lot of them idle at 200-300 watts). There are nice features on those switches, but to get those nice features they have whole small computers as the management plane, and then power-hungry chips for switching.
The time came where I wanted to upgrade past this small Mikrotik switch. 8x10gb/s ports were great for a while, but 1 was uplink to the home core switch; then with running vSAN, I wanted 2 ports per host, and I have 4 hosts. While not urgent, I started to search for a bigger switch. Mikrotik has some bigger offerings, also low power, but a lot of the offerings were $400-$600+ to go to 12+ 10gb/s ports.
One place I like to browse periodically is the ServeTheHome forums. There homelab users talk about many different homelab things including networking. Many users seem to be interested in the Mellanox SX6012 or SX6036. This switch is discontinued from Mellanox (now Nvidia) making them go for fairly inexpensive on eBay.
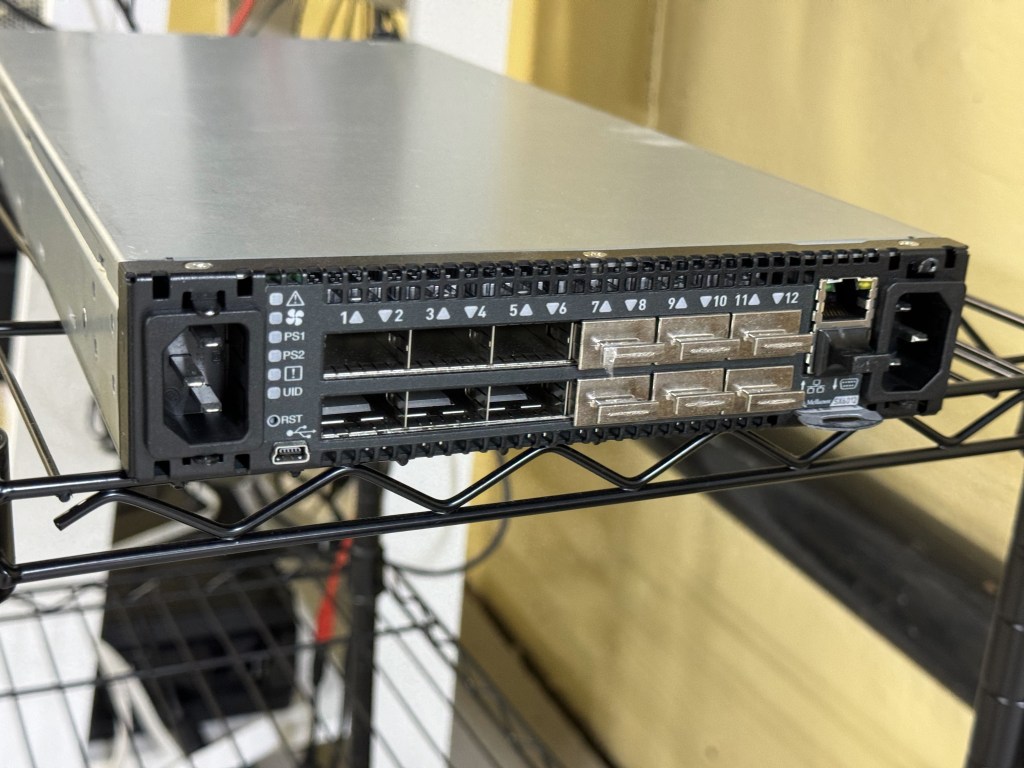
The SX6012 is a 12 port, 40gb/s switch; capable of using 40gb break out cables. That means each 40gb/s port can be 4x10gb/s ports. The switch is technically an Infiniband switch, which can get an optional Ethernet license. There are some switches sold with the license, along with guides online to enable that part of the switch. Apparently, there are also people on eBay who can “assist you” in licensing the switch for $50. Being the switch is no longer supported, I think a lot of the eBay buyers are homelab people going through the guided process of configuring the switch with a license. The switch was reported to be “not that loud”, which is true after some fan setting tweaks; and also idles at 30 watts from a low power PowerPC chip. This made it a go to for me. Plenty of ports to upgrade to over time, and a low power budget.
In looking at the switch, one thing that was heavily mentioned are the different editions of it. There are 12 and 36 port versions, along with Mellanox vs other OEM sub branded versions. For example, you can get a Dell/EMC Branded switch which will come with different features than a HPe switch, or a Mellanox themselves branded on. I wanted the 12-port version because (in theory according to online) it had slightly lower power draw. The 36-port version is supposed to be a big quieter (having more room to cool), but I also saw some firmware hacks to lower the fan noise. I saw one SX6012 unit which had the black front bezel (apparently that makes it Mellanox Brand) sitting on eBay with an expensive Buy It Now, or Make Offer. While they still go for around $250, I gave an offer for a good amount lower, and they took it! Score!
Flash forward a few days; I got the switch from the seller, powered it up, and was met with a dreaded bootloader… The OS had been wiped from the switch completely… along with everything on the flash. After a brief moment of dread, I thought about finding one of the guides online for managing these switches. Those guides are not just about enabling features like Ethernet, they are there to show you how to load different firmware revisions and where to currently find it. The Mellanox firmware itself was behind a support portal which got folded into Nvidia. Although these switches were also sold under Dell/EMC/HP brands, and some of those brands still provide the firmware packages. There are community scripts which can take in a HP firmware package and convert it to a Mellanox or other brand firmware package.
After a slow TFTP image load, I got the switch online. This allowed be to get a GUI and more easily load the follow up firmware packages. After many reboots (which can be heard throughout the house with the fans ramping to 100%), and a few upgrades later I had the switch in a good place at the last available firmware for it. For the last several months the switch has quietly been working well for me. I have one QSFP to SFP+ adapter for the 10GB from my core switch coming in. Then I have 2 QSFP -> SFP+ break out cables going to the small cluster I am running. This means I am running on this one switch, without high availability right now. If I want to reboot or patch the switch, I need to shut down my VMware cluster. One benefit to an out of support switch without firmware updates… You have no firmware updates to do!
The CLI is similar to Cisco. Like many other switch vendors, they seem to follow a similarly universal CLI. The hardest part of getting the switch going for me was figuring out the command to set the QSFP port to breakout mode. Once that was done, it creates 4 virtual sub-ports which you configure with vlans and such. The UI showed the ports as single ports, even with the breakout cable until I went in the CLI and set it to breakout mode.
With this switch working well, I moved the old 8x10gb/s Mikrotik switch over to be my new 10gb core switch. The current flow is Internet in -> Sophos XG Firewall on a Dell Optiplex 5050 -> Ruckus ICX7150 POE switch for Wifi and a few wired ports -> 8 port 10gb/s Mikrotik -> Mellanox SX6012. The house can run with just the firewall and Ruckus switch (which powers all the Wifi APs). The Mikrotik is near the router, and also allows a Cat5e run (19 meters) already in the wall to go up to the attic and give 10gb/s to a NAS and AP up there. (I know 10gb RJ45 is supposed to be Cat6, this line was run before I was here and tested fine, it has been working well the whole time) Then the Mikrotik switch has a SFP that does a longer fiber run to where my little homelab rack is. The whole system is a glorified “router on a stick” with the firewall doing all the routing between vlans.
This setup has been working well, has plenty of room for expansion, and achieved my goal of being fast with relatively low power use. I have the management for the switches on a disconnected vlan that only certain authenticated machines can connect to. This makes me feel better about its not getting security updates.
Currently I have 4 small Dell Optiplex systems as my homelab cluster along with the Mellanox switch. All together the rack idles around 130 watts. Together the systems have about 20 physical cores (not hyper threaded cores), and 288GB of RAM. It can certainly spike up if I start a bunch of heavy workloads, but I continue to find it very impressive.
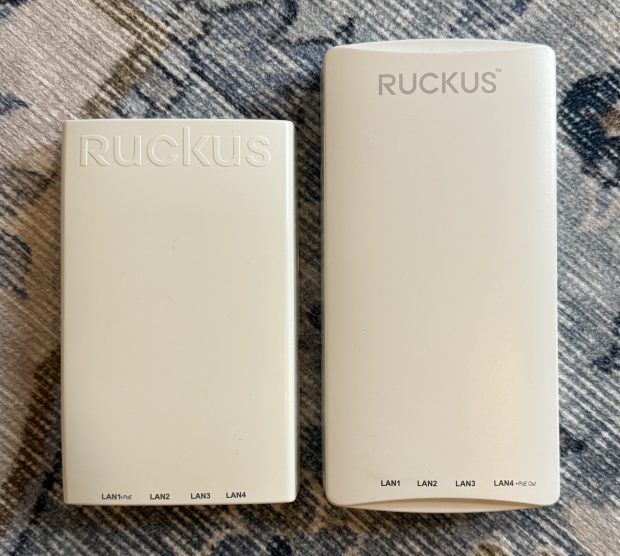
I have a Ruckus Unleashed Wi-Fi setup at home. I have a main R710 (AC Wave 2, 4×4:4) in the center of the house, then a H550 where my desktop is for better wireless and added hardwired connections. One corner of the home was getting only moderate signal and already had ethernet run to it; looking online, another H550 (Wi-Fi 6, 2×2:2) on eBay would run about $150. That was a bit more than I felt like spending to fill in this pocket with lower signal. In looking around the H510 (AC Wave 2, 2×2:2) has gone end of sale, but not end of support; those are currently going for $40.
The Ruckus H510 and H550 are very similar, with the exception that the H550 is Wi-Fi 6. They are great little access points. Their range is not as good as the bigger units, and their sensitivity isn’t that high. They were designed for things like hotel rooms. But for filling in a space with Wi-fi and giving you 4 ethernet ports, each capable of having its over vlan or 802.1x.
Having already setup a H550 I figured this install with an existing cable and POE switch at the other end would be easy. The issue I ran into was I didn’t have the password and the unit refused to factory reset. The documentation said “Hold the Soft Reset Button for 8 seconds” that didn’t work. Elsewhere said “Hold both soft and hard reset buttons for 10 seconds” that didn’t work. Others said, “Hold soft reset for 30 seconds”, which also didn’t work.
In the end, in frustration, the thing that worked was hitting soft reset, which has the red status light come on, then for about 5 seconds I would keep tapping on and off the soft and hard resets. This worked like a charm. Suddenly the password was reset, and I could get in.
Generally, Ruckus Unleashed has been working well for me. There seems to be a bug where when a device restarts, SNMP does not come on even if set. I need to go into the admin panel, turn it off, then back on for SNMP to start responding. But for a home network, not a big deal. Over the holidays I had a bunch of family members over, we had 39 devices on the network at once, with over 1gb/hour being used, and everything worked well. If anyone has Ubiquiti and is tired of their controller and lack of power features, I recommend giving Ruckus Unleashed on used gear a try.
I have a mostly Ruckus and Mikrotik network stack at home. For the longest time, Ruckus Unleashed has had the ability to manage ICX switches; but every time I went to add my switch to the Unleashed interface it would hang at “Connecting…”. After a bunch of troubleshooting, I figured out why it was not working.
Unleashed likes to automatically adopt blank switches, if your switch is already configured you may have the same issue. The issue is Unleashed cannot use a ICX switch with an enable password. I had to run:
SSH@switch(config)#no aaa authentication enable default radius local
Then suddenly if I ran “# show log” I could see Unleashed adding settings to the switch. Unleashed seems to use SSH as the main mechanism for setup, then adds a RO SNMP string to the switch. Hope this helps someone!