For years I used a Windows Server 2008 for my home files, having TechNet I used Windows Server 2008 and then later 2008 R2. While this was nice, it was using software RAID and a random assortment of drives that were cloning (RAID 1 style) between themselves. I originally went with this for the ease that Windows brings to things, but in the end with it mainly being a file server it just sat there initialized.
Fast-forward to this November, with space running out, I decided it was time to get a new system and replace the aging AMD Windows Server.
I wanted a RAID 5 or 6, so that I was not losing as much space as the RAID 10s that I had been using. I also wanted the system to be less maintenance than a Windows Server that needs patched every month. Recently I had heard good things about FreeNAS (freenas.org), from reddit.com/r/homelab; after seeing all the features of ZFS, I decide on a RAID 6, with ZFS. This is also known as a RAIDZ-2.
At first I looked at HP Microservers, http://www8.hp.com/us/en/products/proliant-servers/product-detail.html?oid=5379860 – !tab=features, yet after looking at what you got for the price, decided I wanted to build the new system myself.
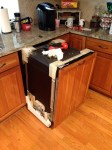
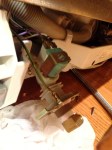
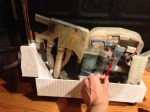
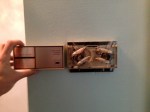
The first challenge was finding a small case, that could hold the amount of hard drives I wanted, at least 5, without having a large footprint. After some searching I came across the LIAN LI PCQ25B, http://www.newegg.com/Product/Product.aspx?Item=N82E16811112339, while not a cheap case, it offered a 5 hard drive tray and at the same time was not that large. This suited my purposes nicely.
Next I had to find which CPU I wanted; since I was hoping to keep the cost of the system down I looked at the AMD processors available. I was disappointed to see how cheap Intel processors were beating or matching far more expensive AMD chips. AMD would throw items in to sweeten the deal such as a decent GPU on the chip. However this was a NAS, I did not need all that extra stuff that would just sit there using power.
My final selection was an Intel Pentium G3220, http://www.newegg.com/Product/Product.aspx?Item=N82E16819116950; this part offers decent performance, and is the latest Haswell chip. This would allow me to upgrade the system down the road if need be. The part is also the latest socket, meaning that it could handle the larger memory sizes available, while I could use the MicroATX board the case required.
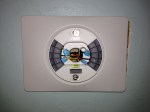
I threw in 16GB of ram (if you haven’t looked ZFS eats memory, you need about 1GB of memory per TB just to idle), and 5 – 3TB hard drives. I got the hard drives from different batches, so if something similar to Seagate’s 7200.11 drive failure happened again (http://www.theinquirer.net/inquirer/news/1050374/seagate-barracuda-7200-drives-failing) I would be protected.
Now that you know the hardware I will talk a little about the experience I have had with FreeNAS. The system is easy to install and has a nice interface. Using ZFS and the terminology they use takes a little getting used to, but the wiki can clear up a lot about what the different options do. I started the box on 9.1.0 and have updated to the latest 9.2.1; you can do updates through the web interface, and in the short time they have fixed a lot of little bugs, cleaned up the interface, as well as added new features. A nice new feature is the ability to make “Jails” of any Linux variety. These are hypervisor level VMS that can run on the system at little cost. I tend not to use them because when I use a VM to develop I tend to need a decent amount of memory, and my FreeNAS with ZFS uses 12GB of the 16GB doing nothing. But a nice feature non-the-less. FreeNAS also has some plugins that are a few clicks away; I installed Plex so I could stream media easily over the home network. FreeNAS uses Jails to run its plugins, creating a separate VM for each, this allows for security between your hosts data, and your plugins.
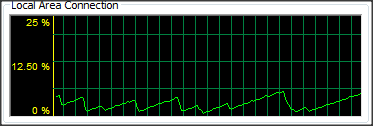
In the end, I am very happy with the box and its performance; my roommate and myself have been able to sustain 100MB/s writes to the box.
A quick side note, Plex is also a fantastic piece of software. You load it on a PC or NAS, point it at your media and sit back. It scans through all your media and gets all the metadata automatically. Then you can stream with the web interface, or through a DLNA device in your network. There are also iPhone and Android apps that let you stream without setting up weird port forwarding: just a very slick and well working product.


